Run Tunnel on Startup for Windows
To run a tunnel on Windows startup, follow these steps:
Generate an ssh key, if you don’t have one already.
- In your terminal / command prompt run:
ssh-keygen - Press Enter key (Return key) till the command finishes.
This is necessary to skip the password input of the ssh command.
Create a Batch File:
- Open Notepad or any text editor.
- Paste your Pinggy command into the text editor. For example:
You can customize the command here:
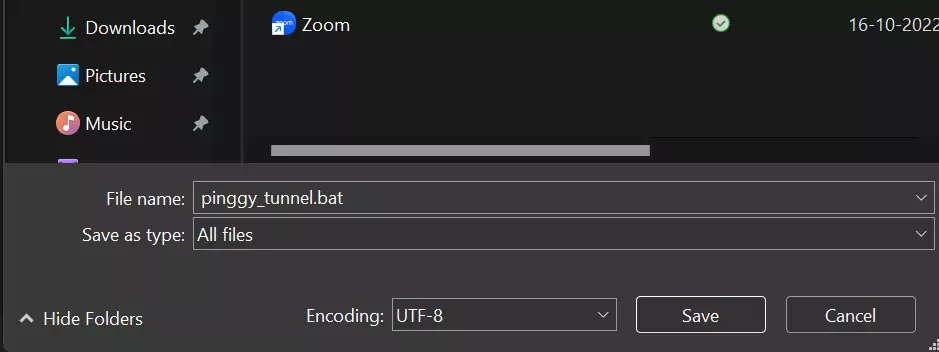
Save the Batch File:
After pasting the Pinggy command into the text editor, go to the ‘File’ menu and select ‘Save As’.
Choose a recognizable name for your batch file, such as pinggy_tunnel.bat.
Crucially, ensure you select ‘All Files’ from the ‘Save as type’ dropdown menu before saving. This prevents the file from being saved as a .txt file unintentionally.
Click ‘Save’ to confirm the creation of your batch file.
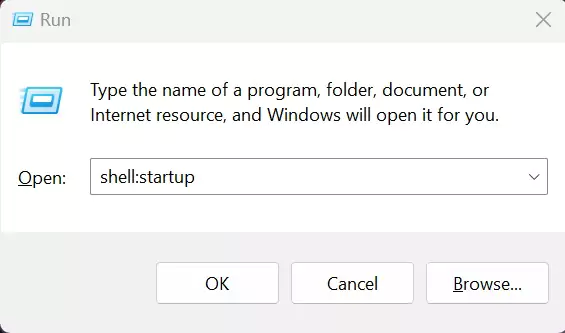
Access the Startup Folder:
- Press
Win + R on your keyboard to open the Run dialog. - Type
shell:startup and press Enter. This will open the Startup folder.
Move the Batch File:
- Copy or move the
pinggy_tunnel.bat file you created into this Startup folder.

Run Tunnel on Startup:
- The
pinggy_tunnel.bat file in the Startup folder will execute automatically each time you log in to your Windows account.