In this article
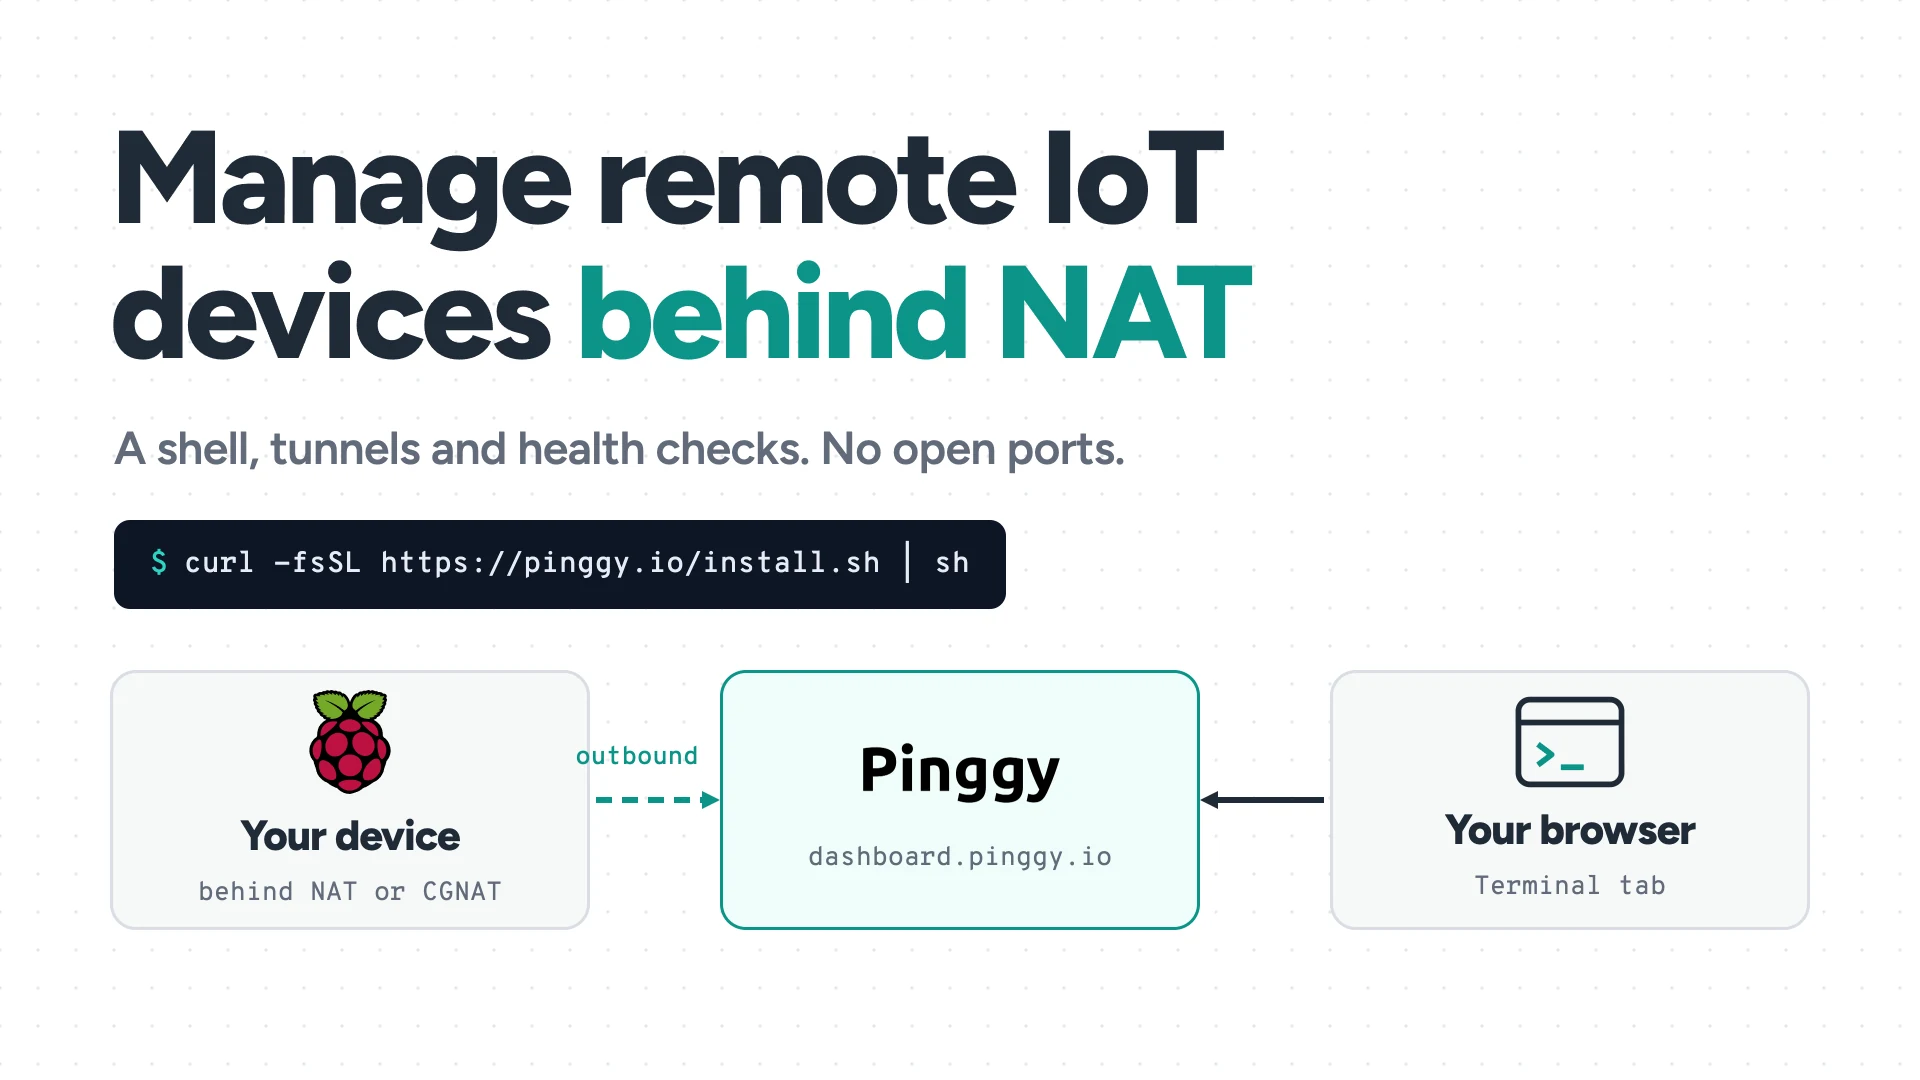
Managing IoT devices such as Raspberry Pis and other single-board computers is hard once they are out in the field, because they usually sit behind home routers, CGNAT or cellular links where nothing can connect in. Easy remote access and management is the first thing a deployed fleet needs.
The way around that is to stop trying to reach the device and let it reach you. A device that opens one outbound connection to a broker can be reached from anywhere, and on top of that one connection you can build the three jobs of remote management: a shell to act, health data to watch, and a safe way to change things. This guide builds all three on a Raspberry Pi-class device with Pinggy, using one install command and a few CLI commands.
Summary
- Get a shell: run
curl -fsSL https://pinggy.io/install.sh | shon the device, then open Terminal on its page in the Pinggy Devices dashboard. - Survive reboots: run
pinggy daemon service-installso the agent starts with the machine. - Reach other services:
ssh -p 443 -R0:localhost:22 tcp@free.pinggy.iopublishes SSH, VNC or a web UI as a TCP address, andpinggy config savemakes it permanent. - Watch and update carefully: check the Overview tab and a small health script, update one device first, and revoke access by deleting a device or rotating its token.
The three jobs of managing a remote device
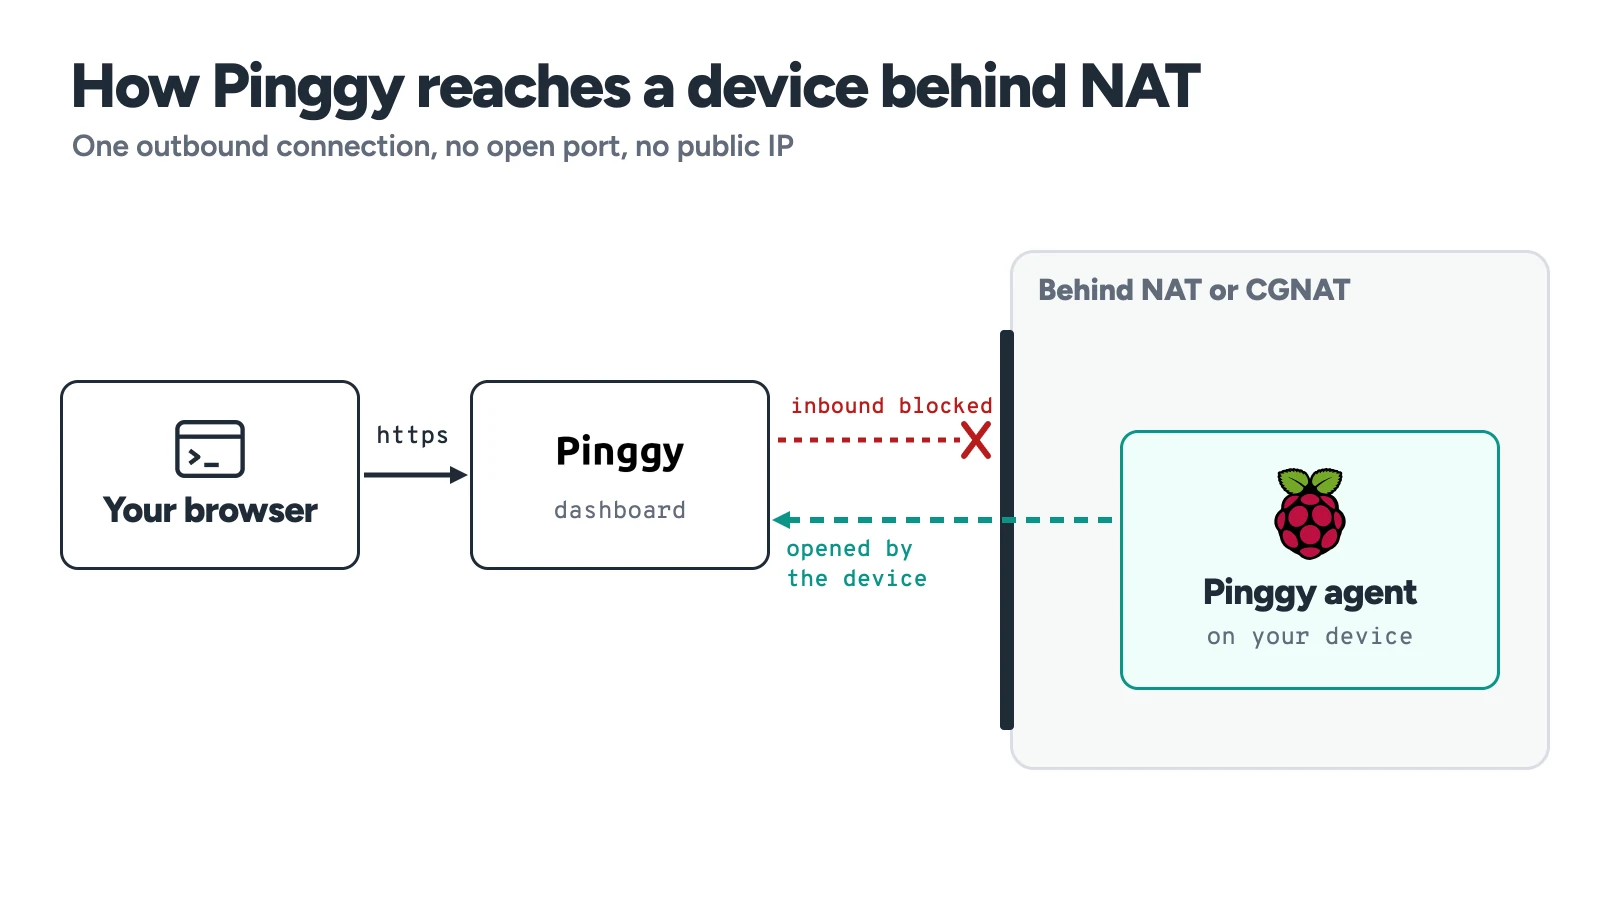
Remote management comes down to reaching the device, observing it, and changing it. Reaching it is the hard part, because a device behind NAT, CGNAT or a corporate firewall has no address you can connect to. The fix is an outbound tunnel: the device dials out and keeps the connection open, and your session rides back along it, so nothing is opened on the router. We explain the mechanism in SSH Reverse Tunneling, and our comparison of remote IoT device management platforms covers the heavier tools. Observing and changing are simpler once a shell exists, so that is where we start.
Step 1: Connect the device and open a shell
On the device, run:
curl -fsSL https://pinggy.io/install.sh | shThe script needs no sudo. It installs the Pinggy CLI to ~/.pinggy/bin, asks for your email, sends a 6-digit code (a new email gets a free account), and starts the device agent in the background. The agent keeps one outbound connection to the dashboard, so the device needs no open port, public IP or SSH server. Open the device’s page in the Pinggy Devices dashboard, go to the Terminal tab and click New shell to get a shell that runs as the user who started the agent.
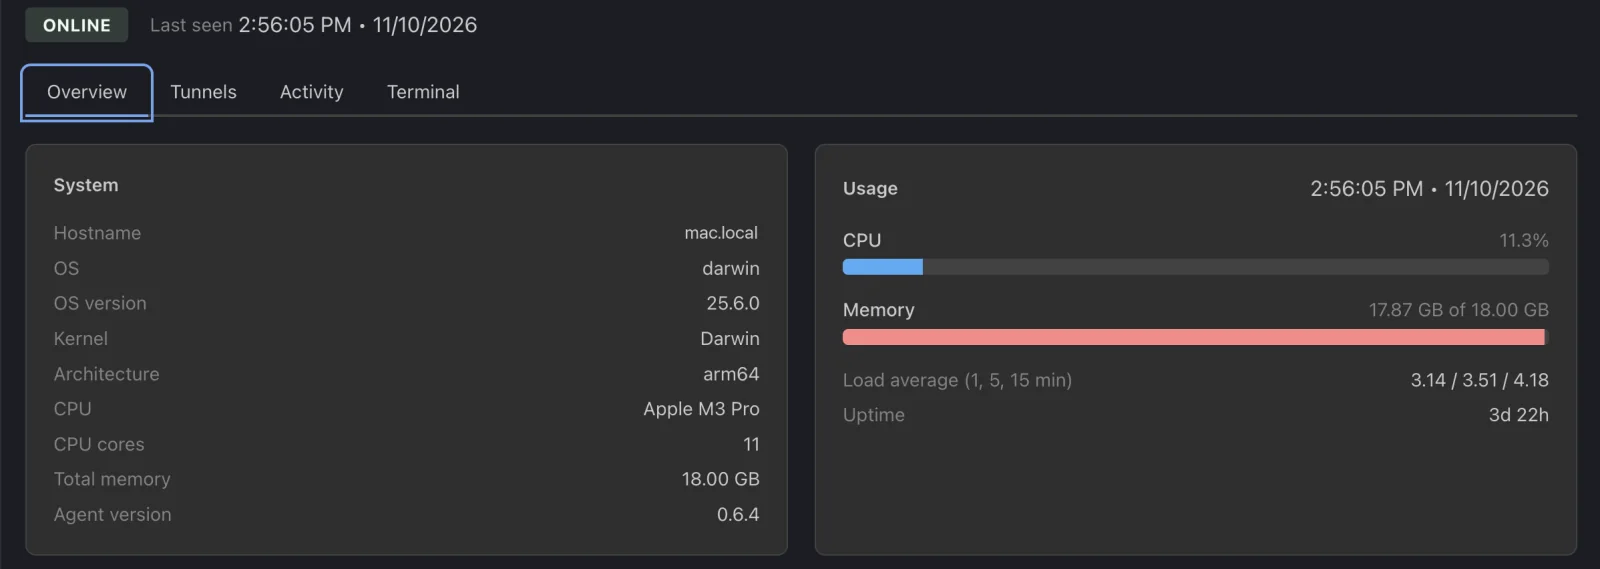
Screenshot: dashboard.pinggy.io, November 2026. The hostname is a placeholder.
Typing an email on every unit does not scale. For a device with no keyboard, click Add device in the dashboard and run the command it shows, which carries the device’s token and asks for no email or code:
curl -fsSL https://pinggy.io/install.sh | DEVICE_AGENT_TOKEN=<TOKEN> sh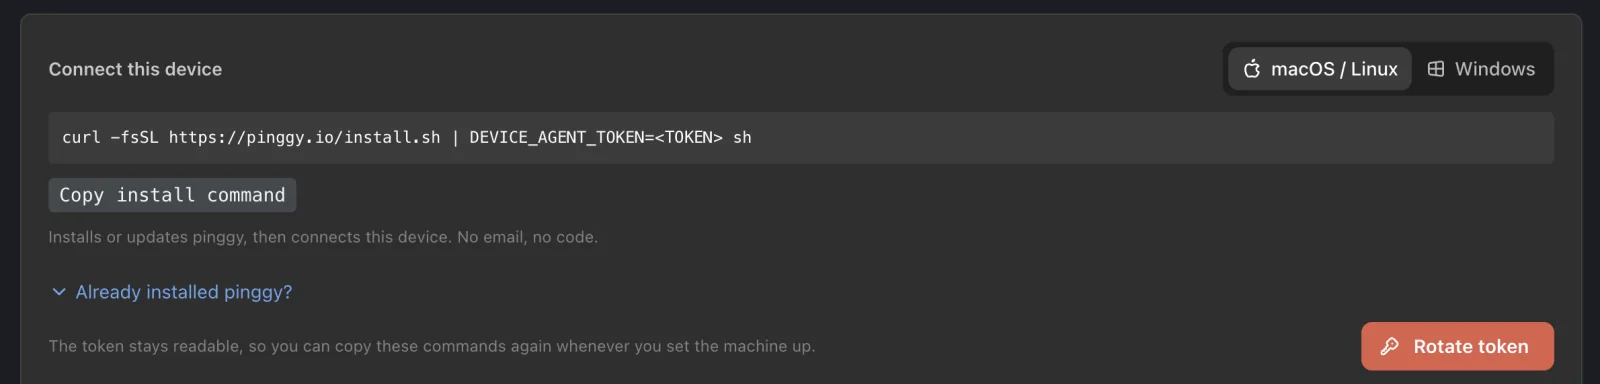
Screenshot: dashboard.pinggy.io, November 2026. The token is a placeholder.
The token reaches the CLI in an environment variable, never on a command line. One machine holds one device credential, so a fleet means one device and one token per unit. The Linux builds are glibc binaries for x64 and arm64, so use 64-bit Raspberry Pi OS; on Alpine and other musl systems, install with npm install -g pinggy.
The agent stops when the machine reboots. Run pinggy daemon service-install once to register the Pinggy daemon as a systemd user service on Linux, a launchd agent on macOS or a scheduled task on Windows. The device agent starts with the daemon, and on Linux the CLI also enables systemd lingering for your user so it can start at boot with nobody logged in. If it cannot, it prints the loginctl enable-linger <user> command to run yourself. This arrived in CLI 0.6.5, and pinggy daemon service-uninstall removes it.
Step 2: Reach SSH, VNC and web UIs with a TCP tunnel
A browser shell covers most tasks, but sometimes you want a real SSH session for scp, VNC for a desktop or a local web UI. Pinggy’s SSH IoT guide gives the one-liner, which you run on the device:
ssh -p 443 -R0:localhost:22 tcp@free.pinggy.ioIt prints a public address like tcp://rndnj-103-170-183-11.a.free.pinggy.online:37315, and from your laptop you run ssh -p 37315 username@rndnj-103-170-183-11.a.free.pinggy.online. Change 22 to 5900 for VNC or 1880 for a Node-RED editor. On the free plan the port changes on every connection and a tunnel lasts 60 minutes, so it suits a one-off fix. With a Pro token, the same tunnel gets a persistent address and port.
For a tunnel that should always be there, save it with the CLI instead of keeping a command running. The first command is the one I ran on CLI 0.6.4, where it saved, showed and deleted a config as documented:
pinggy config save iot-ssh --auto --type tcp -l 22 <TOKEN>@pro.pinggy.io
pinggy start --all      # start every auto-start tunnel
pinggy ps               # list running tunnels
Tunnels saved with --auto are the auto-start ones, and pinggy daemon start lists which configs will auto-start. Use pinggy config show iot-ssh to confirm what was saved. The tunnel commands come straight from the docs, because I did not open a live tunnel from the test machine.
Step 3: Watch the device’s health
The Overview tab shows the hostname, OS, CPU, memory and agent version next to live CPU, load average and uptime, and the Activity tab lists events with source IP addresses. It does not show disk space or board temperature, and Pinggy has no alerting that I could find in its docs, so pair it with a small script you run from the browser shell:
#!/bin/sh
echo "host:   $(hostname)"
echo "uptime: $(uptime | sed 's/^.*up //')"
echo "disk:   $(df -h / | awk 'NR==2 {print $5 " of " $2 " used on /"}')"
if [ -r /proc/meminfo ]; then
  awk '/MemTotal/ {t=$2} /MemAvailable/ {a=$2} END {printf "memory: %d of %d MB available\n", a/1024, t/1024}' /proc/meminfo
fi
if command -v vcgencmd >/dev/null 2>&1; then
  echo "temp:   $(vcgencmd measure_temp | cut -d= -f2)"
fi
I ran this on macOS and in a Debian 12 container, where the disk and memory lines printed correctly. The vcgencmd line only runs on Raspberry Pi OS, where that tool exists, and I could not test it here. SD card wear is the classic Pi failure, so if you care about it, look at the SD card monitoring in the tools compared in our device management comparison.
Step 4: Change things without bricking the device
Pinggy Devices has no over-the-air update system and no fleet-wide jobs, so every change is something you do in a shell, one device at a time. That works for ten Pis and stops working for a thousand. For firmware or image updates with rollback, add a dedicated updater such as Mender or balenaCloud, both covered in the comparison above.
A few habits keep manual changes safe. Update one device first and let it run for a day before touching the rest. A browser shell ends after 30 minutes with no activity or after 8 hours, so run long jobs under tmux or screen on the device, or teh job dies with the shell. And keep a second way in: if an update breaks the Pinggy agent, a saved TCP tunnel or a plain SSH reverse tunnel is your only path back. Never reboot a device you cannot reach any other way without checking that its agent starts at boot.
Step 5: Lock down access
Anyone signed in to your Pinggy account can open a shell on every device as the user running the agent, so turn on 2-factor authentication for the account and run the agent as an unprivileged user, not root. The device token sits in ~/.config/pinggy/device.json, readable only by that user. The agent never logs what you type, and the screen copy that redraws a reopened tab stays in memory.
To cut a device off, delete it in the dashboard or rotate its token. pinggy device remove only forgets the token on the device, so a device whose token leaked needs the dashboard. Pricing is simple: the Free plan covers 1 device with 1 shell, and Pro is $2.50 per seat per month billed annually, with 25 devices and 25 open shells per seat (see the pricing page).
Troubleshooting
If a second device fails to connect on the Free plan, the CLI says Your plan allows 1 device. Delete one in the dashboard, or upgrade, to add another. If the Terminal tab is greyed out, the CLI on that device is too old, so run the install command again. If the agent stops with a message that its token was refused or revoked, the device was deleted or its token rotated, and you need to add it again. If you recieve a message that the Linux uses musl libc, install with npm as shown above.
Conclusion
A remote device needs three things: a way in, a way to see how it is doing, and a safe way to change it. Pinggy Devices gives you the first with one install command and a boot service, a TCP tunnel covers SSH and VNC, and a short script fills the monitoring gap. For updates at scale you will still want a dedicated OTA tool, but for a handful of Pis behind CGNAT this setup takes minutes, not days.