In this article
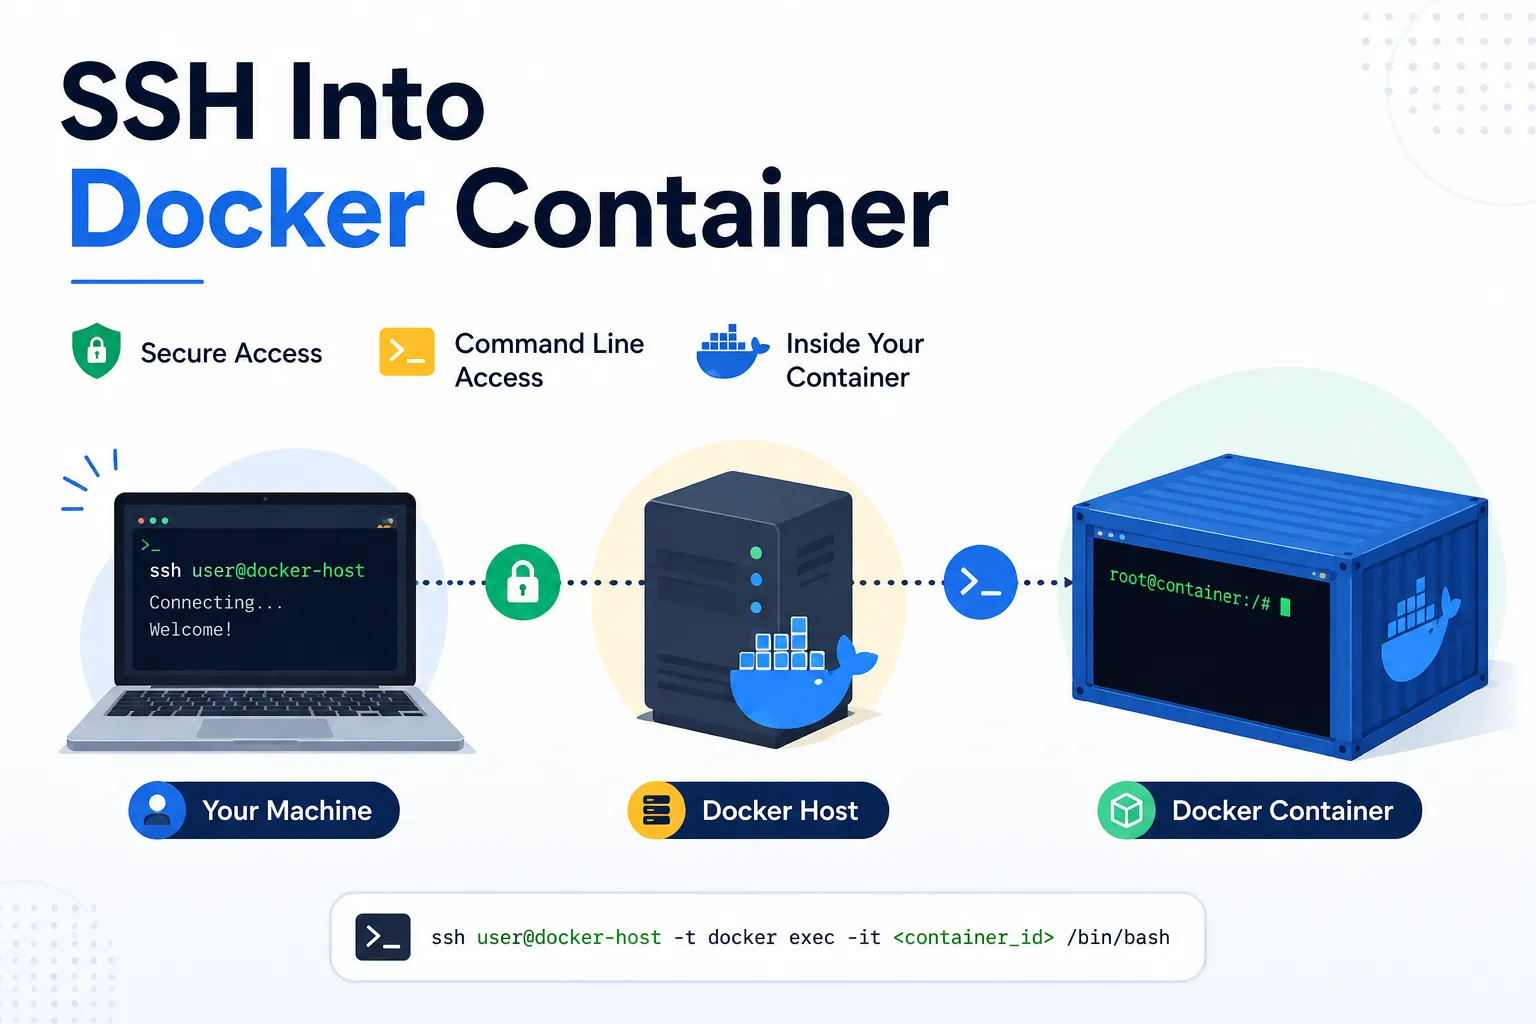
Debugging a container that runs on someone else’s machine - a cloud VM, a build server, a box behind an office firewall - usually means getting a shell on it first, and the usual docker exec only helps once you can already reach the host. Secure Shell (SSH) is the widely supported protocol used for making administrative connections to another computer over the network. It lets you access a different machine and run commands through a terminal as if you were sitting in front of it, which makes it invaluable for system administrators, developers, and network engineers.
In this article, we will explore two methods to SSH into Docker containers and discuss best practices for managing SSH within Docker environments.
Summary
Method 1: SSH into the host, then
docker exec- safer, and the better default. Start your container, enable SSH on the host, then run these on the host:ssh-keygen -t rsa -b 4096 -C "your_email@example.com" # if you have no key yet ssh -p 443 -R0:localhost:22 tcp@free.pinggy.io # tunnel the host's SSHThen from anywhere, using the address and port Pinggy printed:
ssh -p <port> -i ~/.ssh/id_rsa your_username@your-unique-url.a.free.pinggy.link
docker exec -it my-ubuntu-container bash
Method 2: SSH straight into the container - when you need the container itself, not the host. Inside the container:
apt-get update && apt-get install -y openssh-server openssh-client
mkdir /var/run/sshd
echo 'root:password' | chpasswd
sed -i 's/#PermitRootLogin prohibit-password/PermitRootLogin yes/' /etc/ssh/sshd_config
service ssh start
ssh -p 443 -R0:localhost:22 tcp@free.pinggy.io          # run this inside the container
Then connect from your own machine:
ssh -p <port> root@your-unique-url.a.free.pinggy.link
How Does SSH Work?
When you log in to an SSH server, the client (your local machine) and the server exchange keys to establish an encrypted tunnel. Everything that crosses it afterwards - commands, files, passwords - is protected from eavesdropping.
Two pieces are needed: an SSH client on your machine, which Linux and macOS ship with by default, and an SSH server running on the remote machine or container, listening on a port (conventionally 22). The command itself is just ssh user@host, where host is an IP address or domain name.
Why is SSH Important for Docker Containers?
Docker has its own tools for container access, so SSH earns its place mainly in production and remote work. It is worth reaching for when you are managing containers on a remote server such as a cloud VM and need safe access to both the host and what runs on it, when the commands and data in transit need to stay encrypted, or when security policy restricts direct Docker access and SSH is the sanctioned way in. It also brings tunneling and port forwarding along with it, which matters once the network between you and the container is not a straight line.
Method 1: SSH into Host and Exec into Docker
Here you SSH to the host machine that the container runs on, then use the built-in docker exec command to get a shell inside the container. It is the simpler and safer of the two methods, and the better default for production.
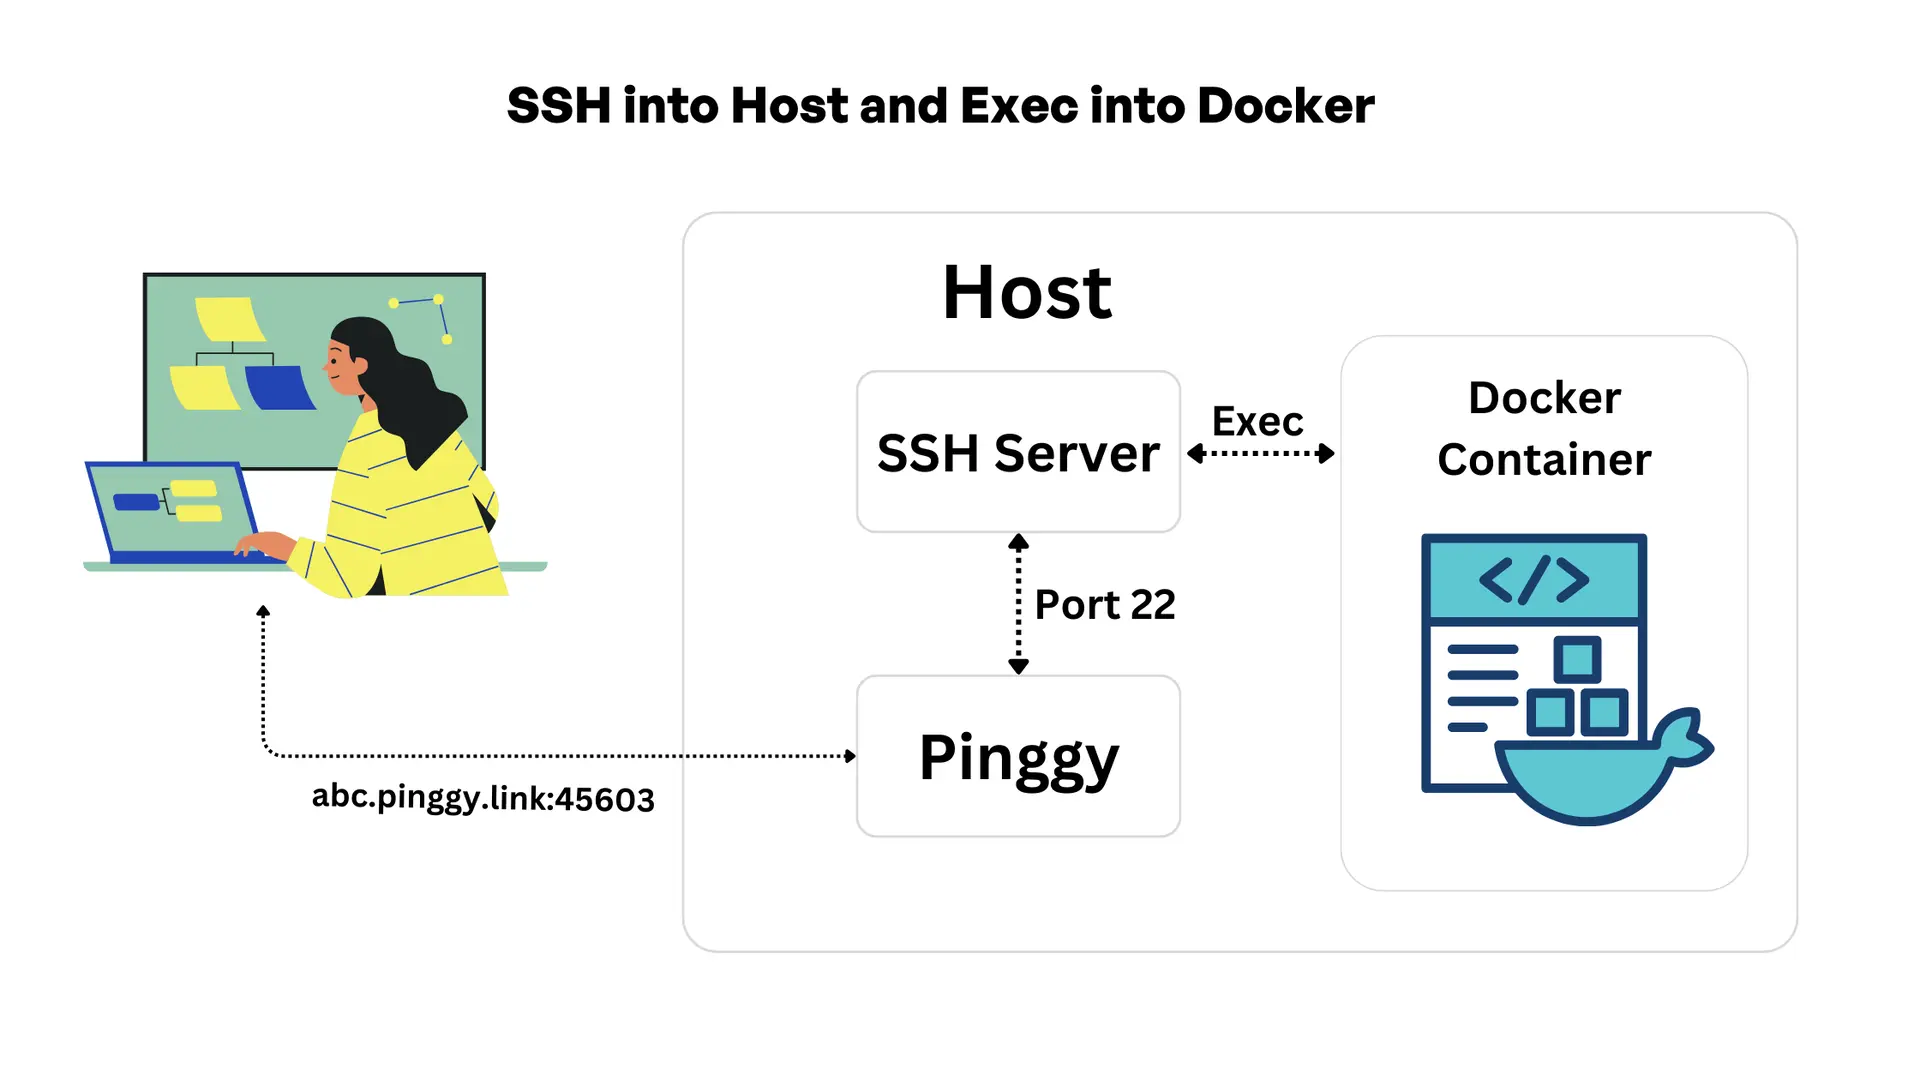
The flow: a Pinggy tunnel exposes the host’s SSH server, the host authenticates you, and once you are in, docker exec opens a terminal session in the running container.
Step-by-Step Guide
Step 1: Install Docker
Ensure Docker is installed on your system. If not, download it from the official Docker website.
Verify Docker Installation:
docker --version
Step 2: Run Your Docker Container
Run an Ubuntu container:
docker run -d --name my-ubuntu-container ubuntu:latest tail -f /dev/nullThis creates a container named my-ubuntu-container running in the background.

Step 3: Secure Access with SSH Keys
To begin, we need to generate an SSH key pair and set this up securely so that we can SSH into our system. In this step, we create the private (~/.ssh/id_rsa) and public keys, which are required.
Run the following command in your terminal to generate an SSH key:
ssh-keygen -t rsa -b 4096 -C "your_email@example.com"-t rsa: Specifies RSA key generation.-b 4096: Creates a 4096-bit key.-C: Adds a comment (typically your email) to the key for identification.
When prompted, save the key in the default location by pressing Enter.
Optional: Add a passphrase for extra security.
Step 4: Enable SSH on Your System
For macOS:
Enable SSH server on your host machine:
sudo systemsetup -setremotelogin onVerify SSH is enabled:
sudo systemsetup -getremotelogin
You should see:
Remote Login: On Note: If prompted for Full Disk Access, enable it in Settings > Privacy & Security > Full Disk Access.
For Linux:
Install OpenSSH Server:
sudo apt update
sudo apt install openssh-server
Enable and Start SSH Service:
sudo systemctl enable ssh
sudo systemctl start ssh
Verify SSH is Running:
sudo systemctl status sshYou should see a status indicating that the SSH service is active and running.
For Windows:
Install OpenSSH Server:
- Go to Settings > Apps > Optional features.
- Click on Add a feature.
- Scroll down to OpenSSH Server, select it, and click Install.
Start and Configure SSH Service:
Open PowerShell as an administrator.
Run the following commands:
Start-Service sshd
Set-Service -Name sshd -StartupType 'Automatic'
Allow SSH Through Firewall:
New-NetFirewallRule -Name sshd -DisplayName 'OpenSSH SSH Server' -Enabled True -Direction Inbound -Protocol TCP -Action Allow -LocalPort 22Verify SSH Service:
Get-Service sshdEnsure the service status is Running.
Note: After enabling SSH, you might need to refresh your system settings or restart your machine for the changes to take effect.
Step 5: Secure Tunneling Using Pinggy
If the client you are connecting from and the host where the container is running are within the same network, then you can use the IP address of the host to establish an ssh connection. However, often the client and the host are on different networks, and the host might not have a public IP address to make it accessible. In such cases, Pinggy can be used to create a TCP Tunnel to your SSH server so that you can access it from the public internet.
Sign up for Pinggy: If you don’t have a Pinggy account, register at the Pinggy dashboard.
Create a TCP Tunnel: Once registered, run the following command to create a tunnel:
The command above simply sets up a tunnel from your system SSH Port (22) out to public internet through Pinggy.

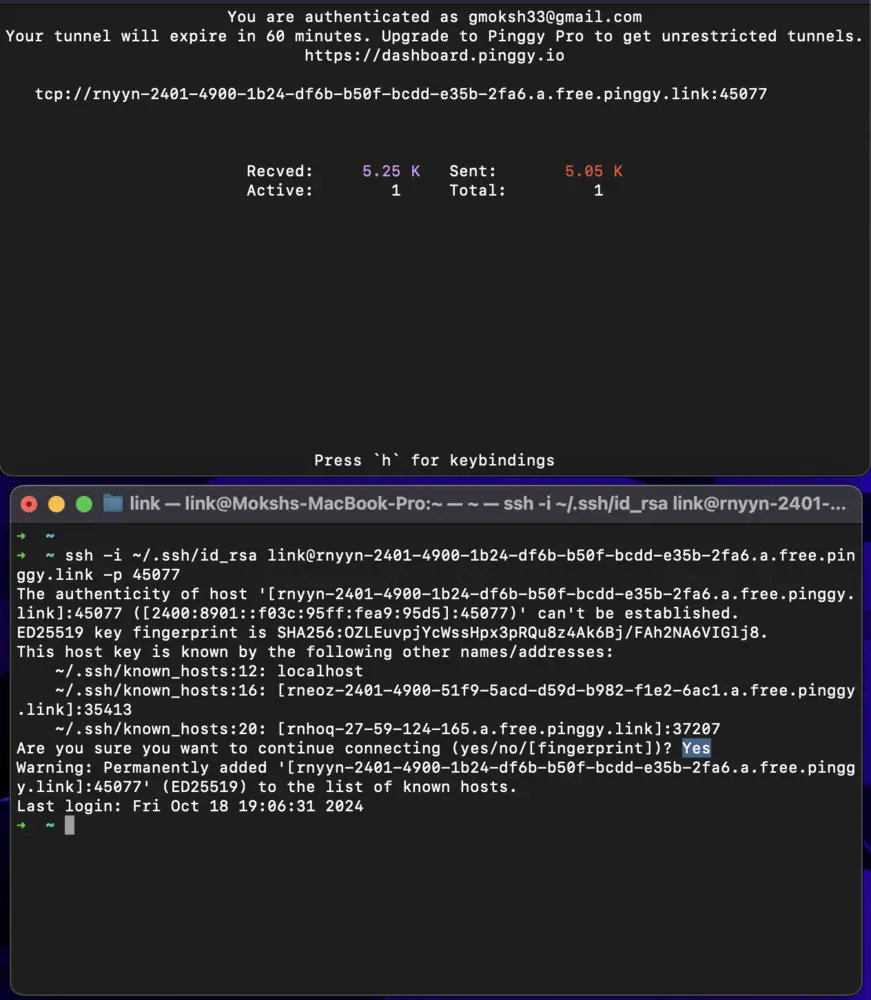
Step 6: Connect to SSH via Public URL
After creating the tunnel, Pinggy will provide a public URL like this:
tcp://your-unique-url.a.free.pinggy.link:portRun whoami on the host to confirm your username, then connect using the address and port Pinggy printed:
ssh -p <port> -i ~/.ssh/id_rsa your_username@your-unique-url.a.free.pinggy.linkReplace <port>, your_username, and your-unique-url with your actual details.
Step 7: Access Docker Container
Once connected to your system over SSH, run:
docker exec -it my-ubuntu-container bashThis opens a terminal inside your running Docker container.
Method 2: SSH Directly into Docker Using Pinggy
When you need SSH access straight into the container rather than the host, run an SSH server inside the container itself. Pinggy then exposes it publicly, so this works even when the host has no public IP address.
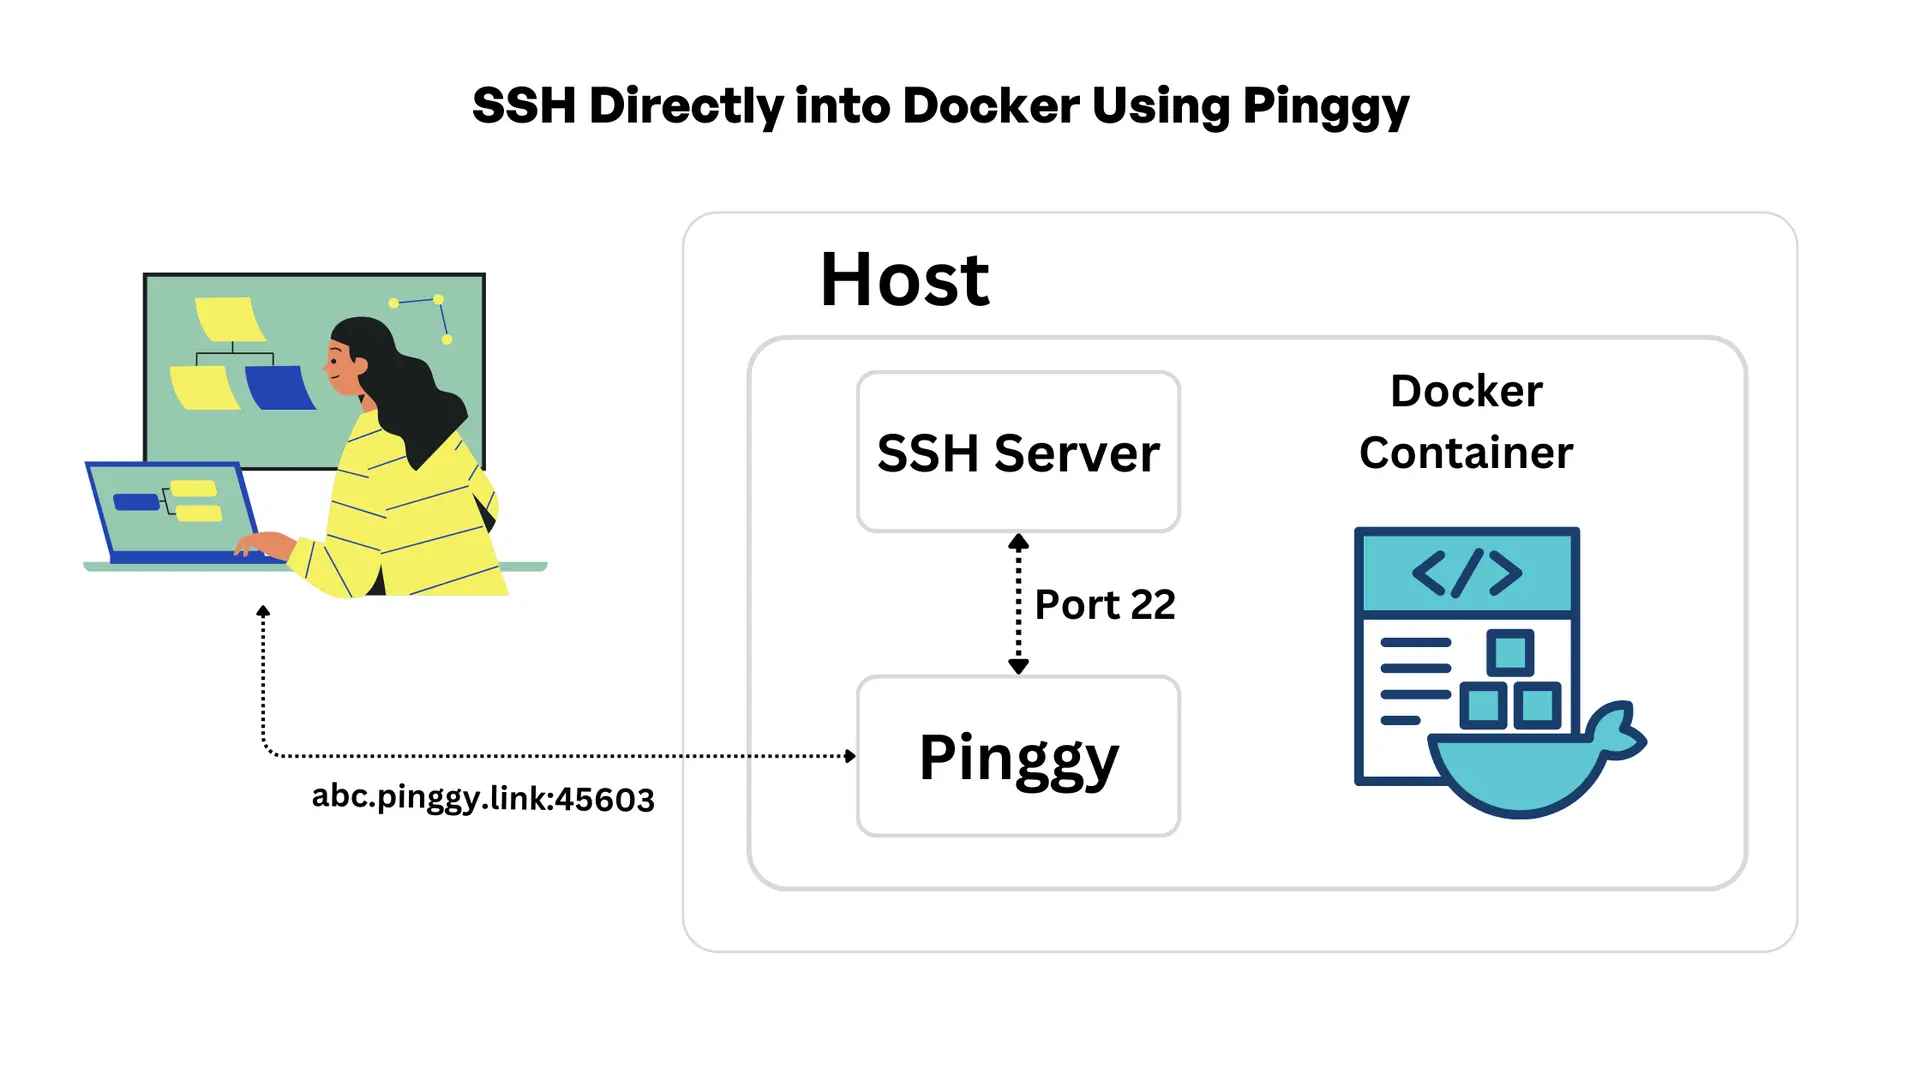
The flow: Pinggy publishes a public endpoint and forwards connections to port 22 inside the container, where the container’s own SSH server picks them up.
Step-by-Step Guide
1. Set Up Ubuntu Docker Container
Run an Ubuntu Container:
We are using an ubuntu container image for demonstrating this method. You can install ssh server in your own existing containers.
docker run -it --name ssh-container ubuntu
Install OpenSSH Server Inside the Container:
Install the server so the container can accept SSH connections, and the client so it can open the outbound Pinggy tunnel in the next step:
apt-get update
apt-get install -y openssh-server openssh-client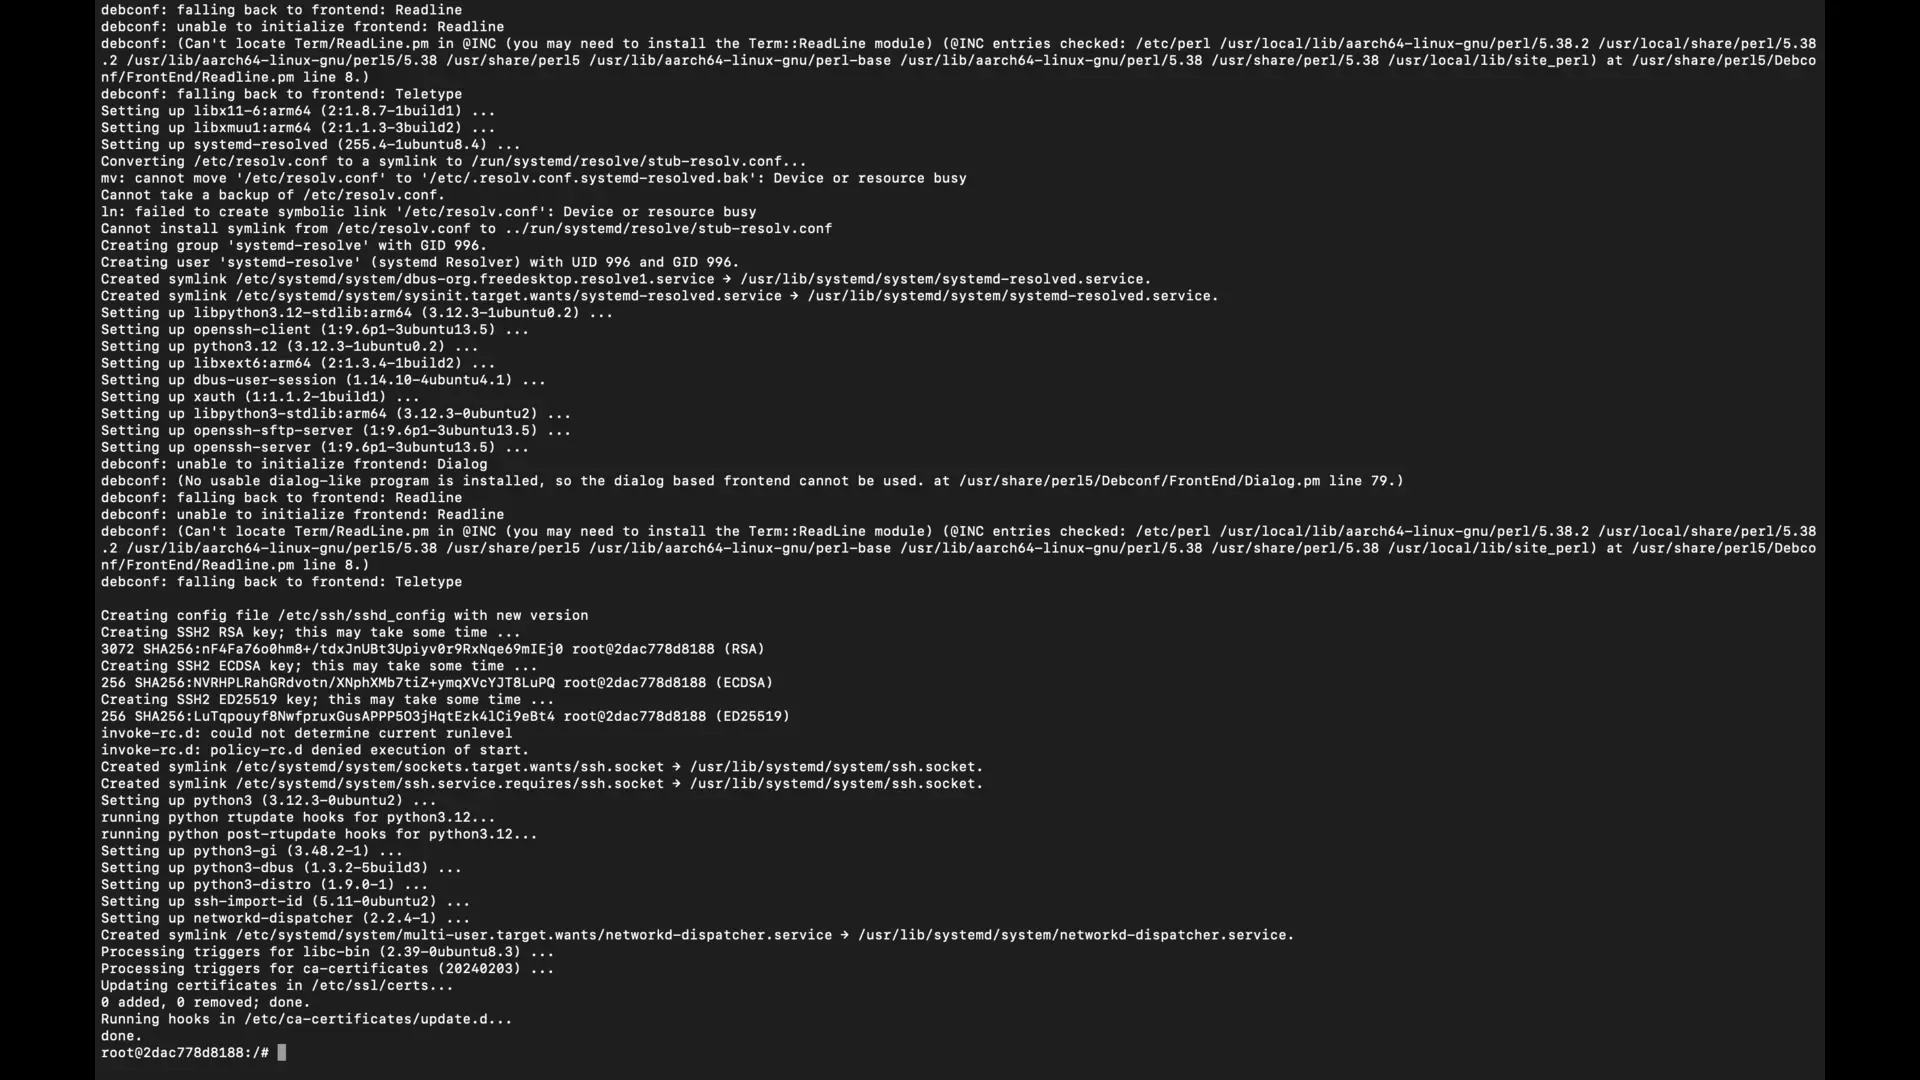
Configure SSH Server:
mkdir /var/run/sshdSet a root password (replace password with your desired password):
echo 'root:password' | chpasswd
sed -i 's/#PermitRootLogin prohibit-password/PermitRootLogin yes/' /etc/ssh/sshd_config
Start SSH Service:
service ssh start
2. Create a Tunnel Using Pinggy
Run the Pinggy Tunnel Command:
Run this from inside the container, in the same shell where you just started the SSH service. That matters: the container’s port 22 is not published to the host, so localhost:22 only resolves to the container’s own SSH server from within the container. Running it on the host would tunnel the host’s SSH server instead, which is Method 1.

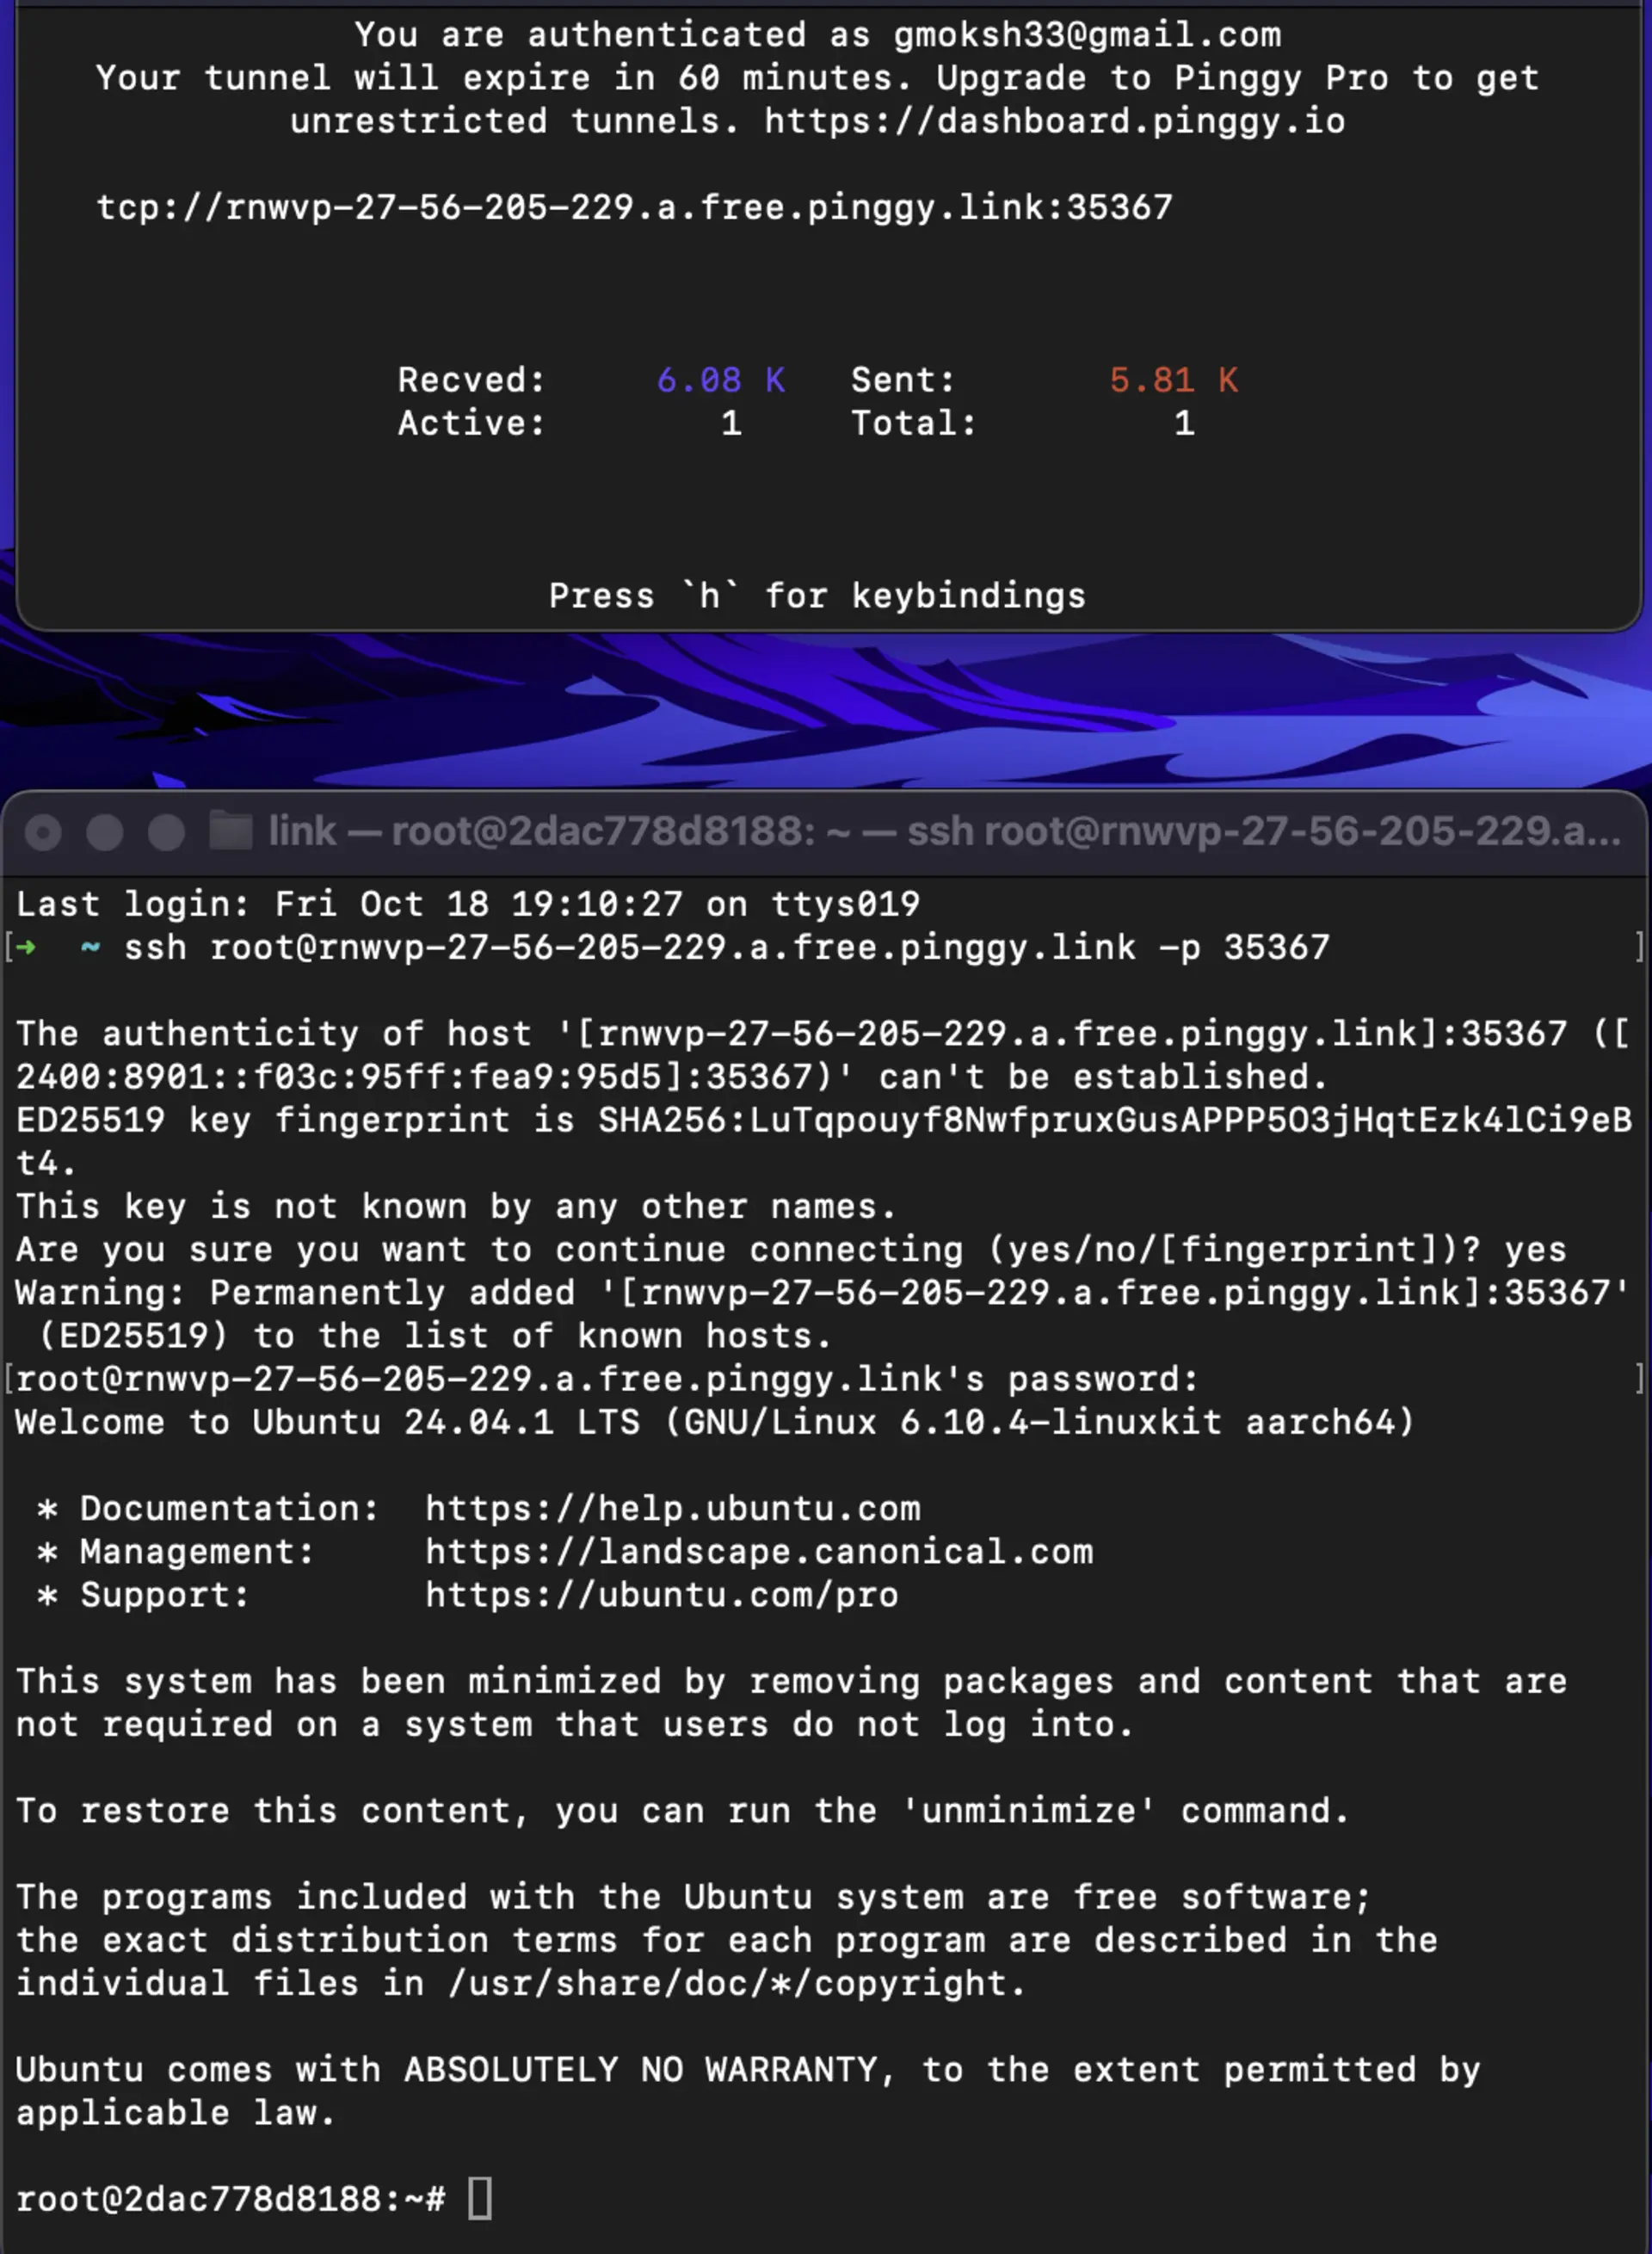
Get the Public URL: After executing the command, Pinggy gives you a public address that anyone can use to reach the container’s SSH server. It looks like this:
tcp://your-unique-url.a.free.pinggy.link:portSince the tunnel process runs in the foreground, keep that shell open. Open a second shell into the container with docker exec -it ssh-container bash if you need to poke around while the tunnel is up.
3. SSH into the Container
From your own machine, connect to the container’s SSH server over the public Pinggy address. Replace <port> and the hostname with the values Pinggy printed:
ssh -p <port> root@your-unique-url.a.free.pinggy.linkAuthenticate:
Enter the password you set earlier (password in this example).
Conclusion
SSH is useful for working with Docker containers, but it works best used sparingly. Reach a container either by SSHing into the host and running docker exec, or by running an SSH server inside the container and connecting directly - a Pinggy TCP tunnel makes either work without a public IP. Prefer docker exec day to day, use key-based auth on any SSH server you expose, and let centralized logging answer the questions that would otherwise send you hunting for a shell.