In this article
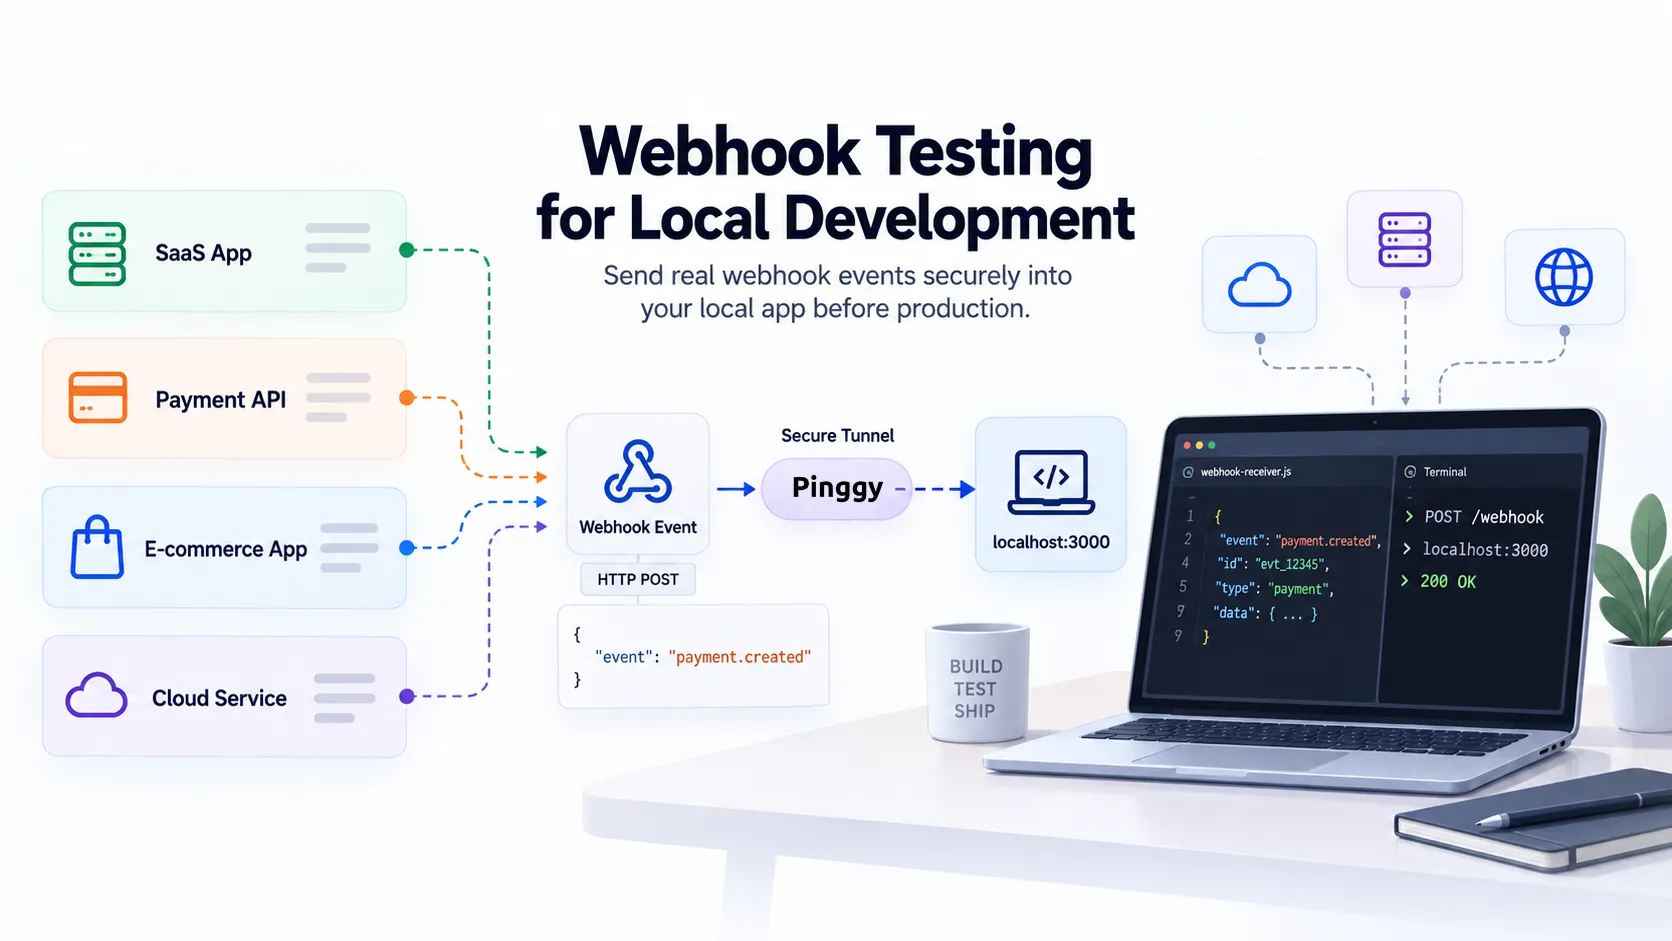
Most integrations eventually need to receive something rather than request it - a payment confirmation, a repository push, an order that just shipped. That works in production, where your app has a public HTTPS URL, and falls apart on a laptop, where localhost:3000 is invisible to Stripe, GitHub, or anyone else holding an outbound HTTP client.
There are three ways out, and picking the wrong one costs hours. Some providers ship a CLI that delivers events straight to your machine over an outbound connection, no public URL involved. Some don’t, and you need a tunnel. Some workflows want neither, just the request captured and replayable so you can iterate on a handler without waiting for the provider to fire a new event. This guide covers all three, plus the part that breaks everyone’s first handler regardless of which tool they picked.
Summary
- If your provider ships a CLI, use it. Stripe (
stripe listen --forward-to localhost:4242/webhook), GitHub (gh webhook forward), and Shopify (shopify app webhook trigger, which fires a signed sample payload) all deliver to localhost with no public URL and nothing exposed. - If it doesn’t, use a tunnel. Pinggy needs no install:
ssh -p 443 -R0:localhost:3000 free.pinggy.ioreturns a public HTTPS URL you paste straight into the provider’s webhook settings. - Add an inspector. Pinggy’s Web Debugger (
-L4300:localhost:4300, then openhttp://localhost:4300) shows every header and body live, with Replay and Modify-and-Replay. - For persistent, shareable event history, use Hookdeck CLI (
hookdeck listen 3000 stripe) or Svix Play (svix listen http://localhost:3000/webhooks), which also exposes a REST API so CI can assert on captured payloads. - The bug you will actually hit: signature verification fails because a global JSON parser re-encoded the body. HMAC is computed over the exact bytes sent - mount a raw body parser on the webhook route only.
- Test duplicates. Providers retry and don’t guarantee ordering. Key your handler on the event ID, then replay the same request twice and confirm nothing happens the second time.
The three mechanisms, and when each one wins
Every tool in this space is one of three things. The distinction matters more than the brand names, because it decides whether your machine is reachable from the public internet at all.
| Mechanism | How events reach you | Public URL? | Best for |
|---|---|---|---|
| Provider CLI | The CLI opens an outbound connection to the provider and pushes events into localhost | No | Stripe, GitHub, and Shopify work; nothing is exposed |
| HTTPS tunnel | The provider posts to a public URL that forwards to your port | Yes, while the tunnel runs | Any provider, including ones with no CLI |
| Relay / capture service | The provider posts to a hosted endpoint that stores the event and forwards it | Yes, hosted for you | Shared event history, replay, CI assertions |
A provider CLI is safest when it exists: no inbound port, no public URL floating around. A tunnel is the universal fallback for the long tail - PayPal, Twilio, Discord, Razorpay, a customer’s internal system. A relay sits in between and adds durable history.
Provider CLIs: no tunnel required
Stripe
The Stripe CLI (npm install -g @stripe/cli) is the reference implementation of this pattern. After stripe login:
stripe listen --forward-to localhost:4242/webhookIt prints a signing secret starting with whsec_, and that secret is stable across restarts of the listen command, so you can drop it in .env once. You don’t need to register a webhook endpoint in the Dashboard at all.
The second half is triggering events on demand:
stripe trigger payment_intent.succeededOne trigger can generate several events, because Stripe creates the objects the event depends on: stripe trigger price.created emits product.created first, since a price needs a product. Run stripe trigger bare for the current list. For Connect, swap in --forward-connect-to; for v2 thin events, --forward-thin-to with --thin-events "*".
GitHub
GitHub’s forwarding lives in a CLI extension, gh webhook, and it went generally available in 2023:
gh webhook forward --repo=OWNER/REPO --events=issues,pull_request --url=http://localhost:4000/webhooksSwap --repo for --org=my-org to forward organisation webhooks, which needs the admin:org_hook scope on your gh login. It is the cleanest way to develop a GitHub App locally, and it replaces the older smee.io workflow.
Shopify
Shopify’s CLI does something slightly different - rather than forwarding real events, it fires a sample payload at an address you choose:
shopify app webhook trigger \
  --topic orders/create \
  --api-version <version> \
  --address http://localhost:3000/webhooks \
  --client-secret <your-app-client-secret>
That --client-secret flag matters. Without it the request arrives unsigned and a correctly written handler rejects it. With it, Shopify returns a real X-Shopify-Hmac-SHA256 header, so you can exercise the verification path locally instead of commenting it out.
Tunnels: the universal fallback
Most providers have no CLI. For those, you need a public HTTPS URL that forwards to your port.
Pinggy is the lowest-friction option because it rides on SSH, which is already installed on macOS, Linux, and modern Windows. Nothing to download, no account:
ssh -p 443 -R0:localhost:3000 free.pinggy.ioThat returns an HTTPS URL to paste into the provider’s webhook settings. Free sessions last 60 minutes and rotate the subdomain each time - fine for a debugging session, annoying if you’re re-pasting into a dashboard all afternoon, which a Pro token fixes with a persistent subdomain.
The reason to pick it over a plain tunnel is the Web Debugger, free rather than Pro-gated. Forward it to a local port when you start the tunnel:
ssh -p 443 -R0:localhost:3000 -L4300:localhost:4300 free.pinggy.io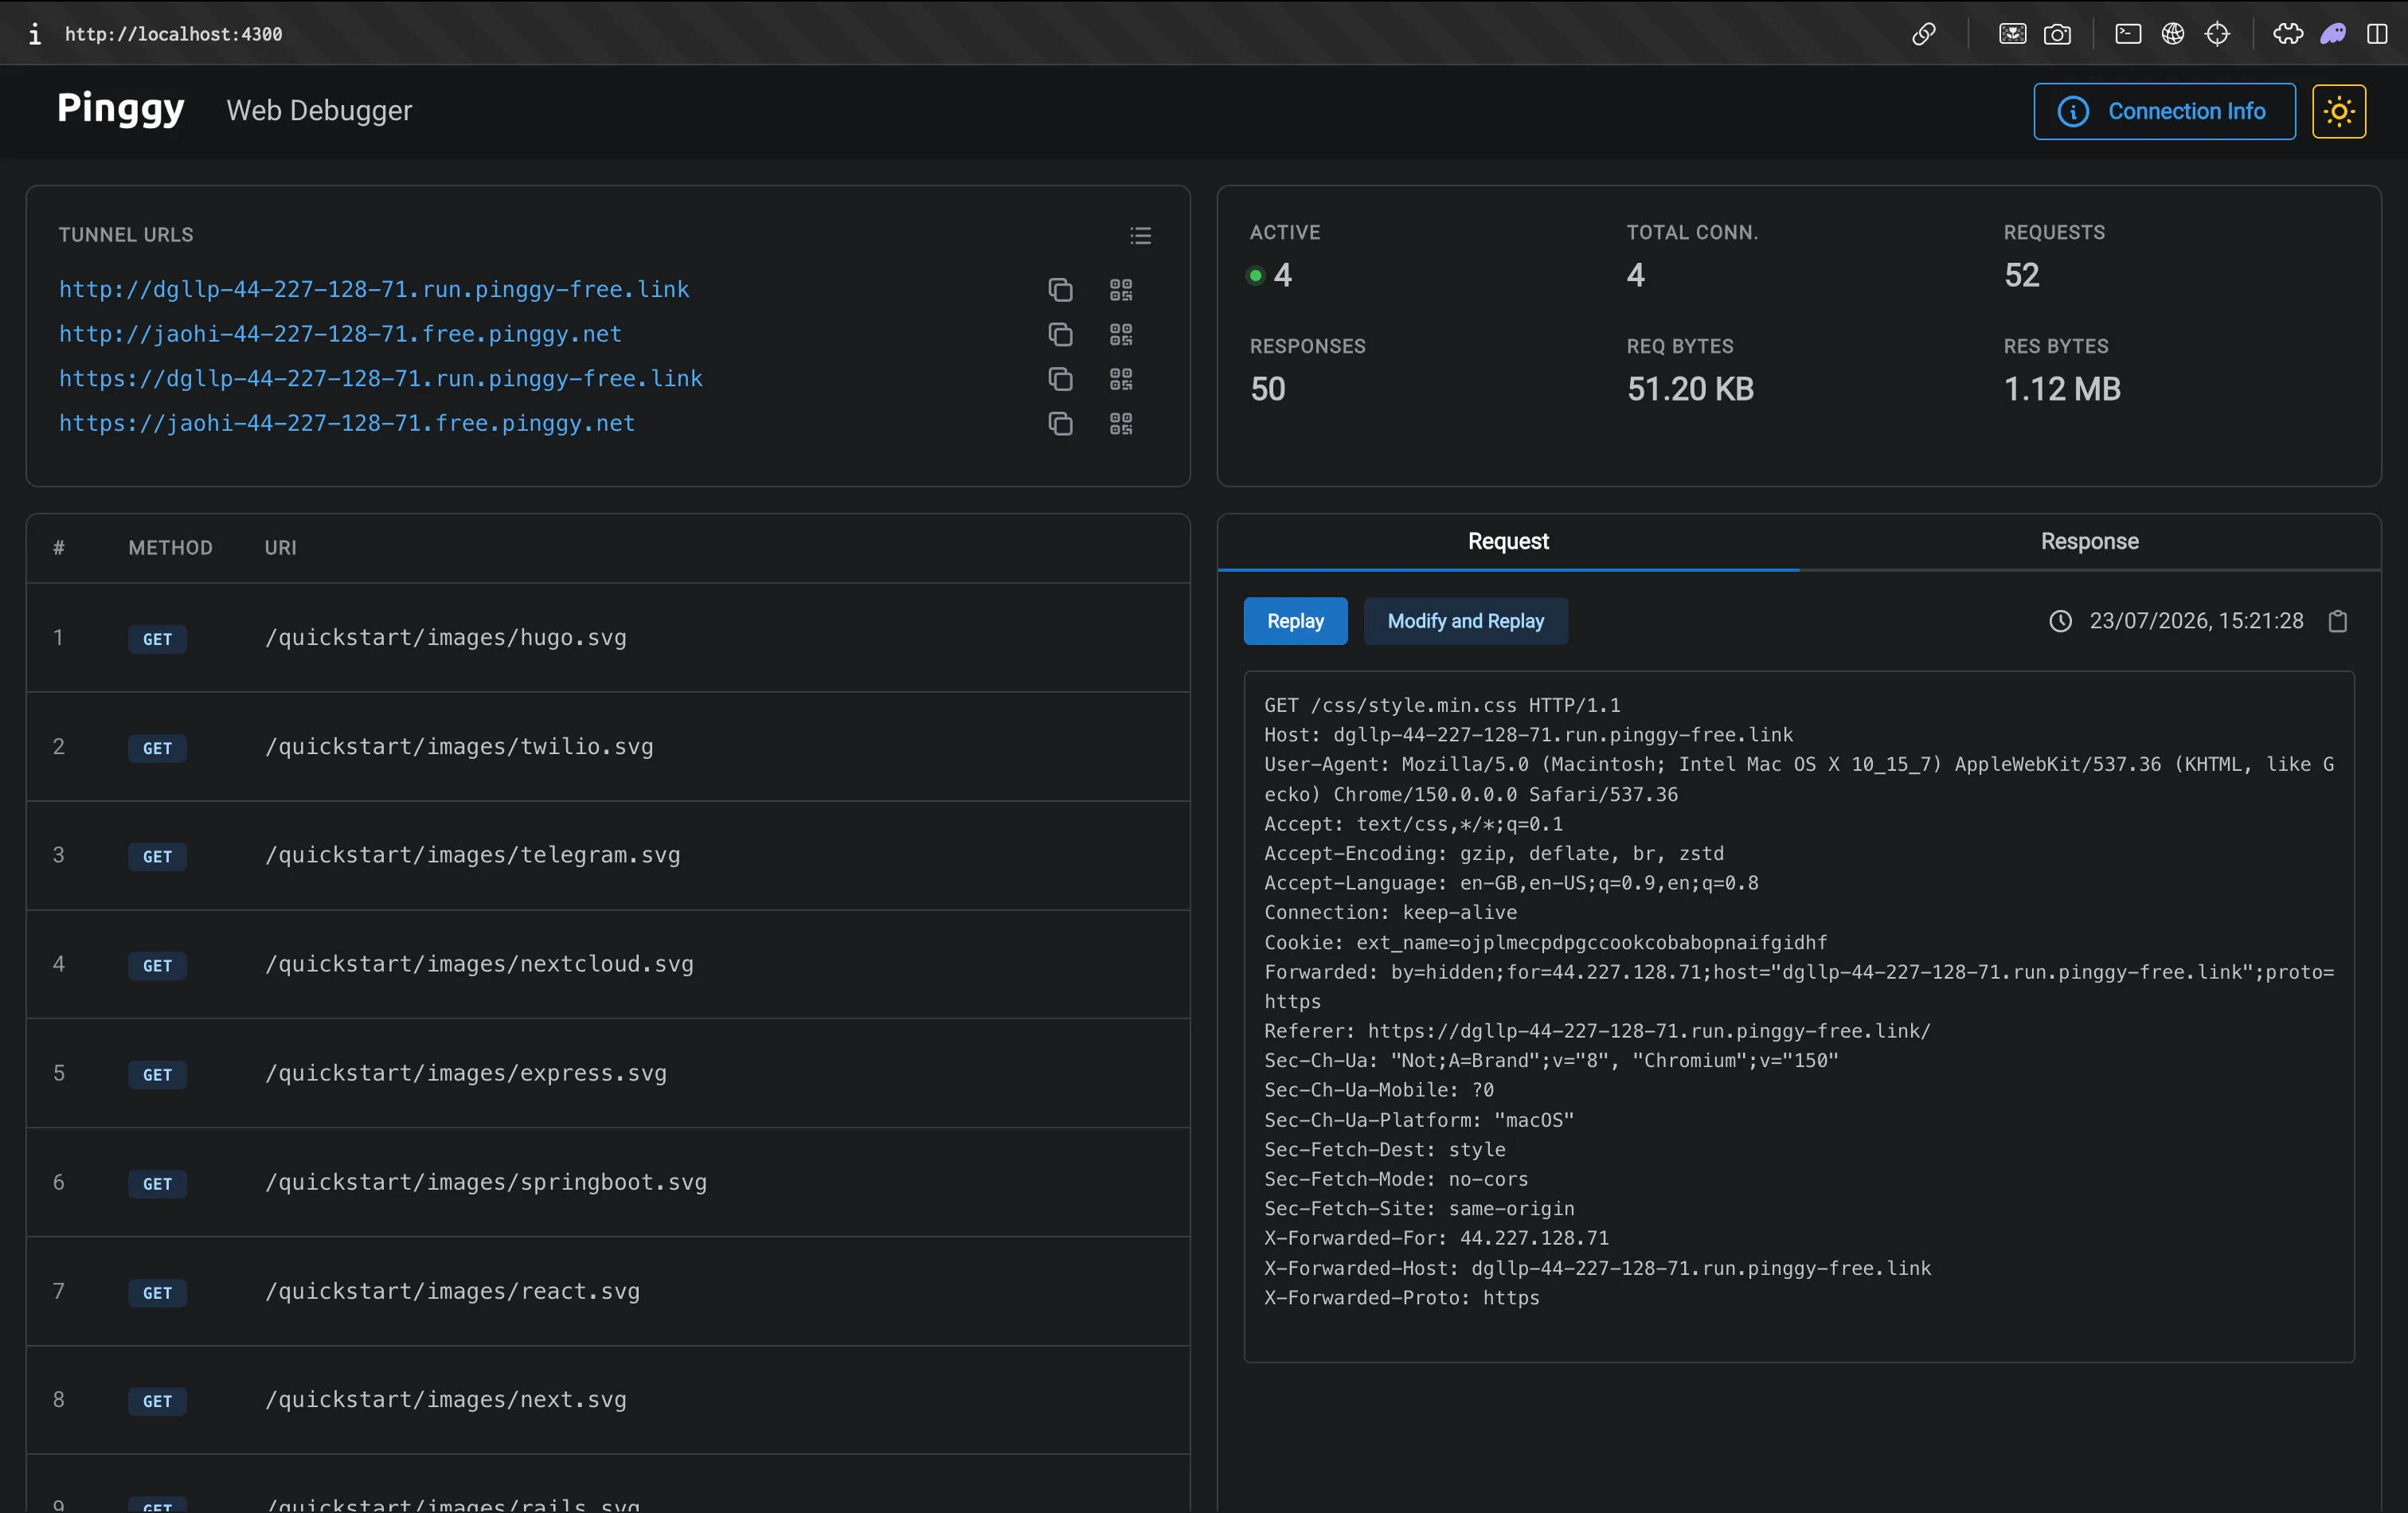
Open http://localhost:4300 and every request shows up live with full headers and body. Replay resends a captured request byte for byte; Modify and Replay lets you change the method, path, HTTP version, or any header first. That second one is the time-saver - you can reproduce “what happens when the signature header is missing” without asking Stripe to send you a malformed event.
The tunnel URL is public while it’s open, so restrict it once real-looking data is involved. Pinggy drops non-matching requests entirely:
ssh -p 443 -R0:localhost:3000 free.pinggy.io -- w:203.0.113.0/24Relay services: durable history and CI assertions
Hookdeck CLI
Hookdeck’s CLI (npm install hookdeck-cli -g, Apache-2.0) is free for development and forwards through Hookdeck’s infrastructure:
hookdeck listen 3000 stripe --path /webhooks/stripeThe difference from a raw tunnel is that event history survives the session: close the terminal, come back tomorrow, and the events are still in the dashboard to replay, visible to teammates too. You can also filter what gets forwarded, useful when a provider fires twenty event types and you care about one:
hookdeck listen 3000 github --filter-body '{"action":"opened"}'Svix Play
Svix Play is free and needs no account. The CLI relays to your local server:
svix listen http://localhost:3000/webhooksThat prints a public https://play.svix.com/in/... URL and proxies everything to your handler. The distinctive part is the Play API: https://api.play.svix.com/api/v1/history/{token}/ returns captured requests as JSON, so an integration test can send an event and assert on the payload that actually arrived instead of mocking the provider. That is the shortest path to webhook coverage in CI. (The CLI now lives in the svix/svix-webhooks monorepo; the standalone svix/svix-cli repo was archived at the end of 2024.)
smee.io
Still maintained (smee-client is at v5.0.0) and the simplest hosted proxy needing no account, though gh webhook forward has largely replaced it for GitHub App work.
The bug everyone hits: signature verification and the raw body
This is where most first webhook handlers die, and no tooling saves you from it. Providers sign the exact bytes they sent. Parse that body into an object, re-serialise it to check the signature, and you get different bytes - verification fails even though nothing was tampered with.
Here is the failure, reproduced. A provider sends { "id": "evt_1", "type": "payment_intent.succeeded" } with the whitespace it happens to use. A handler behind app.use(express.json()) calls JSON.stringify(req.body) to rebuild it, drops that whitespace, and the recomputed HMAC no longer matches. Stripe’s docs put it bluntly: “Any manipulation to the raw body of the request causes the verification to fail.”
The fix is to mount a raw parser on the webhook route only, so the rest of your app keeps its normal JSON body:
const express = require("express");
const crypto = require("crypto");

const app = express();
const SECRET = process.env.WEBHOOK_SECRET;
const seen = new Set();

// Only this route gets the raw body. Everything else can use express.json().
app.post("/webhooks", express.raw({ type: "application/json" }), (req, res) => {
  const header = req.get("Stripe-Signature") || "";
  const parts = Object.fromEntries(
    header.split(",").map((p) => p.split("=").map((s) => s.trim()))
  );
  const { t: timestamp, v1: received } = parts;
  if (!timestamp || !received) return res.status(400).send("missing signature");

  // Reject anything older than 5 minutes - the tolerance Stripe's own libraries use.
  if (Math.abs(Date.now() / 1000 - Number(timestamp)) > 300) {
    return res.status(400).send("timestamp outside tolerance");
  }

  const expected = crypto
    .createHmac("sha256", SECRET)
    .update(`${timestamp}.${req.body}`)  // req.body is a Buffer here, not an object
    .digest("hex");

  const a = Buffer.from(expected, "utf8");
  const b = Buffer.from(received, "utf8");
  if (a.length !== b.length || !crypto.timingSafeEqual(a, b)) {
    return res.status(400).send("bad signature");
  }

  const event = JSON.parse(req.body.toString("utf8"));

  // Providers retry, so the same event id will arrive more than once.
  if (seen.has(event.id)) return res.sendStatus(200);
  seen.add(event.id);

  res.sendStatus(200);   // ack first, then do the slow work
  console.log(`handled ${event.type} ${event.id}`);
});

app.listen(3000, () => console.log("listening on http://localhost:3000"));
Three details matter there. timingSafeEqual throws on length mismatch, hence the explicit length check first. The five-minute tolerance is the replay-attack defence: the timestamp is part of the signed payload, so an attacker can’t move it without breaking the signature, but you have to actually check it. And the 200 goes out before the logging, because providers time out endpoints that think first and respond later.
When verification still fails and you can’t tell whether the bug is your code or the wrong secret, recomputing the digest outside your app is the fastest way to find out. A browser-side HMAC signature verifier that takes the raw payload and the secret will tell you in one step whether the header was ever going to match.
Test the retry path, not just the happy path
Delivery is at-least-once and unordered. Stripe retries for up to three days in live mode with exponential backoff (three attempts over a few hours in a sandbox), and its docs are explicit that you should track event IDs rather than timestamps, because distinct events can share a created second.
So test it. Hit your handler twice with the same captured request - Pinggy’s Replay button, Hookdeck’s dashboard replay, or stripe events resend <event_id> --webhook-endpoint=<endpoint_id>, good for 30 days after the event (the Dashboard’s Resend covers 15). If the second delivery creates a second order, you have found the bug that would otherwise surface as a duplicate charge at 2am. While you are there, return a 500 and watch the retry arrive, and check that a 3xx never leaks out of the route, since Stripe counts redirects as failures.
Which tool for which job
Once you know the mechanism, the choice is mostly mechanical:
| Tool | Command to start | Reach for it when |
|---|---|---|
| Stripe CLI | stripe listen --forward-to localhost:4242/webhook | You are on Stripe - it also gives you stripe trigger |
| GitHub CLI | gh webhook forward --repo=OWNER/REPO --url=... | Building a GitHub App or repo automation |
| Shopify CLI | shopify app webhook trigger --topic orders/create | You want a signed sample payload on demand |
| Pinggy | ssh -p 443 -R0:localhost:3000 free.pinggy.io | Any provider with no CLI, plus a free inspector with Replay |
| Hookdeck | hookdeck listen 3000 stripe | Event history has to outlive the terminal session |
| Svix | svix listen http://localhost:3000/webhooks | CI needs to assert against real captured payloads |
Start at the top. A provider CLI means nothing is exposed and signature verification works end to end, so it beats a tunnel whenever it exists. Drop to a tunnel for the long tail, and add a relay only when you need durable history or CI assertions.
Conclusion
Picking the tool is the easy half. Any of these will get a provider’s request onto your laptop, and you can switch between them in an afternoon. The handler is what decides whether the integration actually works: read the raw body, verify the signature and its timestamp, key on the event ID so a repeat delivery does nothing, and return the 2xx before you do the slow work.
Get that right and the tunnel is just plumbing. For a wider survey of inspection and capture tools, see best webhook testing tools for local development, and for how the delivery model works underneath, webhooks explained.