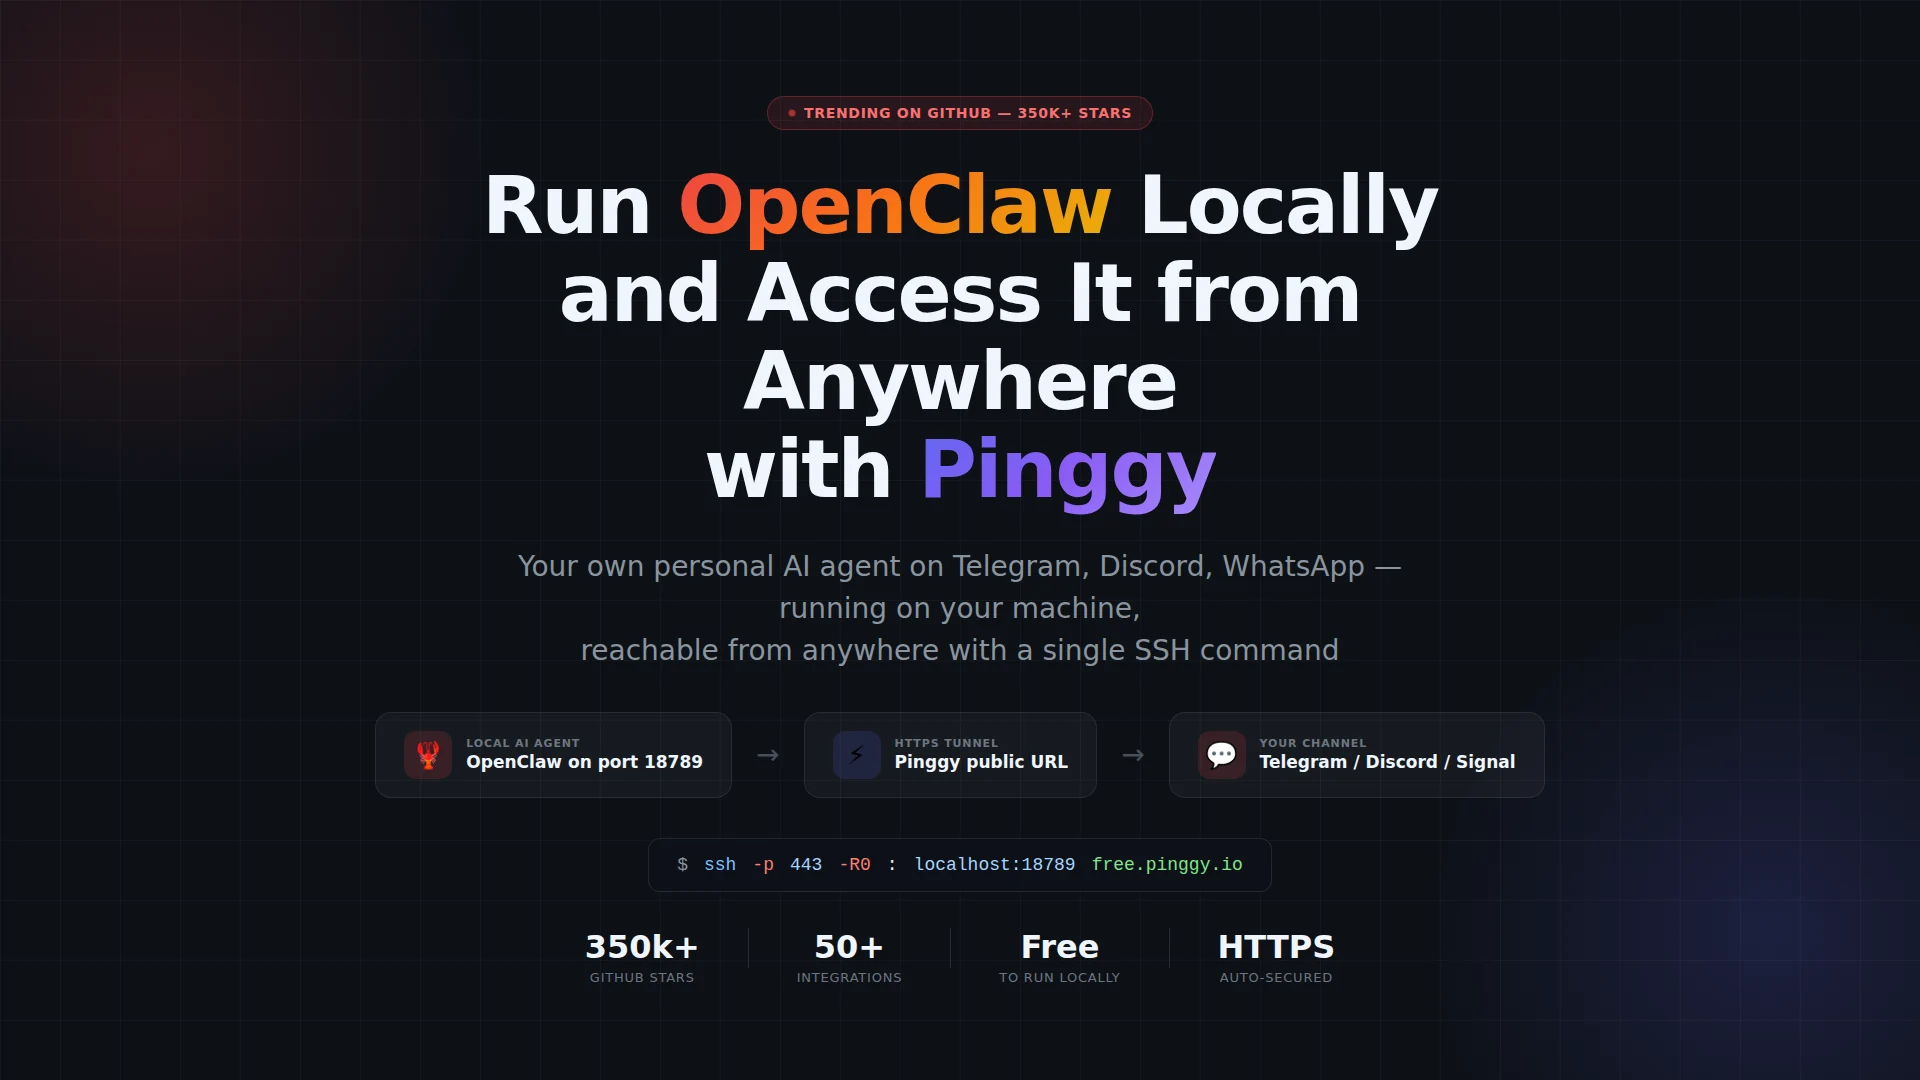
OpenClaw went from 9,000 GitHub stars to over 350,000 in a matter of weeks - the fastest any open-source project has grown in GitHub’s history. If you haven’t looked at it yet, the pitch is simple: a personal AI agent that runs on your own hardware, answers you through the messaging apps you already use (Telegram, Discord, WhatsApp, Signal, and about 46 others), and keeps your data off every third-party cloud.
The setup is straightforward until you want to reach it from somewhere other than your laptop. OpenClaw’s Gateway starts at http://localhost:18789, and the Control UI flat-out refuses to work over plain HTTP from any remote origin. That’s not a bug - it’s a browser security restriction baked into the WebCrypto API. HTTPS is required, and that’s what Pinggy makes trivially easy.
Summary
- Install OpenClaw:
npm install -g openclaw@latest - Run the wizard:
openclaw onboard - Start the gateway:
openclaw gateway start - Expose it with Pinggy in a new terminal:
ssh -p 443 -R0:localhost:18789 free.pinggy.io - Open the printed HTTPS URL in any browser to reach your Control UI remotely.
- For Telegram webhook mode, set
channels.telegram.webhookUrlto your Pinggy URL in~/.openclaw/openclaw.json.
What OpenClaw actually is
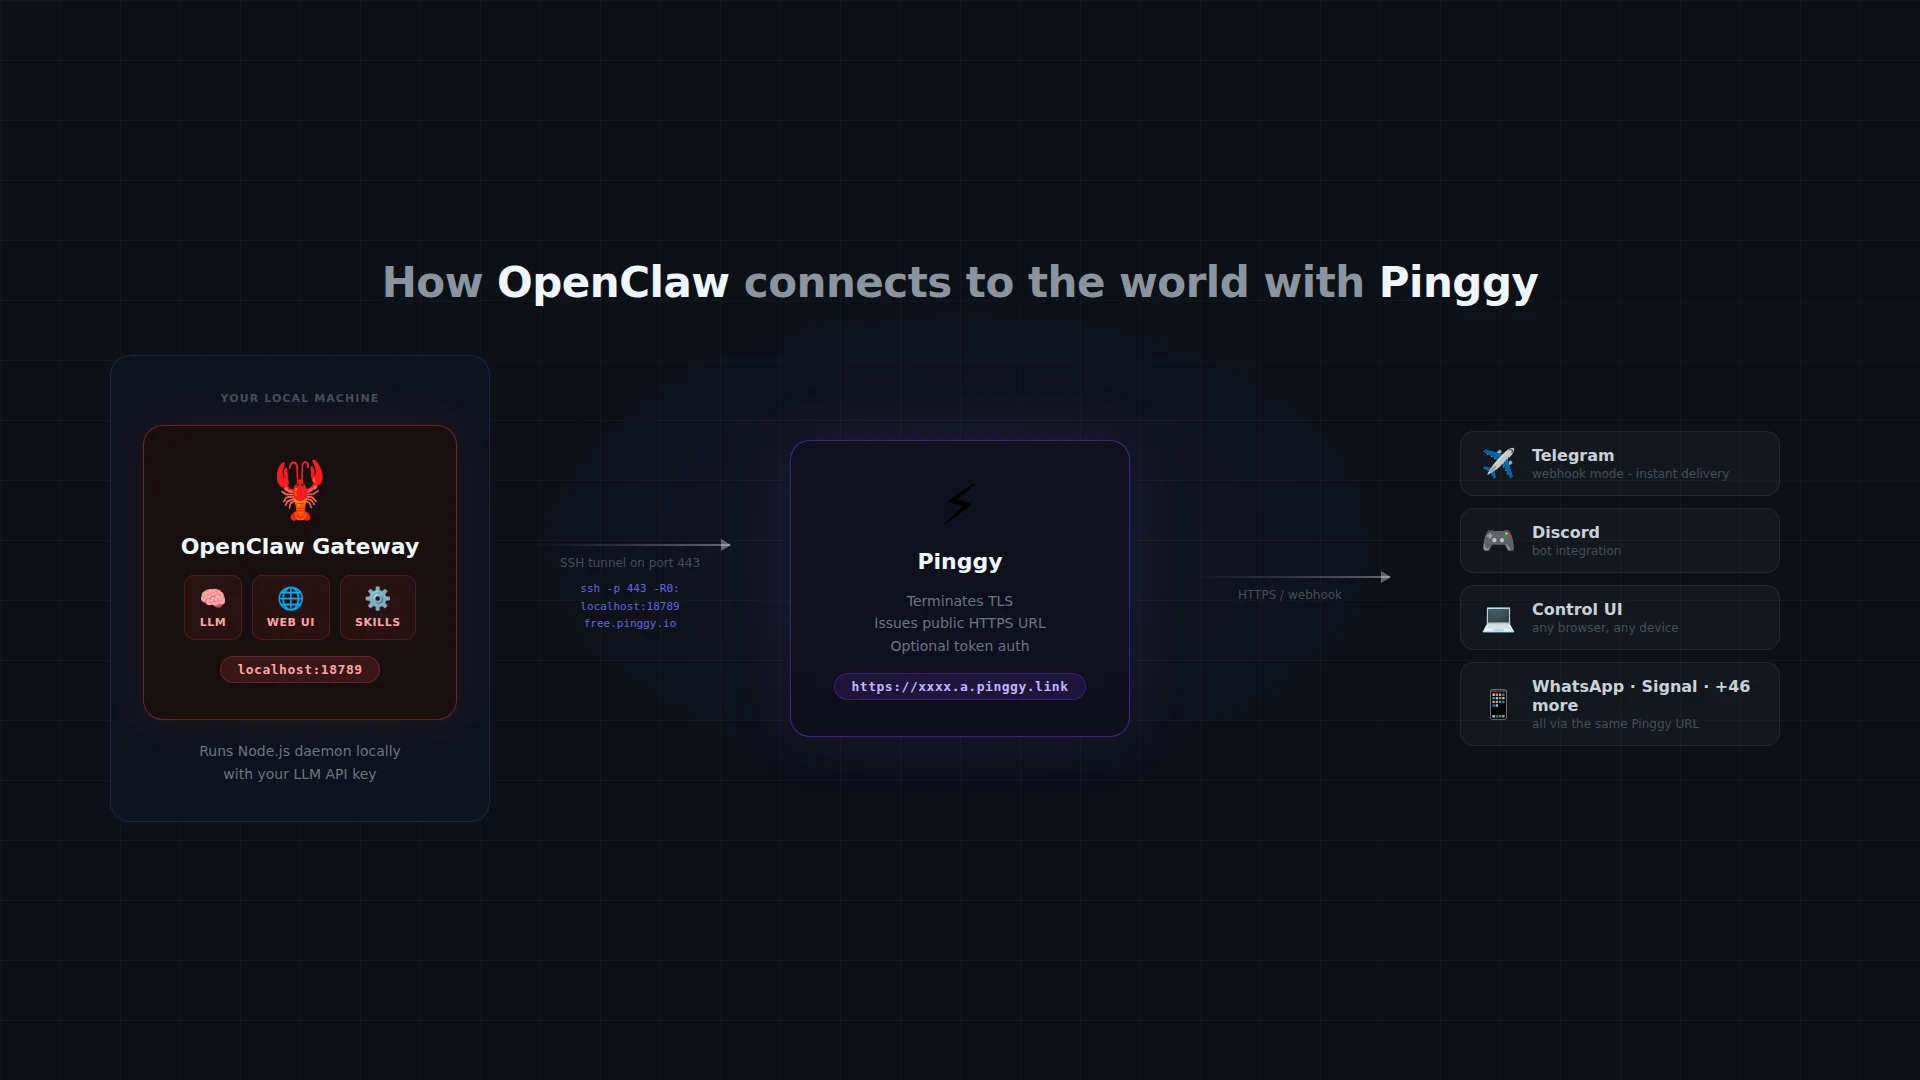
OpenClaw describes itself as “a personal AI assistant you run on your own devices.” The core unit is the Gateway - a Node.js daemon that manages sessions, channels, skills, and routing. You talk to it via whatever messaging app you already have open: send a message to your Telegram bot, get a response from Claude or GPT-4o, have it run a skill (search the web, control Home Assistant, read your calendar). Everything routes through the Gateway on your machine.
The design is deliberately local-first. OpenClaw does not relay your messages through its own servers. You bring your own API key for the LLM provider, and the Gateway just wires everything together. Skills are small packages you install from a registry - think npm for AI capabilities.
The GitHub repo is at github.com/openclaw/openclaw, and the project has collected endorsements from NVIDIA and the OpenAI team since going viral in early 2026. The community has already published hundreds of skills covering productivity tools, smart home devices, music services, and coding helpers.
Why remote access requires HTTPS
OpenClaw’s Control UI is a browser-based dashboard. It uses the WebCrypto API for device pairing and identity verification - the mechanism that prevents random people from connecting to your Gateway once it’s on a public URL.
Here’s the catch: browsers only expose the WebCrypto API in secure contexts. A secure context means either localhost (loopback) or a proper HTTPS connection. Plain http://your-ip:18789 from a remote device is neither - the WebCrypto API is completely unavailable, and the Control UI authentication flow fails with a cryptic error.
This matters beyond the UI. Telegram’s webhook delivery also requires HTTPS at the endpoint. If you want OpenClaw to receive Telegram messages via webhook instead of polling (lower latency, less CPU), you need a public HTTPS URL to configure as your bot’s webhook.
Pinggy gives you that URL with one SSH command. No server to provision, no certificate to obtain, no DNS record to update.
Prerequisites
- Node.js 22 or later (
node --versionto check) - An LLM API key - OpenAI, Anthropic, or any provider OpenClaw supports
- SSH available in your terminal (it is on macOS and Linux by default; on Windows, use Git Bash or WSL)
No Pinggy account is needed for the free tier. No extra software to install.
Step 1 - Install OpenClaw
npm install -g openclaw@latestVerify it worked:
openclaw --versionYou should see a version string like 2026.x.x.
Step 2 - Run the onboarding wizard
openclaw onboardThe wizard walks you through four things:
- Gateway - accept the default port (18789) unless something else is already using it
- Workspace - a name for your local agent instance
- LLM provider - paste your API key for OpenAI, Anthropic, or whichever provider you use
- Channel - you can configure a messaging channel now or skip and do it later
If you want it to start automatically when your machine boots:
openclaw onboard --install-daemonStep 3 - Start the Gateway
openclaw gateway startAfter a few seconds, the Gateway is listening on http://localhost:18789. Open that URL in your browser to confirm the Control UI loads. You’ll be asked to pair your device on first open - approve it, and you’ll see the dashboard with your workspace, skill registry, and channel status.
If you want to run it in the foreground to watch the logs (useful while setting things up):
openclaw gateway --foregroundStep 4 - Expose with Pinggy
Open a new terminal tab. You need nothing beyond the ssh command that ships with your OS:
ssh -p 443 -R0:localhost:18789 free.pinggy.ioPinggy prints something like:
You are forwarded at:
https://randf0e9ab12.a.pinggy.link
http://randf0e9ab12.a.pinggy.link
The https:// URL is what you want. Open it in any browser - on your phone, another laptop, anywhere - and you will hit your OpenClaw Control UI over a valid HTTPS connection. The WebCrypto device-pairing flow works correctly because the origin is HTTPS.
The tunnel stays active as long as the SSH session is running. To keep it alive in the background, use a terminal multiplexer like tmux or screen, or add a Pinggy persistent tunnel with a fixed subdomain using a Pinggy account.
Step 5 - Configure Telegram webhook mode
OpenClaw supports two modes for Telegram: long polling (the default, no URL needed) and webhook (requires a public HTTPS endpoint, but delivers messages instantly with no polling overhead).
Webhook mode is worth setting up if you message your bot frequently. Here’s how.
Create a Telegram bot:
Open Telegram, find @BotFather, and run /newbot. Follow the prompts and save the token it gives you - it looks like 7123456789:AAHdqTcvCH1vGWJxfSeofSAs0K5PALDsaw.
Generate a webhook secret:
openssl rand -hex 32Keep the output. This secret ensures only Telegram can push messages to your endpoint.
Edit your OpenClaw config:
Open ~/.openclaw/openclaw.json (it is created by the onboarding wizard). Add the Telegram channel block:
{
  "channels": {
    "telegram": {
      "botToken": "7123456789:AAHdqTcvCH1vGWJxfSeofSAs0K5PALDsaw",
      "webhookUrl": "https://randf0e9ab12.a.pinggy.link/telegram-webhook",
      "webhookSecret": "your-generated-secret-here",
      "dmPolicy": "allowlist",
      "allowFrom": []
    }
  }
}
Replace randf0e9ab12.a.pinggy.link with your actual Pinggy subdomain, and add your own Telegram username (without the @) to the allowFrom list to avoid your bot being usable by anyone who finds it.
The Gateway watches openclaw.json and applies changes without a restart. Within a few seconds of saving, OpenClaw registers the webhook URL with Telegram’s API. Send your bot a message to test it.
A note on URL stability: Free Pinggy URLs change each time you reconnect the SSH tunnel. If you want a stable webhook URL, you can get a fixed subdomain with a Pinggy paid plan - set the persistent subdomain once in the config and stop worrying about updating it after restarts.
Running OpenClaw via Docker
If you prefer containers, the official Docker image is at ghcr.io/openclaw/openclaw:latest:
docker run -it \
  -p 18789:18789 \
  -v $HOME/.openclaw:/home/node/.openclaw \
  ghcr.io/openclaw/openclaw:latest
The Pinggy command is the same - you’re still forwarding localhost:18789 to the outside world. The -v mount keeps your config, credentials, and workspace persistent across container restarts.
Adding authentication to the tunnel
By default, anyone who gets your Pinggy URL can hit the Gateway. OpenClaw has its own device-pairing defense, but adding a second layer at the tunnel level is easy:
ssh -p 443 -R0:localhost:18789 -t free.pinggy.io b:myusername:mypasswordThe b:user:pass argument tells Pinggy to require HTTP Basic Auth before forwarding any request to your local port. This is useful if you’re sharing the tunnel URL with teammates or just want belt-and-suspenders protection.
For key-based auth (better for API clients):
ssh -p 443 -R0:localhost:18789 -t free.pinggy.io k:mysecrettokenRequests then need Authorization: Bearer mysecrettoken. The OpenClaw Control UI is browser-based, so Basic Auth is the more practical choice there.
What the Telegram webhook port is about
One subtlety worth knowing: OpenClaw runs the Telegram webhook listener on a separate port, 8787 by default, not 18789. The 18789 port is for the Gateway control plane (API and web UI). The 8787 port is an internal HTTP endpoint that OpenClaw tells Telegram to POST messages to.
Pinggy forwards public HTTPS traffic to whichever local port you specify. When you forward 18789, you can reach the Control UI and the Gateway API. The webhookUrl in your config points at /telegram-webhook on that same domain - OpenClaw’s Gateway handles the routing internally and relays messages to the 8787 listener.
If you hit issues with Telegram webhooks, check that your webhookUrl starts with https:// (not http://) and that the Pinggy tunnel is still connected. Telegram requires a valid certificate, which the Pinggy URL provides.
Practical limits of the free tunnel
A few things to know before relying on this in production:
- URL changes on reconnect. The free Pinggy URL is random and changes each time you restart the SSH session. Update
webhookUrlin your config whenever this happens, or get a persistent subdomain. - Tunnel drops on inactivity. Free tunnels can be closed if there’s no traffic for a while. A Pinggy paid plan gives you persistent connections.
- Single user. OpenClaw is designed as a single-user personal assistant. It is not a multi-tenant service, so keep your tunnel auth tight.
For a home server or always-on machine, the paid persistent tunnel is worth it - you set the subdomain once and never touch the webhook config again.
What you can do next
Once you have the tunnel running and Telegram connected, the interesting part begins. The OpenClaw skill registry has tools for browsing the web, controlling Home Assistant, reading RSS feeds, querying databases, and running local scripts. Skills are installed with openclaw skills install <package-name> and are immediately available in your chat sessions.
You can also add multiple channels - run Telegram and Discord in parallel from the same Gateway, or switch between them depending on context. The dmPolicy: "allowlist" setting in each channel config controls who can interact with your agent, which is worth configuring before you hand out the URL.
OpenClaw has grown fast partly because the setup is genuinely minimal once you get past the HTTPS requirement. Pinggy removes that friction - one SSH command and your local AI agent is reachable from your phone while commuting, from a browser tab at a client site, or from any device on any network.
For questions about Pinggy tunneling options or persistent subdomains, see the Pinggy documentation.