In this article
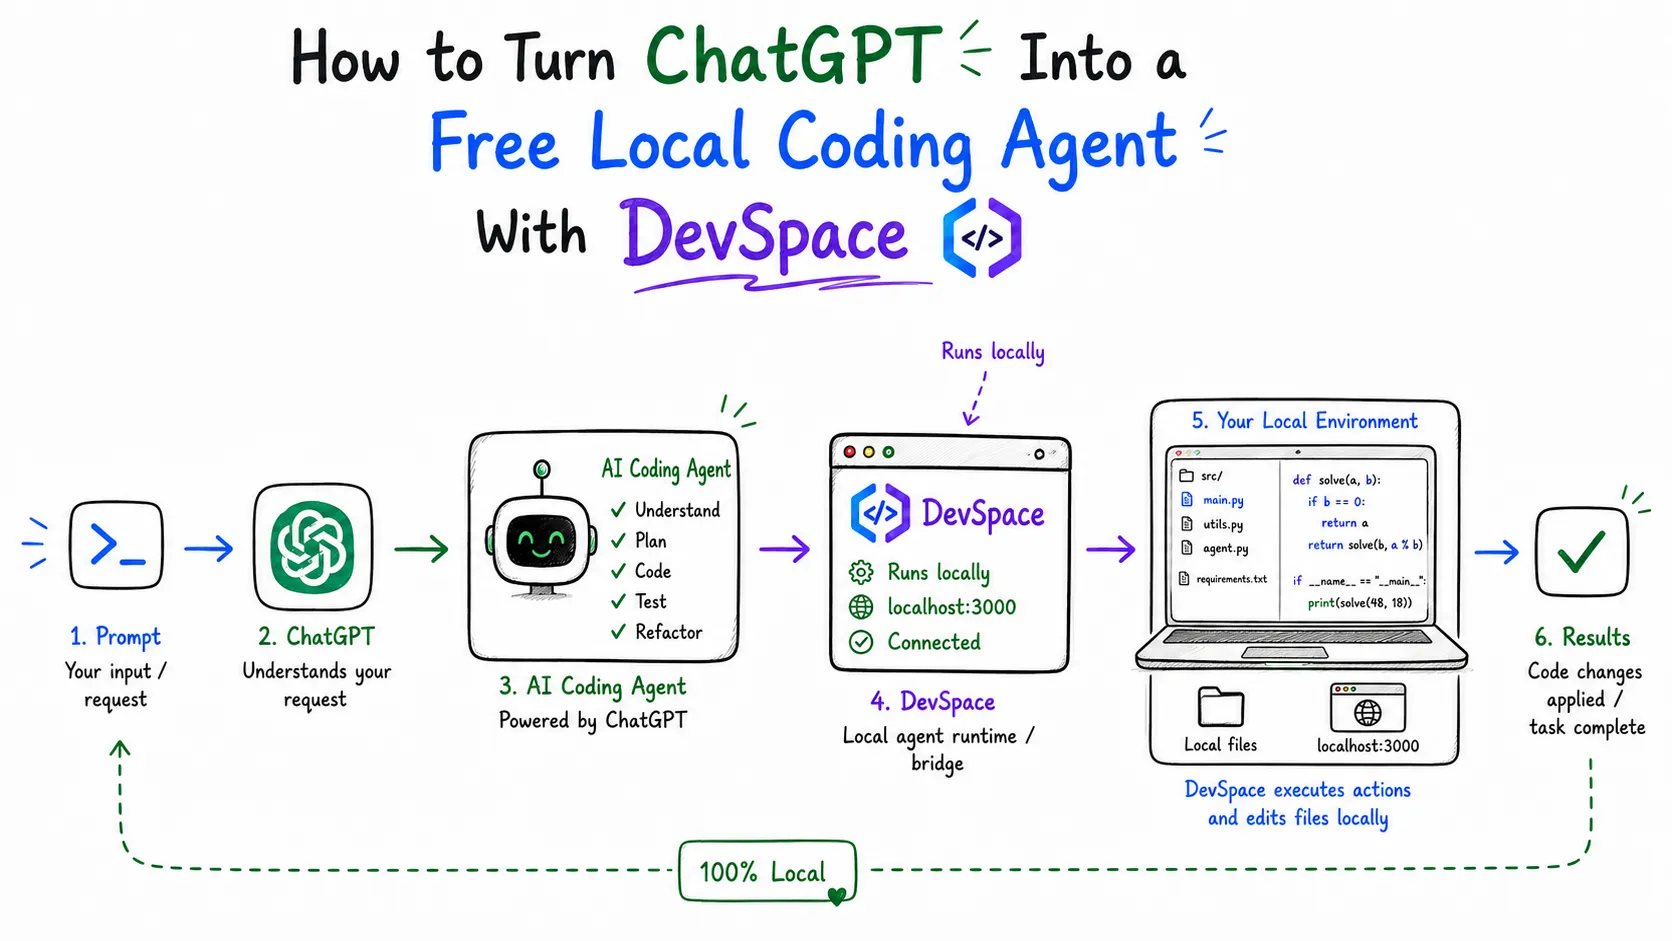
ChatGPT can write code, but by default it cannot touch your actual project. The regular chat interface has no view of your filesystem, no terminal, and no way to run your test suite. Even Codex, OpenAI’s own coding agent, mostly works against a cloned copy of your repo in a cloud sandbox, not the folder open in your editor right now with your local .env file, your running dev server, and your actual database connection.
DevSpace closes that gap. It is a small, self-hosted MCP server that you run on your own machine. Once it is connected, ChatGPT can open a real project folder, read and edit files, run shell commands, and show you diffs, the same loop you get from Codex or Claude Code, except it is your laptop doing the work and your existing ChatGPT subscription paying for it. No extra coding-agent subscription, no code leaving your machine except through the Plugin calls you approve.
This guide covers what DevSpace actually does, how to set it up end to end with a Pinggy tunnel, and where the rough edges are right now, because it is a genuinely new project (first commit June 14, 2026) and not everything is polished yet.
Summary
What DevSpace does: an open-source, MIT-licensed MCP server (npm package, currently v1.0.4) that gives ChatGPT (or Claude, or any MCP-capable client) tools to read, write, edit, search, and run shell commands inside project folders you explicitly allow. It is free and open source; you only need a ChatGPT plan that supports Developer Mode.
The catch: custom Plugins (what ChatGPT called connectors until recently) live behind ChatGPT’s Developer Mode, which as of this writing requires Plus, Pro, Business, Enterprise, or Edu - not the Free plan. So this is “free” in the sense that DevSpace costs nothing and you are not paying for a second coding-agent product, not in the sense that the Free ChatGPT tier gets it.
Setup in short:
npm install -g @waishnav/devspace, thendevspace initto pick allowed folders and a port (default7676)- Tunnel that port publicly, e.g.
ssh -p 443 -R0:localhost:7676 free.pinggy.iovia Pinggy devspace serveto start the server,devspace doctorto sanity-check the setup- In ChatGPT web: Settings → Security and login → scroll down → enable Developer mode → add a Plugin pointing at
https://your-tunnel/mcp - Approve the connection with the Owner password from
~/.devspace/auth.json, then tell ChatGPT to open one of your allowed folders
Requirements: Node >=22.19 <27, npm, Git, a Bash-compatible shell (Git Bash or WSL on Windows), and a public HTTPS tunnel. Linux, macOS, and Windows (via Git Bash/WSL) are supported; plain PowerShell or cmd.exe is not, yet.
Why plain ChatGPT can’t just edit your code
On July 9, 2026, OpenAI merged the standalone Codex app into a single ChatGPT desktop app (Chat, Work, and Codex modes, available on every plan including Free) and shipped the GPT-5.6 model family. That’s a real upgrade, but it doesn’t change the more basic limitation this post is about: Codex, whether in the desktop app, the CLI, or the cloud, works by cloning a GitHub repository into a sandbox, not by touching the folder currently open on your machine, with your actual node_modules, your running dev server, and your uncommitted changes. Plain ChatGPT chat has no filesystem access at all, and its built-in Code Interpreter only runs Python in a throwaway container.
That’s the specific hole DevSpace fills: it turns a normal ChatGPT conversation into a client that can act directly on a local folder you choose, through the Model Context Protocol (MCP).
What DevSpace actually is
DevSpace is a self-hosted MCP server. You install it with npm, run it on your own machine, and expose it to the internet through a tunnel you control. When an MCP-capable client, ChatGPT’s Developer Mode, Claude, or another host, connects to it, DevSpace lets that client open one of a small set of folders you explicitly allowed during setup and work inside it.
The tool surface is deliberately small. In the default minimal tool mode, DevSpace exposes four tools plus one entry point:
open_workspace- opens an allowed folder and returns aworkspaceIdthat every later call reusesread- reads file contentswrite- creates or overwrites a fileedit- makes a targeted change to an existing filebash- runs a shell command inside the workspace, for tests, builds, git, and package scripts
There’s also a full tool mode that adds dedicated grep, glob, and ls tools, and an experimental codex mode that swaps in apply_patch, exec_command, and write_stdin, mirroring OpenAI’s own Codex CLI. You pick the mode with the DEVSPACE_TOOL_MODE environment variable.
Two details make it feel less like a toy: it reads your project’s own AGENTS.md or CLAUDE.md when a workspace opens, so ChatGPT follows the same conventions your other agents already do; and it supports isolated Git worktrees under ~/.devspace/worktrees (via "mode": "worktree") so ChatGPT can try changes without touching your actual checkout.
The part that isn’t free: ChatGPT’s plan requirement
DevSpace itself costs nothing, it’s MIT-licensed and published on npm. But connecting it to ChatGPT requires Developer Mode, which is currently gated to ChatGPT Plus, Pro, Business, Enterprise, and Edu accounts. The Free and Go tiers get built-in Codex access as of the July 2026 rollout, but not the custom Plugin feature that lets a third-party MCP server like DevSpace plug in.
So the honest pitch is: if you already pay for ChatGPT Plus, you don’t need to separately pay for Cursor, GitHub Copilot, or a Codex-specific plan to get a local coding agent, DevSpace lets that same subscription do the job. If you’re on the Free tier, this workflow isn’t available yet, though free-tier access to Codex itself has been expanding fast, so that could change.
Prerequisites
Before you start, make sure you have:
- Node.js
>=22.19and<27. Check withnode --version; install vianvm,fnm, ormiseif you need to switch versions. - npm and Git.
- A Bash-compatible shell. DevSpace’s
bashtool requires actual Bash. On Windows that means Git Bash, WSL, MSYS2, or Cygwin; plain PowerShell orcmd.exewon’t run shell commands yet. - A ChatGPT account with Developer Mode available (Plus or above, as covered in the previous section).
- A way to expose a local port publicly over HTTPS. We’ll use Pinggy below; Cloudflare Tunnel, ngrok, and Tailscale Funnel also work, since DevSpace doesn’t manage the tunnel for you.
Setting up DevSpace step by step
Step 1: Install DevSpace
npm install -g @waishnav/devspaceOr skip the global install and just use npx in the steps below.
Step 2: Initialize and choose what ChatGPT can touch
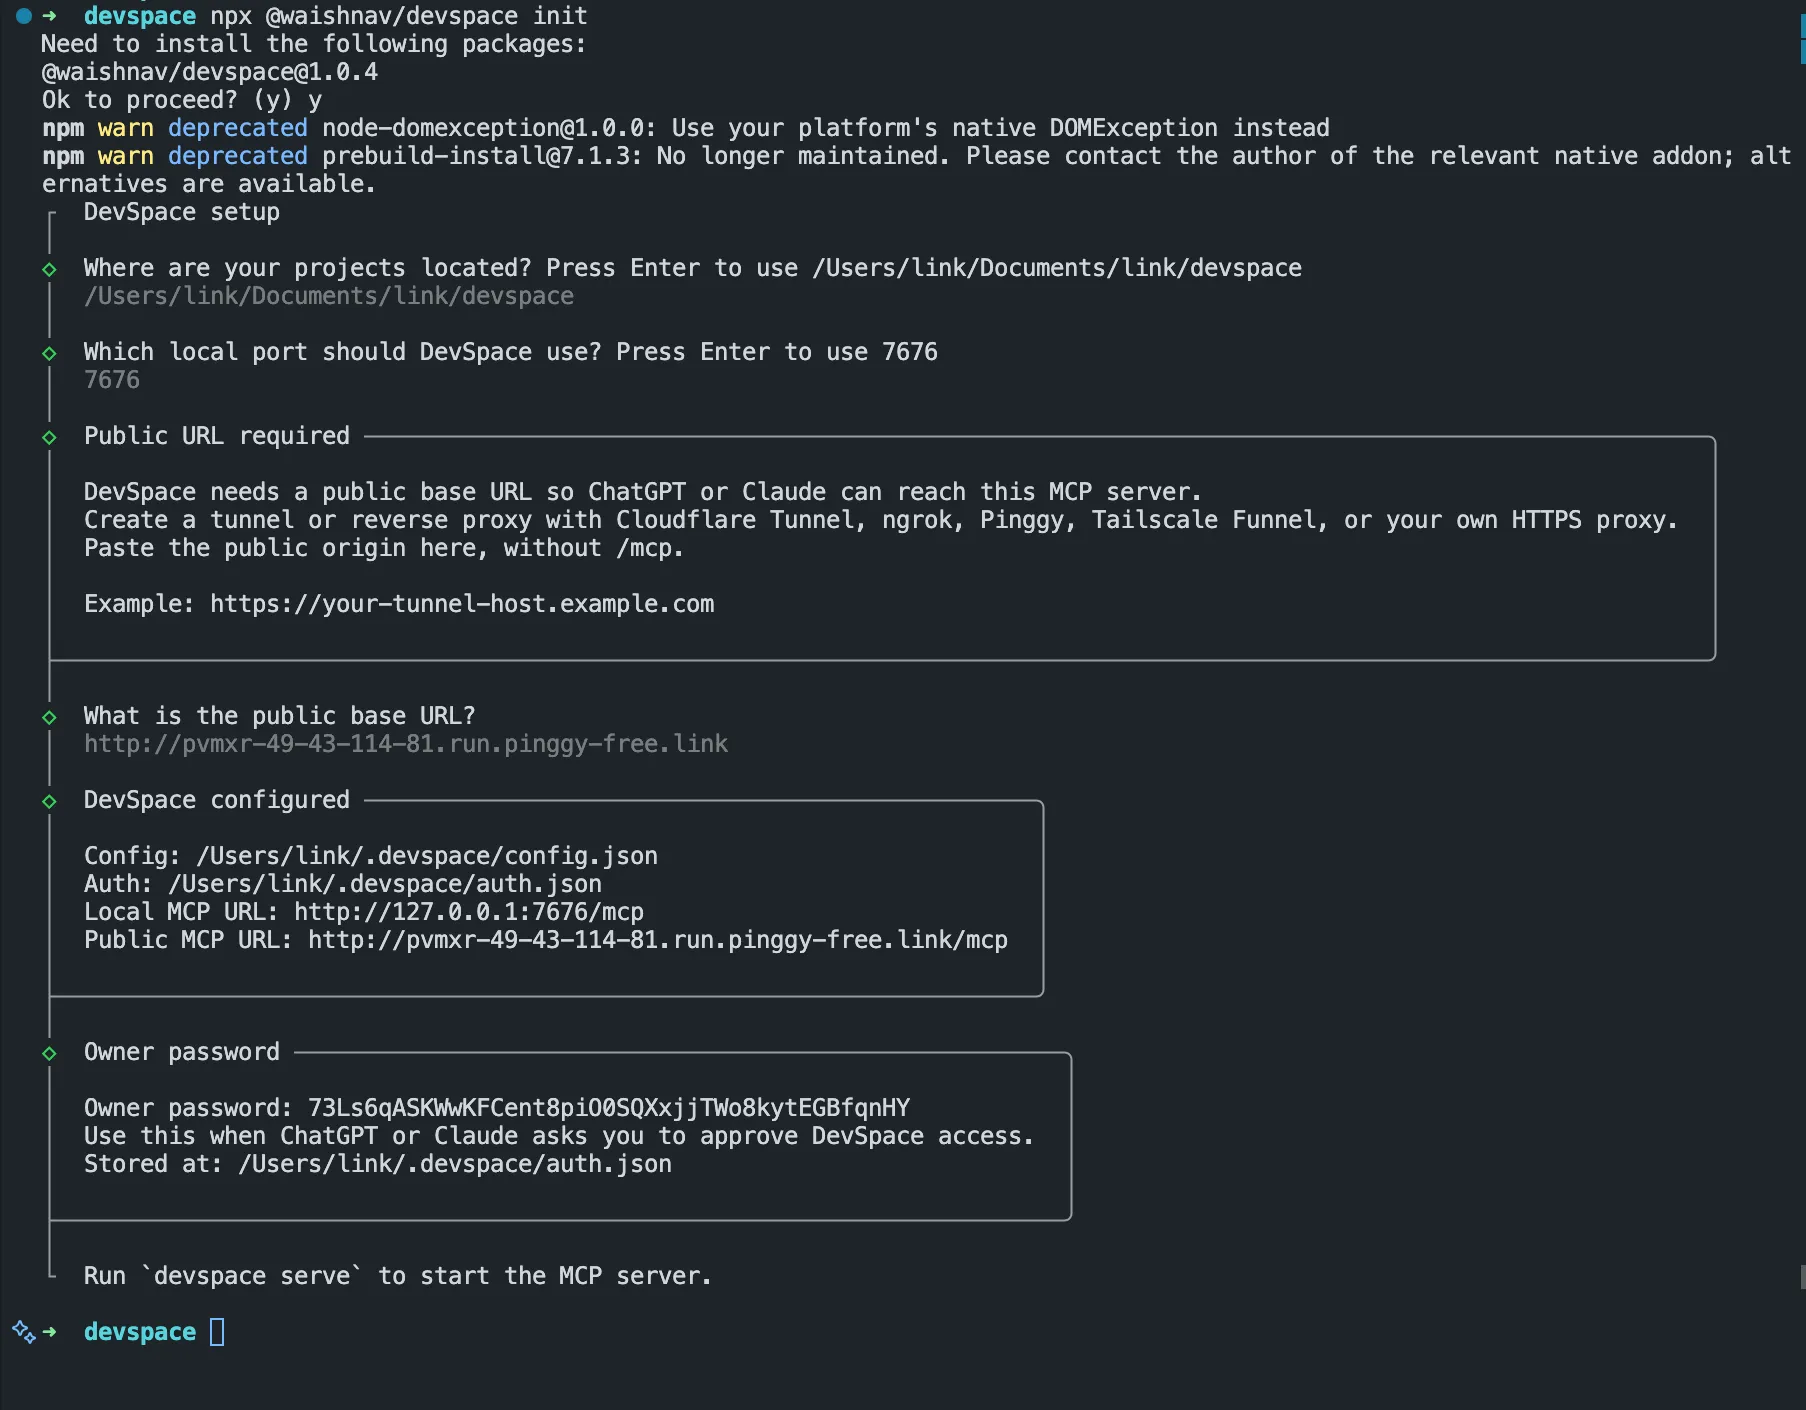
Run the init command and answer the prompts one at a time:
npx @waishnav/devspace initYou’ll be asked for three things:
- Project roots - the folders ChatGPT is allowed to open, for example
~/work,~/personal/open-source. Keep this narrow. DevSpace’s own security docs specifically warn against allowing broad roots like~or/. - Local port - defaults to
7676. The local MCP endpoint ends up athttp://127.0.0.1:7676/mcp. - Public base URL - the HTTPS origin your tunnel will expose, entered without the
/mcpsuffix. You’ll need your tunnel already pointed athttp://127.0.0.1:7676before you fill this in.
devspace init also generates an Owner password, printed to your terminal and saved to ~/.devspace/auth.json. You’ll use this in a minute to approve ChatGPT’s connection, so don’t close that terminal yet.
Step 3: Expose port 7676 with a Pinggy tunnel
Open a new terminal and start a tunnel to the port DevSpace will listen on:
Run this to expose your local DevSpace server:
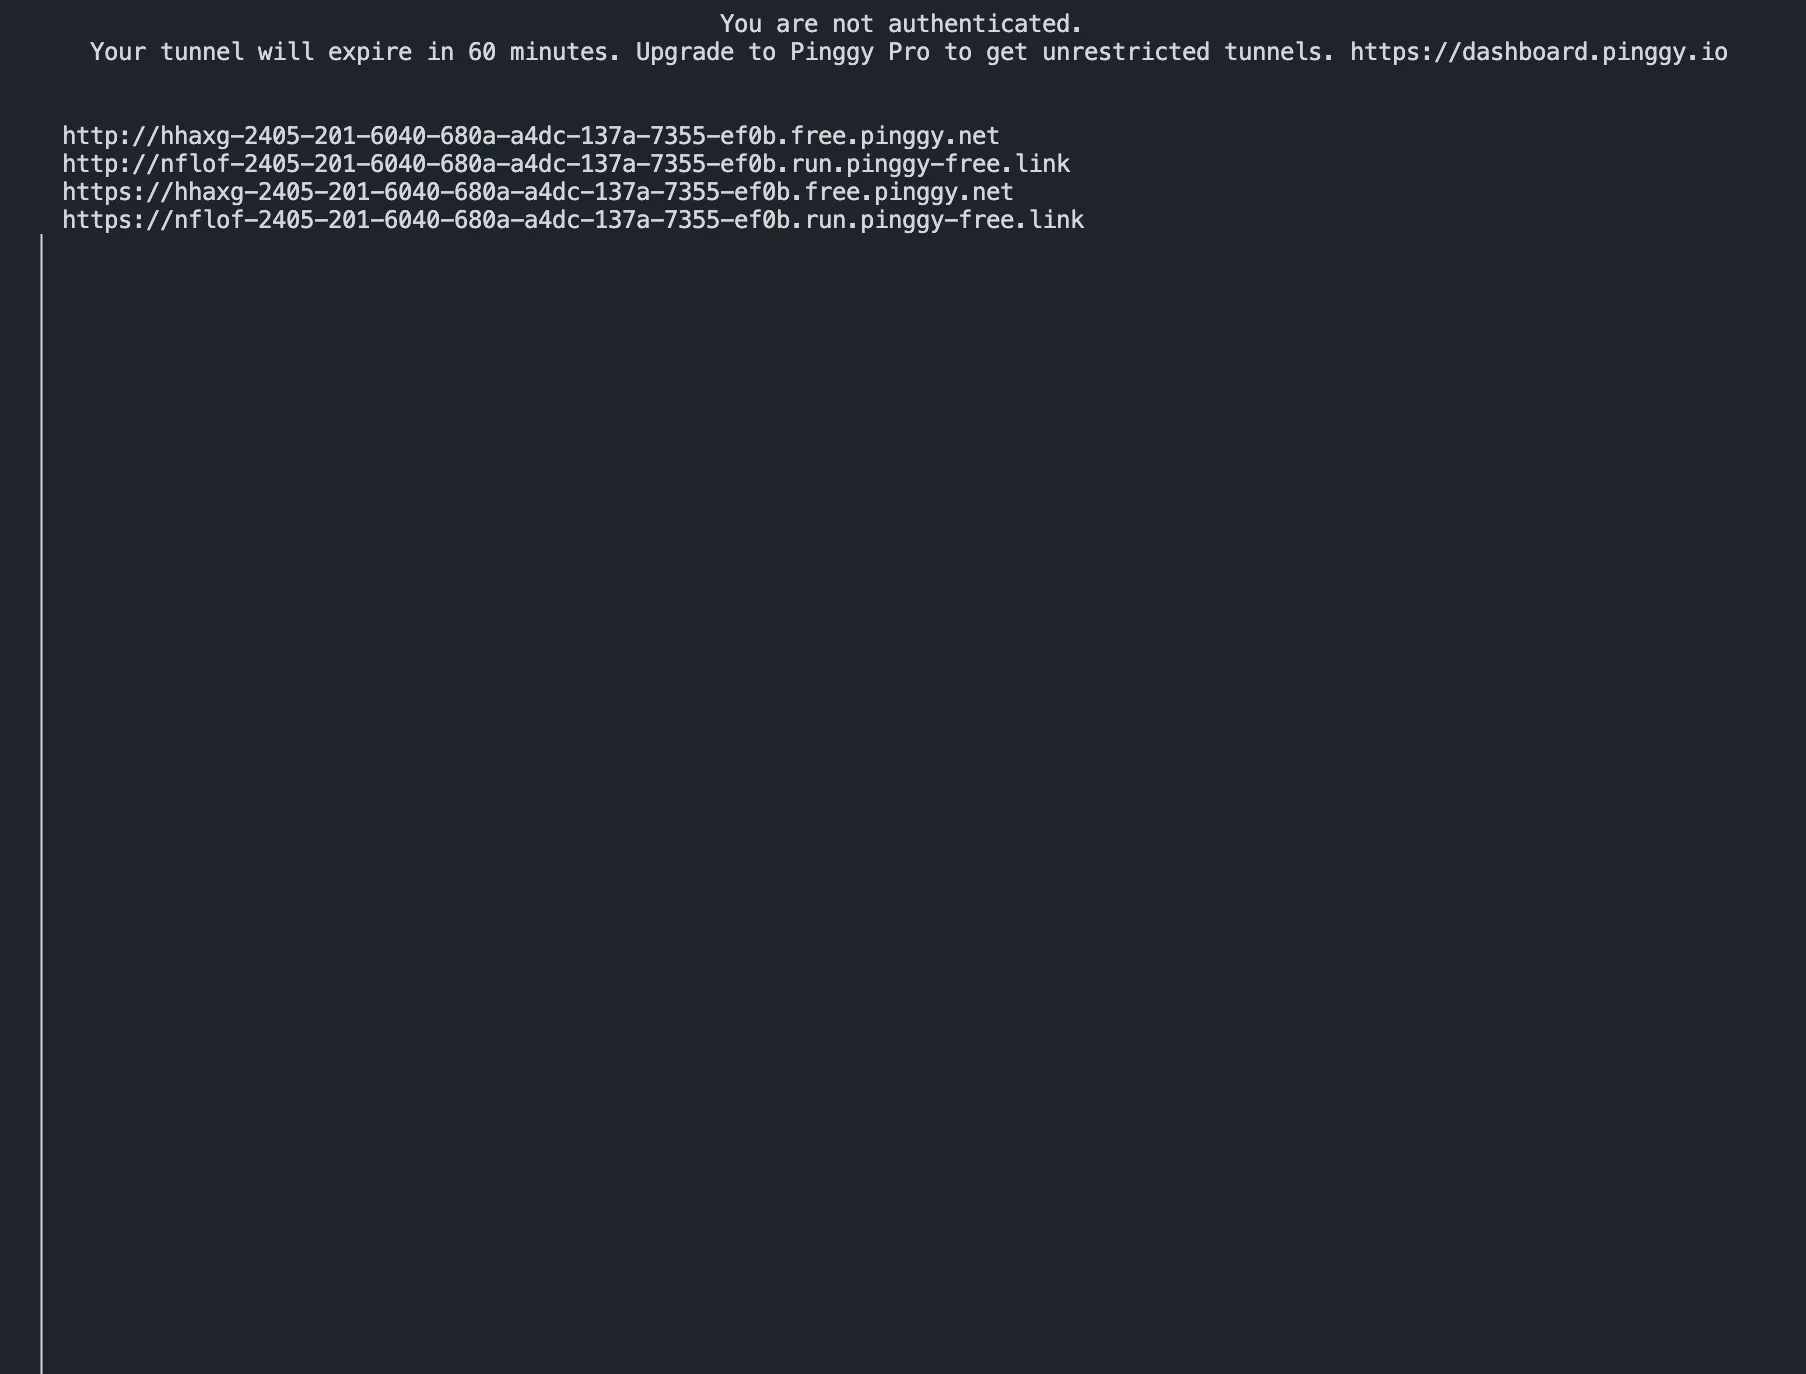
Pinggy prints two URLs, http:// and https://, on a *.a.free.pinggy.link domain. Copy the HTTPS one, it’s what you enter as DevSpace’s public base URL and what you’ll append /mcp to for the ChatGPT Plugin.
One thing to plan around: a free Pinggy session lasts 60 minutes and hands out a new random subdomain on reconnect, so if it drops you’ll need to update DevSpace:
npx @waishnav/devspace config set publicBaseUrl https://your-new-tunnel-url.a.free.pinggy.linkA Pinggy Pro token ($3/month) gives you a persistent subdomain instead, worth it if you run DevSpace as a standing background service.
Step 4: Start the DevSpace server
Back in your first terminal:
npx @waishnav/devspace serve
If your tunnel URL is different from what you saved during init, override it for one run without touching the saved config:
DEVSPACE_PUBLIC_BASE_URL="https://your-tunnel.a.free.pinggy.link" npx @waishnav/devspace serveThen sanity-check everything:
npx @waishnav/devspace doctordoctor reports your resolved config, Node/Git/Bash detection, the public URL, and whether the native SQLite dependency loaded. Fix anything it flags before moving on (a better-sqlite3 load failure is usually fixed with npm rebuild better-sqlite3).
Step 5: Turn on ChatGPT Developer Mode
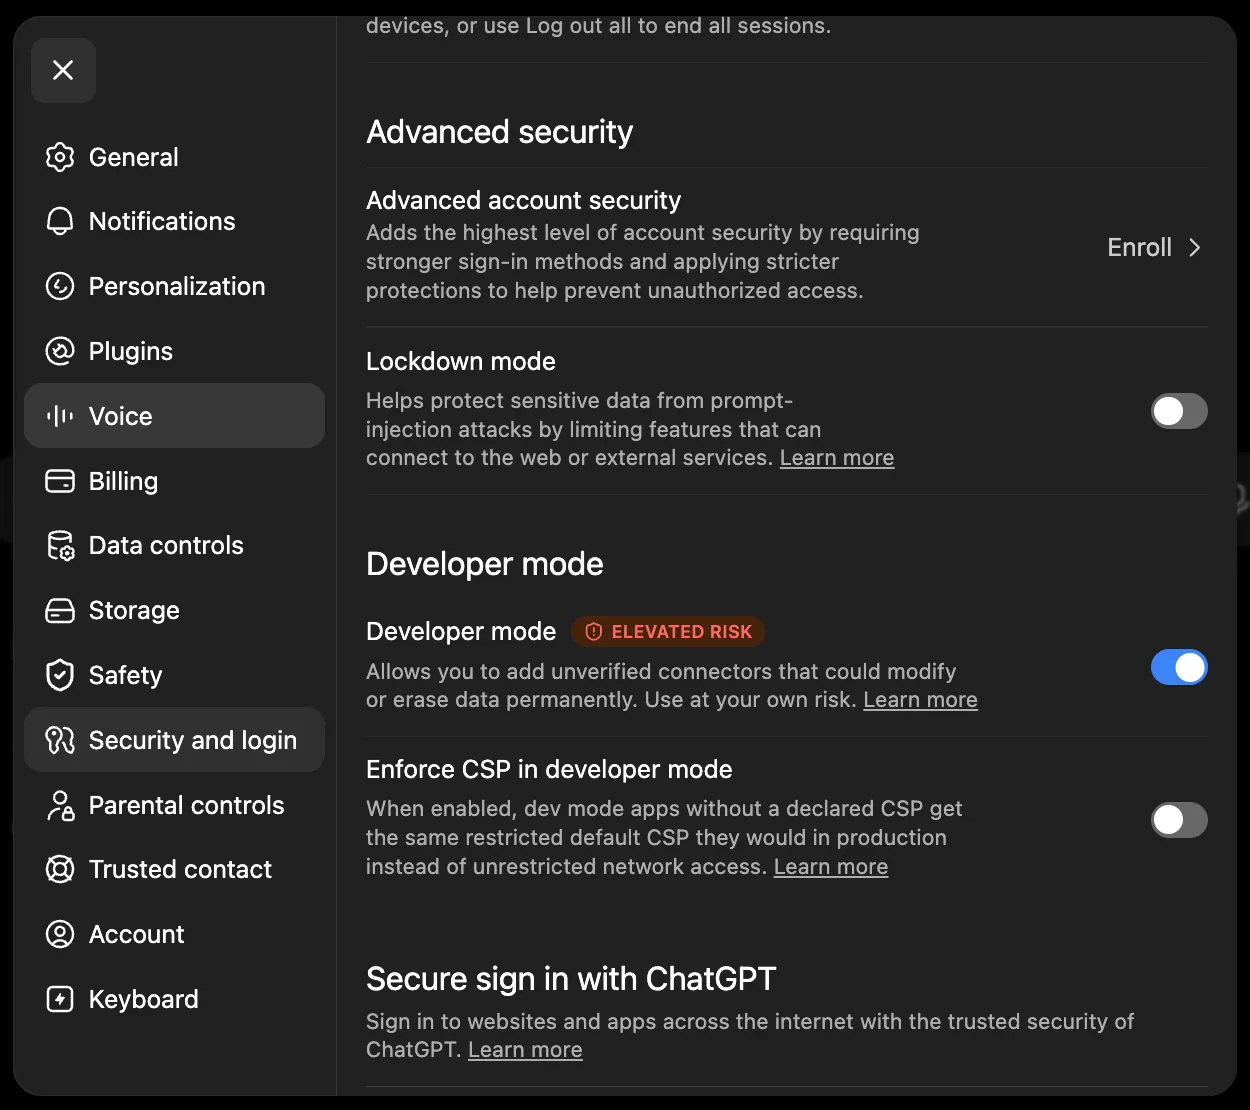
In ChatGPT on the web (a Plus, Pro, Business, Enterprise, or Edu account is required): open Settings, go to Security and login, scroll down, and enable the Developer mode toggle.
Step 6: Add DevSpace as a custom Plugin
Still in Settings, create a new Plugin: give it a name like DevSpace, and set the MCP server URL to your tunnel’s HTTPS URL with /mcp appended, e.g. https://your-tunnel.a.free.pinggy.link/mcp.
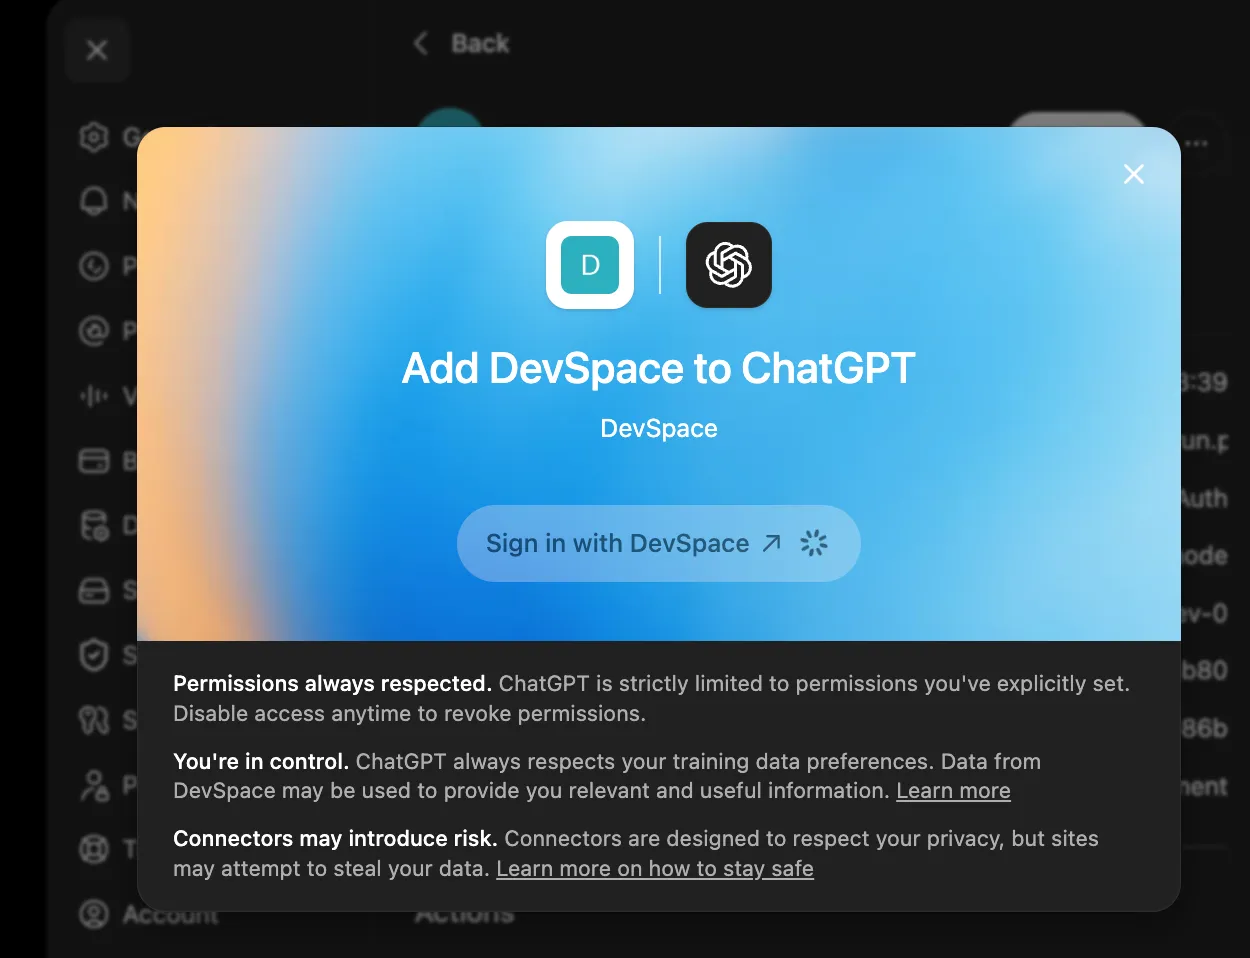
Save it, then in a new chat click the + next to the message box and enable the DevSpace Plugin for that conversation.
Step 7: Approve the connection and open a workspace
The first time you enable the Plugin in a chat, ChatGPT prompts you to sign in to it:
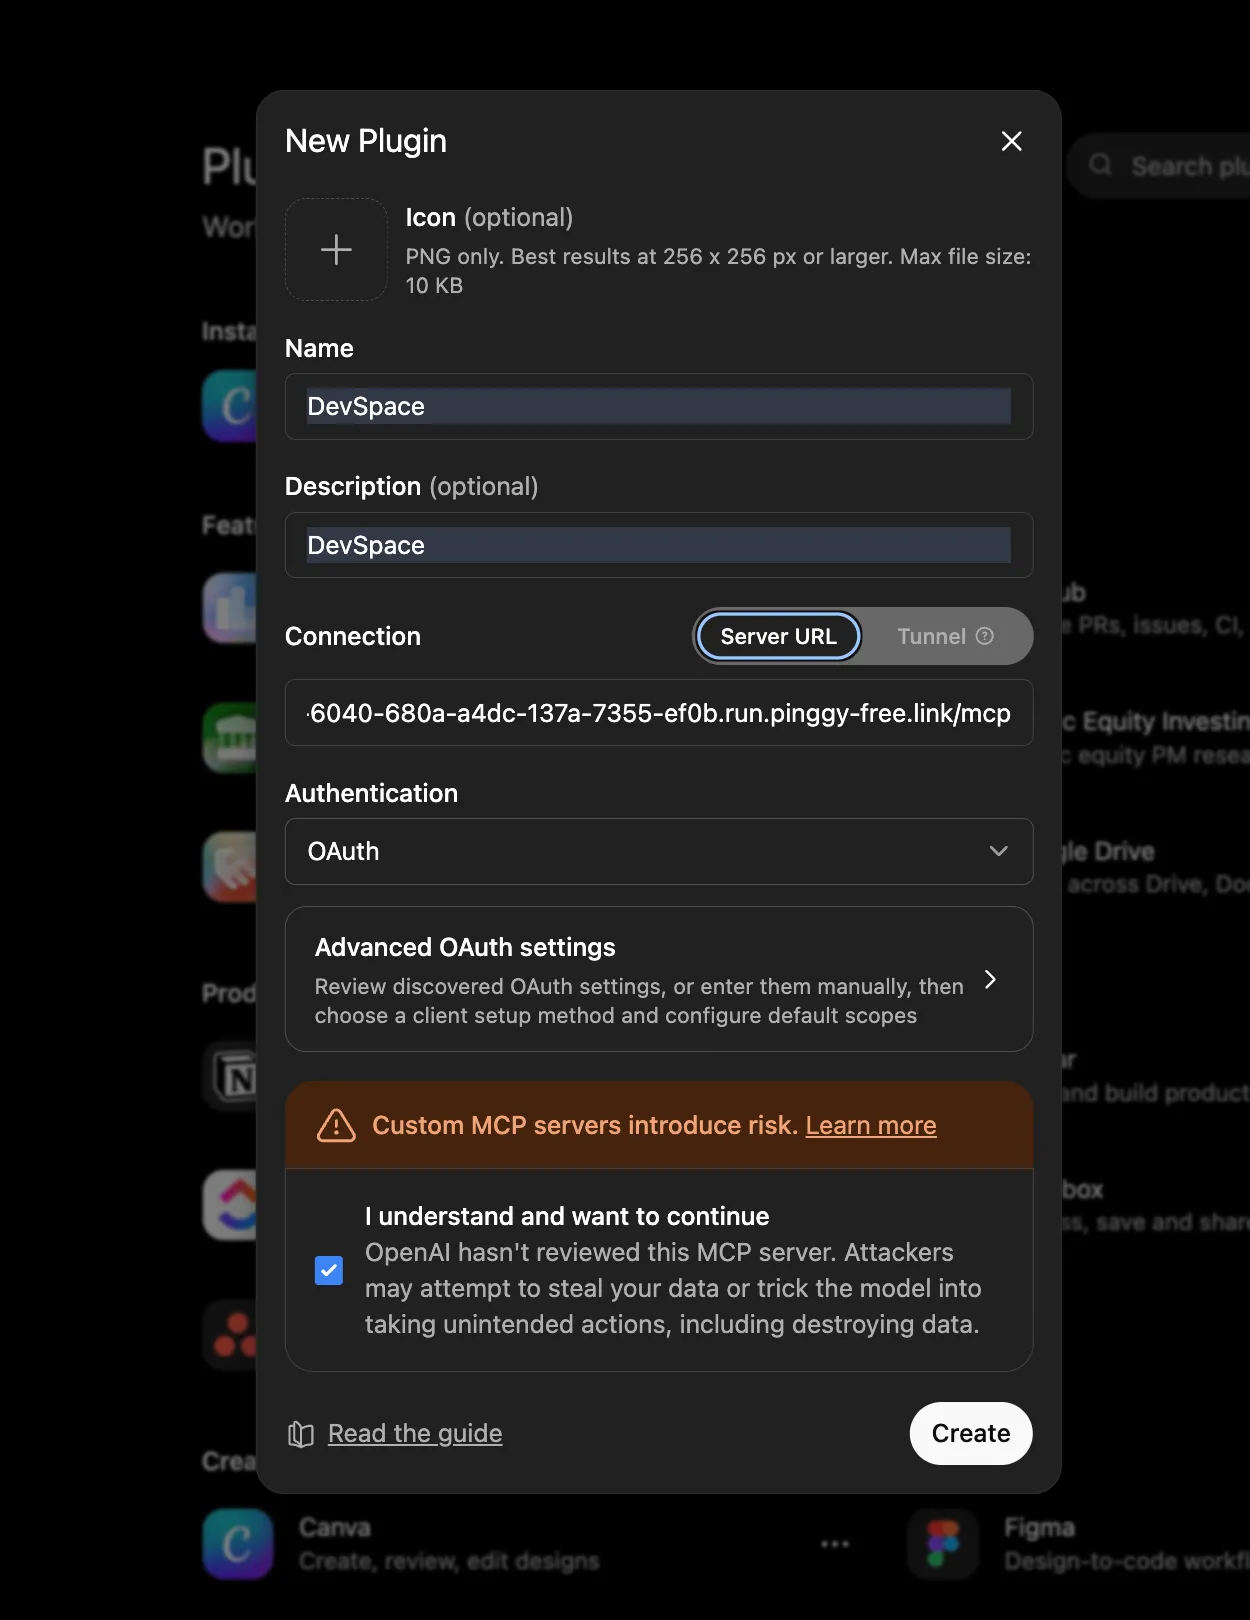
That redirects to DevSpace’s own OAuth approval page, asking for the Owner password:
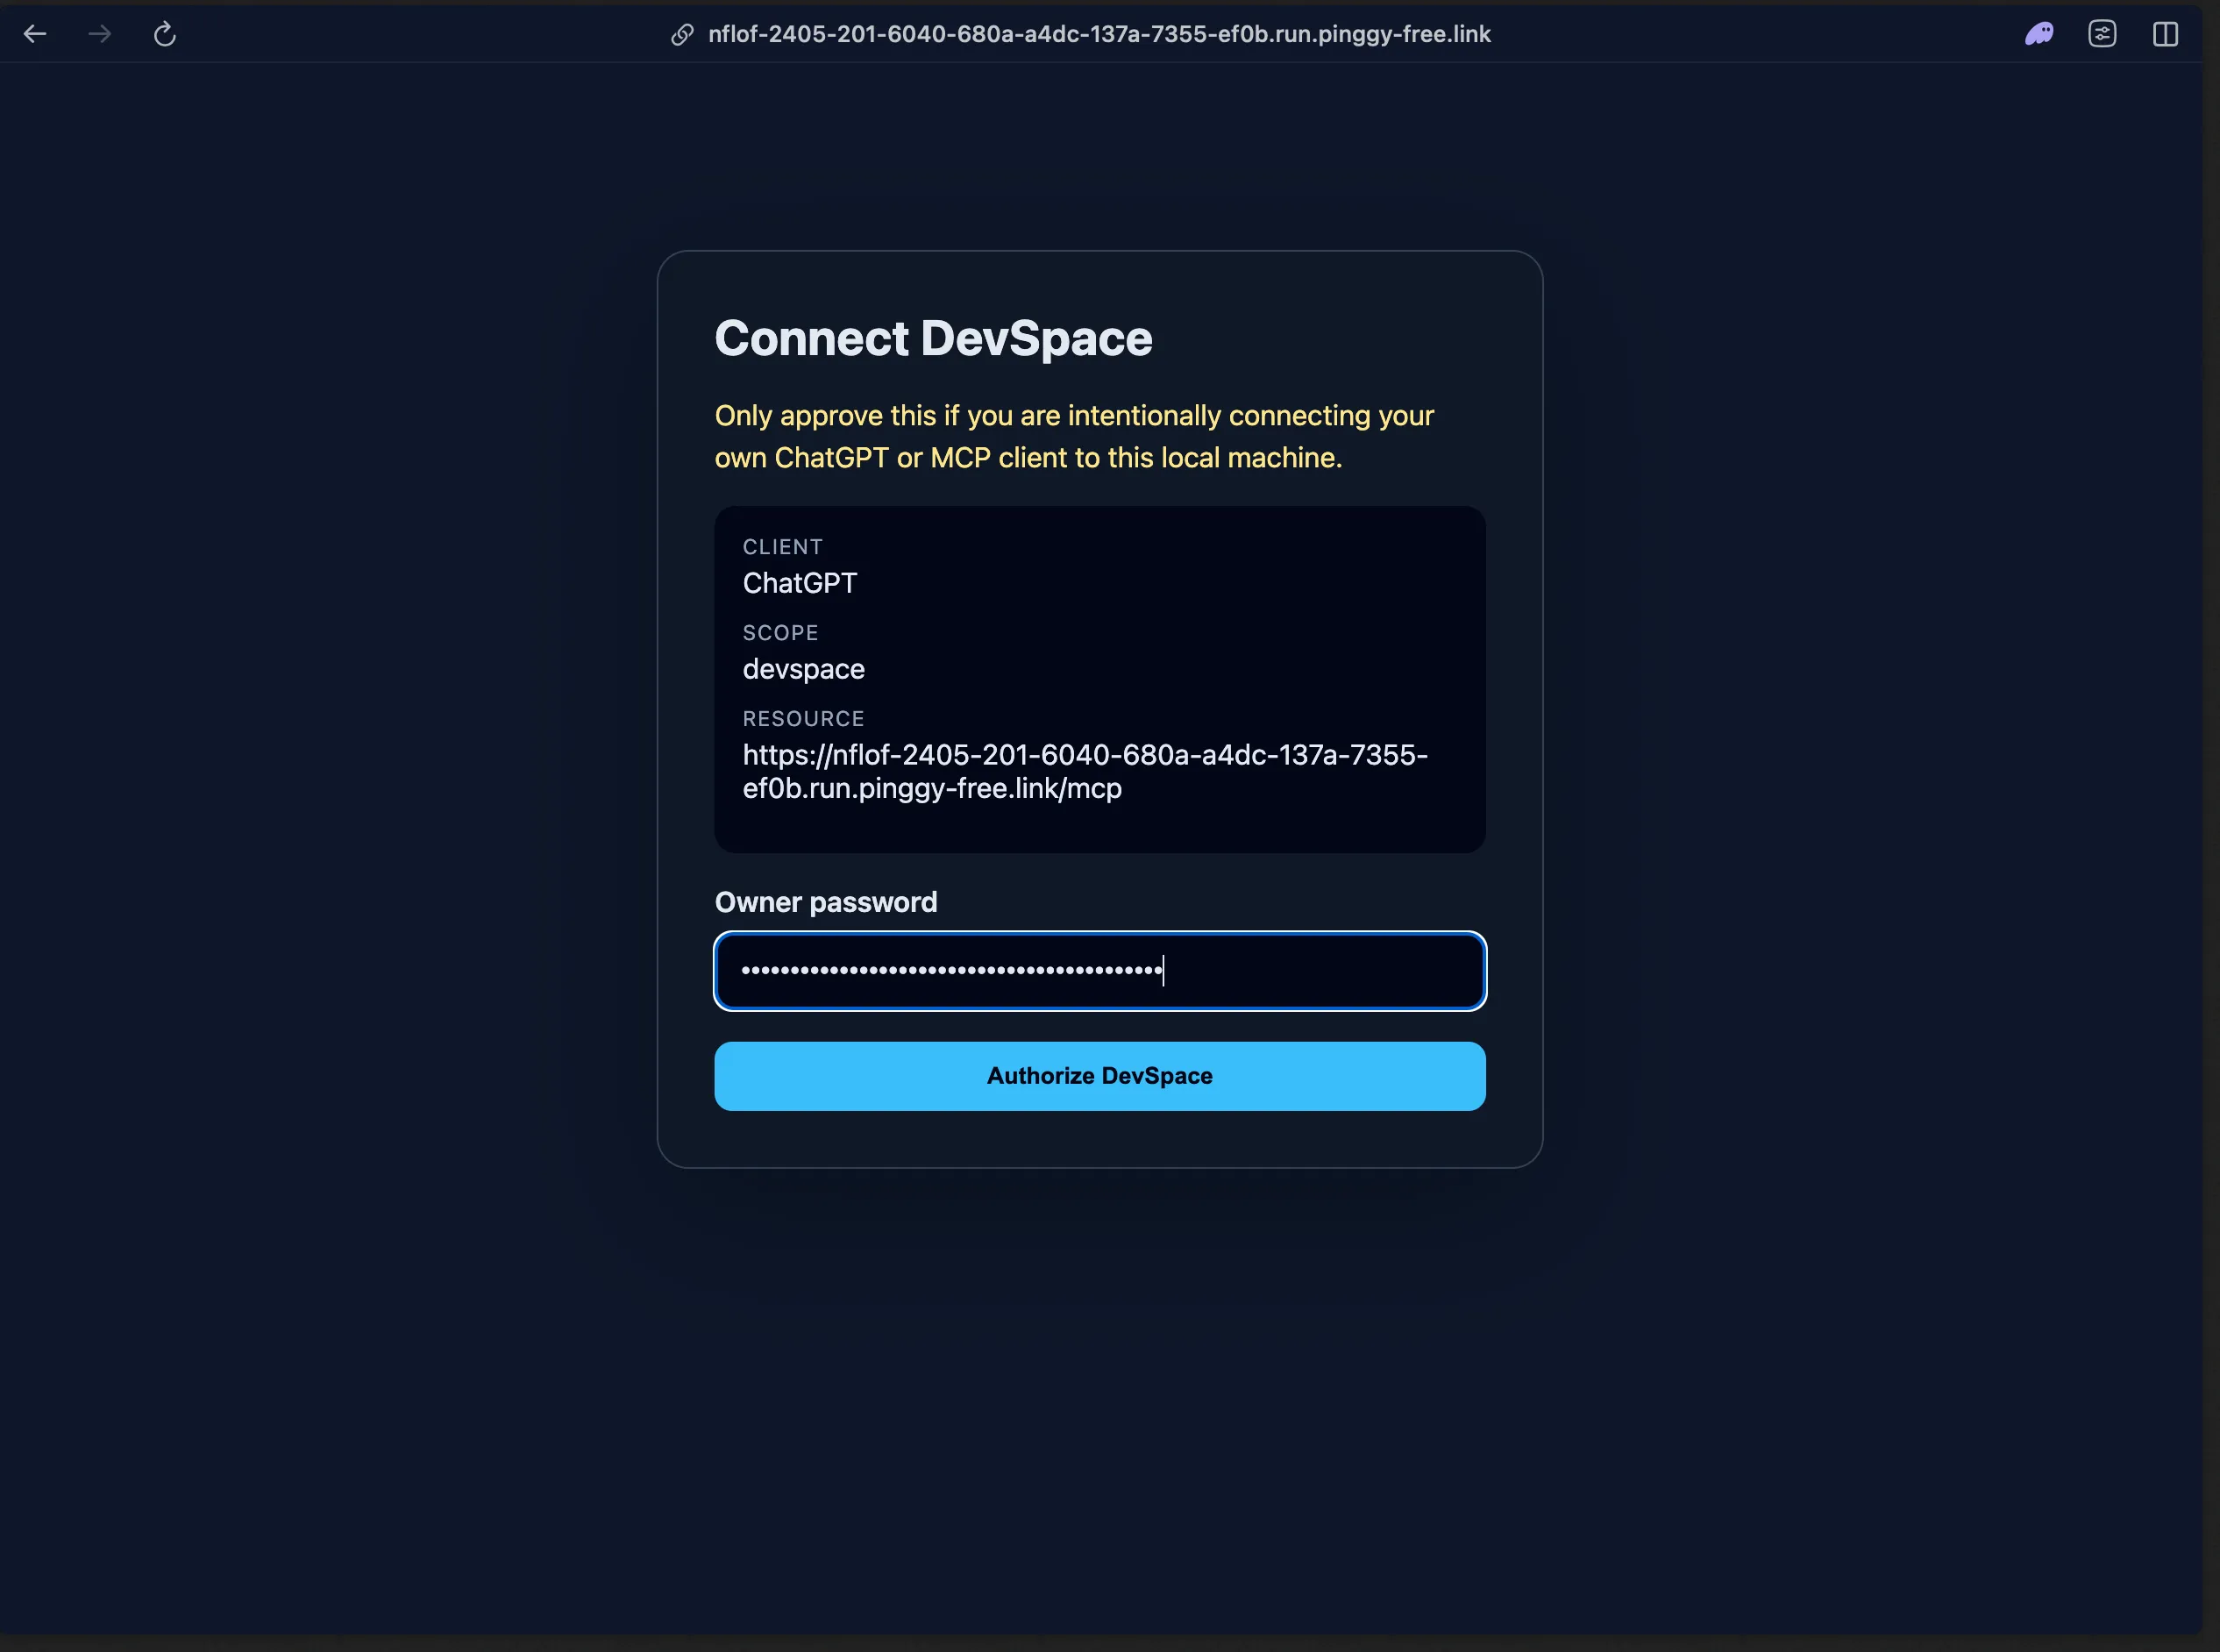
Paste in the value from ~/.devspace/auth.json, hit Authorize DevSpace, and you’re connected. Now just ask in plain language:
Open my project at
~/work/my-projectand show me the failing tests.
ChatGPT calls open_workspace, gets back a workspaceId, reads your AGENTS.md or CLAUDE.md if you have one, and starts working with the same read/edit/bash loop you’d get from a CLI agent, just from inside a normal ChatGPT conversation:
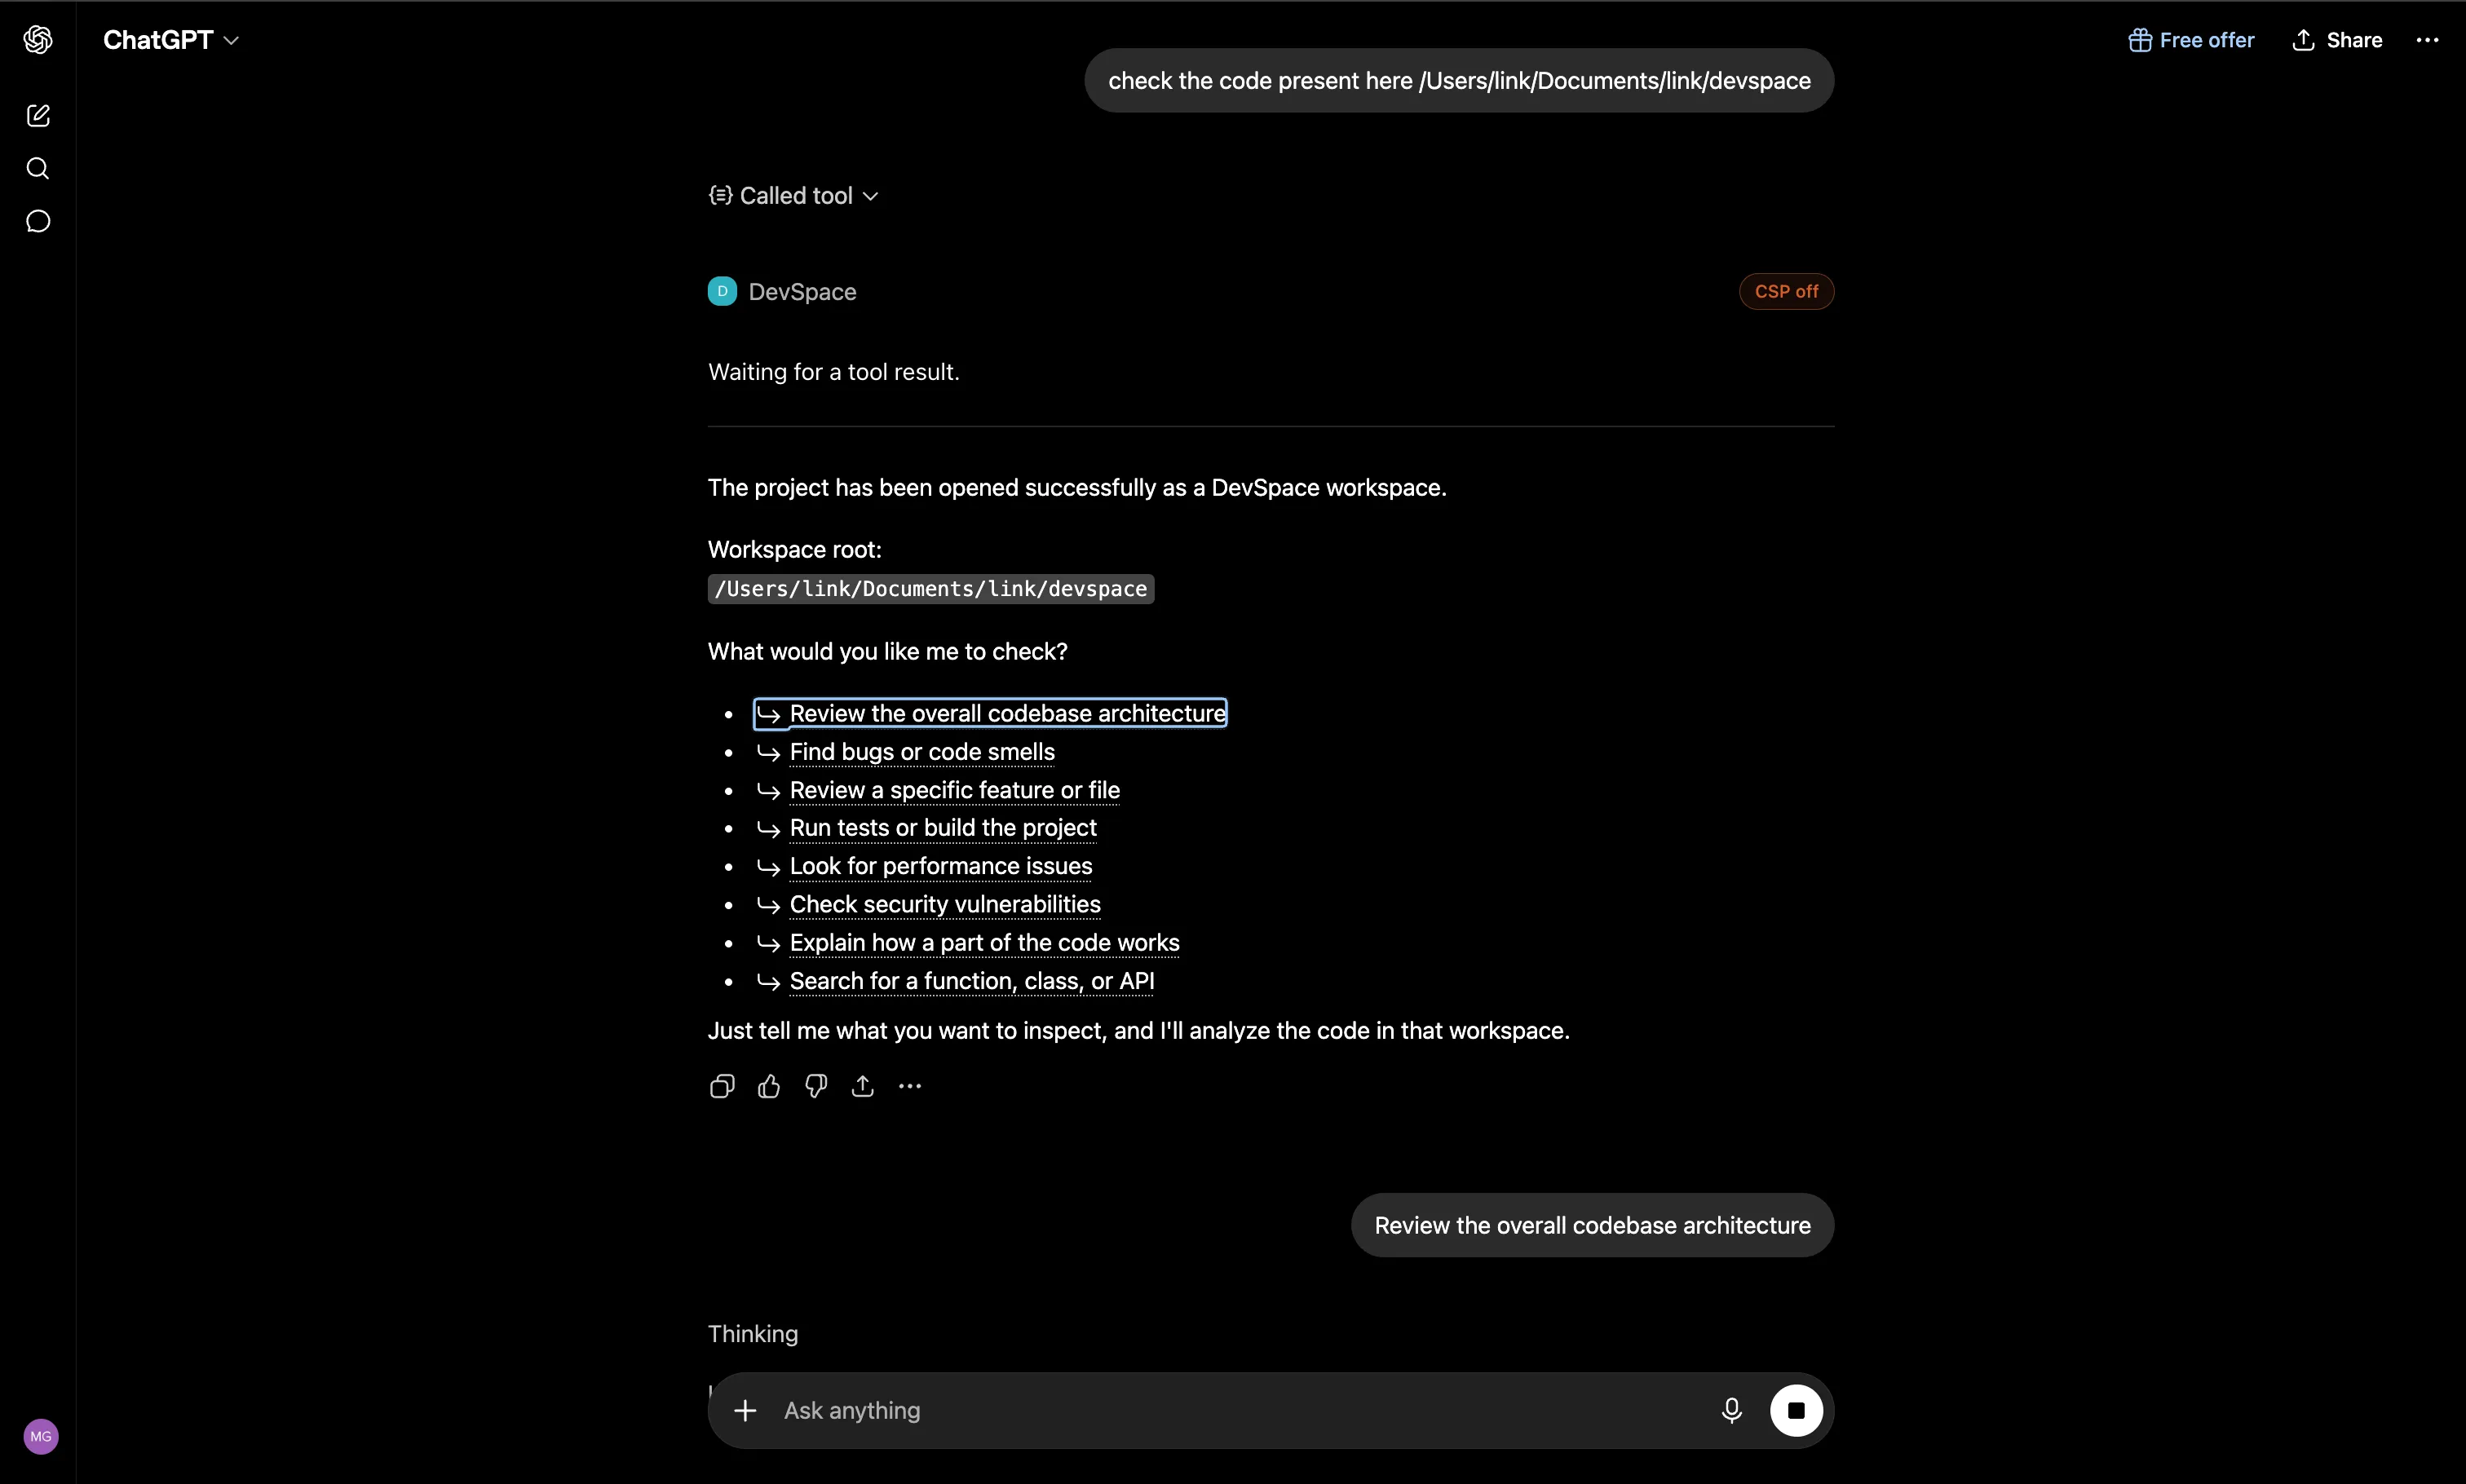
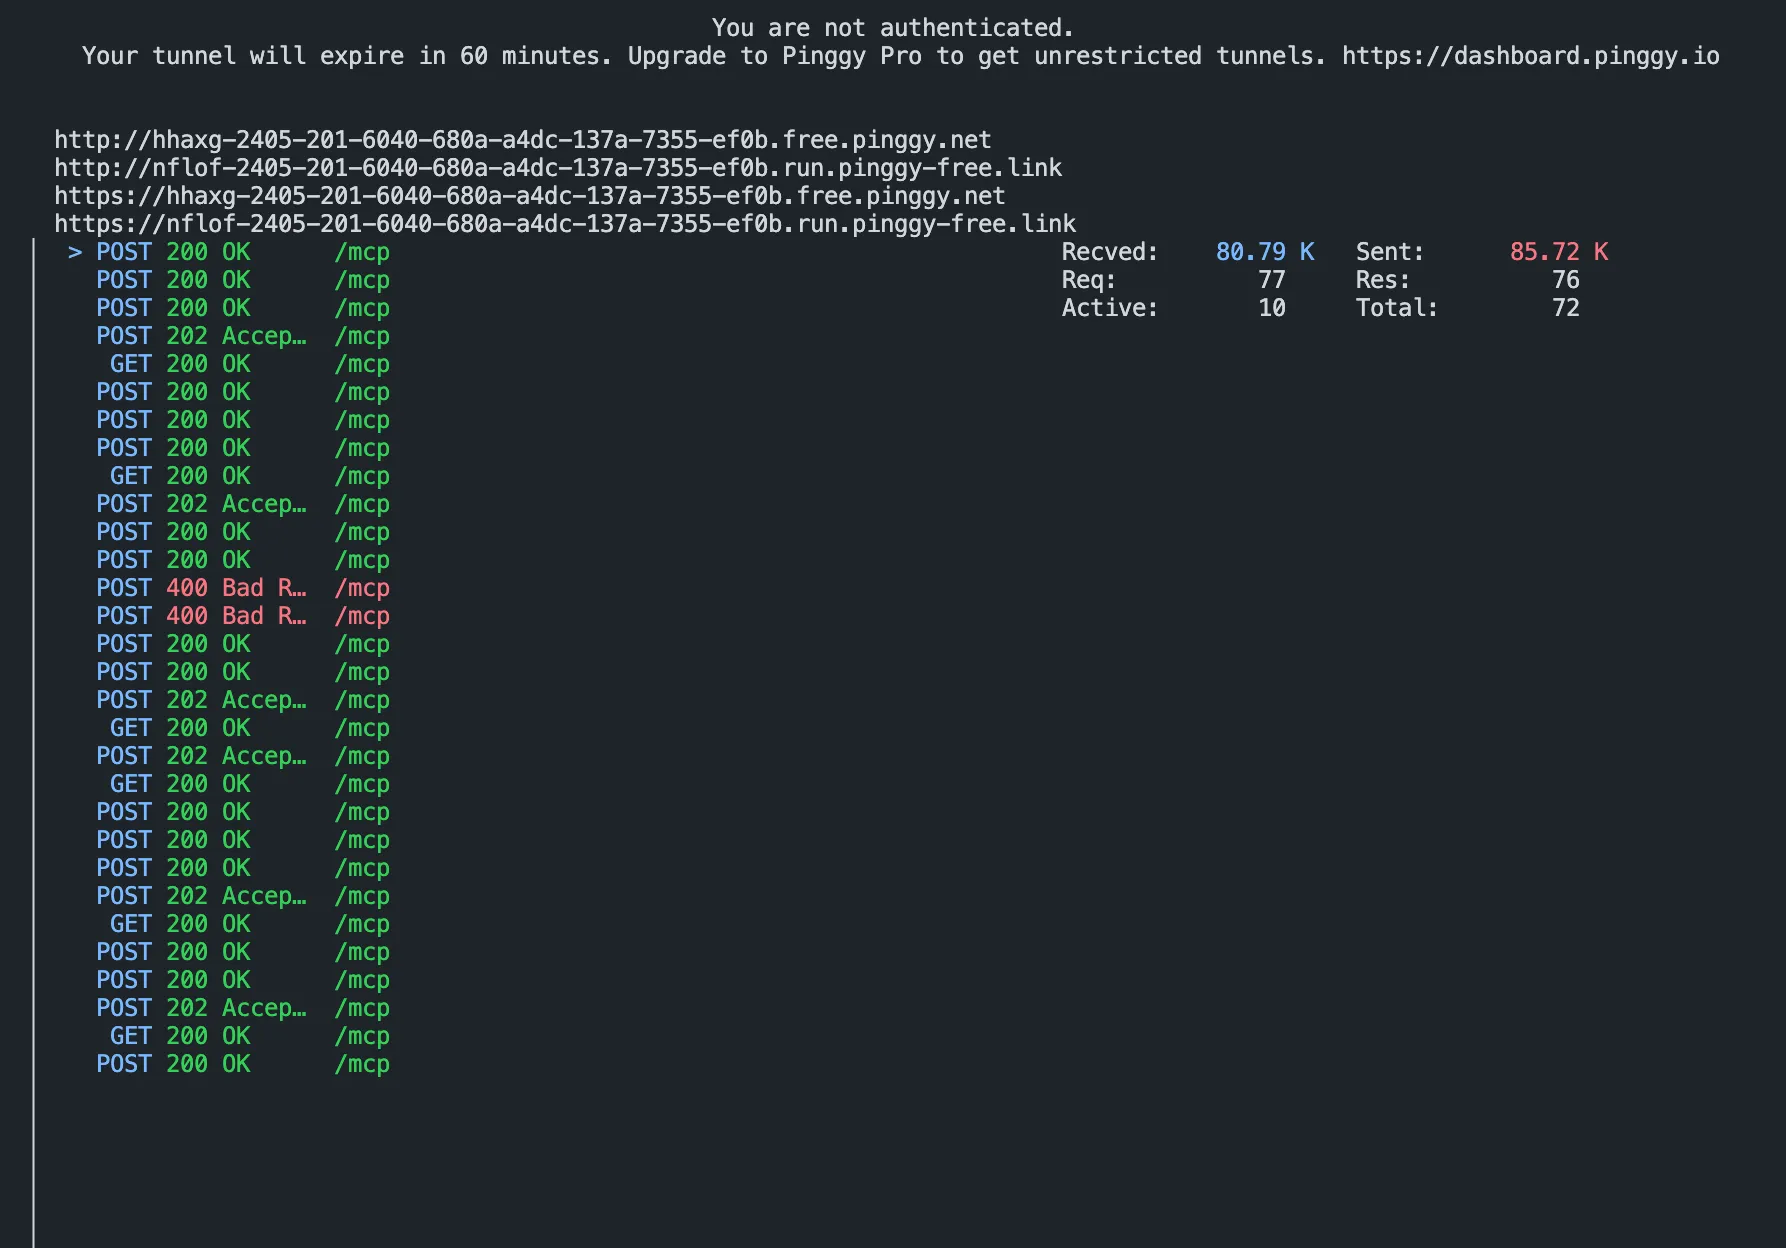
You can also watch the calls land in real time through Pinggy’s web debugger while ChatGPT works:
What you’re actually exposing
DevSpace’s own security docs are blunt about this: treat a connected MCP client as remote access to your machine, not a sandboxed guest.
- The filesystem allowlist is your main safety net. DevSpace only opens workspaces under the roots you configured, so keep those narrow, a couple of project directories, not your whole home folder.
- Shell access is unrestricted within your user account. The
bashtool can do anything your own shell can do, unlike Codex’s sandboxed cloud containers. That’s the tradeoff for working on your real environment: real power, real risk if you approve a client you don’t trust. - The tunnel URL isn’t a secret by itself. DevSpace’s OAuth layer (gated by your Owner password) protects the endpoint, but the docs still recommend Cloudflare Access or Tailscale identity controls in front of a long-lived public tunnel.
Read docs/security.md in the repo before pointing DevSpace at anything you care about.
Known rough edges
DevSpace’s first commit landed June 14, 2026 (currently v1.0.4, ~3,200 GitHub stars), so it’s young. Two things worth knowing from its issue tracker: the write tool can get flagged as “destructive” and refuse to create a brand-new file (a create-only create_file tool has been proposed to fix this), and not every ChatGPT reasoning tier reliably exposes DevSpace’s tools even when the Plugin pill is visible, so if something seems stuck, try switching the model setting before assuming DevSpace is broken. Also, Windows support means Git Bash or WSL, not native PowerShell or cmd.exe.
Conclusion
DevSpace is a small, sharply scoped tool: an MCP server, a filesystem allowlist, and a handful of tools that map onto what any coding agent needs, read, write, edit, and run a shell. Paired with a Pinggy tunnel, it turns a ChatGPT conversation into an agent that edits the files sitting on your disk right now, no separate Codex, Cursor, or Copilot bill required.
The one real caveat is ChatGPT’s own plan tiers: Developer Mode currently means Plus or above, not Free. Keep an eye on OpenAI’s release notes; free-tier access has been expanding fast through 2026, and custom Plugins may follow.