Self-hosting Obsidian
Updated on May 23, 2026 · 12 mins read
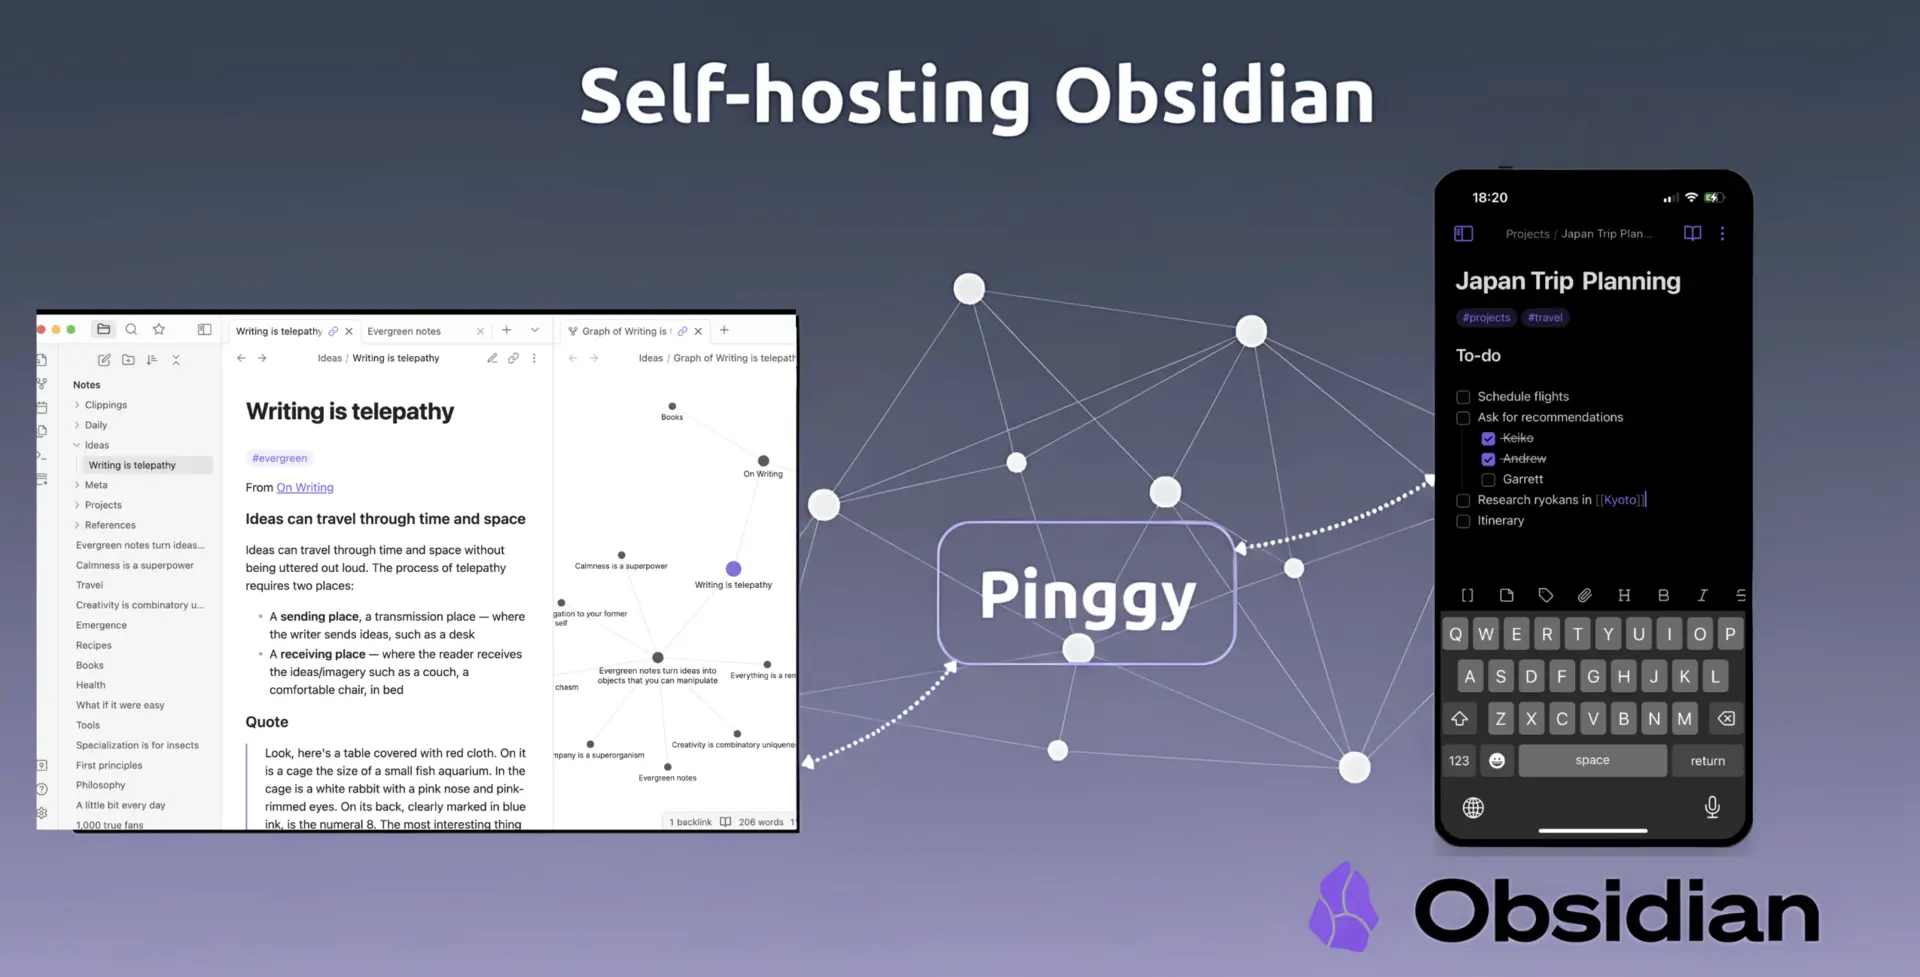
Obsidian Sync costs $5/month. You can replace it with a CouchDB container, the Self-hosted LiveSync community plugin, and a tunnel to reach the database from outside your home network. I run mine in Docker with Pinggy as the tunnel; total monthly cost is zero. This post walks through the setup, end to end.
LiveSync does most of the heavy lifting. It speaks CouchDB’s replication protocol directly, so edits propagate in a second or two and conflicts get resolved on the client without manual merges. I’ve used it through large vault reorganizations and concurrent edits across desktop and mobile and haven’t lost a note. The Docker side keeps the install identical on Windows, macOS, and Linux. Plan on 30 to 60 minutes start to finish.
Summary
What You’ll Build:
- Self-hosted CouchDB database for storing your notes securely
- Docker containers for easy deployment and management across any OS
- Pinggy tunnel for secure remote access without port forwarding hassles
- Real-time sync across all your devices using the LiveSync plugin
- Complete data ownership with zero monthly fees (save $48/year!)
Prerequisites:
- Docker installed on your system (Windows, macOS, or Linux)
- Basic command line knowledge (copy/paste level)
- Obsidian installed on your devices
Why I Built My Own Sync Server
My vault is a few thousand notes - project docs, code snippets, research, journal entries, the usual mix. Putting all of that on someone else’s servers started to feel like a single point of failure I hadn’t thought hard enough about. The $5/month wasn’t really the issue; control was. Two annoying sync conflicts (and one lost edit) later, I went looking for an alternative.
What pushed me to self-host:
- Privacy: my vault has client work and personal notes I’d rather not park on someone else’s servers.
- Cost: $48/year isn’t a lot, but the self-hosted option turned out to be better, not just cheaper.
- Understanding: setting it up taught me how CouchDB’s replication actually works, which I’d been hand-waving past for years.
- Reliability: I own the uptime, the backups, and the recovery plan. No third party can change the terms on me.
- Flexibility: I can tweak any layer of the stack without waiting for someone to ship a feature.
I tried a couple of other approaches before settling on this one. Git-based sync (commit notes, push, pull) gets noisy fast and produces merge conflicts on mobile. Syncthing handles arbitrary files well but doesn’t know what a note is, so partial syncs leave Obsidian in odd intermediate states. CouchDB plus LiveSync was the first combination that just behaved.
What we’re building
Four pieces, all open source except Pinggy:
- CouchDB is the database. Its replication protocol is what makes the whole thing work; nodes and CouchDB-compatible clients (like LiveSync) reconcile by trading document revisions, not by diffing files.
- Docker keeps the install reproducible across Windows, macOS, and Linux. The CouchDB side is one
docker-compose.yml. - Self-hosted LiveSync is the Obsidian community plugin that talks to CouchDB. It watches the vault for changes and pushes them upstream within a second or two.
- Pinggy is an SSH-based tunnel that gives the CouchDB container a public HTTPS URL. Saves you from router port-forwarding and dynamic-DNS plumbing.
Prerequisites and system requirements
System requirements are whatever Docker needs to run. CouchDB itself is light on resources, so a modest box - old laptop, cheap VPS, home server, Raspberry Pi - is plenty.
You’ll need Docker on whichever machine will host CouchDB. Docker Desktop is the easiest install on Windows and macOS; on Linux, Docker Engine from the official repository is the cleanest path. If you already have Docker running for other projects, you’re set.
You’ll also need Obsidian on every device you want to sync. LiveSync works wherever Obsidian works: Windows, macOS, Linux, iOS, and Android.
Step 1: Installing Docker
Docker is the foundation of our setup, providing containerization that makes deployment consistent across different operating systems. The installation process varies by platform, so I’ll cover all three major operating systems.
Windows Installation
Download Docker Desktop from docker.com and run the installer. You’ll need Windows 10 64-bit Pro, Enterprise, or Education (Build 19041 or higher), or Windows 11. The installer will enable WSL 2 if it’s not already active.
# Verify Docker installation
docker --version
docker compose version
After installation, Docker Desktop should show a green status indicator in your system tray. If you encounter issues, make sure virtualization is enabled in your BIOS settings.
Note: the legacy docker-compose (V1, with the hyphen) binary was retired in 2023. Compose V2 ships as a Docker CLI plugin and is invoked as docker compose (with a space). Docker Desktop installs it by default.
macOS Installation
Download Docker Desktop for Mac from the official website. The installer works on both Intel and Apple Silicon Macs running macOS 10.15 or newer.
# Verify Docker installation
docker --version
docker compose version
Linux Installation
For Ubuntu/Debian systems, use the official Docker repository for the most up-to-date version:
# Update package index
sudo apt update

# Install prerequisites
sudo apt install apt-transport-https ca-certificates curl gnupg lsb-release

# Add Docker's official GPG key
curl -fsSL https://download.docker.com/linux/ubuntu/gpg | sudo gpg --dearmor -o /usr/share/keyrings/docker-archive-keyring.gpg

# Add Docker repository
echo "deb [arch=$(dpkg --print-architecture) signed-by=/usr/share/keyrings/docker-archive-keyring.gpg] https://download.docker.com/linux/ubuntu $(lsb_release -cs) stable" | sudo tee /etc/apt/sources.list.d/docker.list > /dev/null

# Install Docker
sudo apt update
sudo apt install docker-ce docker-ce-cli containerd.io docker-compose-plugin

# Add your user to docker group (requires logout/login)
sudo usermod -aG docker $USER

# Verify installation
docker --version
docker compose version
Step 2: Setting Up CouchDB with Docker
Now we’ll create our CouchDB instance using Docker. CouchDB is perfect for this use case because it’s designed for replication and handles the complex synchronization logic that makes LiveSync work so well.
Creating the Docker Compose Configuration
Create a new directory for your Obsidian sync server and set up the Docker Compose configuration:
Windows (PowerShell):
# Create project directory
mkdir obsidian-sync
cd obsidian-sync

# Create docker-compose.yml
New-Item -ItemType File -Name "docker-compose.yml"
macOS/Linux:
# Create project directory
mkdir obsidian-sync
cd obsidian-sync
# Create docker-compose.yml
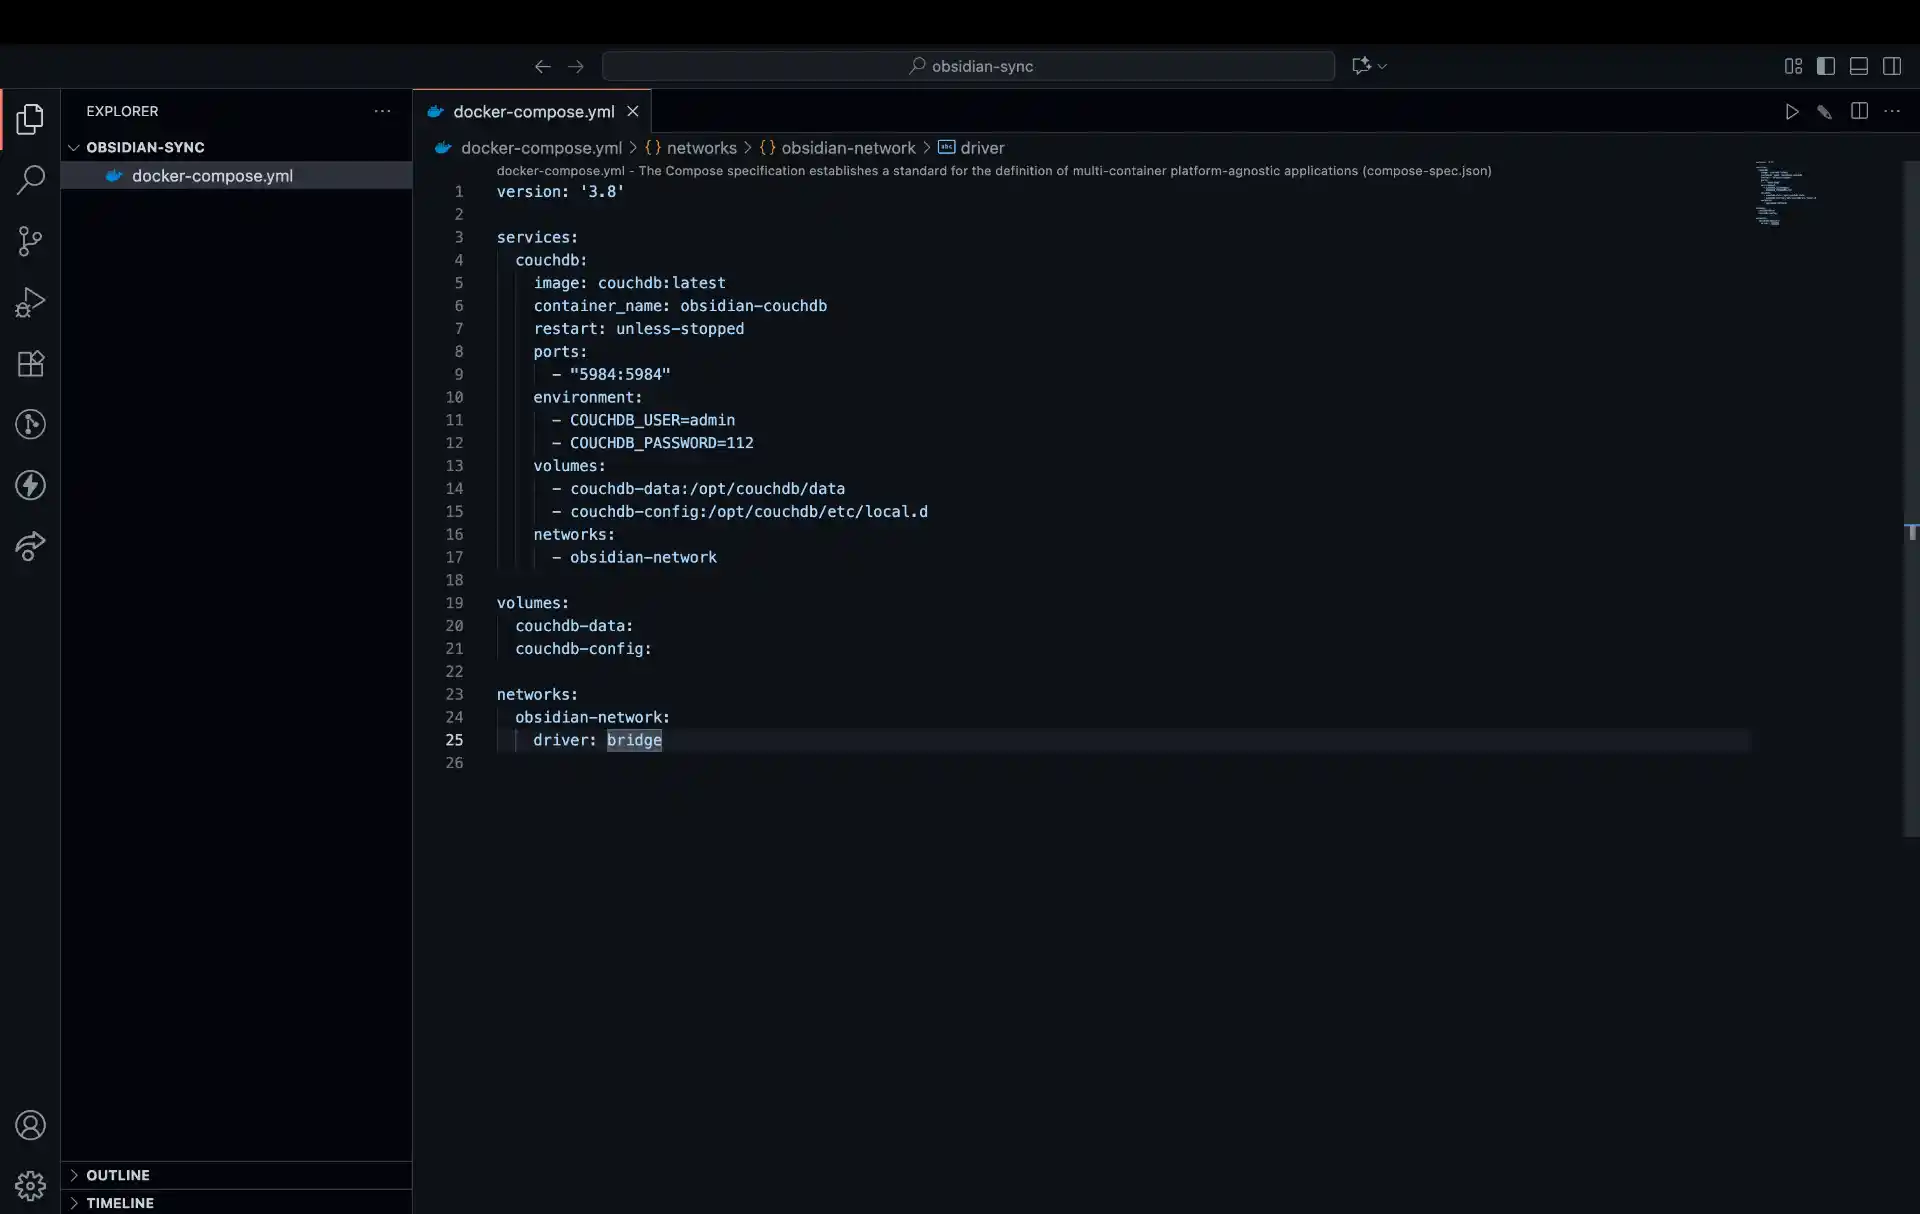
touch docker-compose.ymlNow edit the docker-compose.yml file with your preferred text editor and add the following configuration:
services:
  couchdb:
    image: couchdb:latest
    container_name: couchdb-for-ols
    user: 5984:5984
    environment:
      - COUCHDB_USER=admin #Please change as you like.
      - COUCHDB_PASSWORD=112 #Please change as you like.
    volumes:
      - ./couchdb-data:/opt/couchdb/data
      - ./couchdb-etc:/opt/couchdb/etc/local.d
    ports:
      - 5984:5984
    restart: unless-stopped
The top-level version: field that older guides put at the top of the file is no longer required and Compose V2 prints a deprecation warning if you include it. The Compose schema is inferred from the CLI version now.
Replace the default password (112 in the example above) with a strong, secure password. This will be your CouchDB admin password, so make it both secure and memorable.
Starting CouchDB
Launch your CouchDB container using Docker Compose:
All Platforms:
# Start CouchDB in detached mode
docker compose up -d

# Check if container is running
docker compose ps

# View logs if needed
docker compose logs couchdb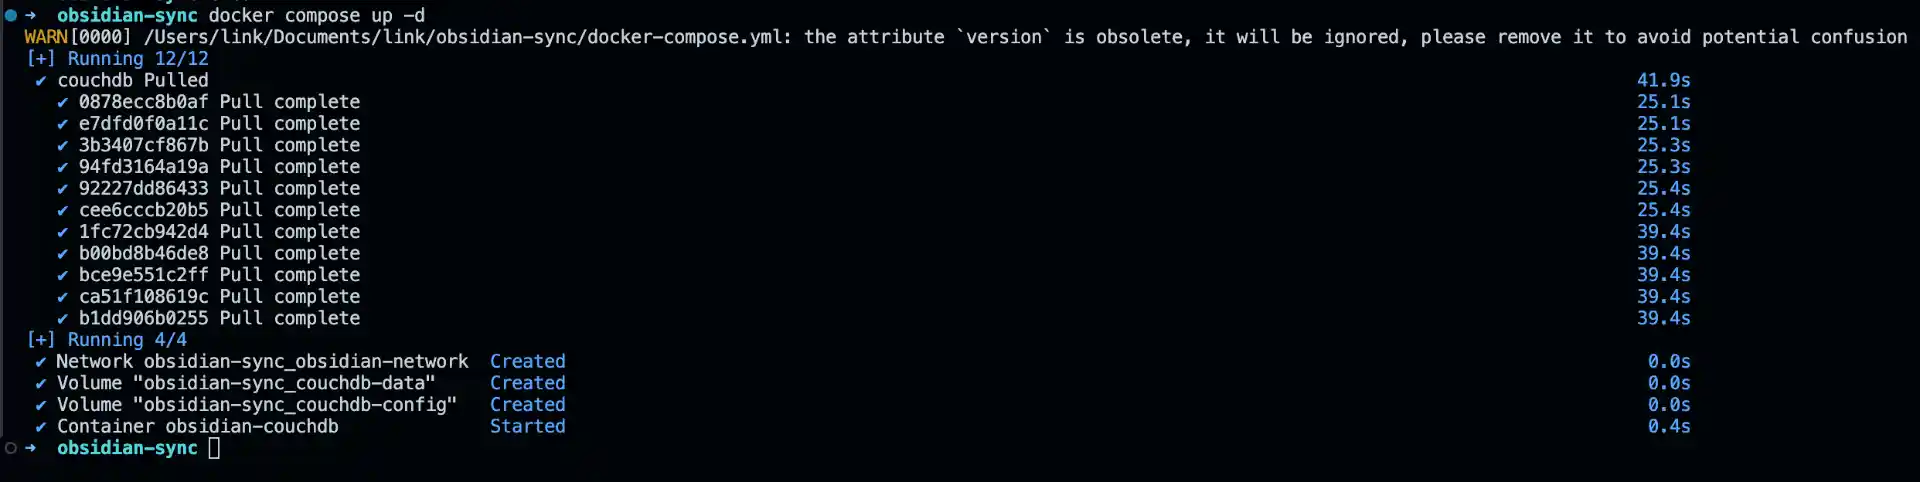
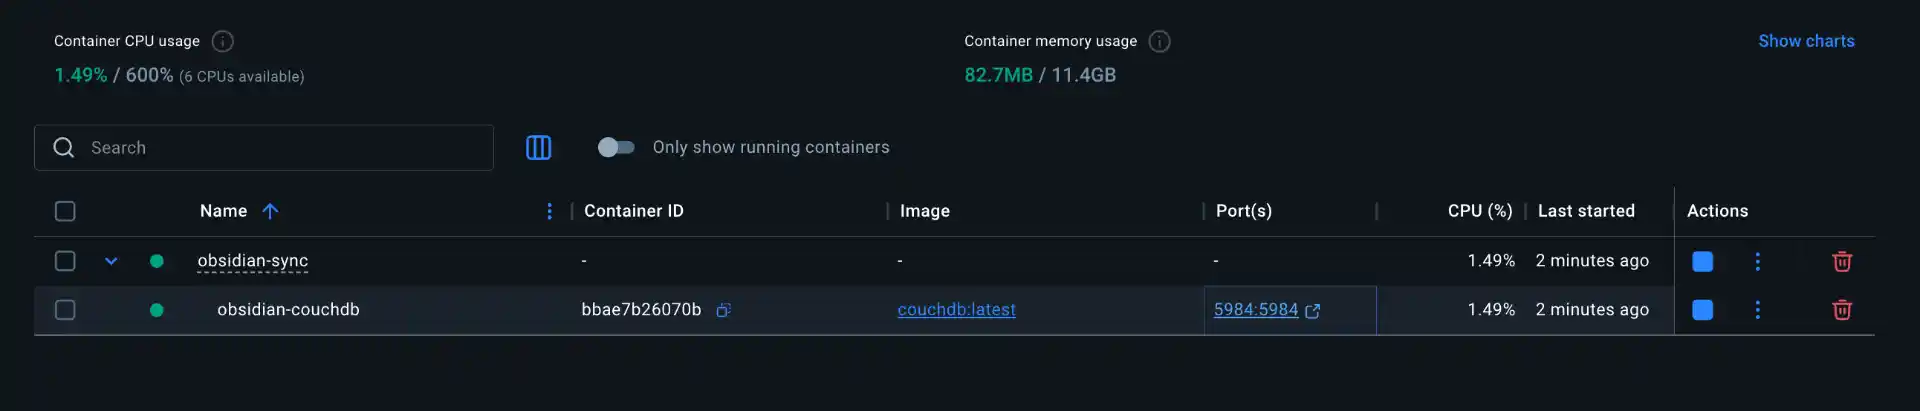
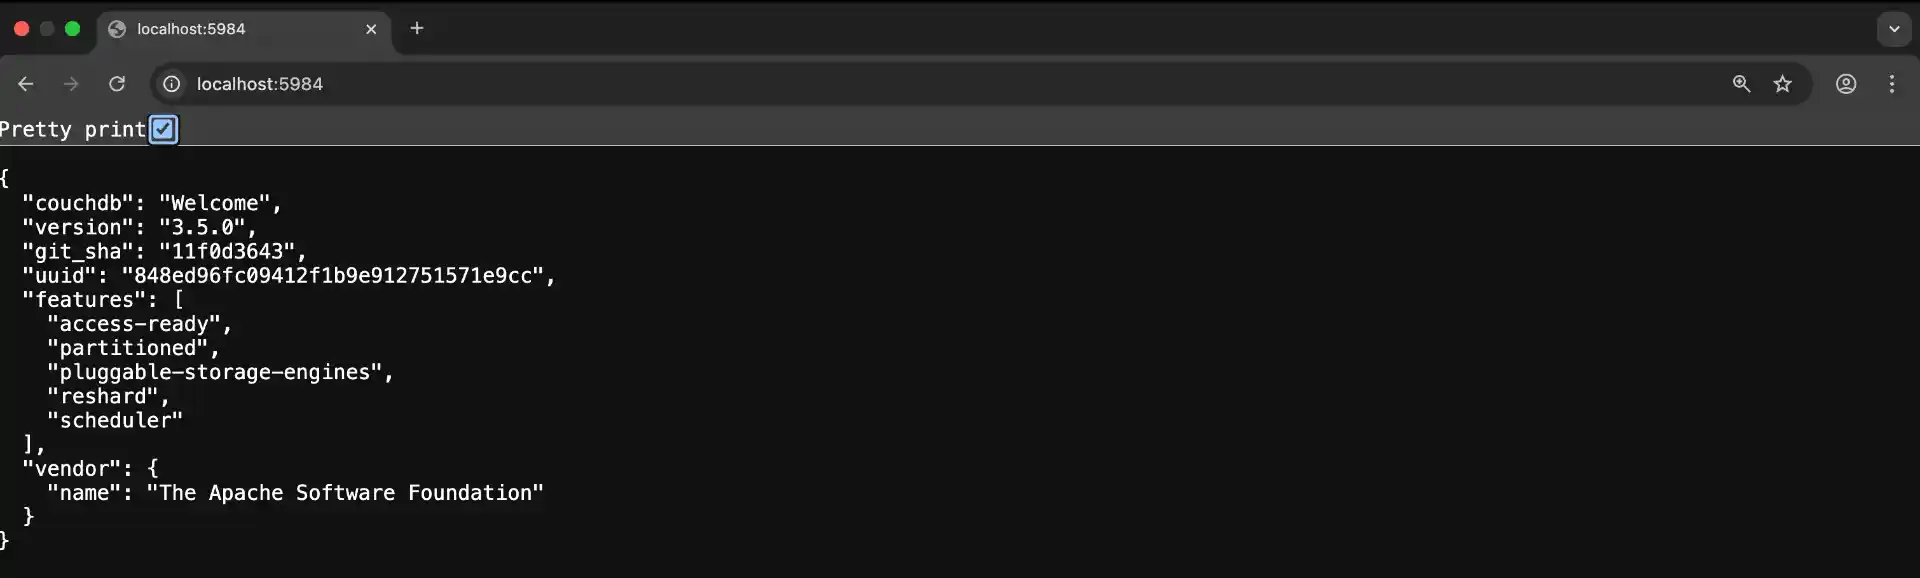
After a few moments, CouchDB should be running and accessible at http://localhost:5984. Open the URL in your browser to verify - you should see a JSON response welcoming you to CouchDB.
Step 3: Configuring CouchDB
With CouchDB running, we need to set it up for use with Obsidian LiveSync. This involves creating a database and configuring user permissions.
Initial CouchDB Setup
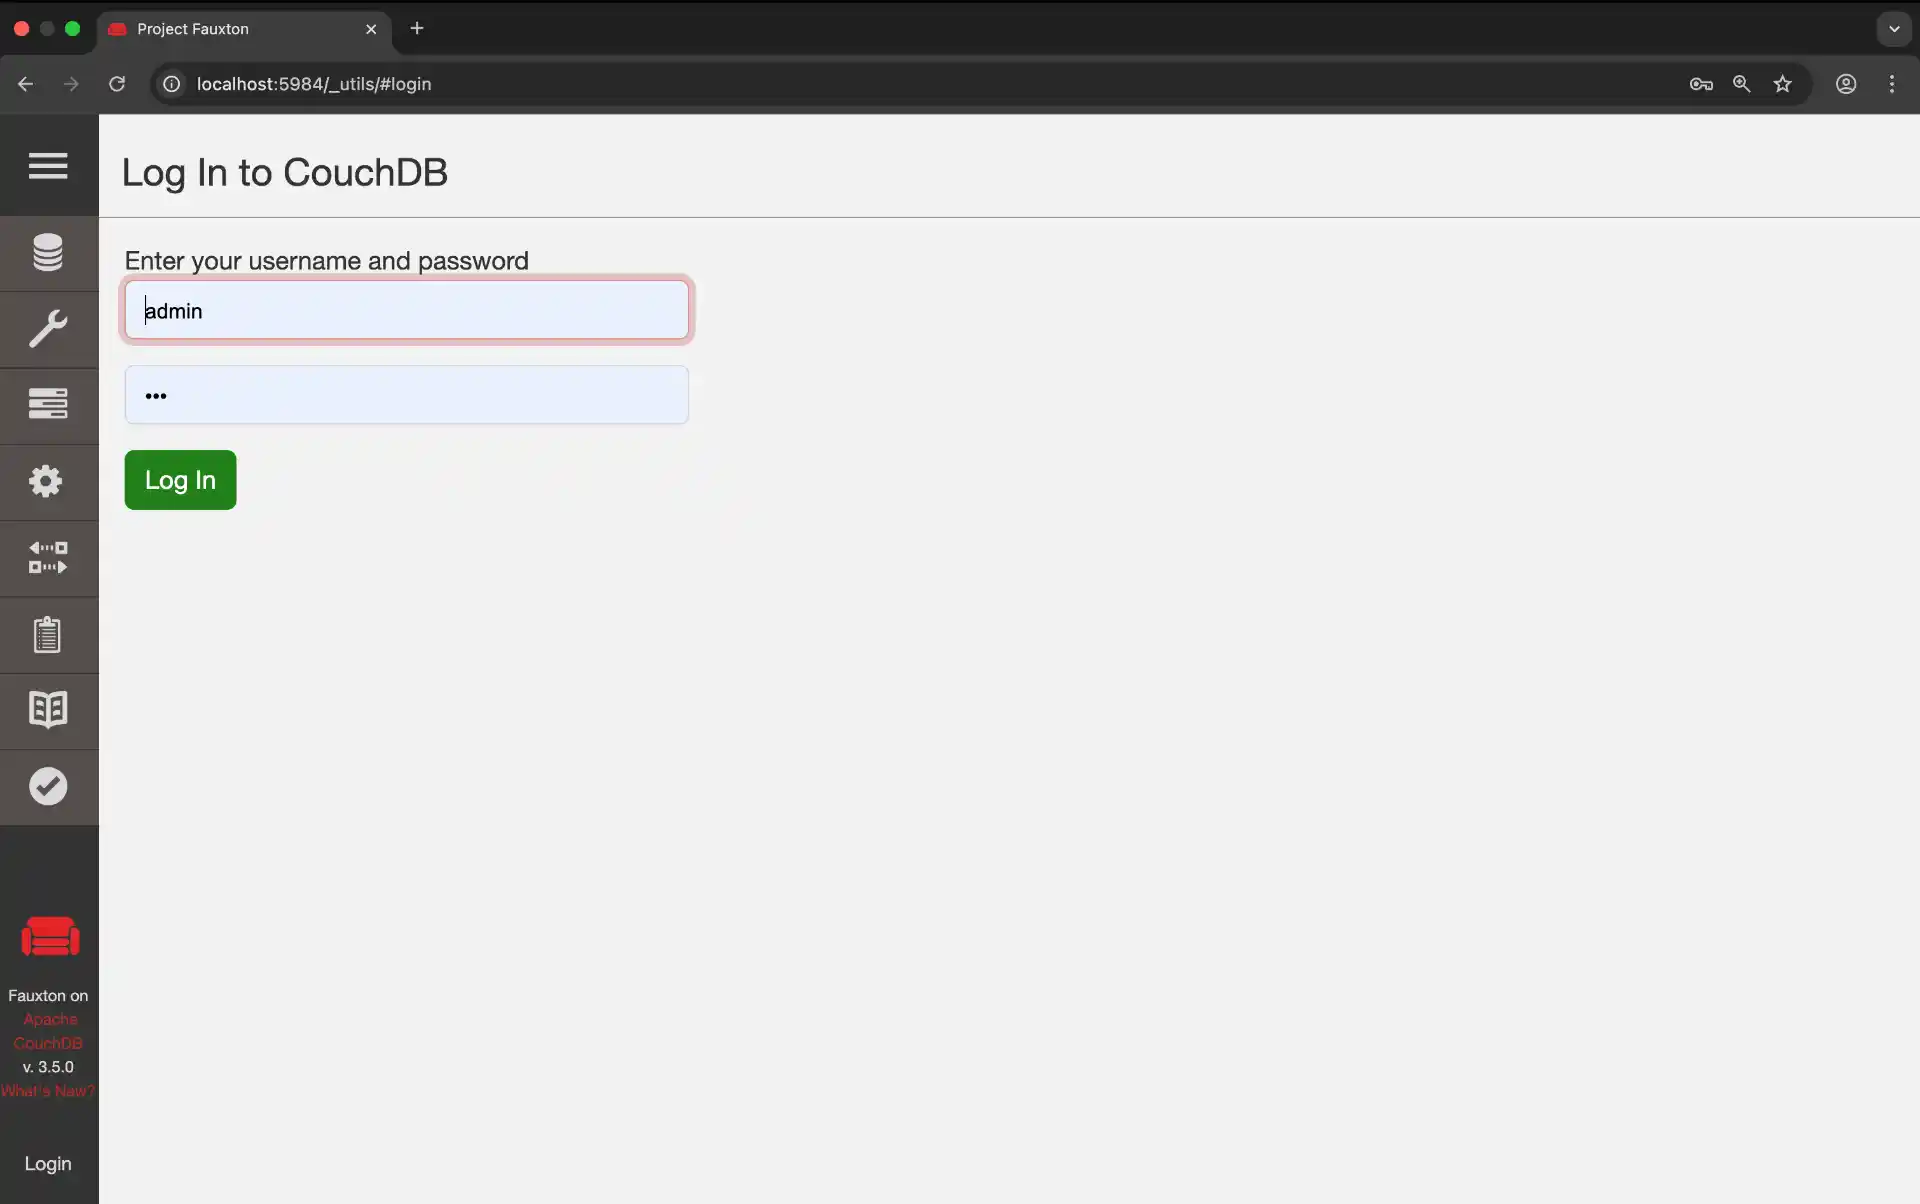
Open your browser and navigate to http://localhost:5984/_utils to access the CouchDB admin interface. Log in using the credentials you specified in the Docker Compose file (username: admin, password: your chosen password).
Creating the Database
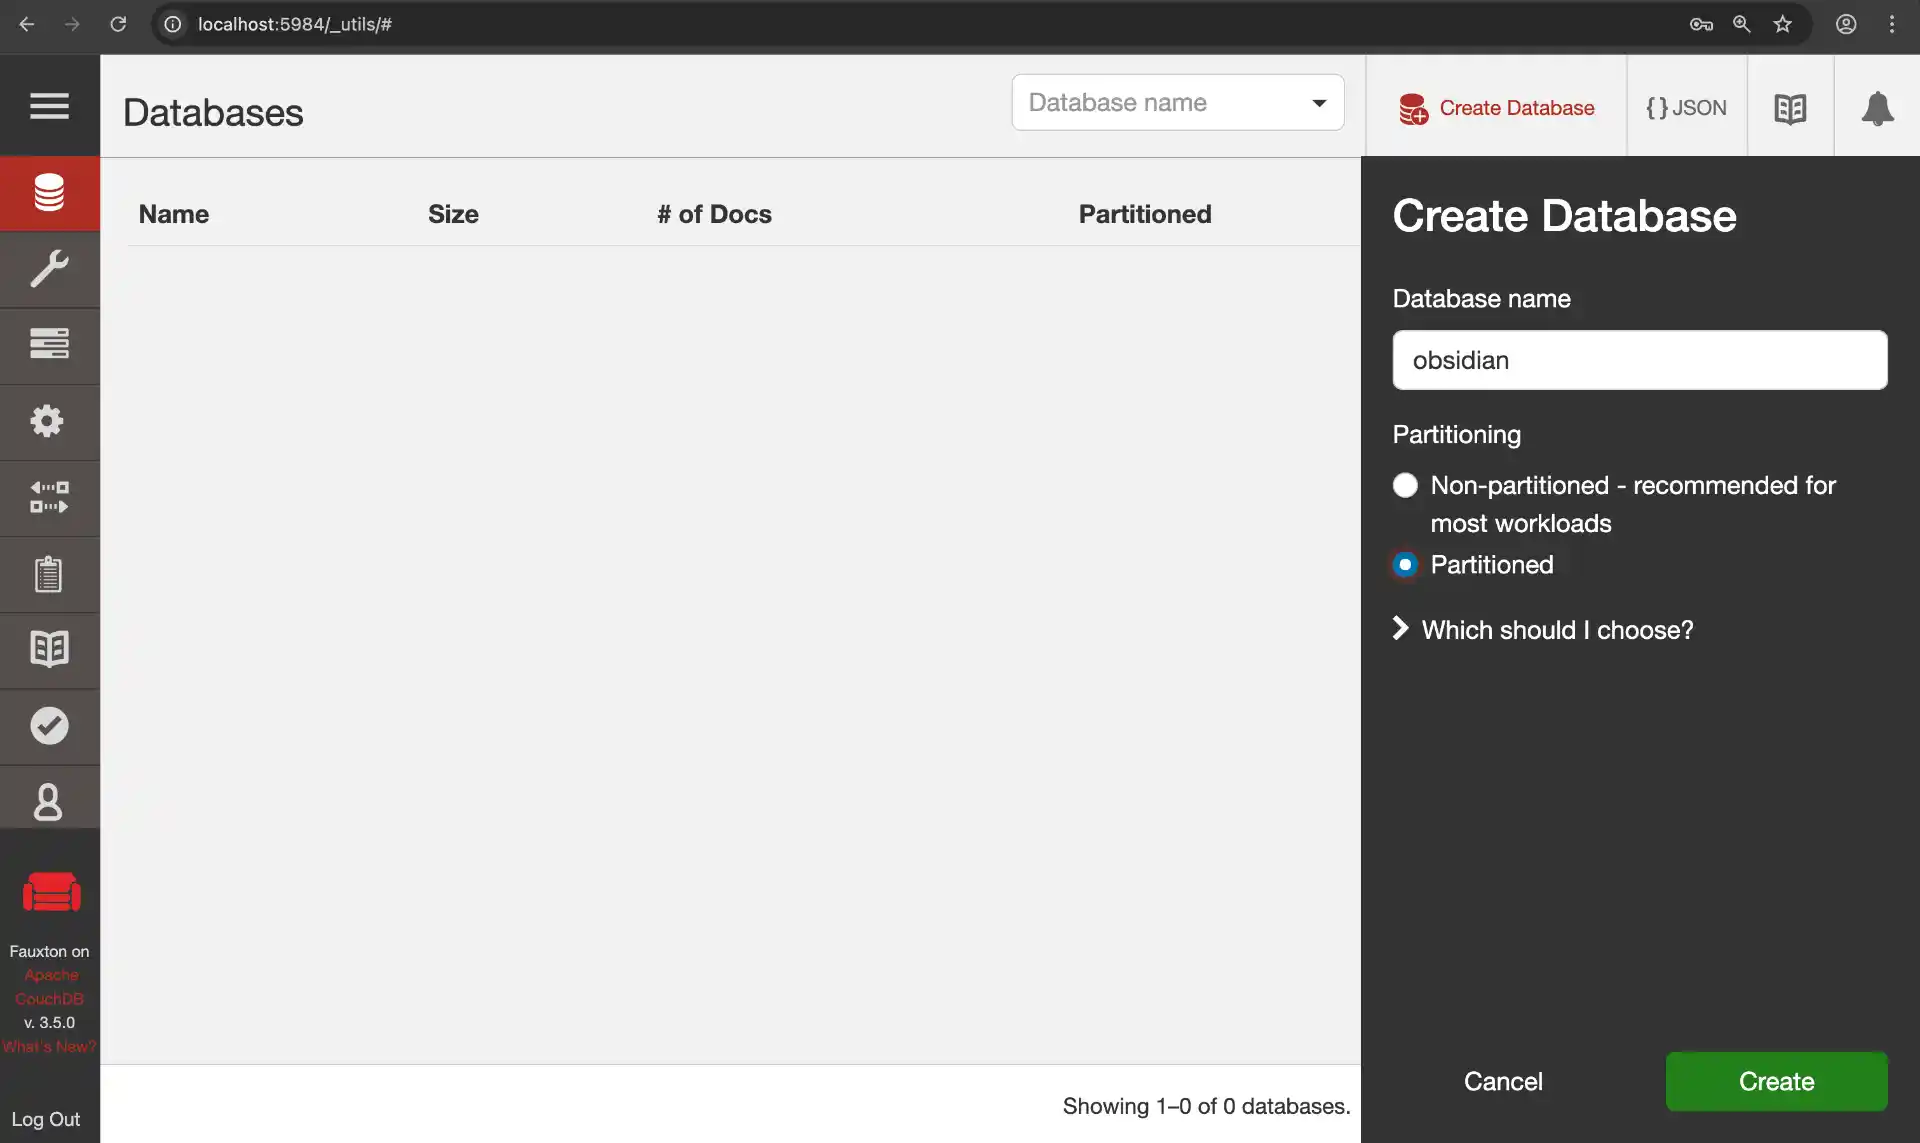
In the CouchDB admin interface:
- Click “Create Database” in the sidebar
- Name your database
obsidian(or any name you prefer) - Leave “Partitioned” unchecked
- Click “Create”
Configuring Database Permissions
Now we need to give our new user access to the obsidian database:
- Navigate to your
obsidiandatabase - Click on “Permissions” in the sidebar
- Under “Members”, add
obsidian_userto both “Names” fields (for read and write access) - Click “Save”
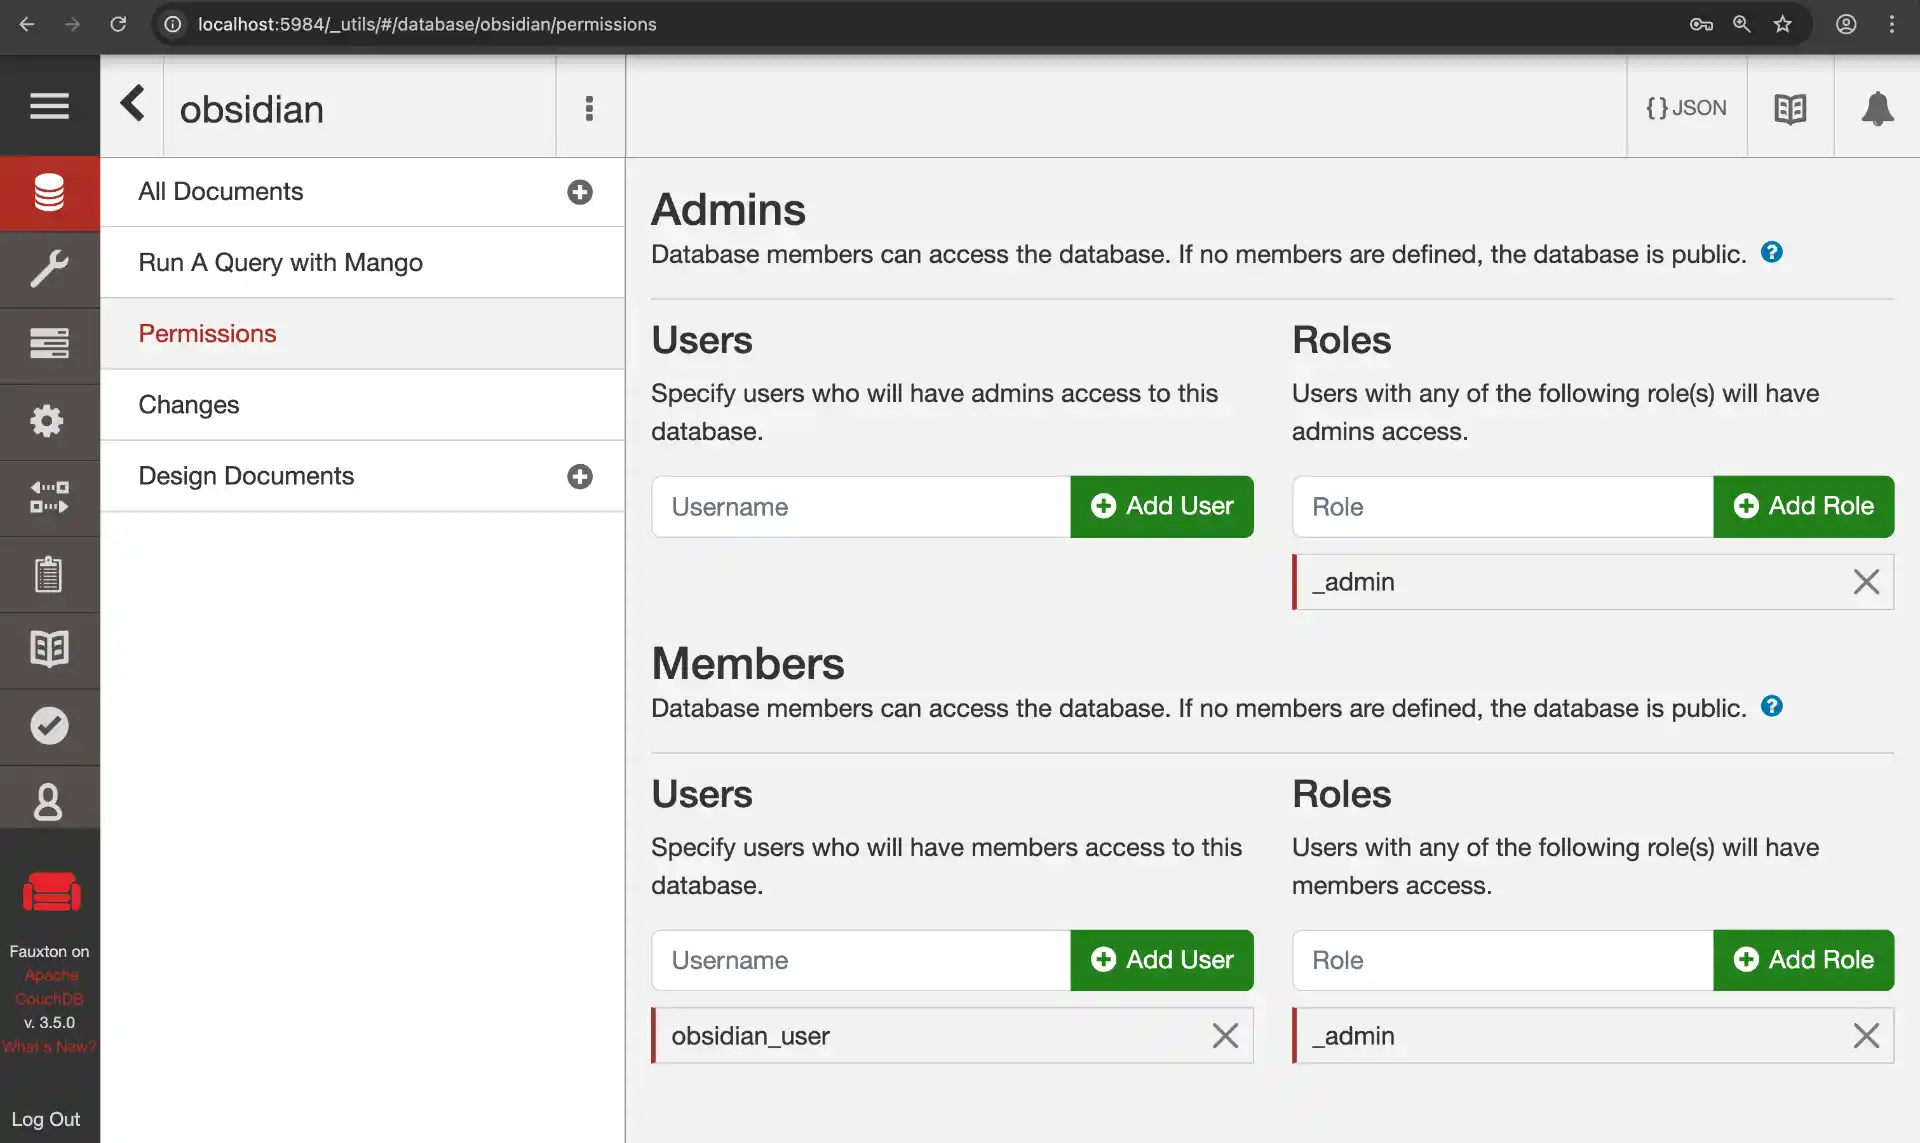
Your CouchDB instance is now ready for Obsidian LiveSync!
Step 4: Setting Up Pinggy Tunnel for Remote Access
Now that CouchDB is running locally, we need a way to access it from outside your home network. Traditional approaches like port forwarding or dynamic DNS are tedious to configure and come with security risks. Instead, we’ll use Pinggy to create an encrypted tunnel that securely exposes your CouchDB instance to the internet.
What makes Pinggy ideal for this use case is that there’s nothing to install it works entirely over SSH, which comes pre-installed on every modern operating system. You run a single command, and Pinggy gives you a public HTTPS URL that routes traffic directly to your local CouchDB server.
Note: This tunnel setup requires Pinggy Pro.
Creating the Tunnel
Start a Pinggy tunnel to expose your CouchDB instance securely with just one command:
ssh -p 443 -R0:localhost:5984 free.pinggy.io
That’s it! Pinggy will provide you with a public URL (something like https://abc123.a.pinggy.io) that securely tunnels to your local CouchDB instance. This URL will work from anywhere on the internet, allowing you to sync your Obsidian notes from any device.
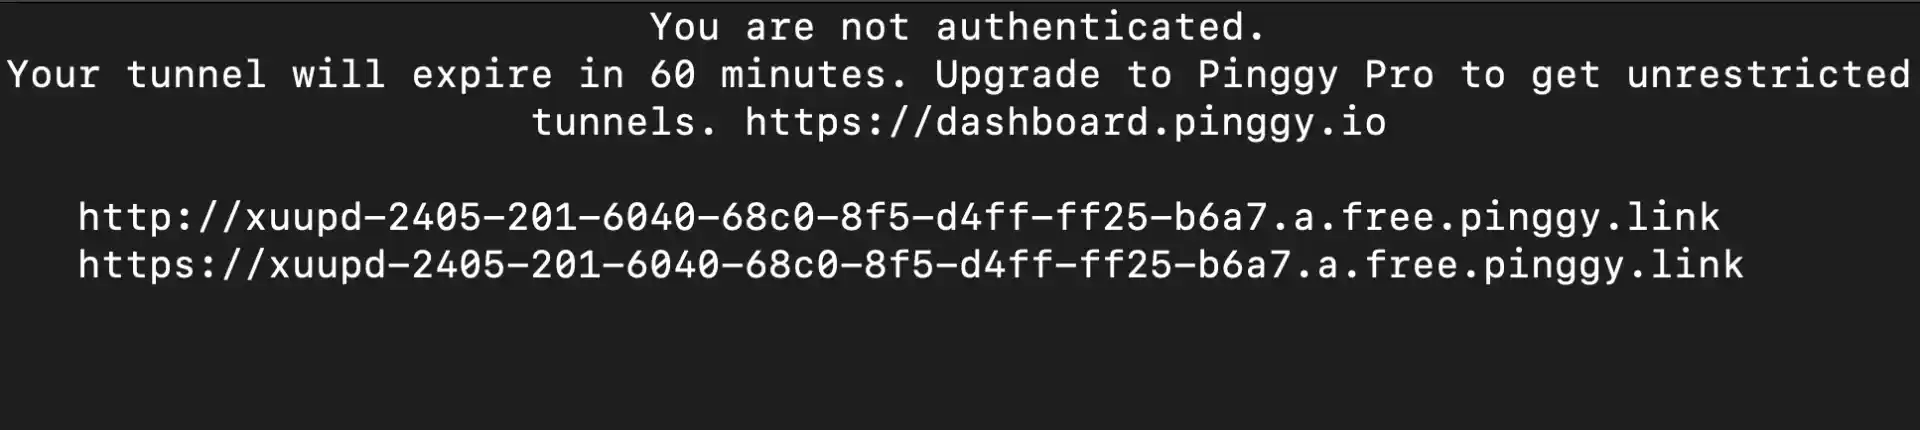
The tunnel will display something like this:
You can access local server via following URL(s):
https://abc123.a.pinggy.io
Copy this URL - you’ll need it for configuring Obsidian LiveSync.
If you’d rather start the tunnel from a script or a long-running service (instead of leaving an SSH session open), Pinggy now ships official Node.js and Python SDKs. Both wrap the same protocol the SSH command above uses, so you can spin the tunnel up and tear it down programmatically from inside your own automation. Useful if you want the tunnel to come up alongside the CouchDB container on boot rather than as a separate manual step.
Step 5: Installing Obsidian and Configuring LiveSync
With the database and tunnel running, the rest is on the Obsidian side: install the app, enable the LiveSync plugin, and point it at the tunnel URL.
Downloading and Installing Obsidian
First, let’s get Obsidian installed on your system. Obsidian is available for all major platforms and is completely free to use.
Windows:
- Visit obsidian.md
- Click “Download for Windows”
- Run the downloaded installer (
Obsidian.Setup.exe) - Follow the installation wizard
- Launch Obsidian from your Start menu or desktop shortcut
macOS:
- Visit obsidian.md
- Click “Download for Mac”
- Open the downloaded DMG file
- Drag Obsidian to your Applications folder
- Launch Obsidian from Applications or Spotlight
Linux:
- Visit obsidian.md
- Choose your preferred format:
- AppImage (universal): Download and make executable
- Snap:
sudo snap install obsidian --classic - Flatpak:
flatpak install flathub md.obsidian.Obsidian - DEB/RPM: Download the appropriate package for your distribution
Initial Obsidian Setup
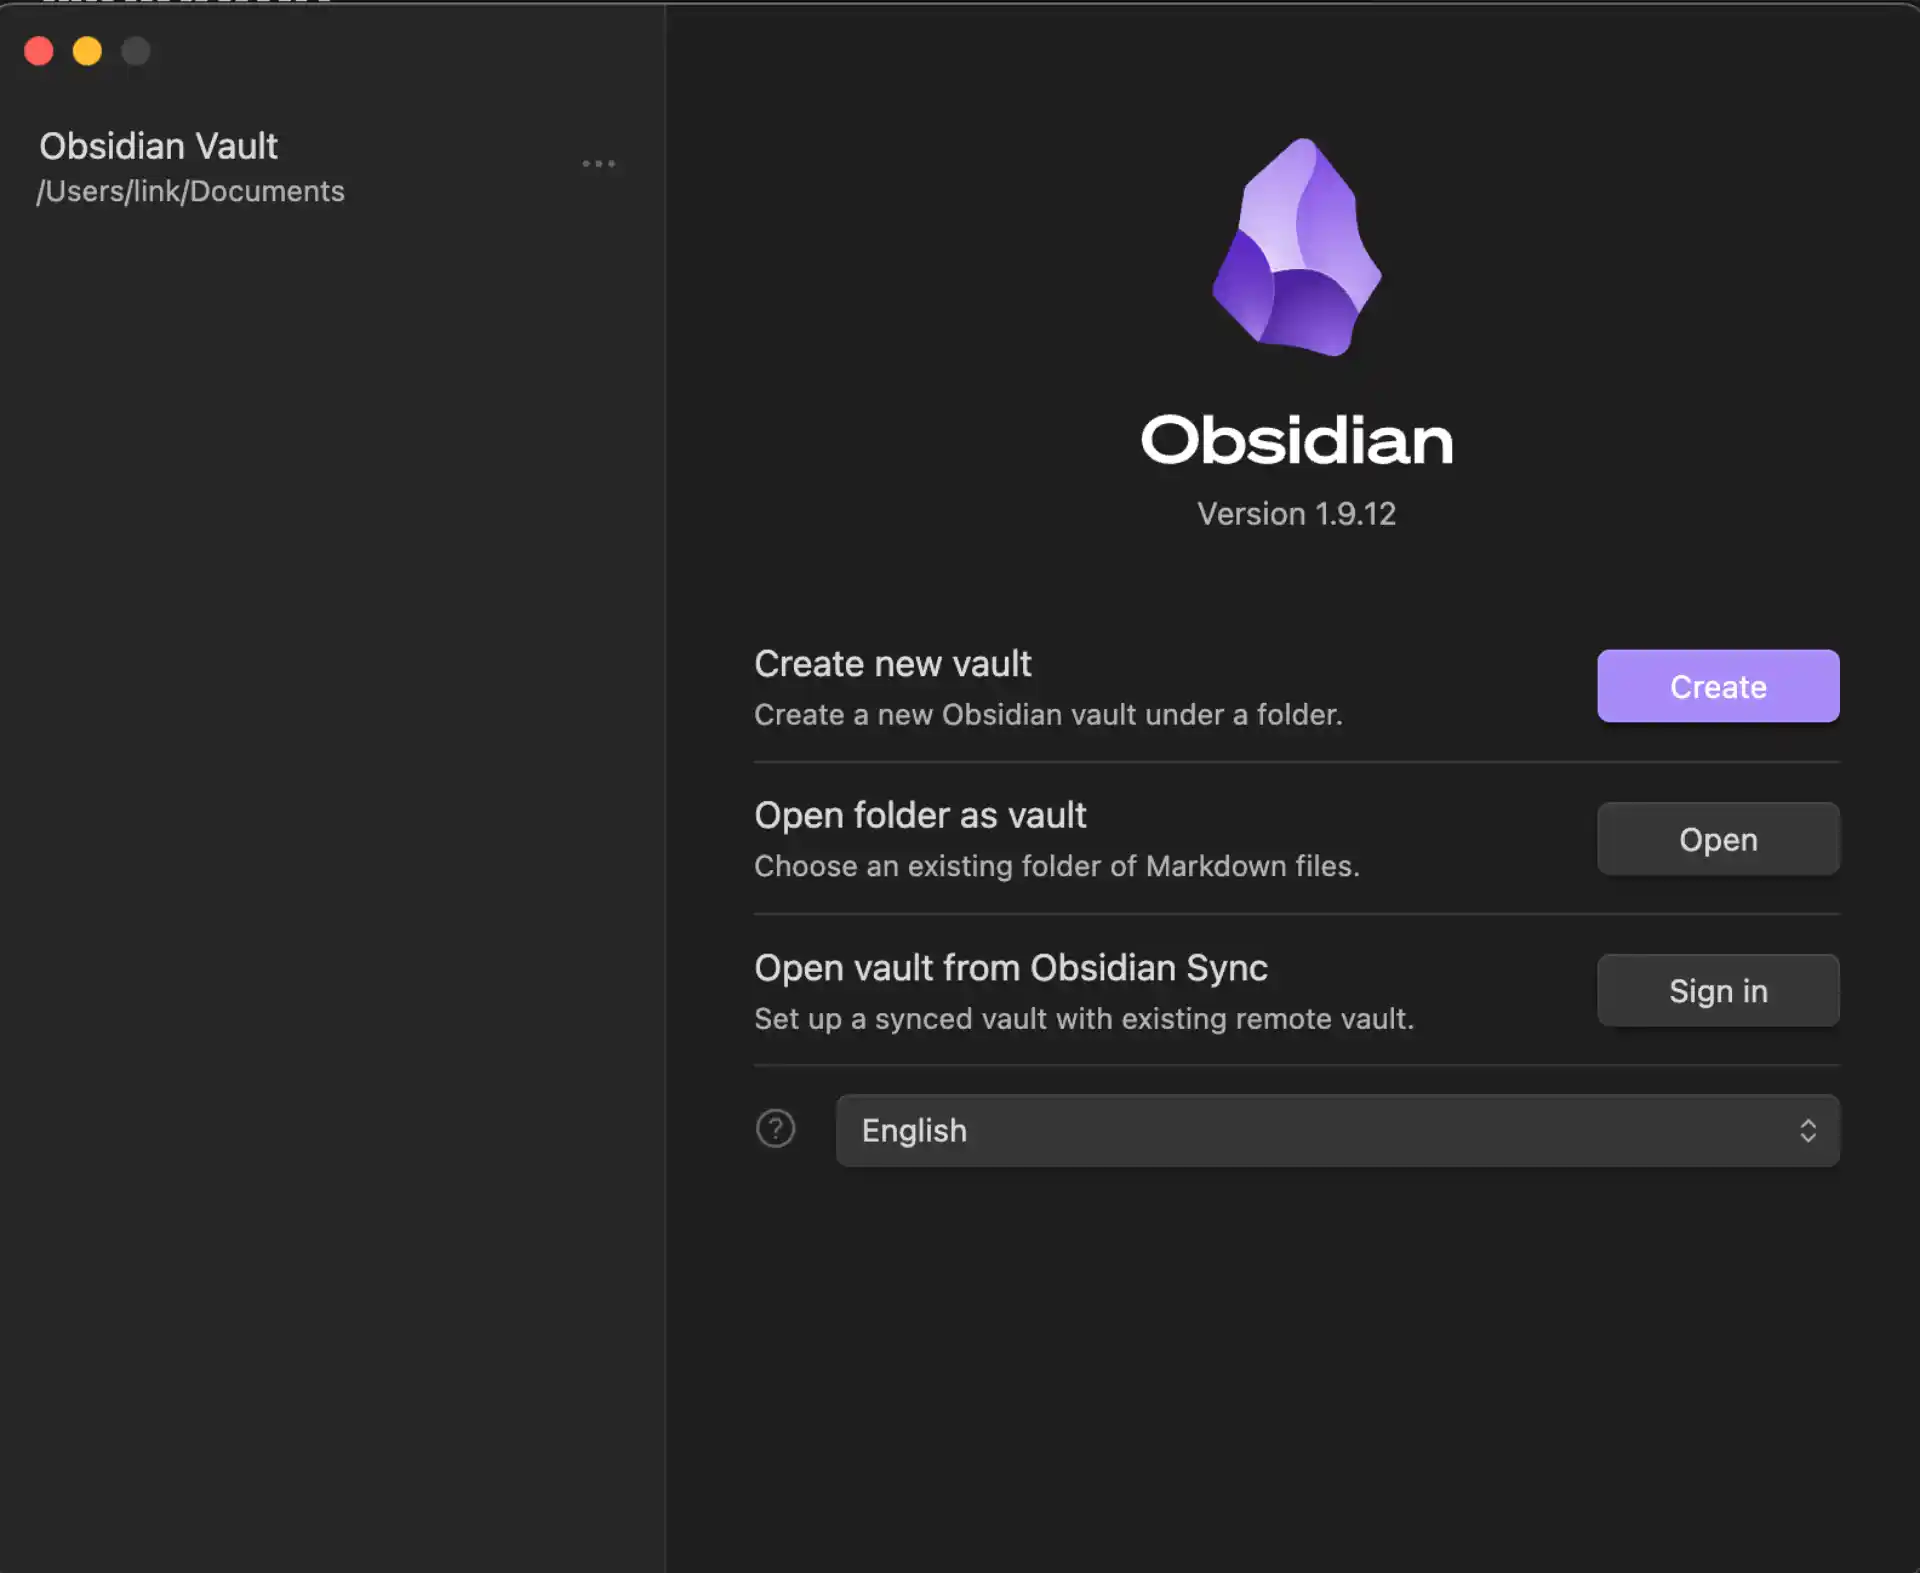
When you first launch Obsidian:
- Create or Open a Vault: Choose “Create new vault” if this is your first time
- Name your vault: Give it a meaningful name like “My Notes” or “Knowledge Base”
- Choose location: Select where you want to store your notes locally
- Skip the tutorial for now (we’ll set up sync first)
Installing the LiveSync Plugin
Now let’s install the plugin that will connect to your CouchDB server:
- Open Obsidian and click the Settings icon (gear icon) in the bottom-left
- In the left sidebar, navigate to “Community plugins”
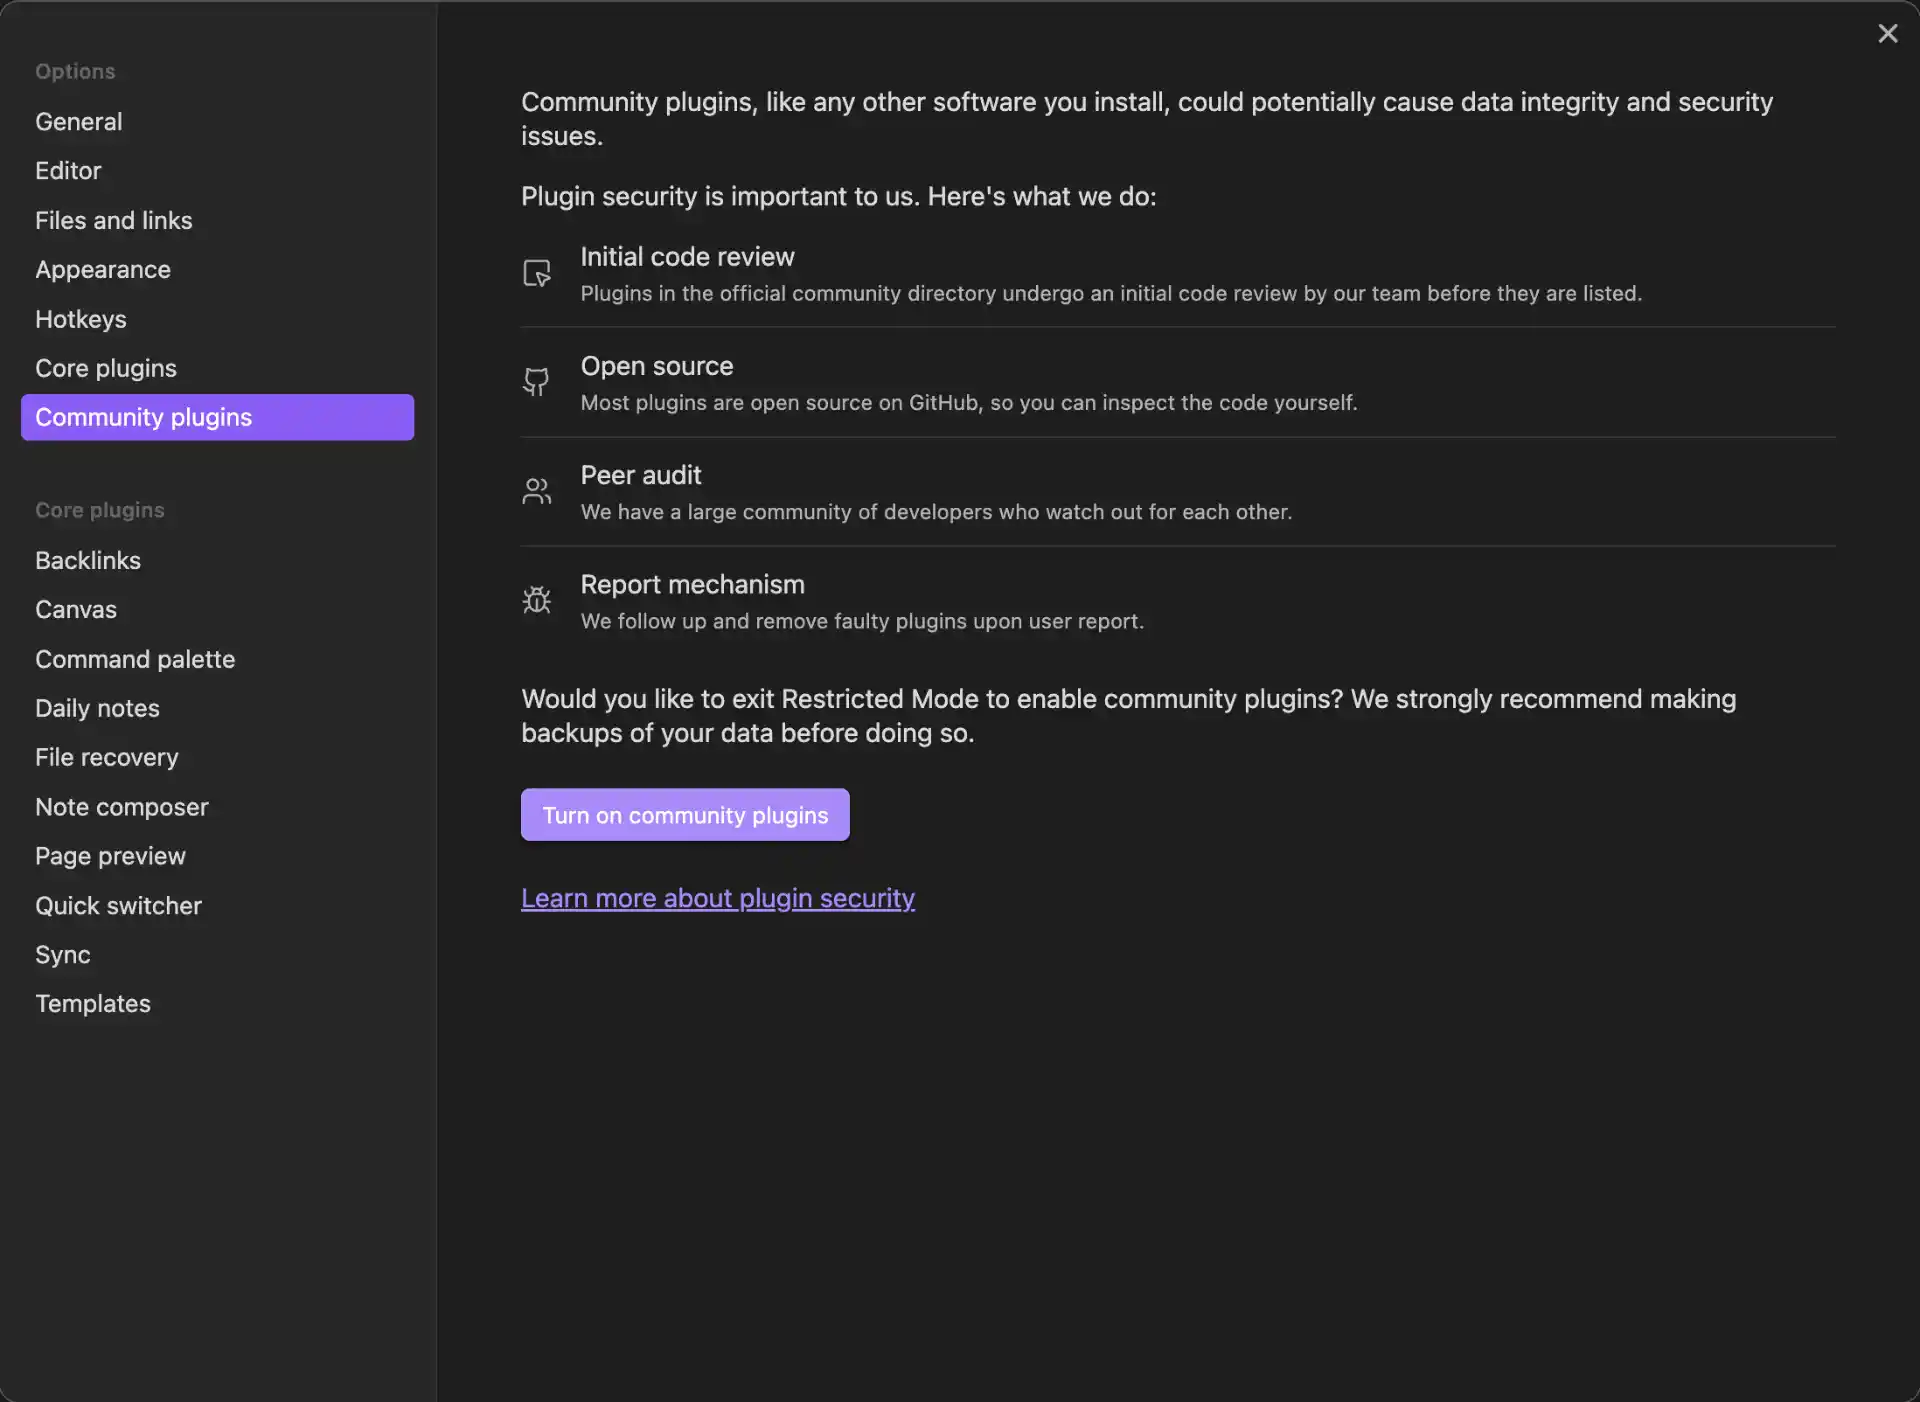
- If this is your first community plugin, click “Turn on community plugins”
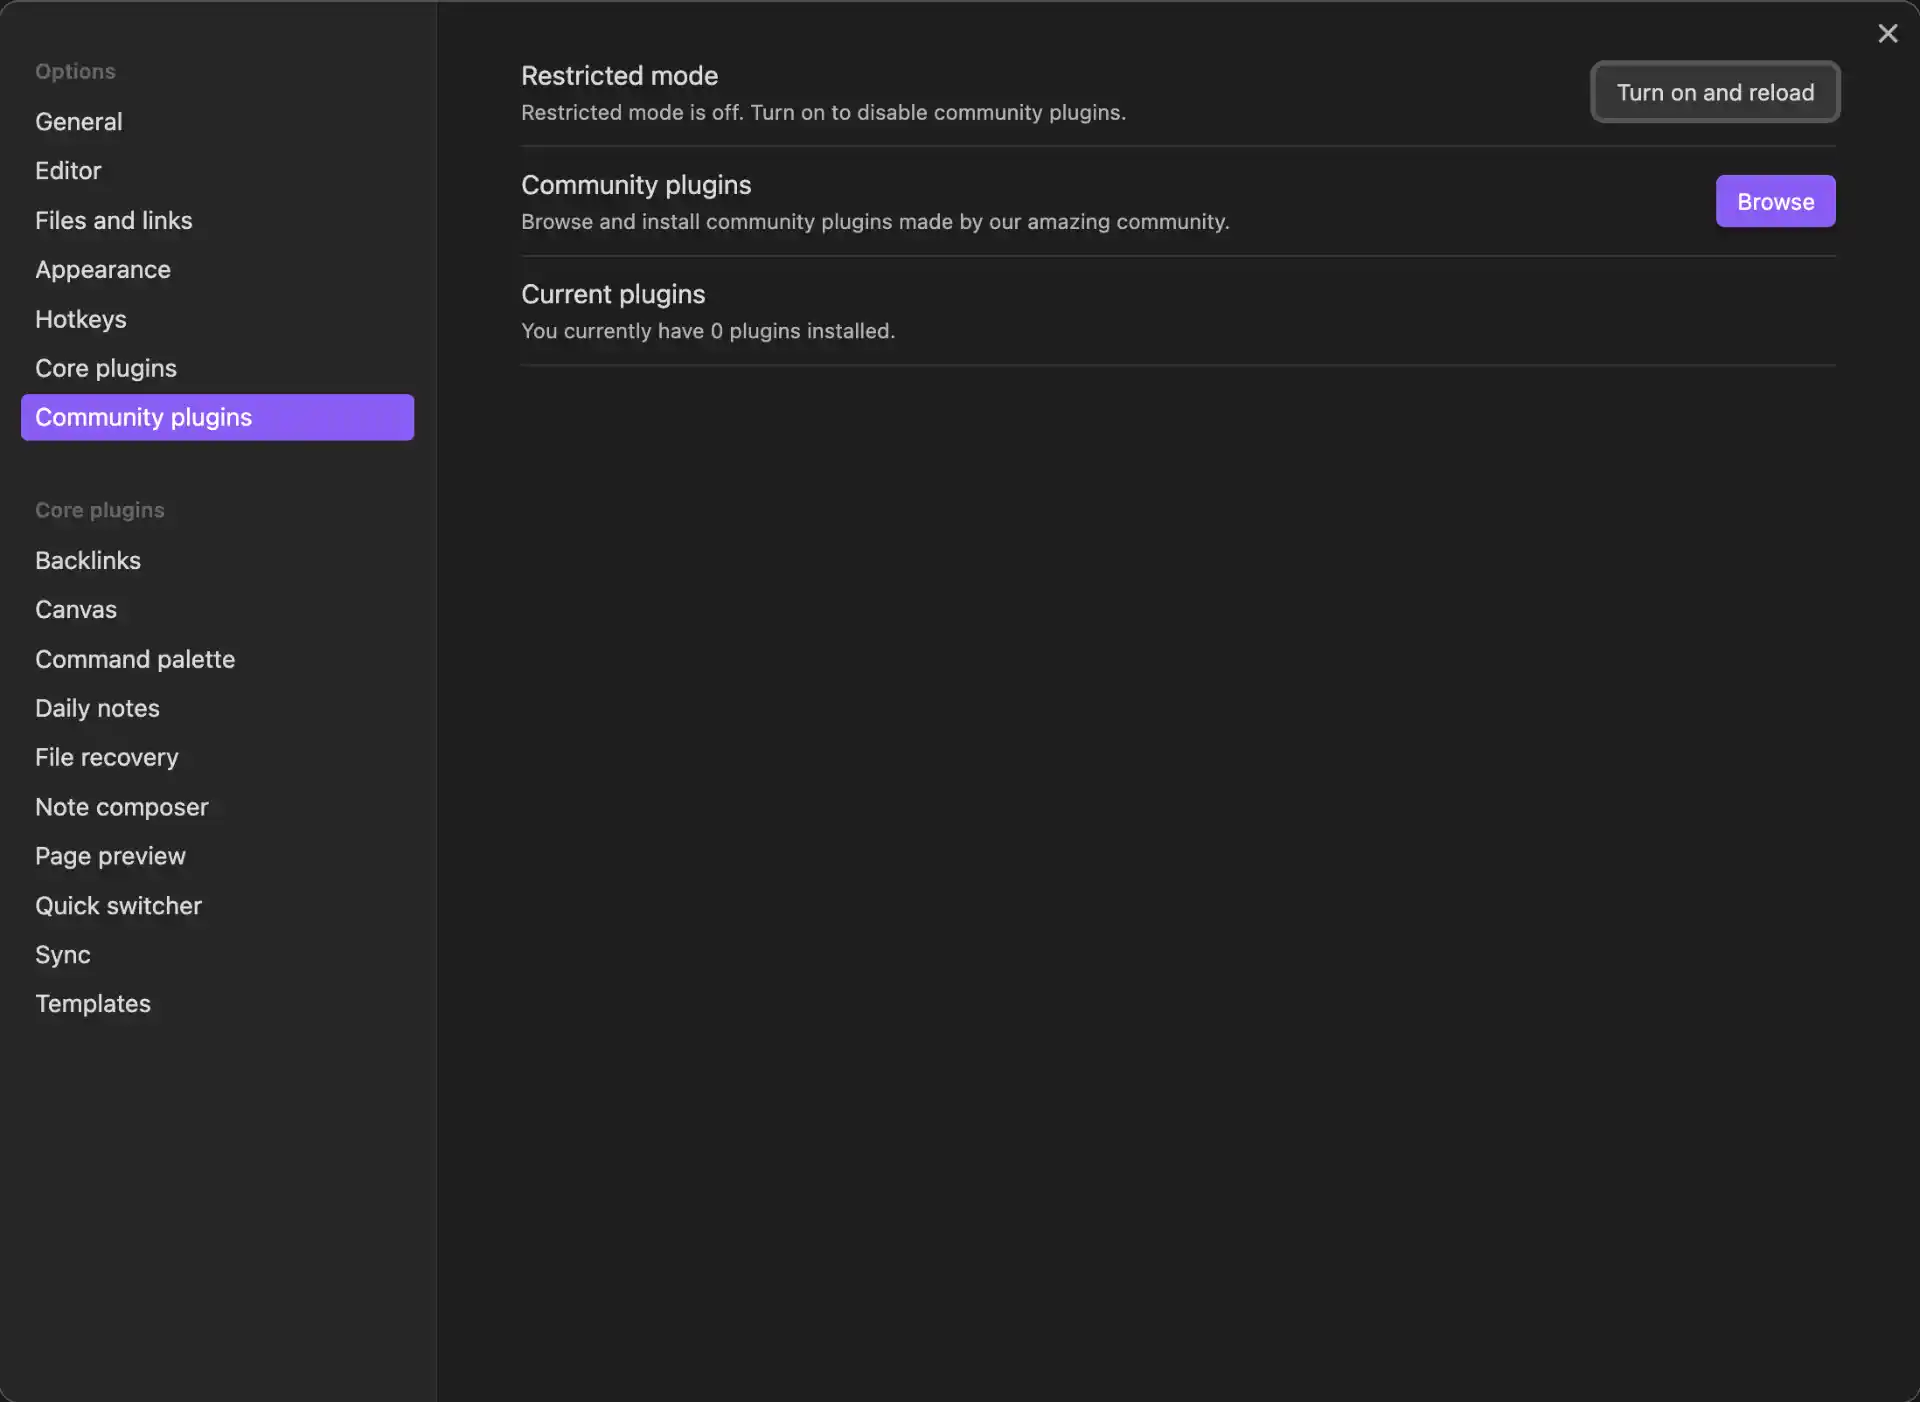
Click “Browse” to open the plugin marketplace
In the search bar, type “Self-hosted LiveSync”
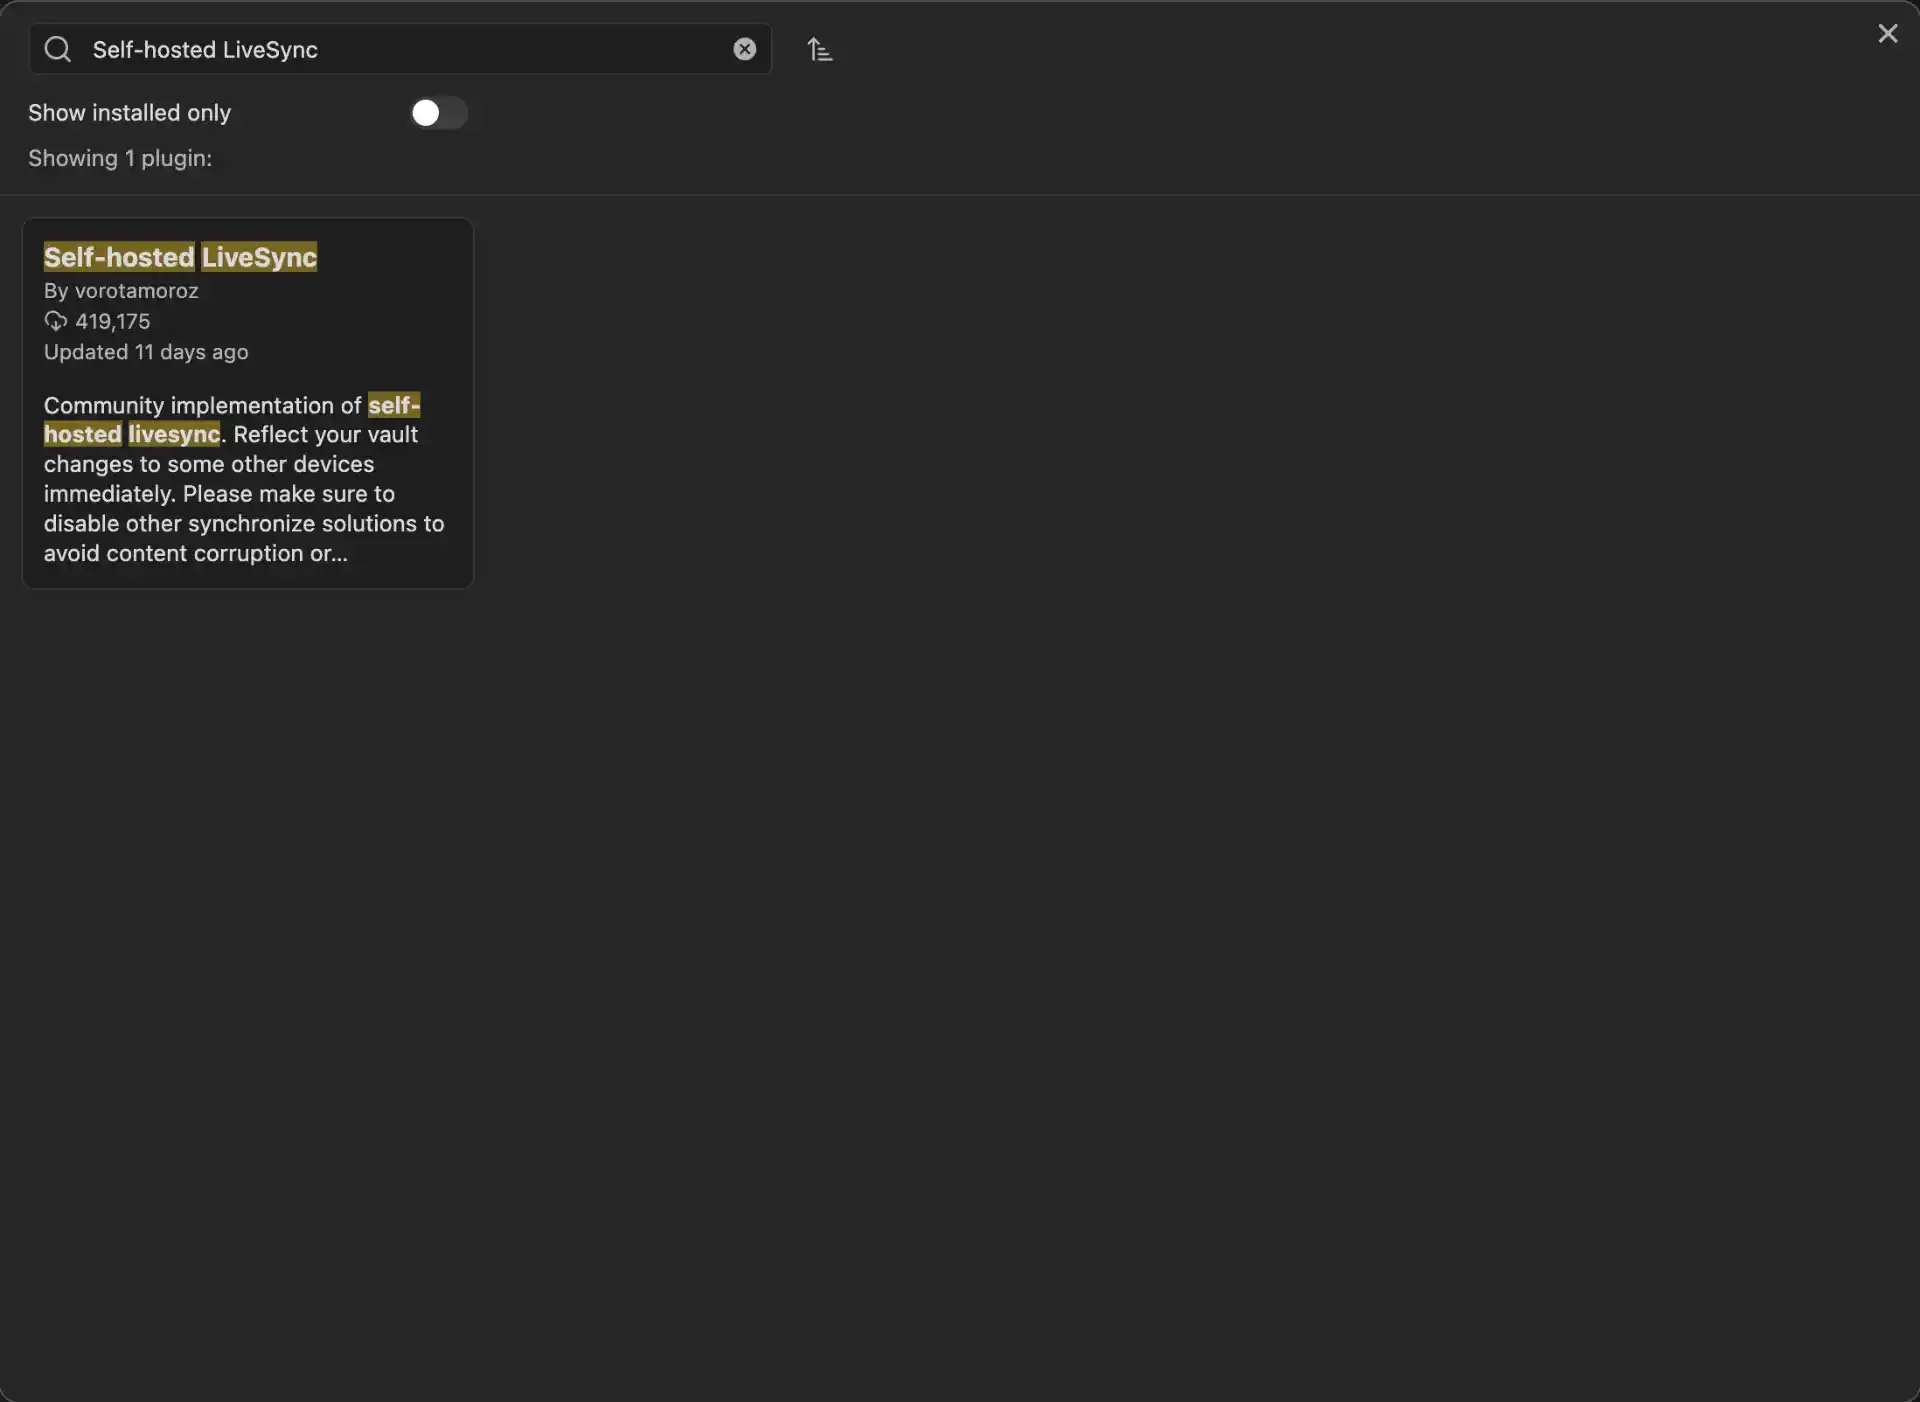
- Find the plugin by vorotamoroz (make sure it’s the official one)
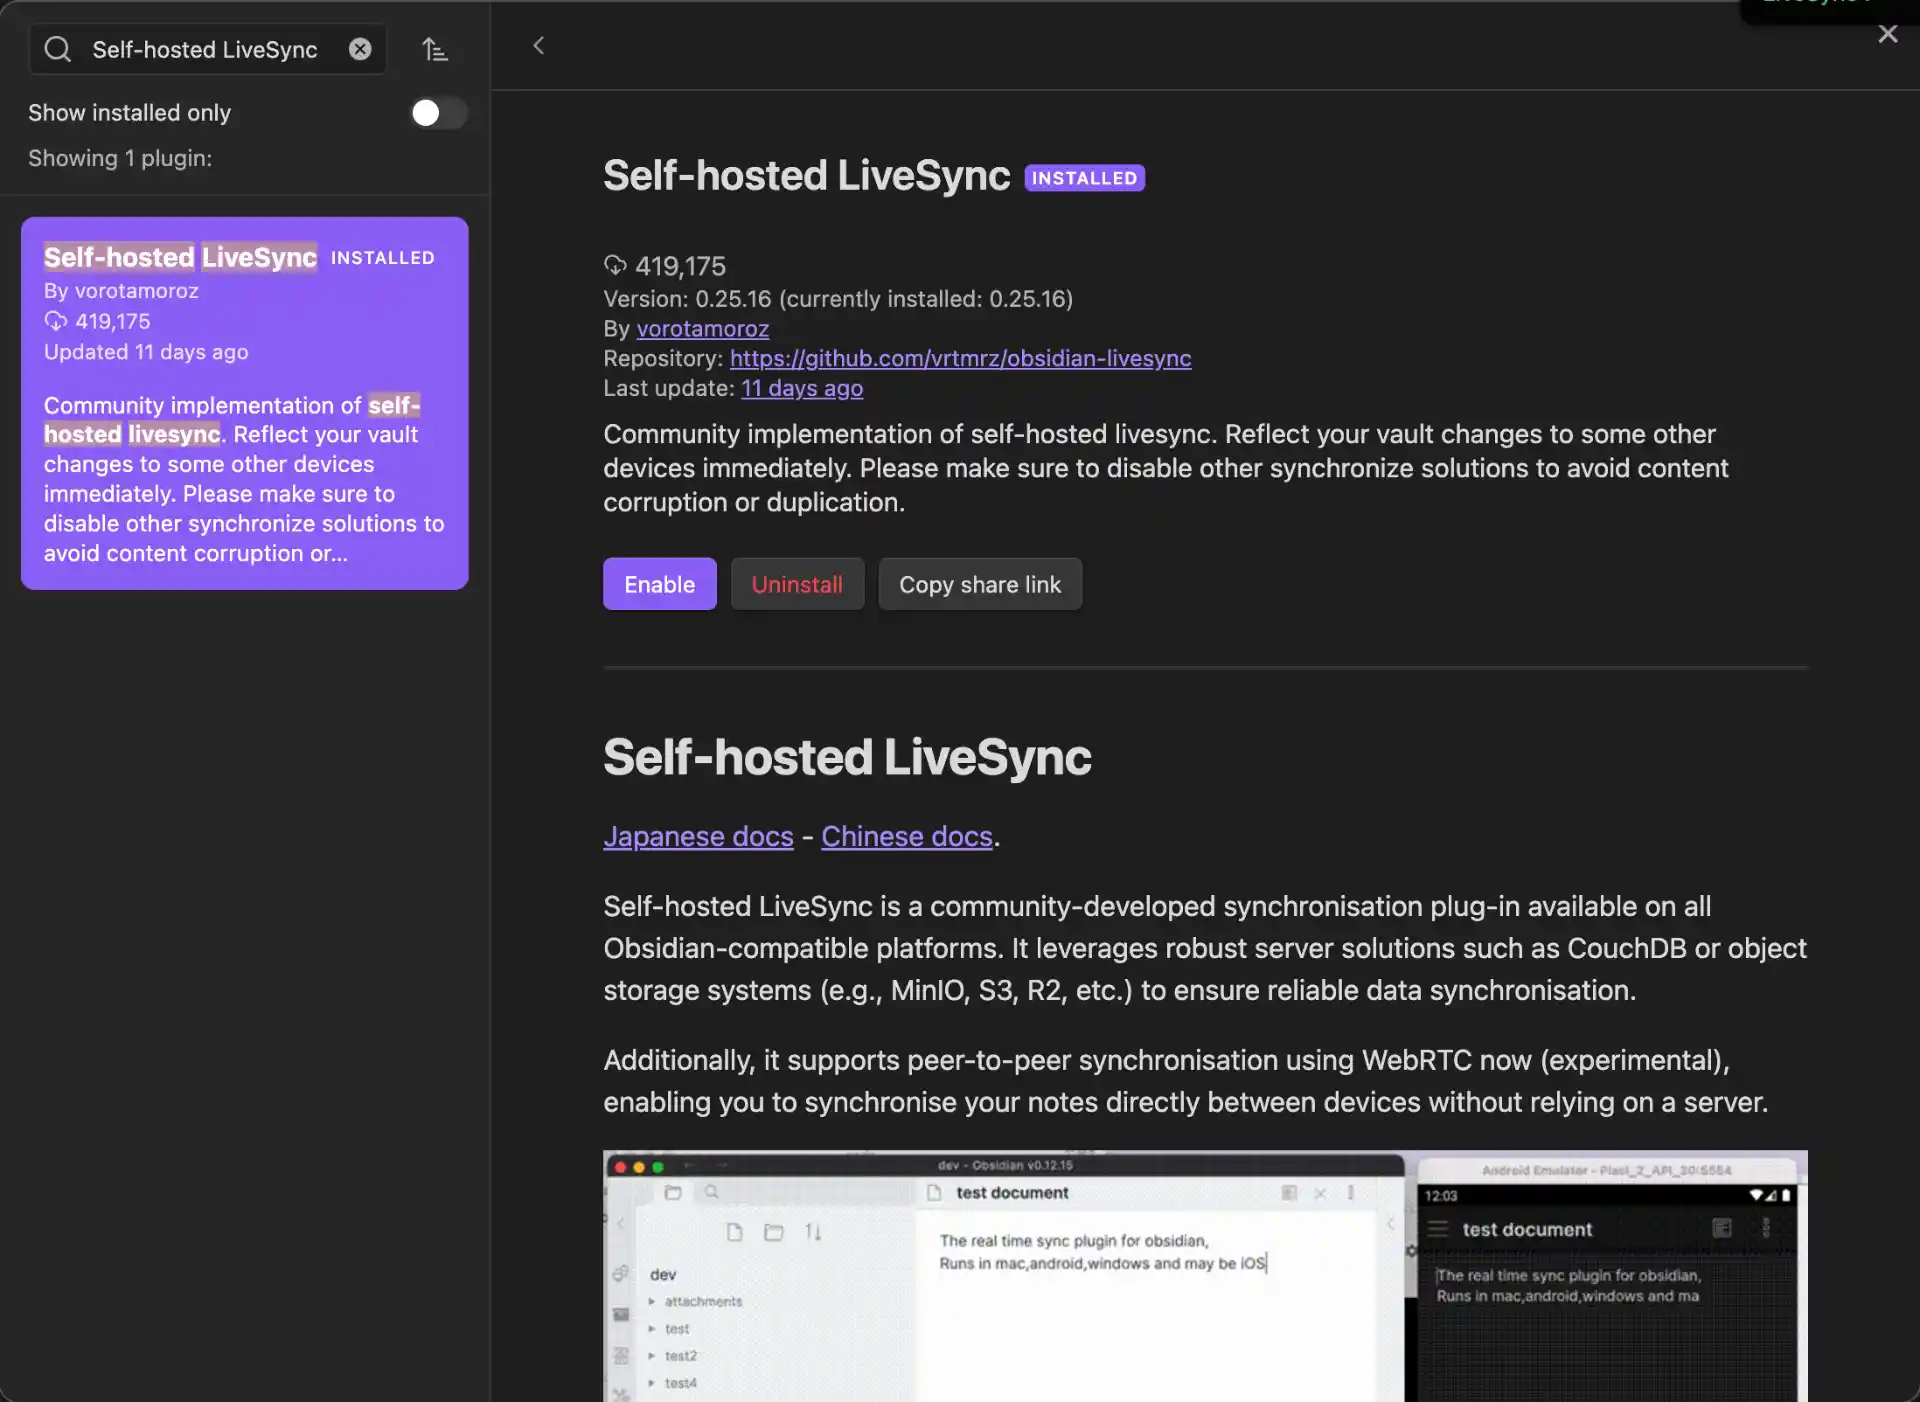
- Click “Install”
- After installation, click “Enable” to activate the plugin
Configuring LiveSync Plugin
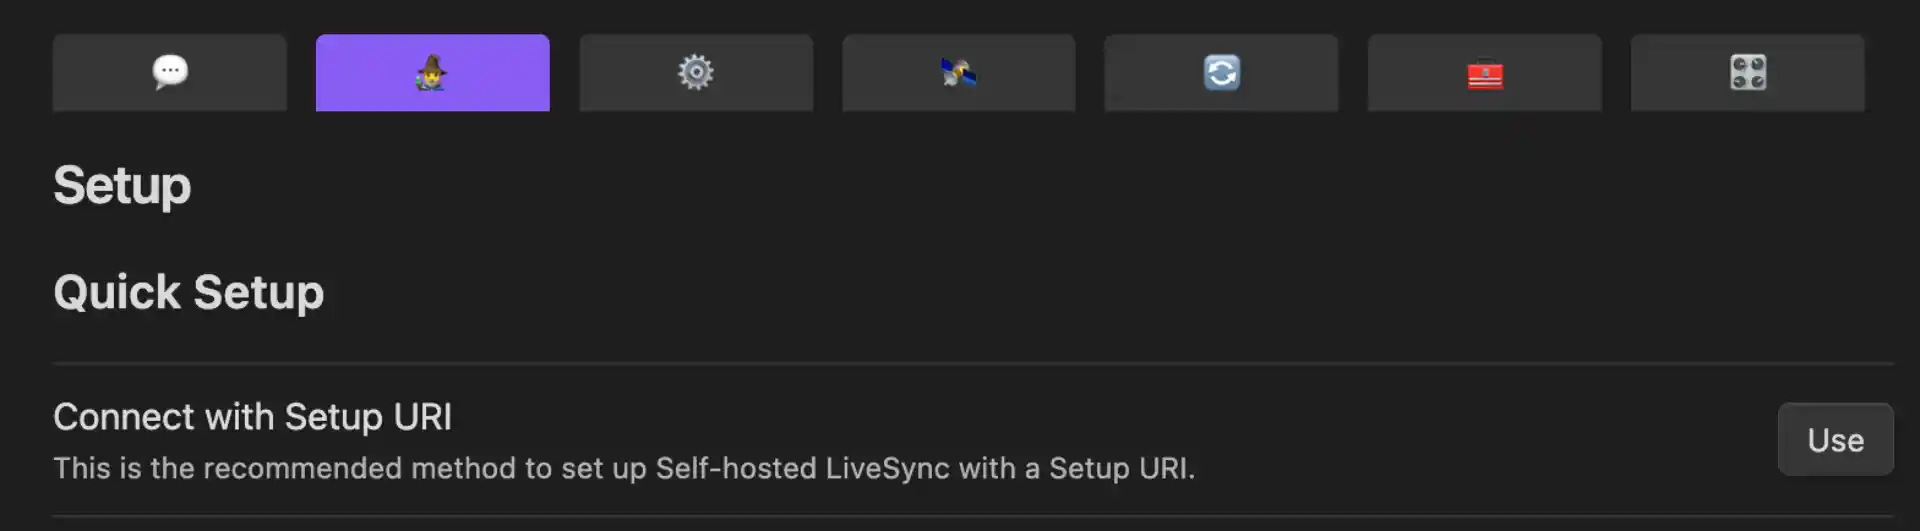
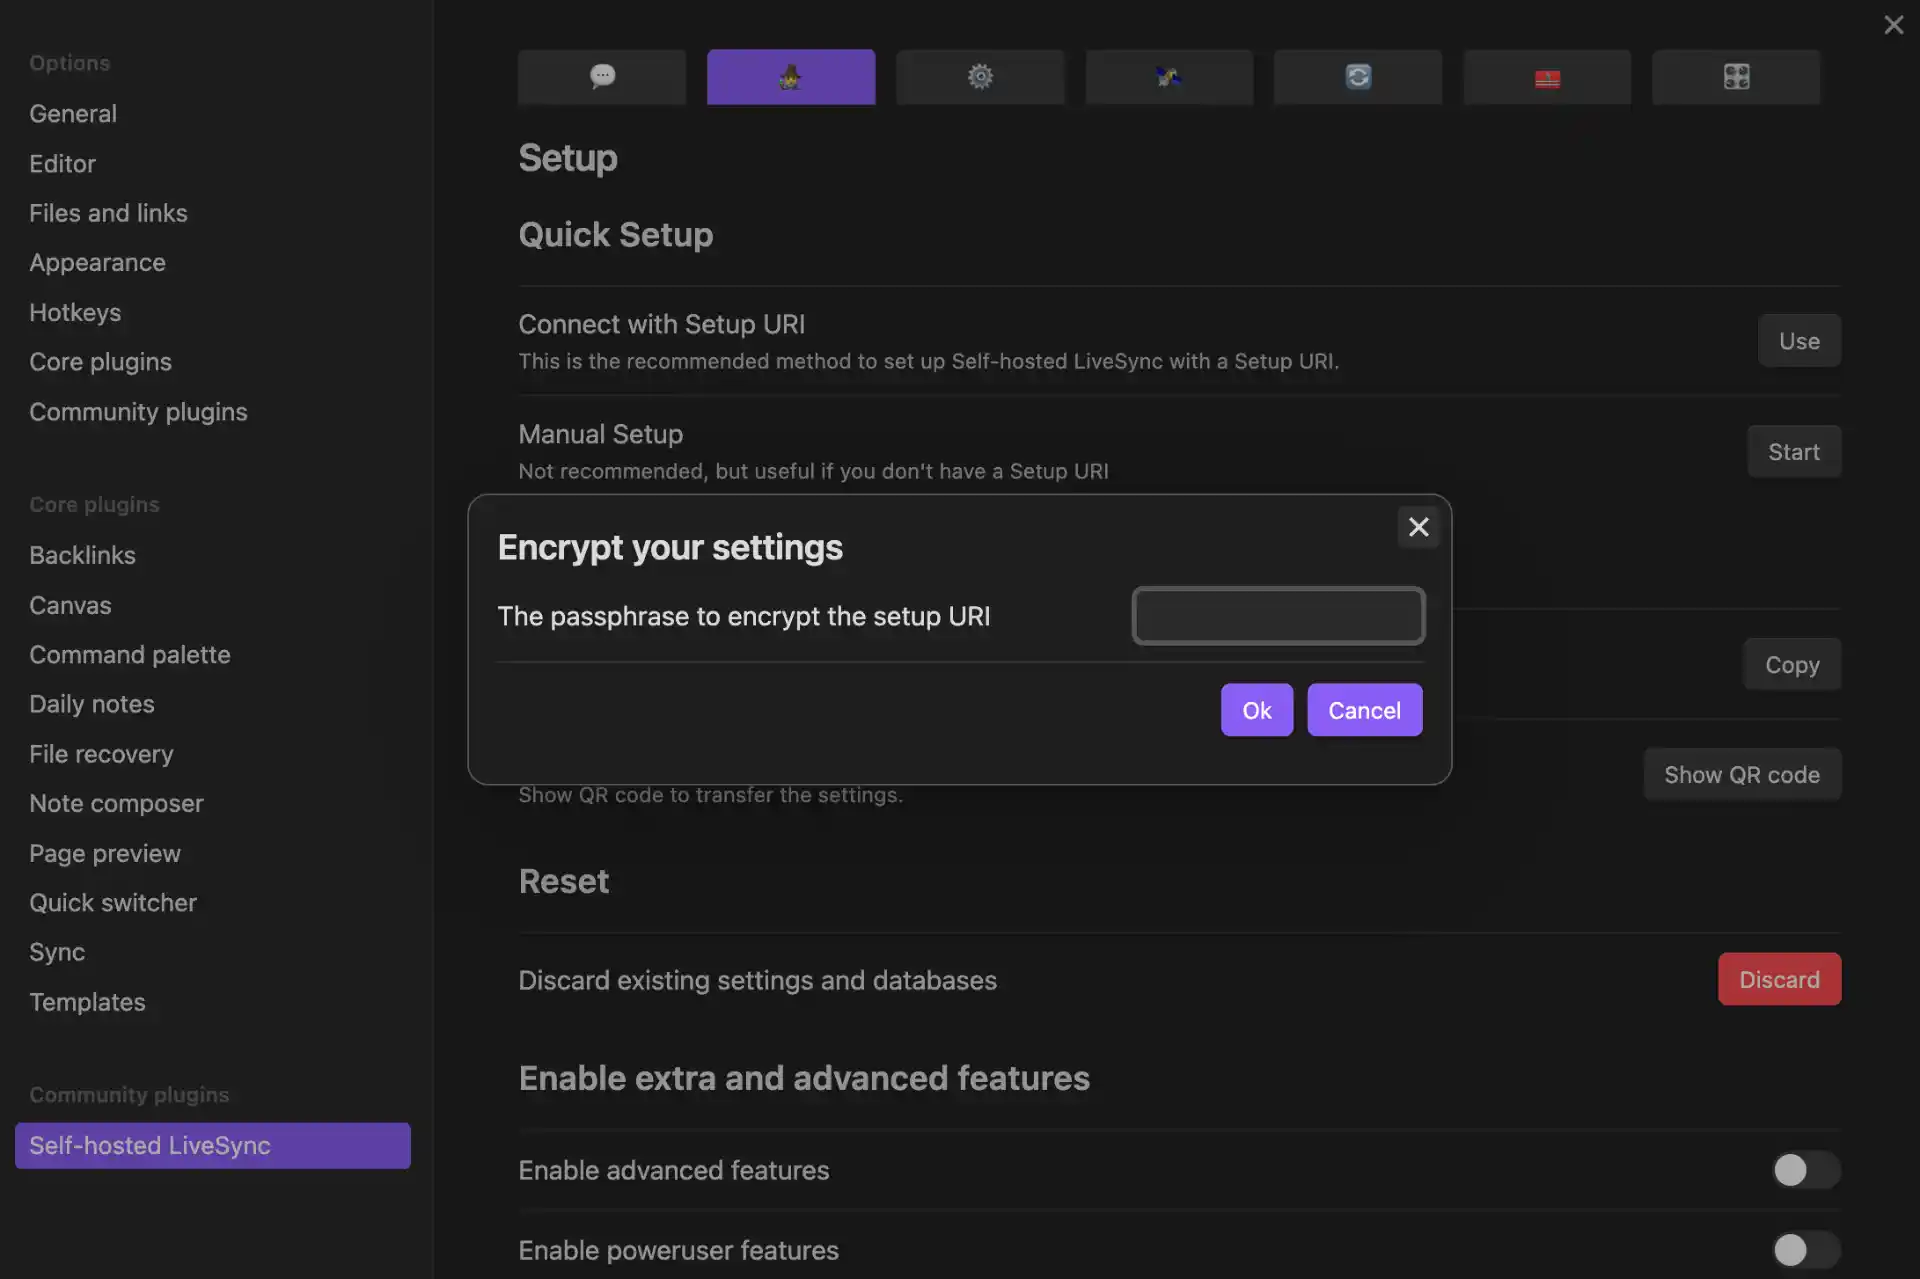
Once the plugin is installed and enabled, you’ll see a new “Self-hosted LiveSync” option in your settings. We’ll use the manual setup for full control.
- In Settings, scroll down to find “Self-hosted LiveSync” in the left sidebar
- Click it to open the plugin settings
- Go to the “Setup” tab
- Click “Manual setup”
- Click “Next” to Appearance Settings
- Fill in your connection details:
Database Configuration:
- Server URI: Your Pinggy tunnel URL (e.g.,
https://abc123.a.pinggy.io) - Username:
admin - Password: Your CouchDB admin password (from
docker-compose.yml) - Database name:
obsidian - Enable CORS: Turn this on to allow cross-origin requests (required for web-based sync)
- Test Connection: Click to verify your settings
- Then click “Next” and accept any warnings if prompted
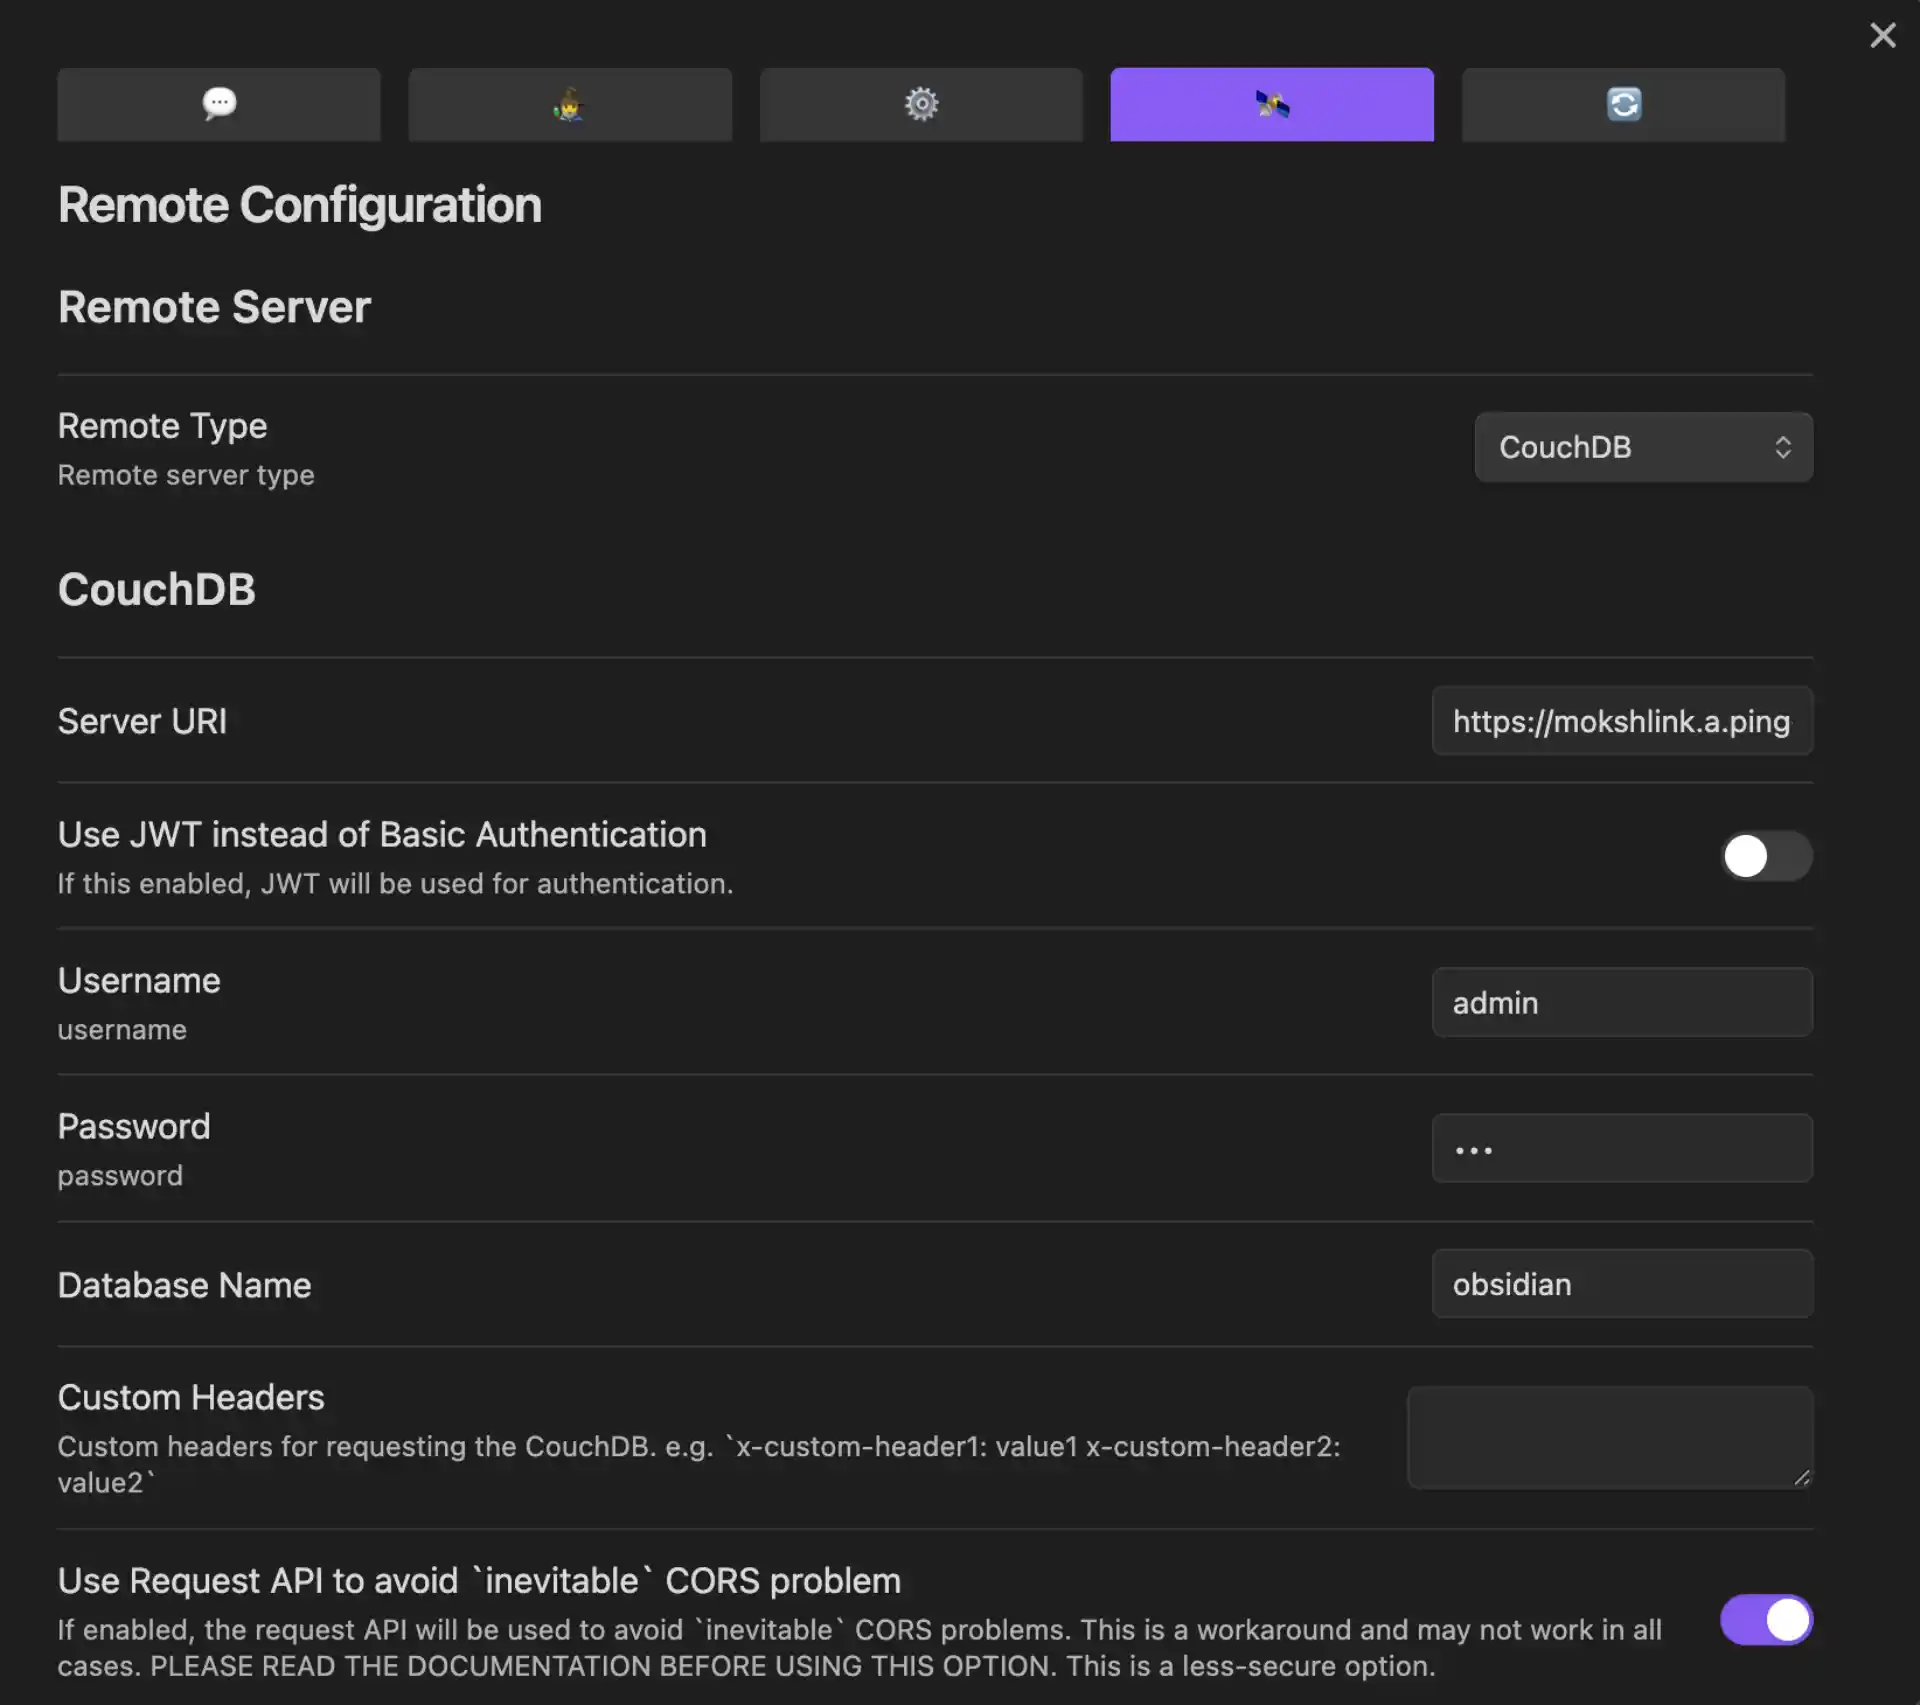
Important Configuration Notes:
- Use the full Pinggy URL including
https:// - Don’t add
/obsidianor any extra path to the URI - Make sure your Pinggy tunnel is running before testing
Step 6: Adding Additional Devices
One of the best features of this setup is how easy it is to add new devices to your sync network.
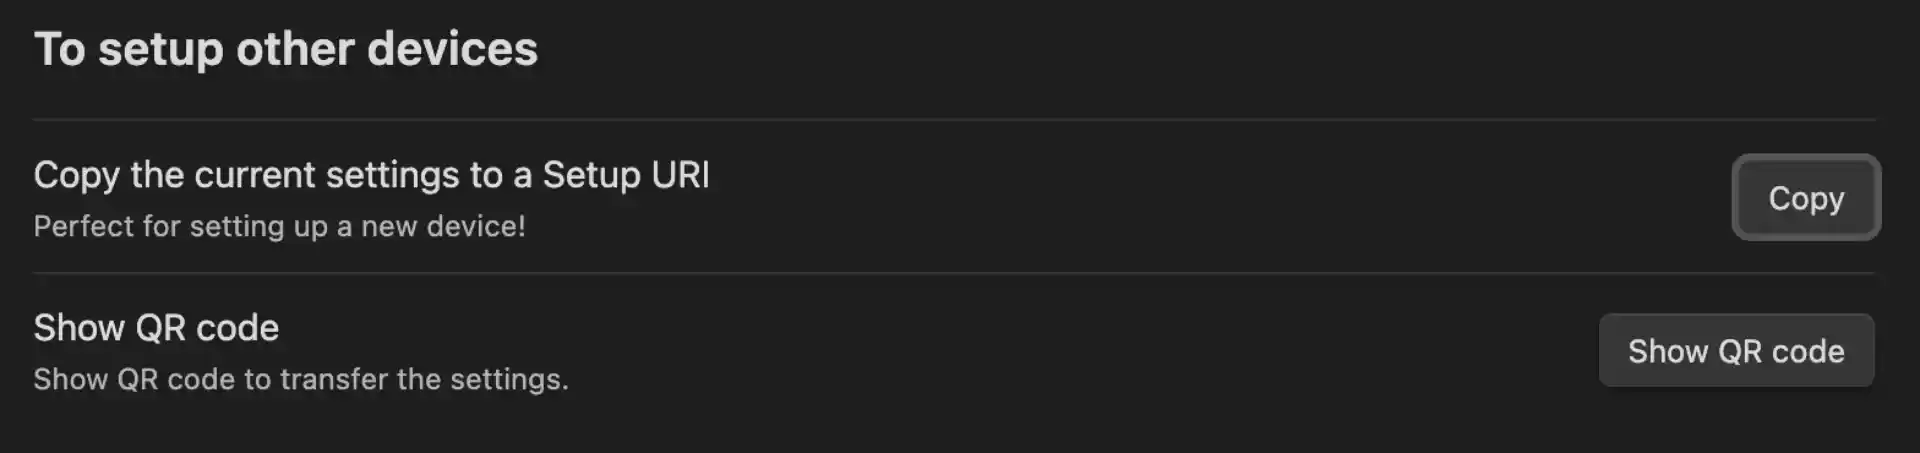
Generating Setup URI for Other Devices
Once sync is working properly:
- Go to the “Setup” tab in LiveSync settings
- In the “Set up other devices” section, click “Copy setup URI”
- Enter a passphrase to encrypt the setup URI and click “OK”
- The setup URI will be copied automatically
- The URI format:
obsidian://setuplivesync?settings=encrypted_config_data
Security Note: This URI contains encrypted connection information. Store it in a password manager or secure location.
Using the Setup URI
On each new device where you want to sync your Obsidian vault:
- Install Obsidian and the Self-hosted LiveSync plugin
- Go to Settings → Self-hosted LiveSync
- Go to the “Setup” tab
- Choose “Connect with setup URL”
- Paste the setup URI you saved earlier
- Enter the passphrase
- Click “Apply”
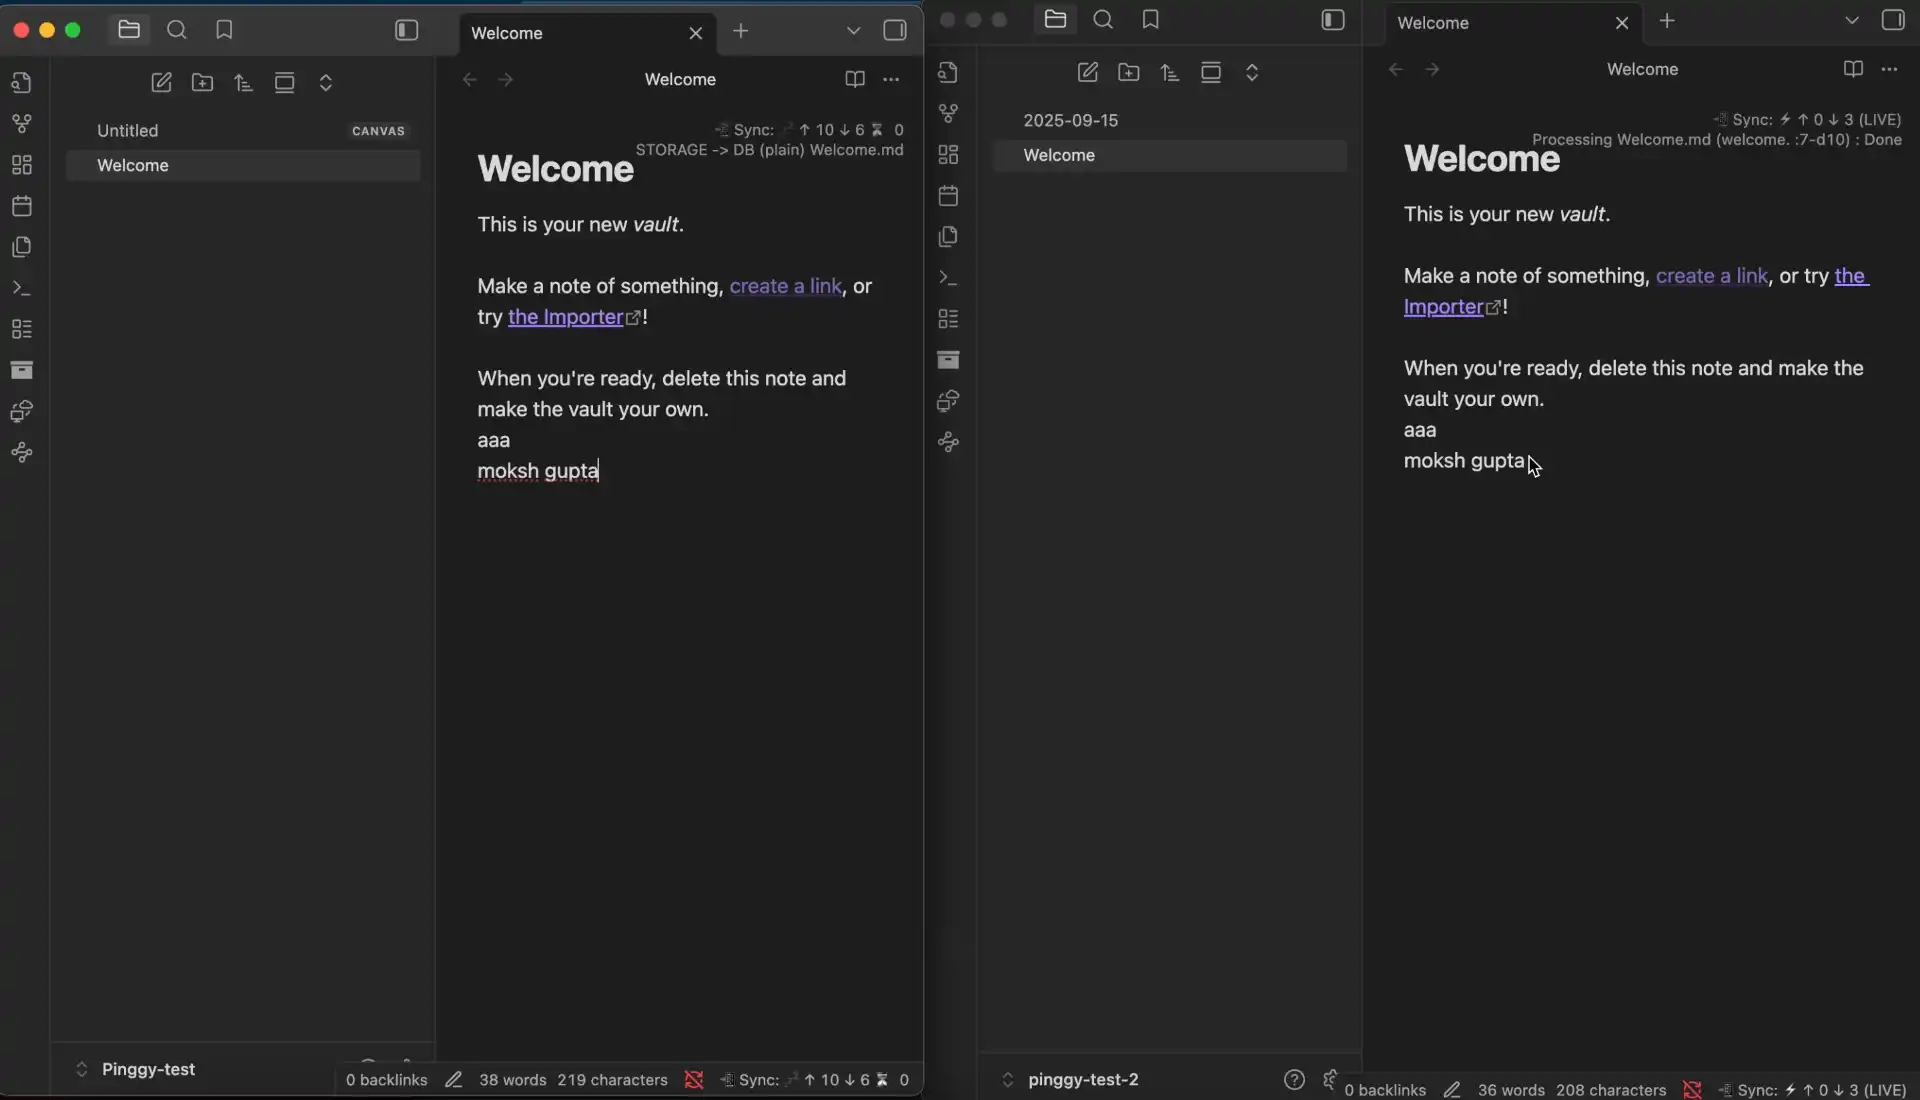
The plugin will automatically configure all the connection settings and begin syncing your vault to the new device.
Wrapping up
What you end up with: a CouchDB container, a Pinggy tunnel, and the LiveSync plugin keeping your vault in sync across whatever devices you’ve got. Day-to-day maintenance is mostly leaving it alone; the container’s restart policy handles reboots.
A few things worth flagging for anyone setting this up:
- The tunnel URL needs to stay reachable. The free Pinggy tier rotates the URL when the session ends, so for a permanent setup, run it on a Pro plan with a persistent URL or a custom domain. Otherwise you’ll be updating LiveSync’s settings every time the tunnel restarts.
- Back up the CouchDB data directory. The whole point of self-hosting is owning the failure mode too. Snapshot
./couchdb-datato whatever you already trust for backups. - LiveSync’s end-to-end encryption is worth enabling even though the tunnel is already HTTPS. It means the CouchDB instance never sees plaintext notes, which is the right default once the data leaves your machine at all.