# Relays for Custom Domain
> Pinggy supports . Access your localhost with the domain of your choice.
> Source: https://pinggy.io/docs/relays/
# Relays for Custom Domain
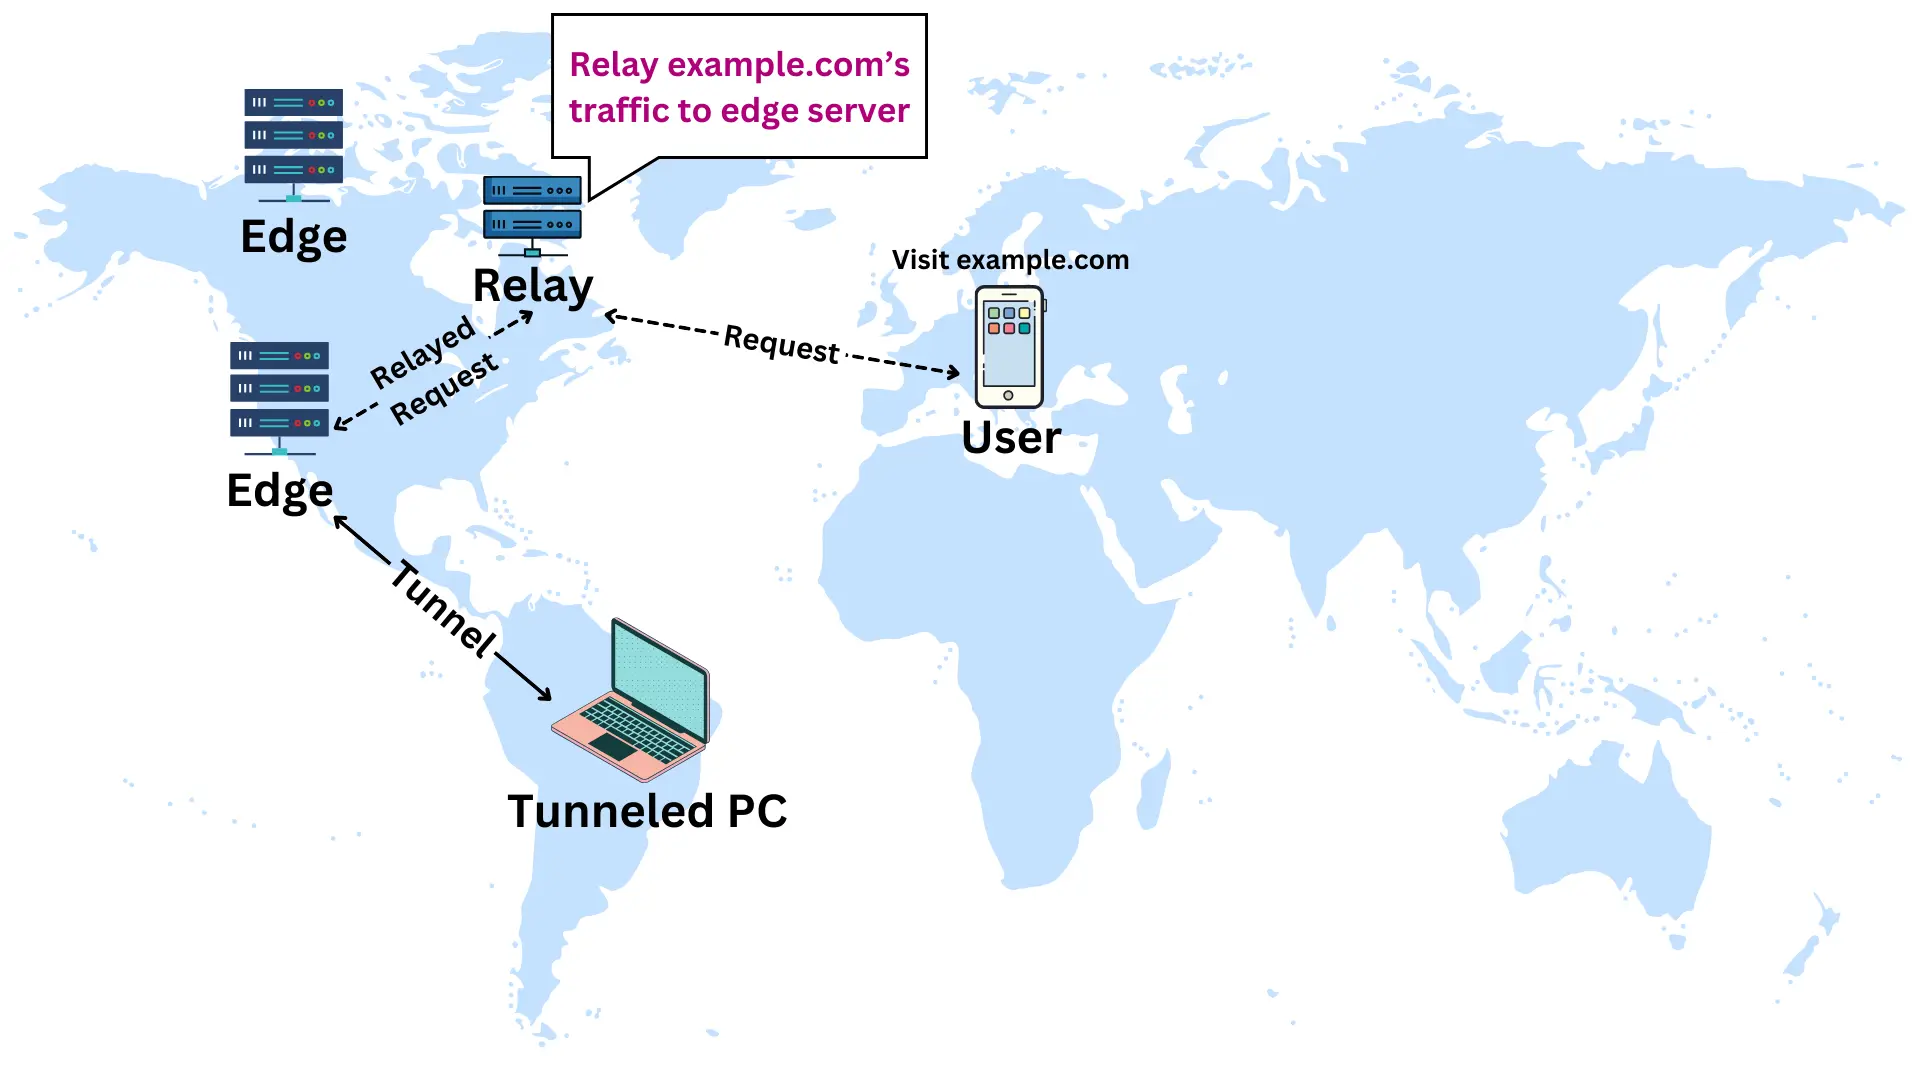
Pinggy uses `CNAME` records to configure custom domains. But most DNS servers do not allow setting CNAME records for the root domains, such as `mysite.com`. Therefore, we provide a relay based configuration for such base domains.
> Note: Custom domains set up using relays will work for HTTP(S), TLS, and TCP tunnels. **However, you will not be able to use your custom domain for UDP tunnels.** You can still use the persistent subdomain.
## Get your domain
- This guide assumes that you own a domain name such as `example.com`.
- We also require you to be able to manage the DNS records for this domain.
- In case you do not own a domain and wish to buy one, you can get one from any popular domain name provider such as GoDaddy, Namecheap, etc.
## Configure Custom Domain in Pinggy
Once you have upgraded to Pinggy Pro, log in to Pinggy Dashboard -> Custom Domains.
### Set custom domain value
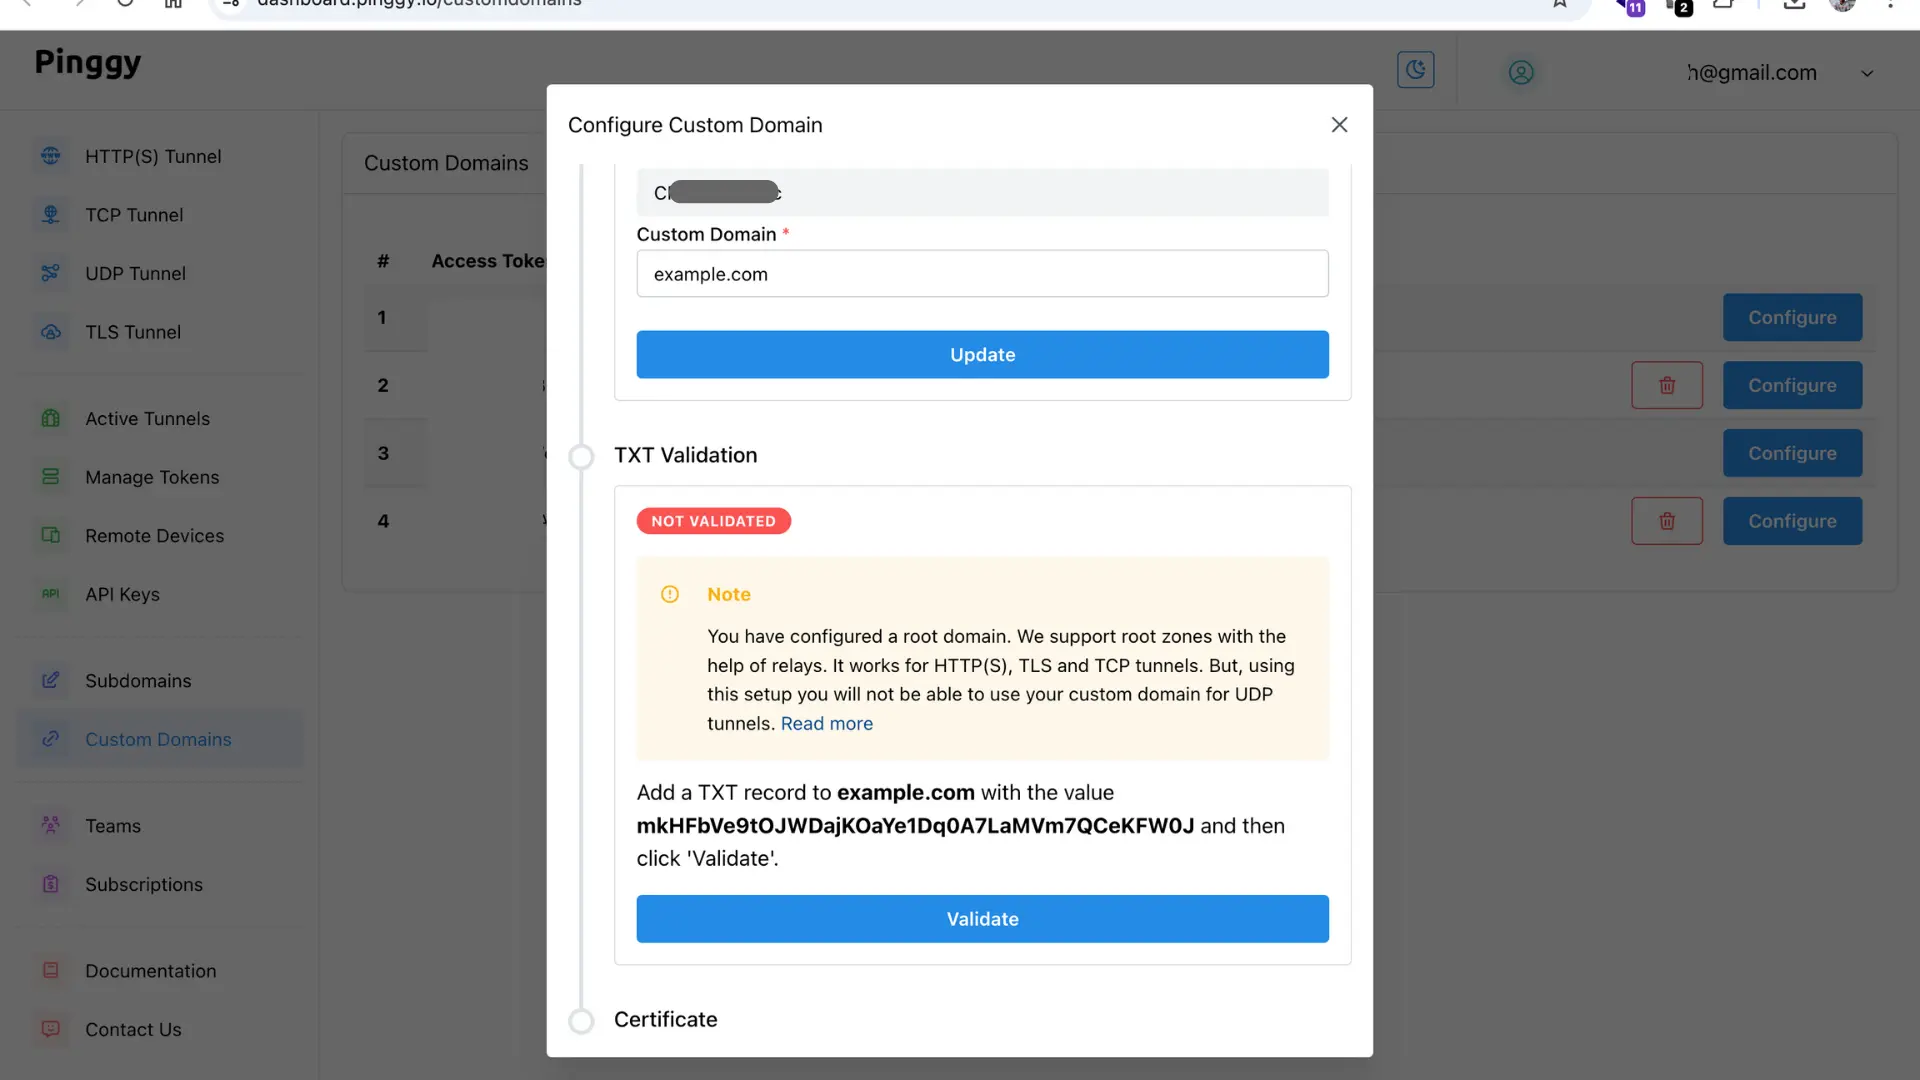
- Click on the **Configure** button for the token for which you want to set up the custom domain.
- Enter your custom domain such as `example.com`. Then press the **Update** button.
- After that, you will get the `TXT` record configuration instructions, such as:
> Add a `TXT` record to `example.com` with the value `AWkoZorpwIPDzKB6YMCdycS5bJpa78IFDklUmGq` and then click **Validate**.
---
> **NOTE:** If you use a subdomain, such as `app.example.com`, instead of `example.com`, then you will be guided through a [CNAME setup process](/docs/custom_domain/). Click [here](/docs/custom_domain/) to read about the CNAME setup process.
---
## Update the TXT record
- Follow the given instructions to set the `TXT` record.
- For example, for the above example, you need to set the `TXT` record for `example.com` with the value `AWkoZorpwIPDzKB6YMCdycS5bJpa78IFDklUmGq`
- For configuring your `TXT` record, visit your domain name provider's DNS manager.
- There, add a new DNS record. The record type will be `TXT`.
- Host value will be the part of the domain name excluding your base domain. Use `@` if you are using the base domain. For example: `@` in case of `example.com`. Similarly, for `abc.example.com`, host will be `abc`.
- The value of the record will be the TXT value shown in the dashboard. For example: `AWkoZorpwIPDzKB6YMCdycS5bJpa78IFDklUmGq` [ Note: you may need to put quotes: `"AWkoZorp...."` ]
- **Check the TXT record:** Use the online tool: toolbox.googleapps.com/apps/dig/ to check if your TXT record is set correctly or not.
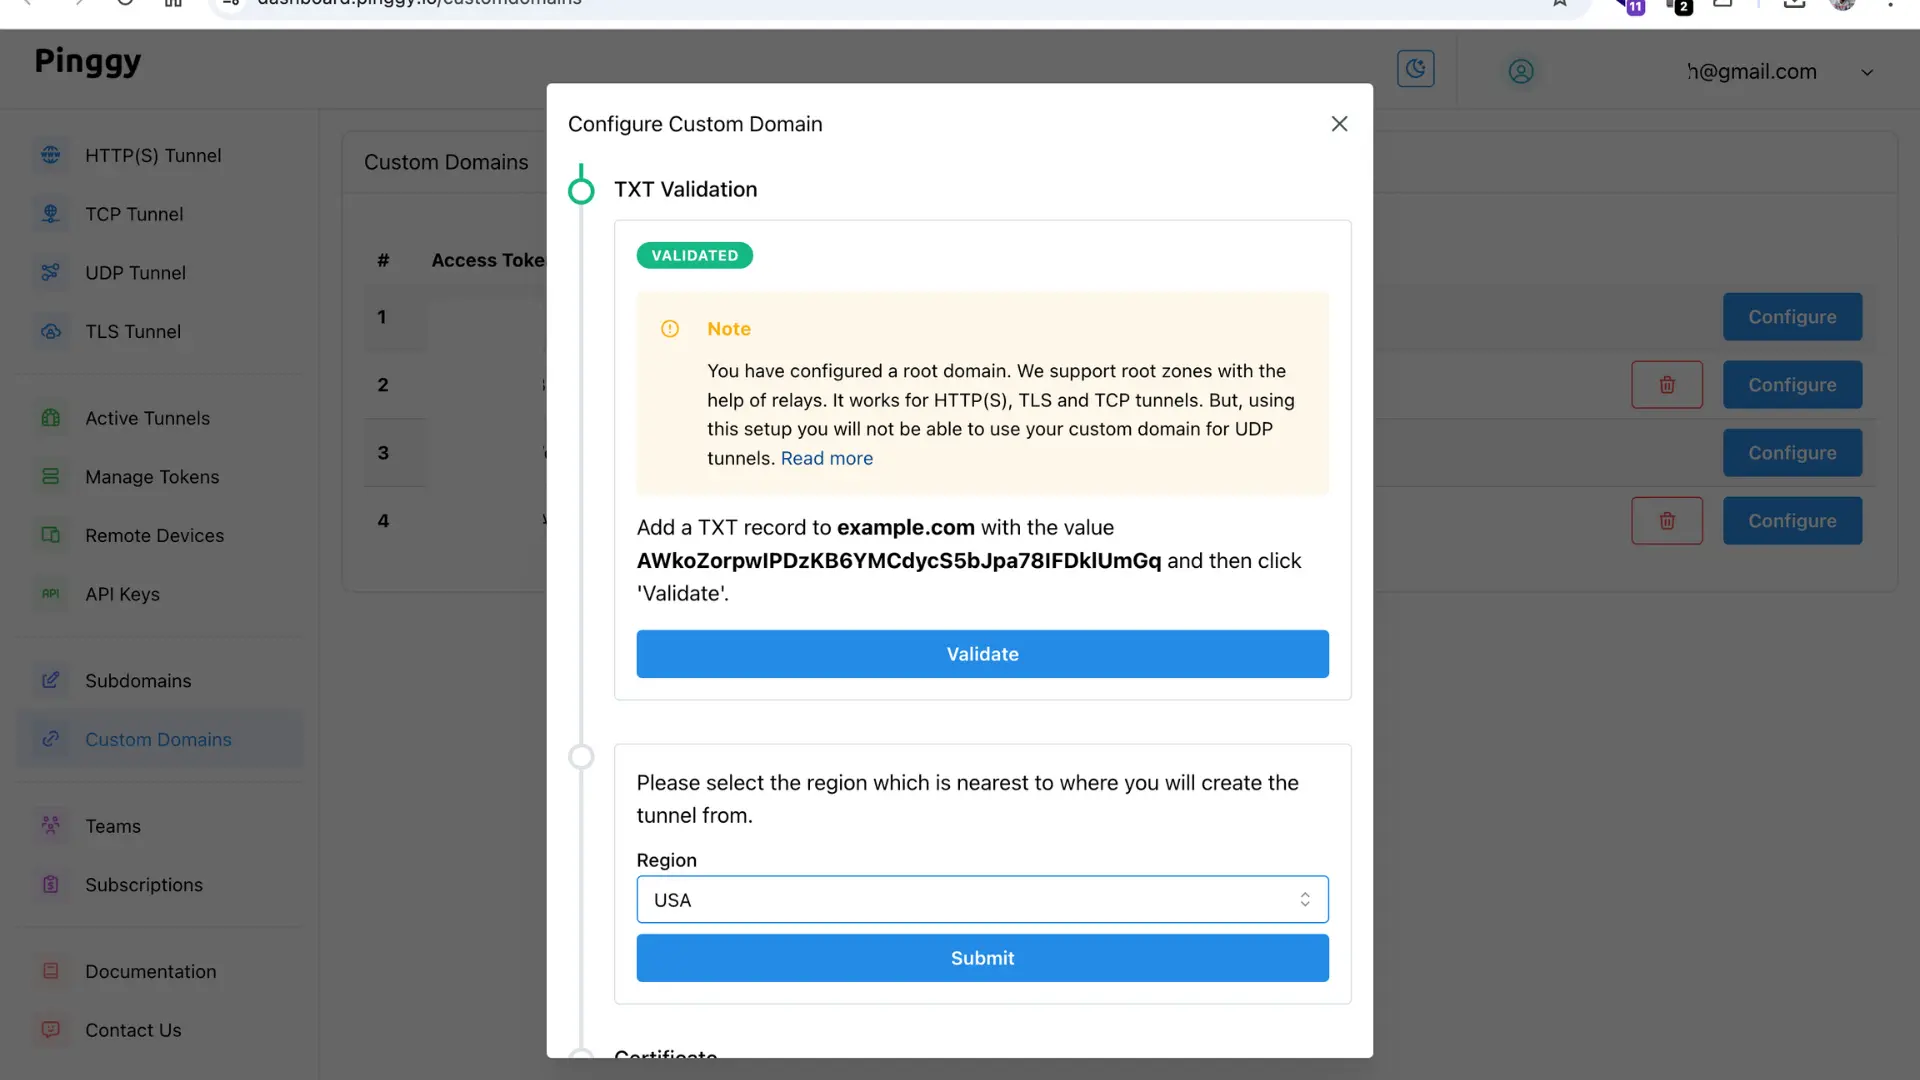
- Click on the **Validate** button to validate the TXT record and proceed to relay setup.
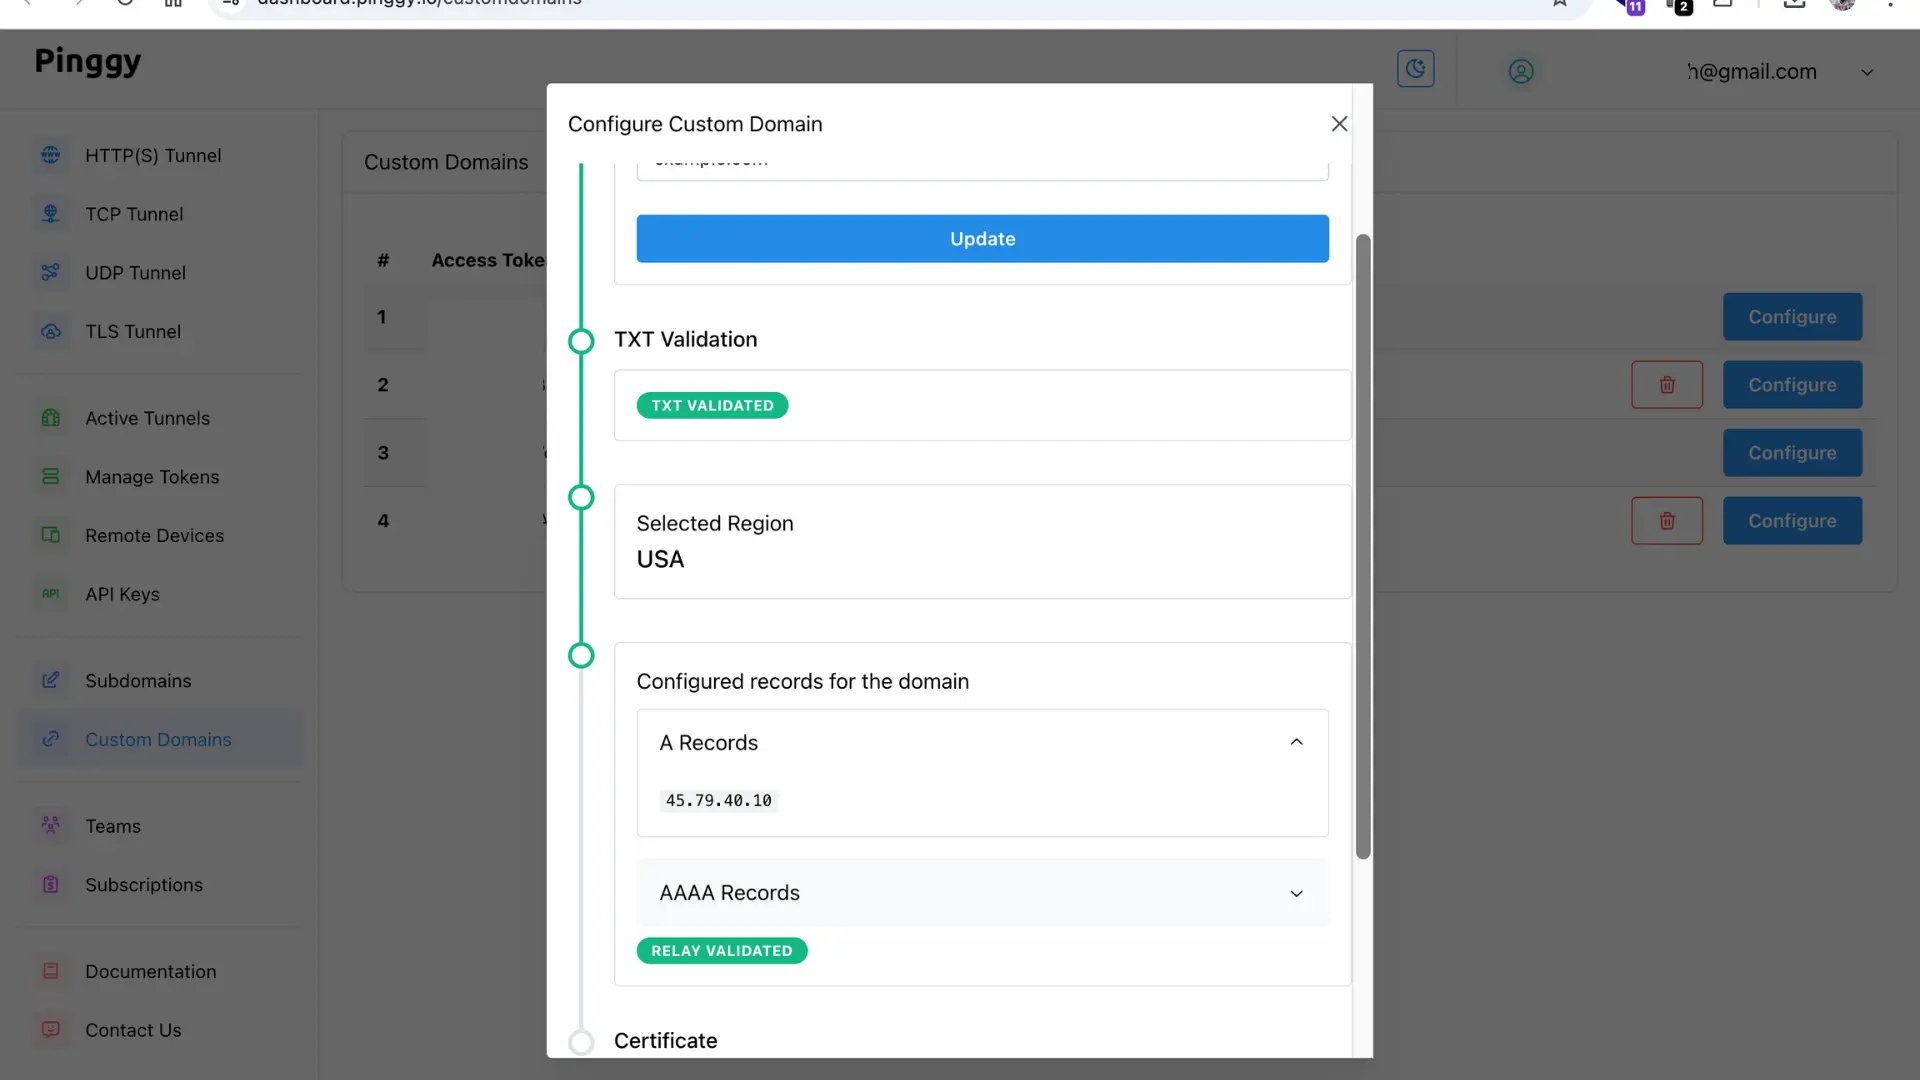
## Update relay records
- Once the `TXT` record is validated, you will be able to choose a relay region.
- Choose the region geographically nearest to you. E.g. If you are located in Canada, you may choose **USA**.
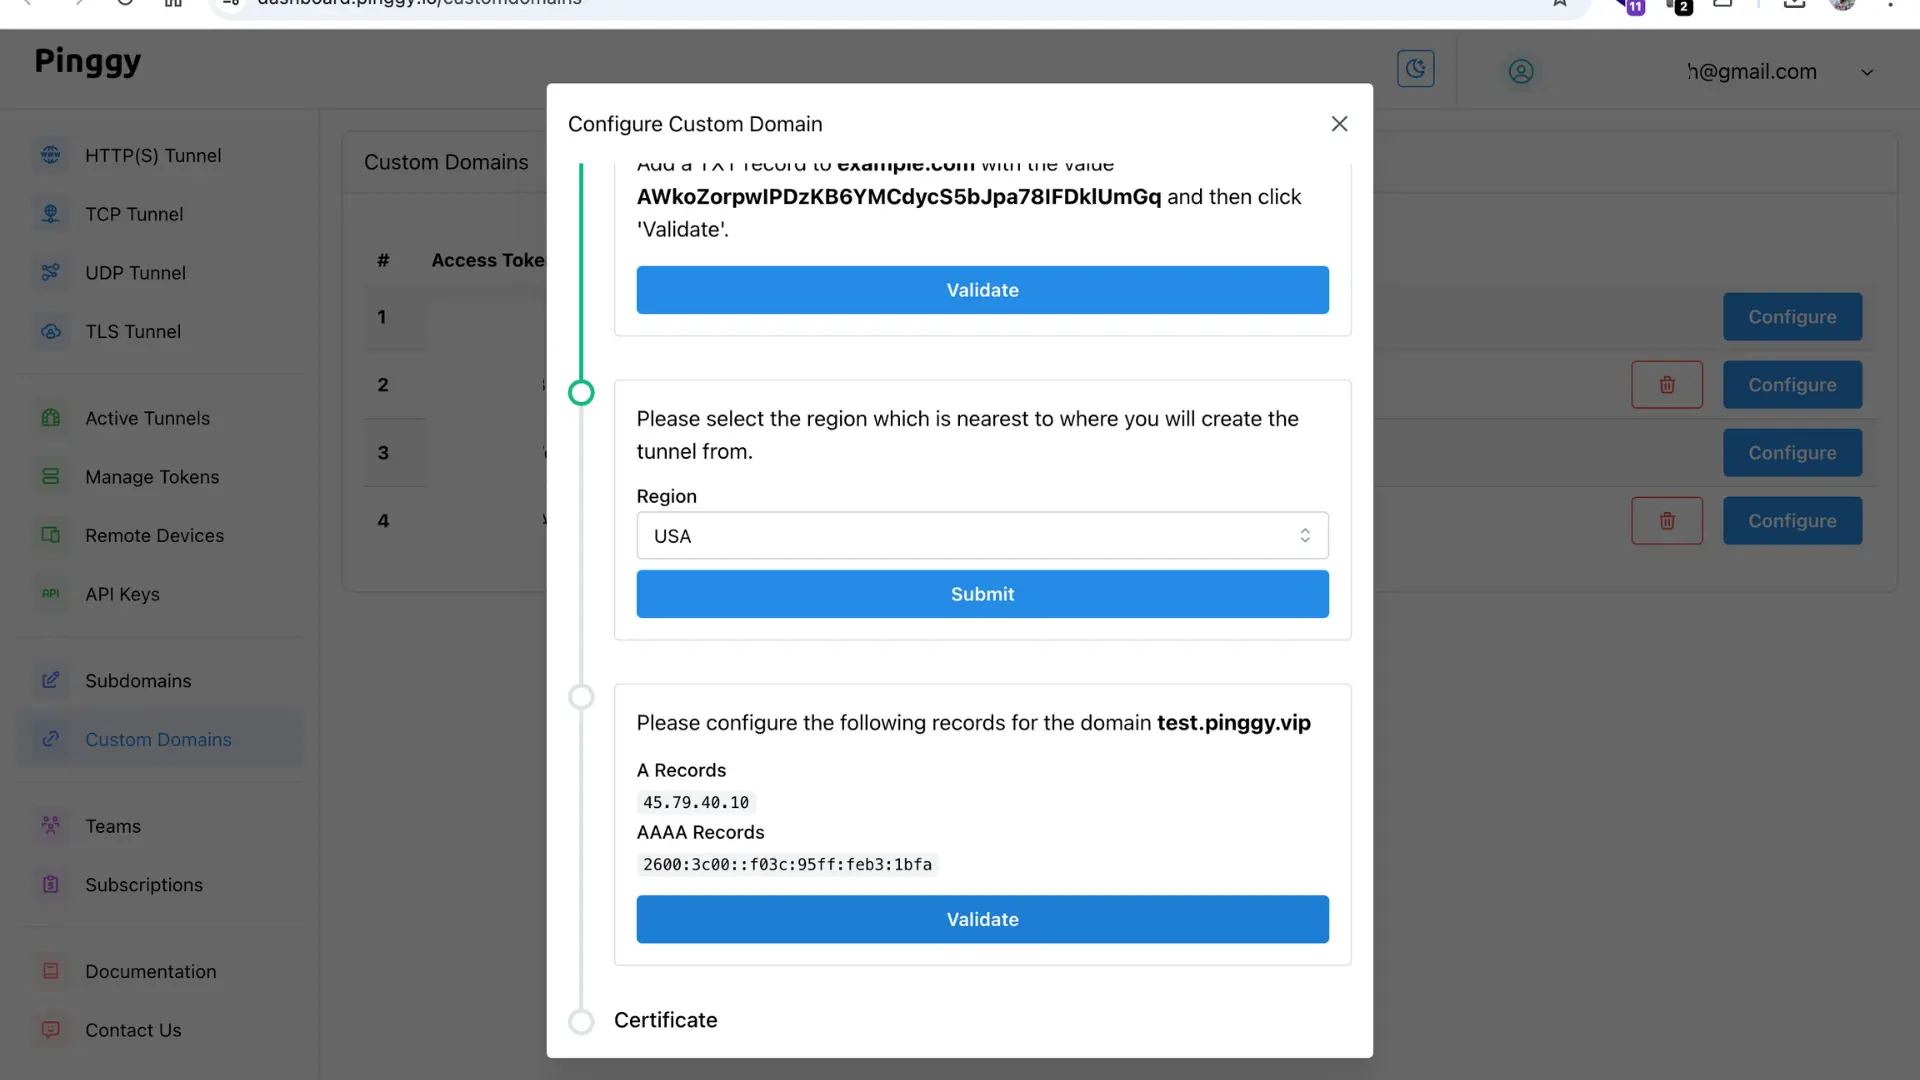
- You will then be guided to set up `A` and `AAAA` records for your base domain. **You need to configure both.**
- For configuring your `A` and `AAAA` records, visit your domain name provider's DNS manager.
- There, add a new DNS record. The record type will be `A` or `AAAA` depending on what you are configuring.
- Host value will be the part of the domain name excluding your base domain. Use `@` if you are using the base domain. For example: `@` in case of `example.com`. Similarly, for `abc.example.com`, host will be `abc`.
- The value of the record will be the value shown in the dashboard. For example: `45.79.40.10`
- Click on the **Validate** button to validate the Relay records and proceed to certificate issuing step.
## Issue Certificate
- Once both TXT and relay records are validated, you can issue a TLS certificate.
- Make sure that **no tunnel is running** (with this token).
- Click on the "Issue Certificate" button.
- Certificate issuing process may take up to a minute.
- After the certificate is issued, restart your tunnels after some time. It may take up to 7 minutes for the certificate to be active.
- You can now access your tunnels with your custom domain such as `example.com`.
Reach out to us at `contact@pinggy.io` if you are facing any difficulty in configuring the custom domain.