# Persistent Subdomain
> Get a stable, persistent subdomain with Pinggy Pro. Simplify URL management for seamless and secure access. Upgrade now for a hassle-free experience.
> Source: https://pinggy.io/docs/persistent_subdomain/
# Persistent Subdomain
Pinggy assigns random URLs for **free** tunnels, such as `rnskg-21-24-129-38.run.pinggy-free.link`.
If you want a URL that does not change every time you create a new tunnel, you need to upgrade to Pinggy Pro.
Once you have upgraded to Pinggy Pro, log in to dashboard.pinggy.io. In the dashboard, you will find your access token.
Example:
```bash
xGBTh6cy58q
```
The dashboard will also contain commands to start a tunnel using your token. A simple example Pinggy command using your token is as follows:
```bash
ssh -p 443 -R0:localhost:8000 xGBTh6cy58q@pro.pinggy.io
```
# Configure Persistent Subdomain
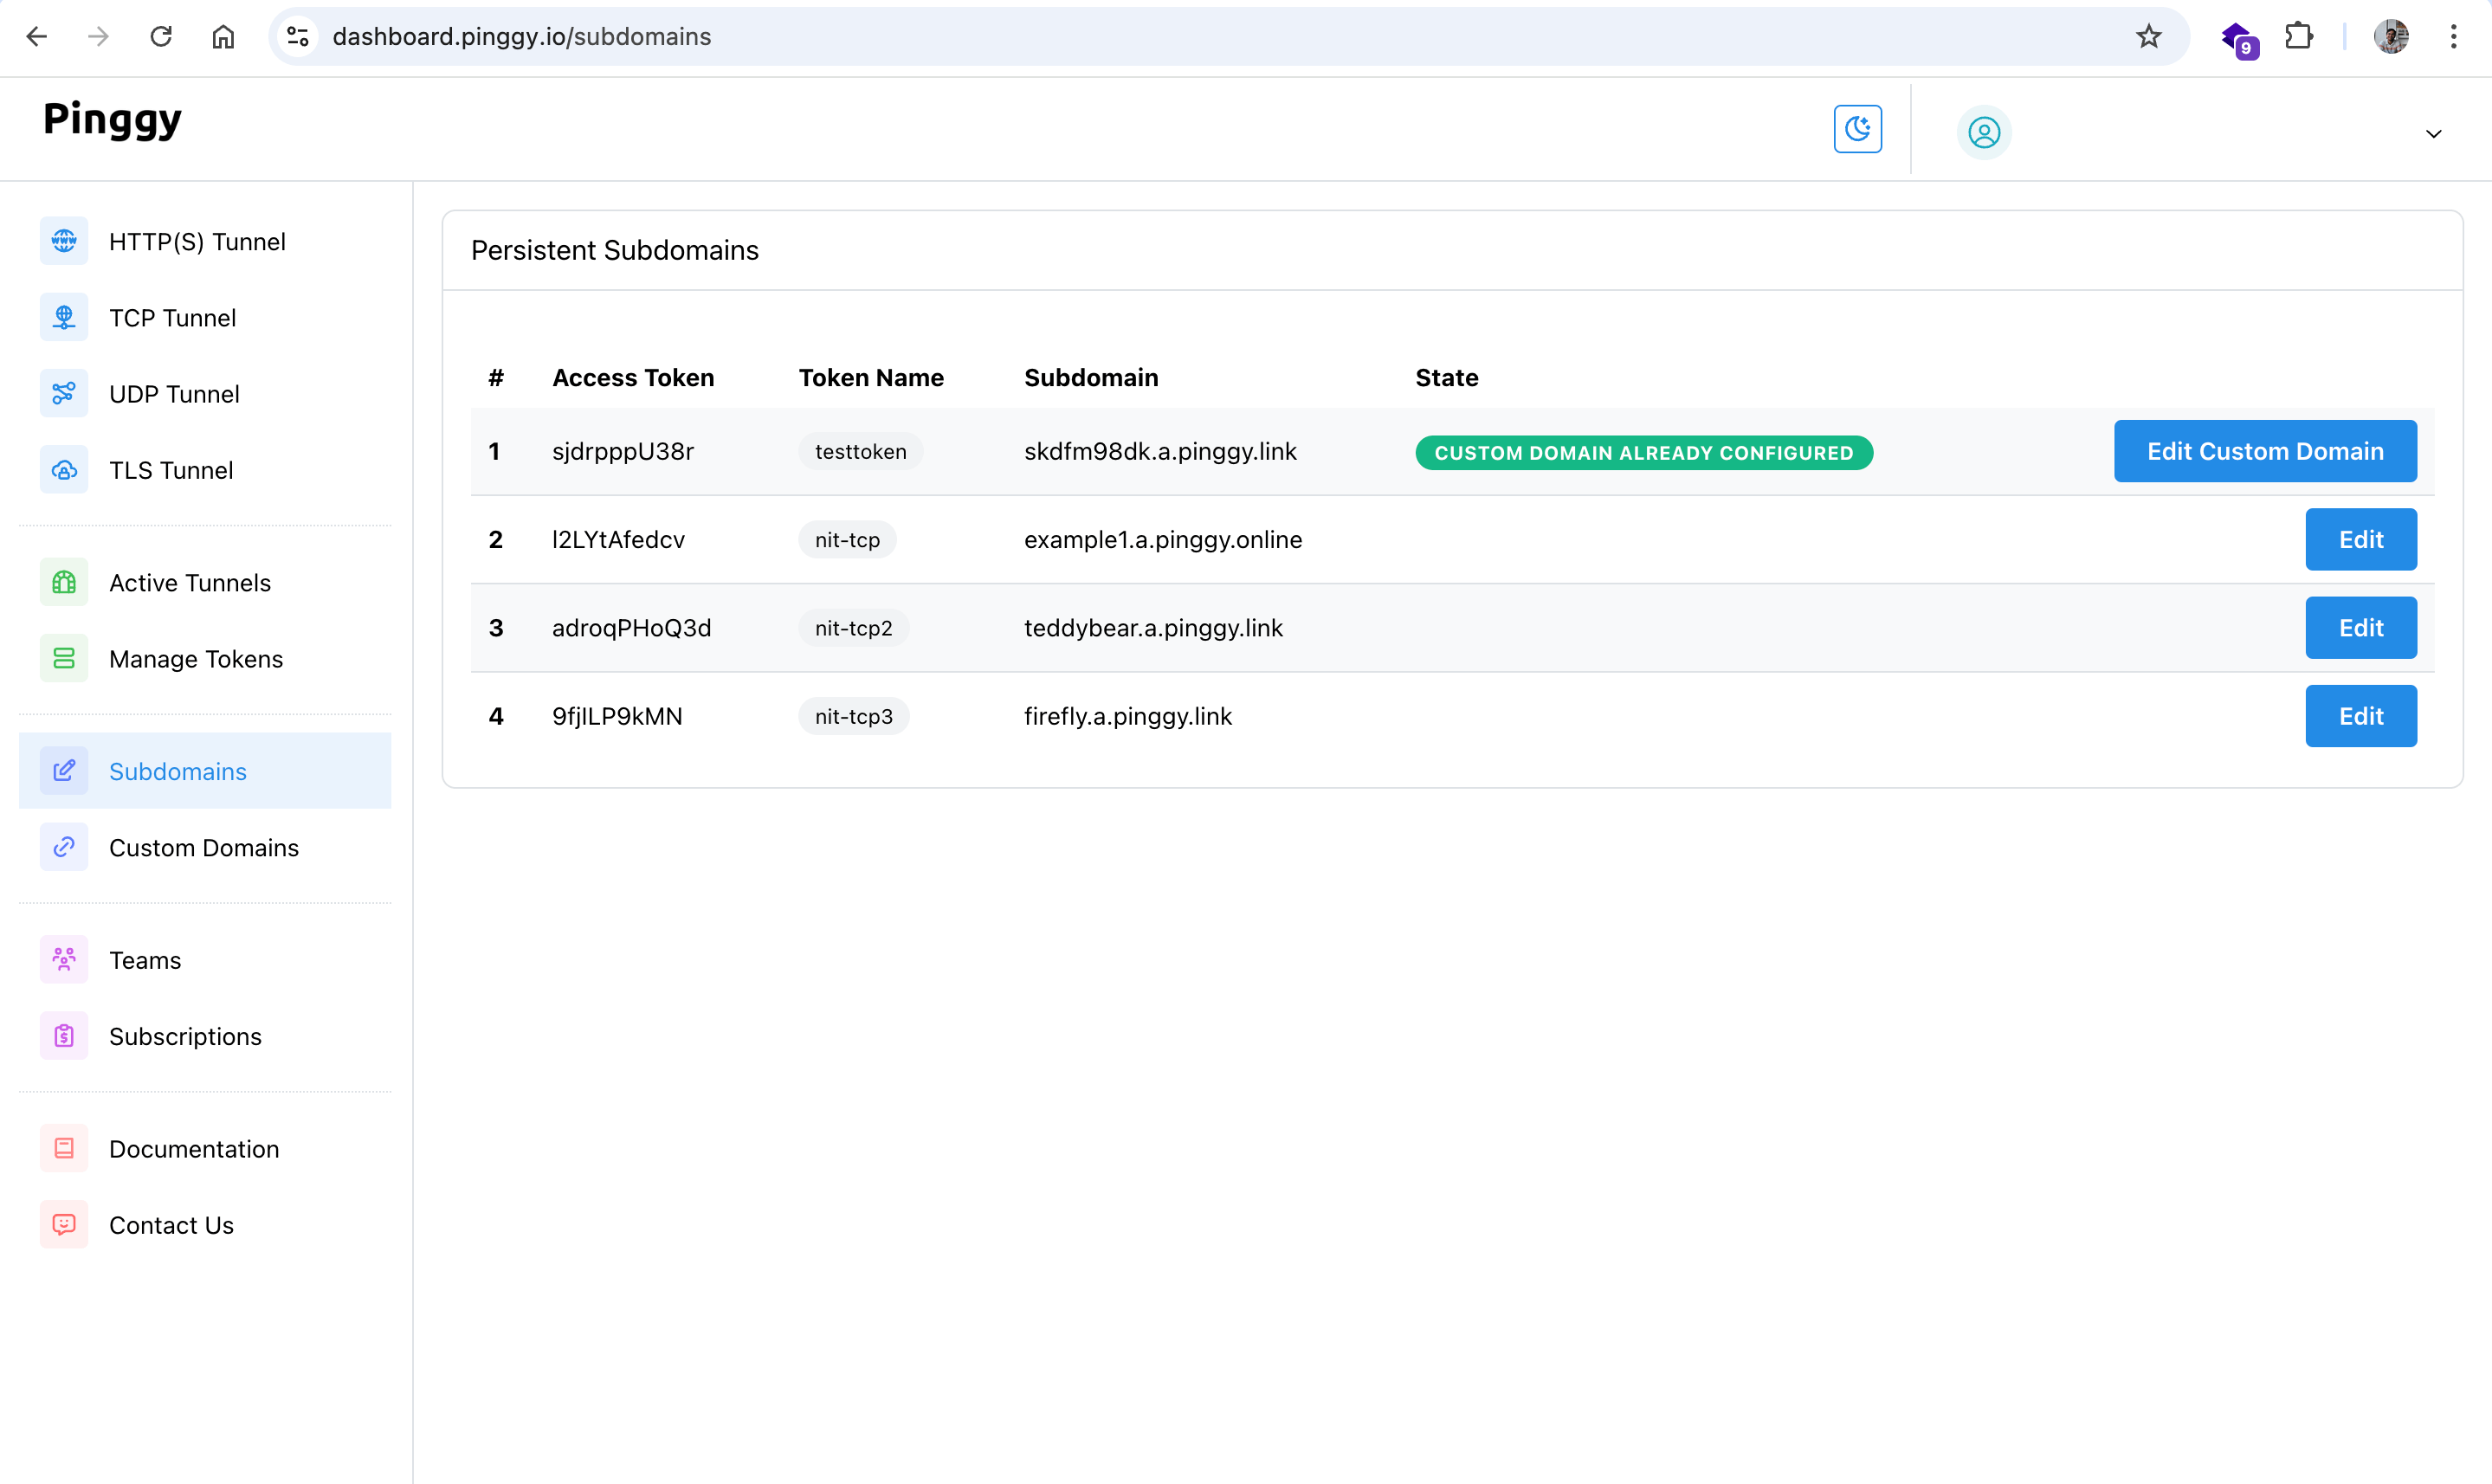
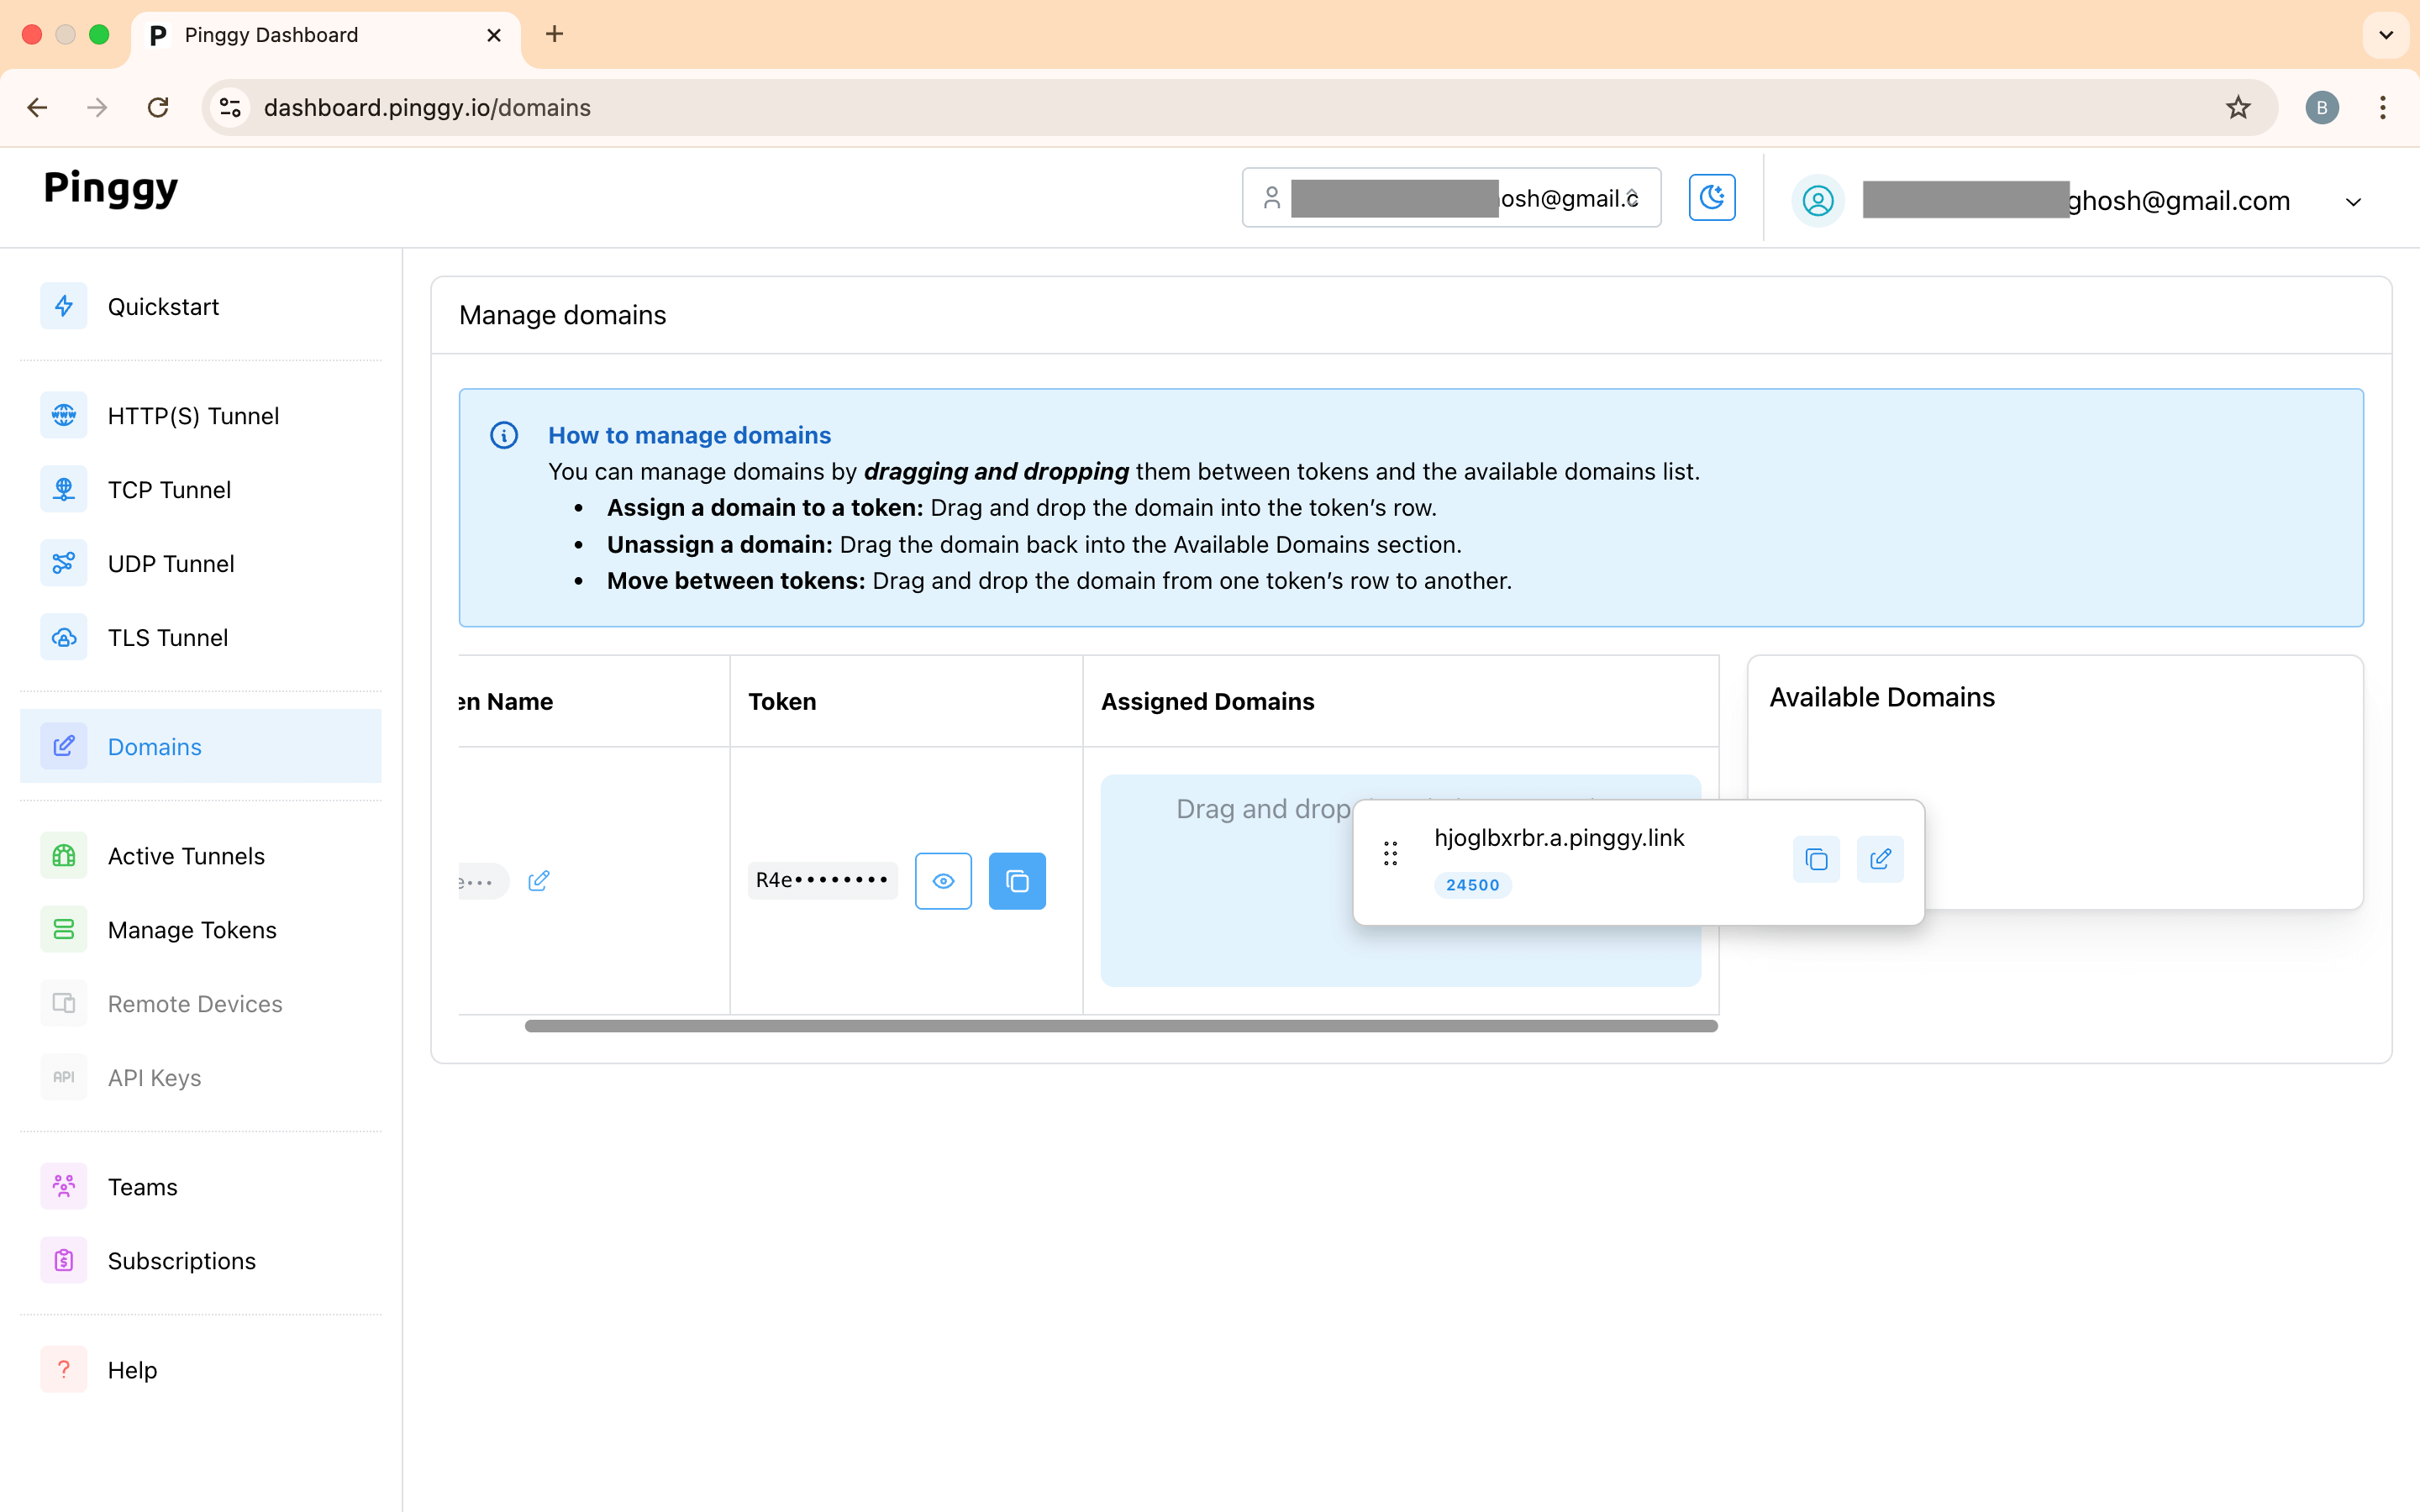
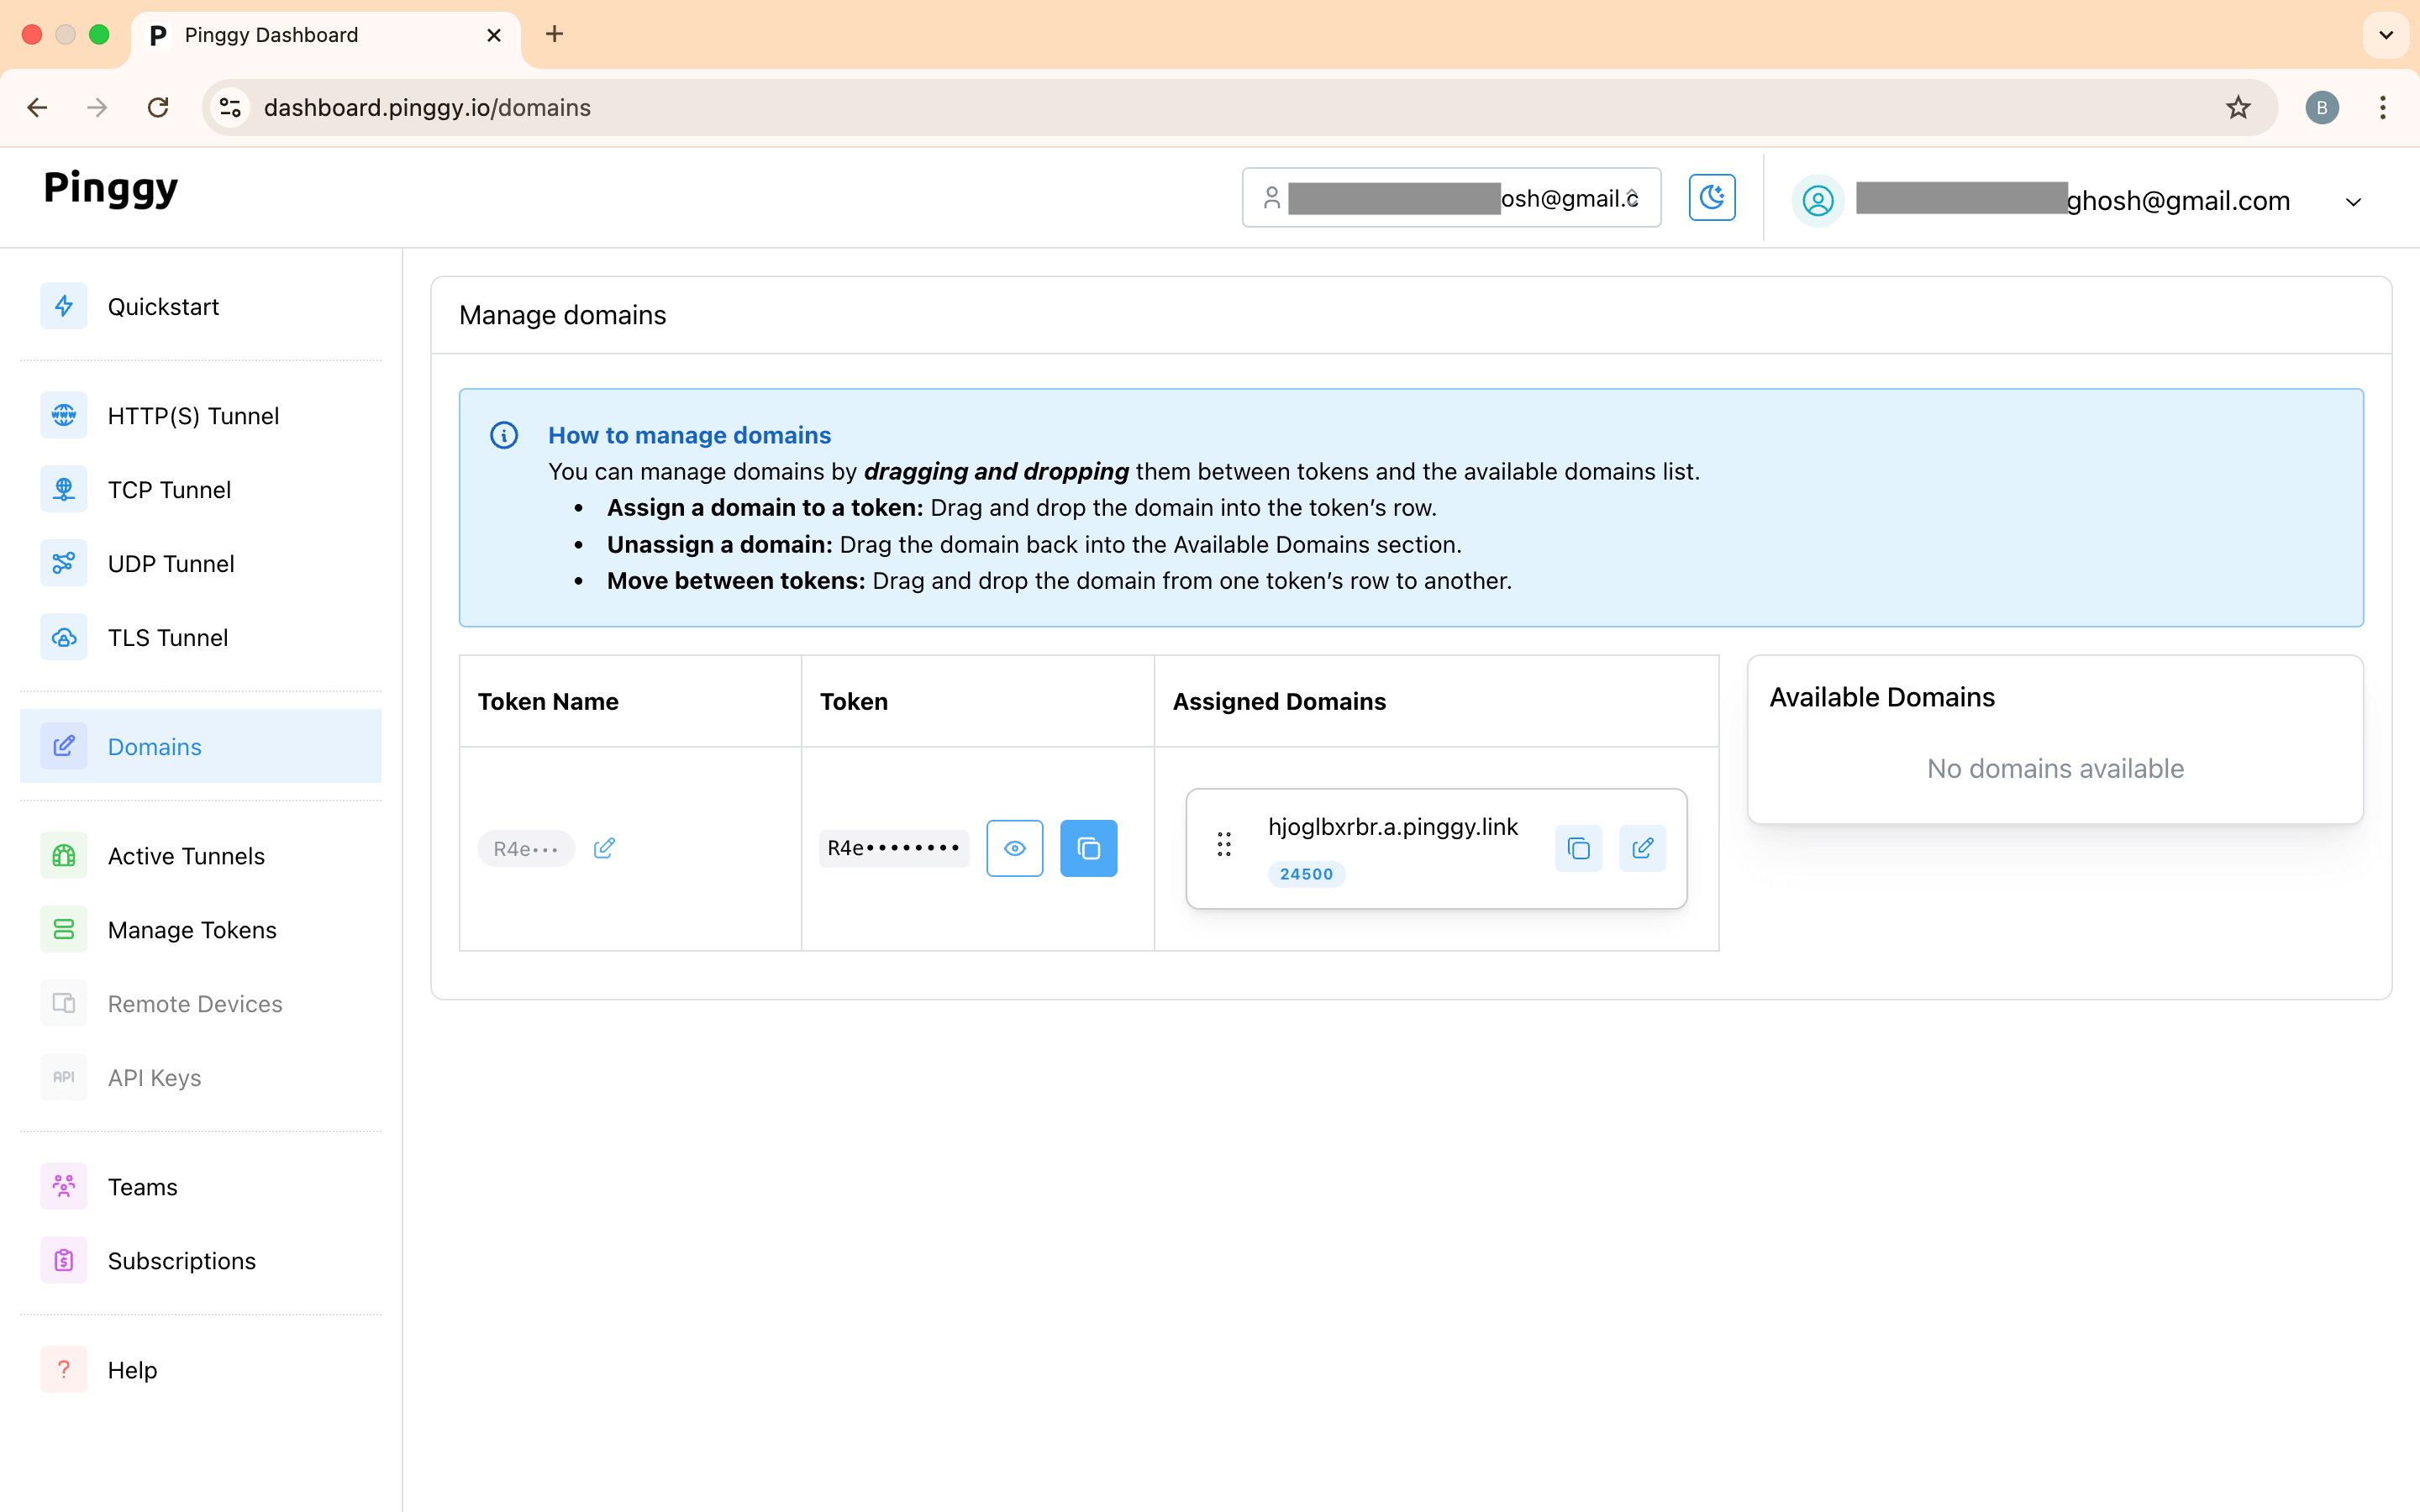
In order to configure your persistent subdomain, first visit dashboard.pinggy.io/domains.
- You will find a list of access tokens and persistent domains.
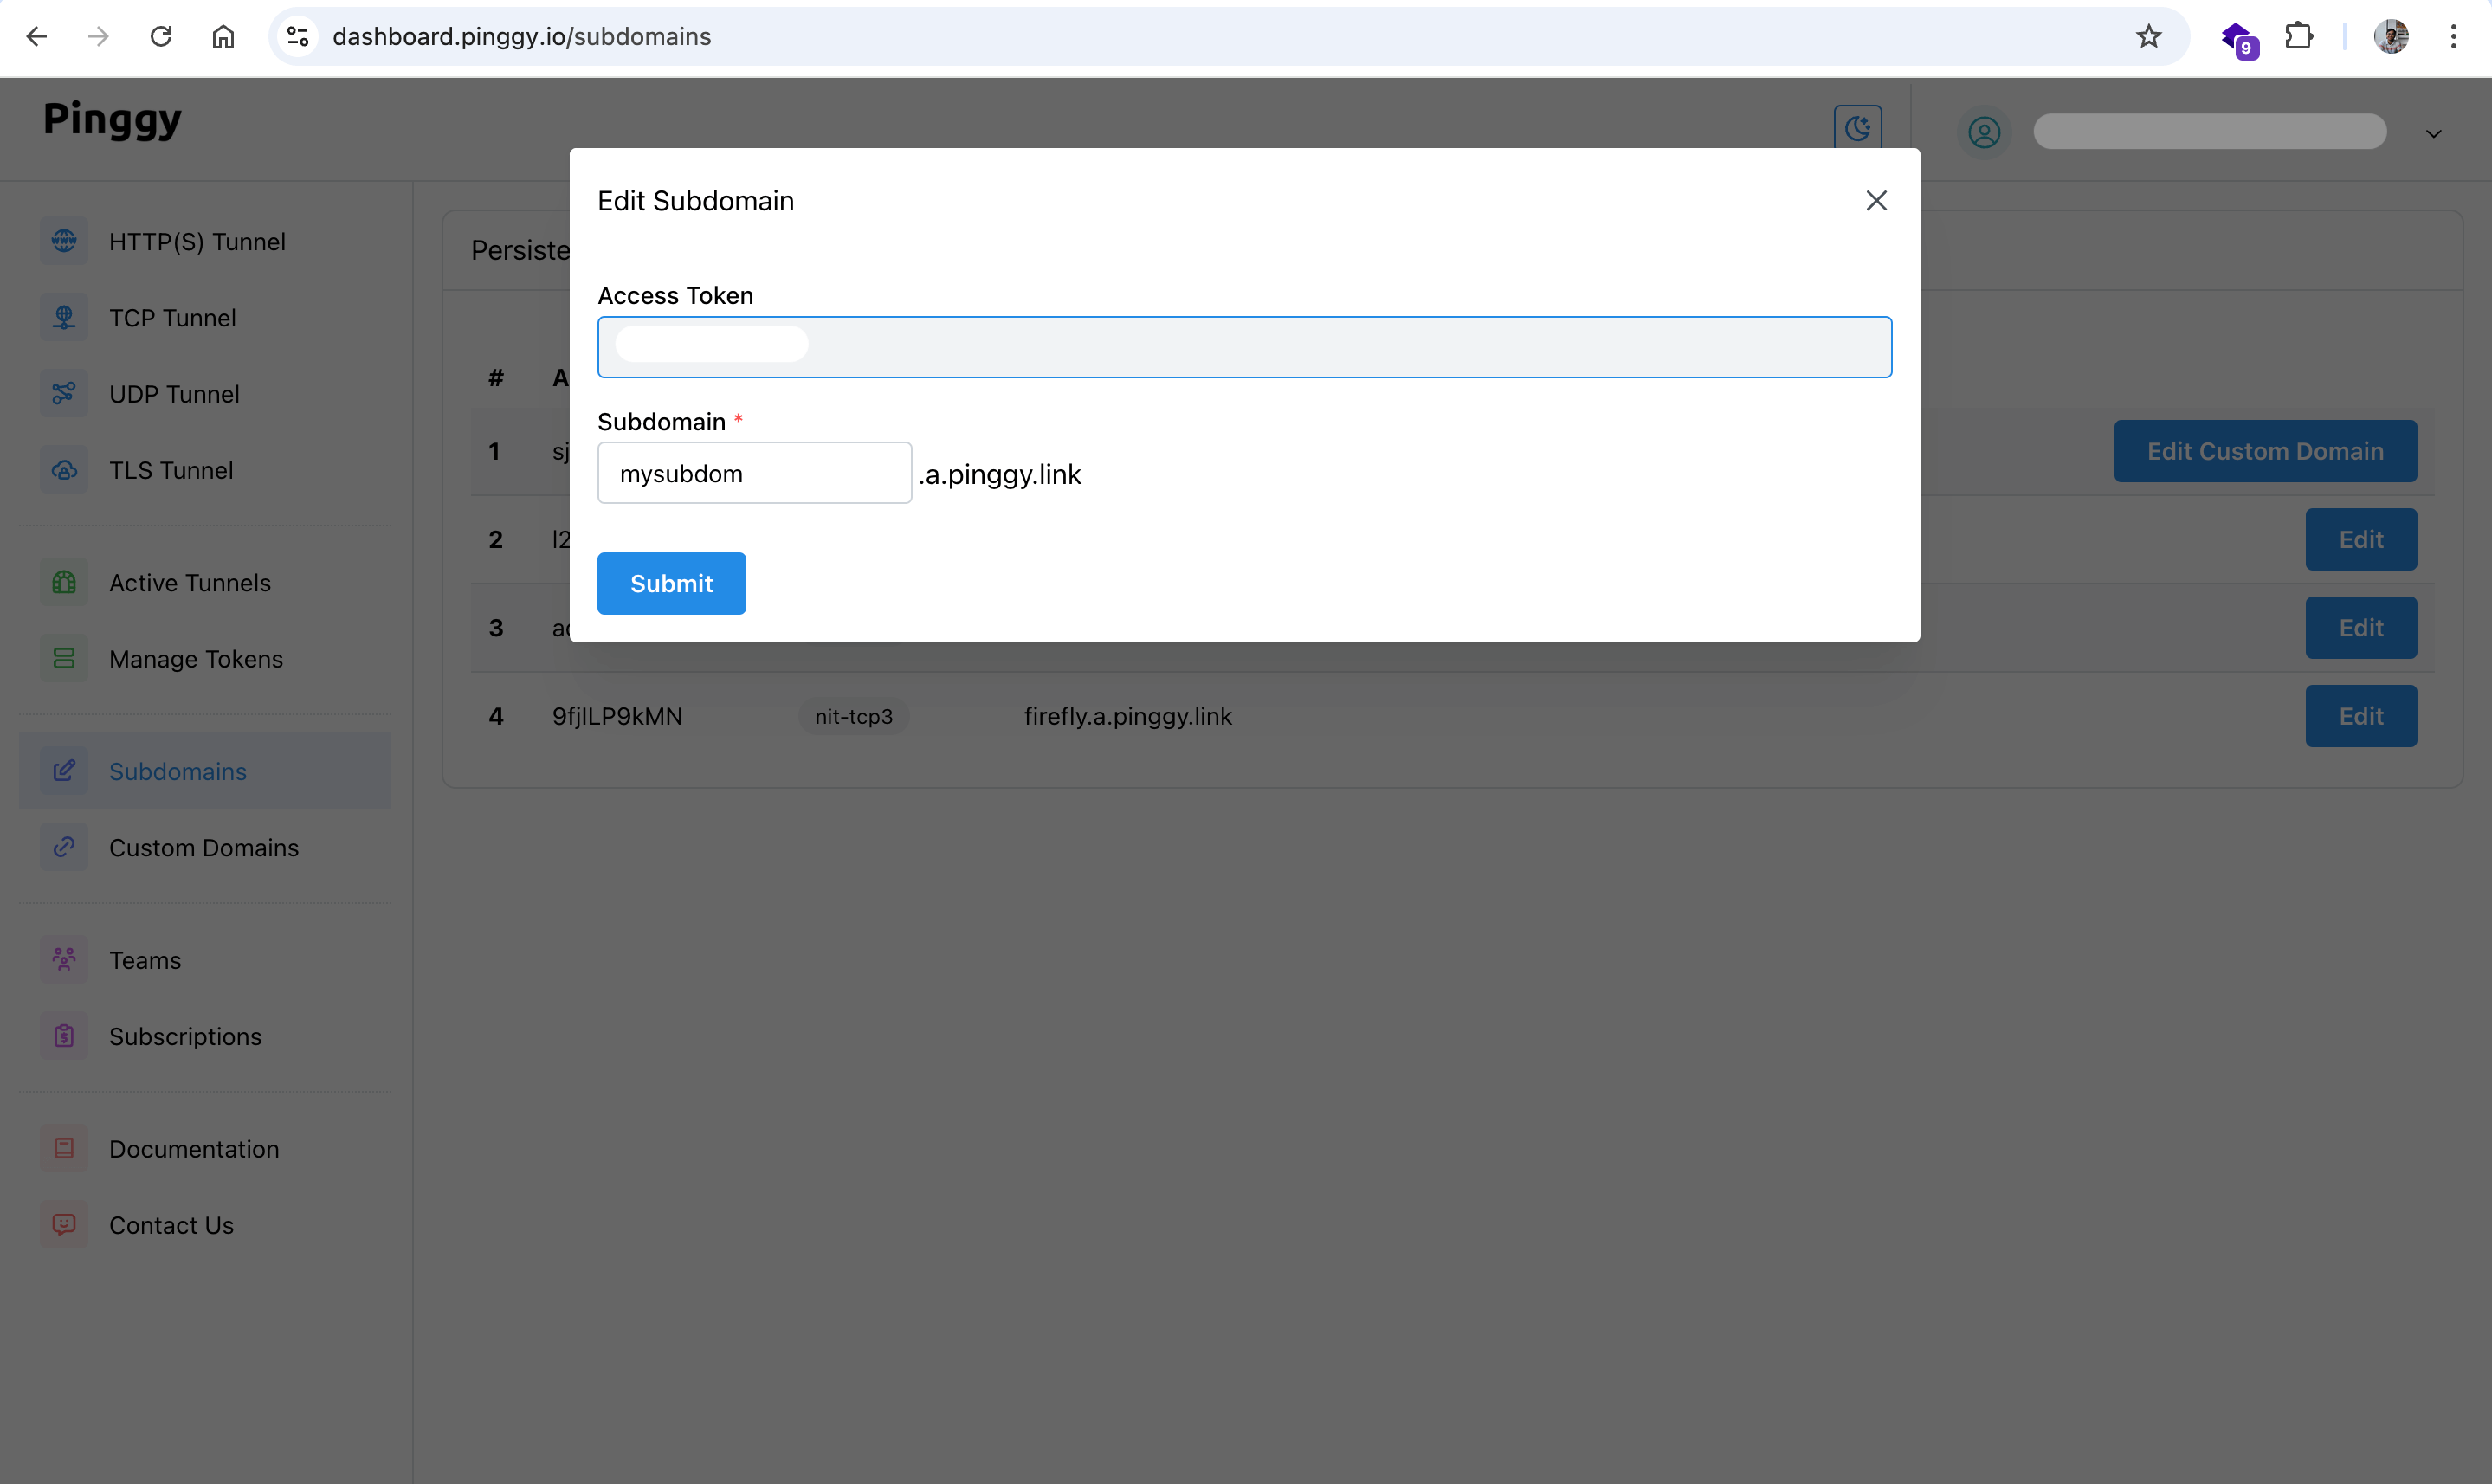
- To edit a subdomain, click the **edit** icon next to the domain card, make your changes, and save the persistent subdomain.
- To use a persistent subdomain, **drag it to assign it to a token**.
- Then, use that token to start a tunnel.
> Note that if you have already configured a custom domain for your token, you will need to delete the custom domain configuration first in order to change the subdomain.