Run OpenCode Remotely from Any Browser with Pinggy
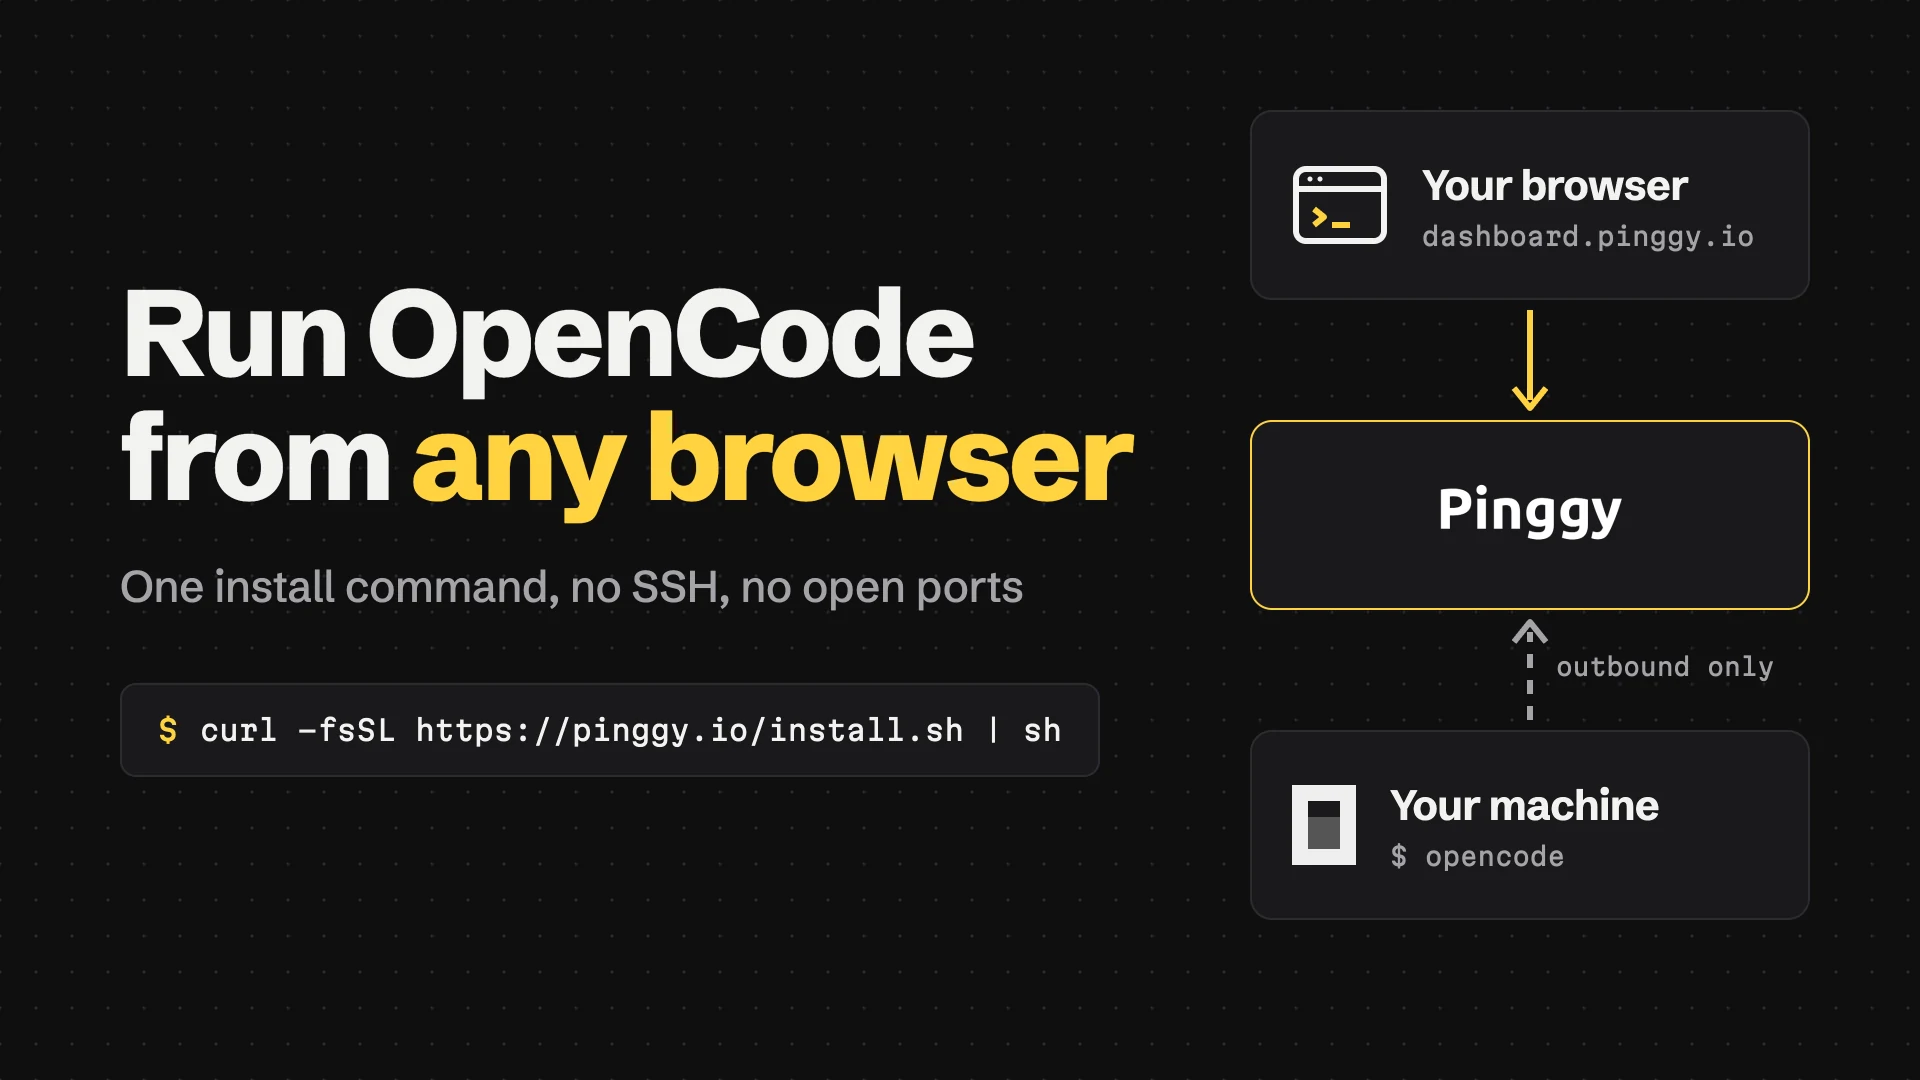
Access your terminal from anywhere, right in your browser, with Pinggy.
Install the Pinggy CLI on the machine where your code lives, then open that machine’s terminal from the Pinggy dashboard on any browser and run OpenCode in it. The machine only makes an outbound connection, so there is no SSH server, open port or public IP to set up.
Summary
- Install Pinggy and sign in:
curl -fsSL https://pinggy.io/install.sh | sh(Windows:irm https://pinggy.io/install.ps1 | iex). Enter your email and the 6-digit code. - Install OpenCode:
curl -fsSL https://opencode.ai/v2/install | bash - Open the terminal: go to the Pinggy Devices page, click your device, open Terminal, and click New shell.
- Run OpenCode:
opencode
How it works
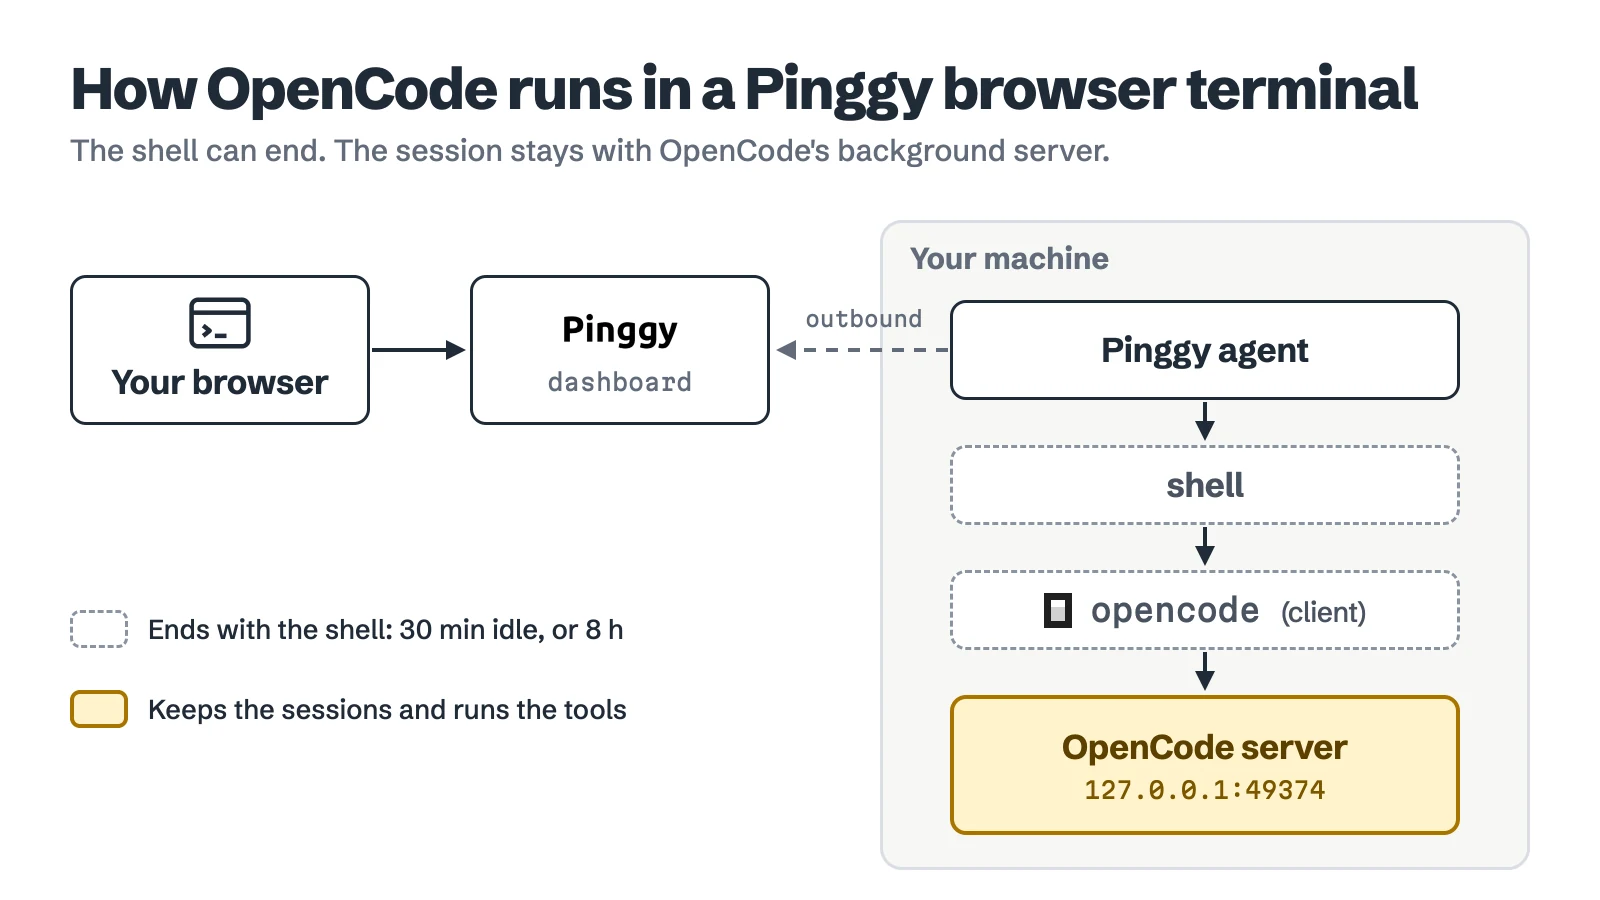
Two pieces do the work. Pinggy Devices arrived in Pinggy CLI v0.6.2 on November 2, 2026. The CLI runs on your machine as an agent and keeps one outbound connection open to the dashboard. Your browser talks to the dashboard, and the dashboard passes your keystrokes down that connection into a shell on the machine. Nothing connects inbound, so it works behind NAT, CGNAT and firewalls. Since v0.6.4 (November 5), the agent runs in the background by default.
OpenCode 2 is a client and a server. The opencode command you type is a terminal client. A shared background server, which OpenCode starts on first use, owns the sessions, permissions and tool execution, and listens on 127.0.0.1:49374 on macOS and Linux. That split is what makes it a good fit for a browser terminal: the shell can go away without taking teh session with it.
OpenCode is MIT-licensed and sits at 225,629 GitHub stars as of November 9, 2026. I ran the whole flow that day on an Apple Silicon MacBook with Pinggy CLI 0.6.4 and OpenCode 2.2.6, released November 6, adding the machine with the dashboard’s token command. Most screenshots come from that run; a few were taken on November 10 in the dashboard’s dark theme, and two come from our Claude Code guide. Tokens, emails, hostnames and usernames are placeholders. Limits and plan numbers come from the Pinggy Devices docs.
Step 1: Install the Pinggy CLI and sign in
On the machine you want to reach, run:
curl -fsSL https://pinggy.io/install.sh | shOn Windows, run this in PowerShell instead:
irm https://pinggy.io/install.ps1 | iexThe script installs the CLI without sudo, then runs pinggy device login. Enter your email and type the 6-digit code it sends. You can also click Approve sign-in in the email, but only if the page shows the same Device Code your terminal printed. An email with no Pinggy account gets a new free account, and the machine is added as a device named after its hostname.
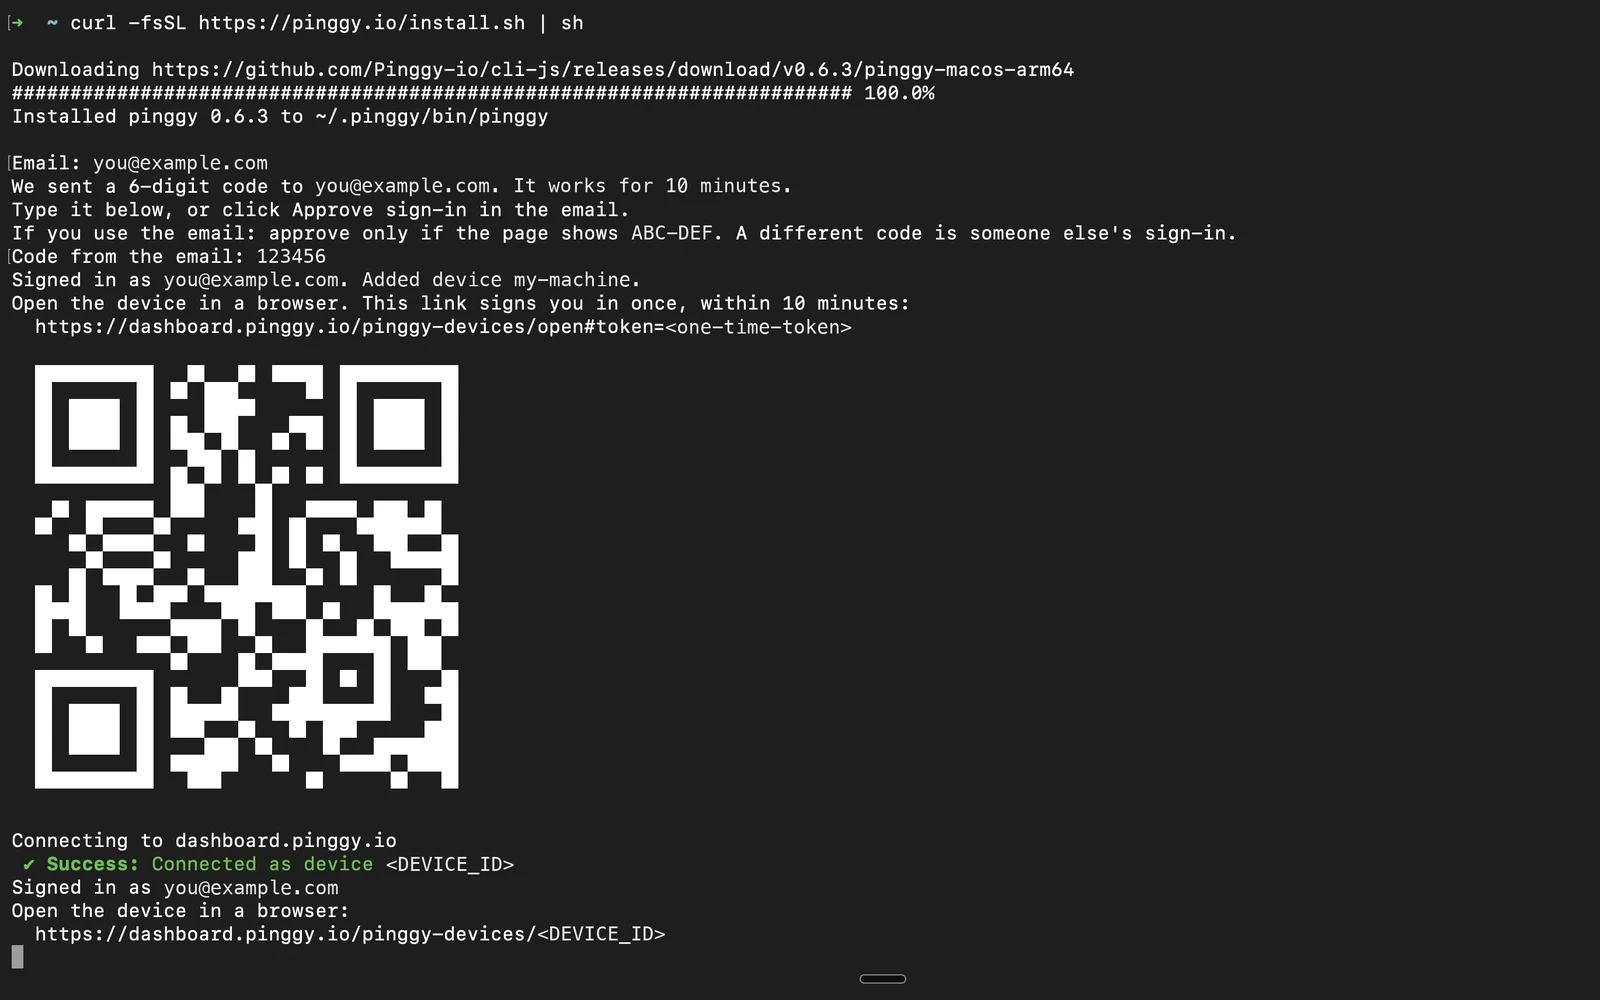
Screenshot: the email sign-in on Pinggy CLI 0.6.3, from our Claude Code guide. On 0.6.4 the agent then starts in the background instead of staying in the terminal. Email, code, link and IDs are placeholders.
When sign-in finishes, the CLI prints a link and a QR code to the device’s page in the dashboard, starts the agent in the background and exits. The agent keeps running after you close the terminal, but not after a reboot. Run pinggy device connect again after one; the token is saved, so it asks nothing. A CLI older than 0.6.4 keeps the agent in the foreground unless you add -b, so run the install command again to update it.
Already have a Pinggy account? Click Add device on the Devices page and give the machine a name. The dashboard shows a command with the device’s token in it, and the device’s Overview tab keeps it in a Connect this device card. It needs no email and no code, so it also works on a machine you only reach through a script:
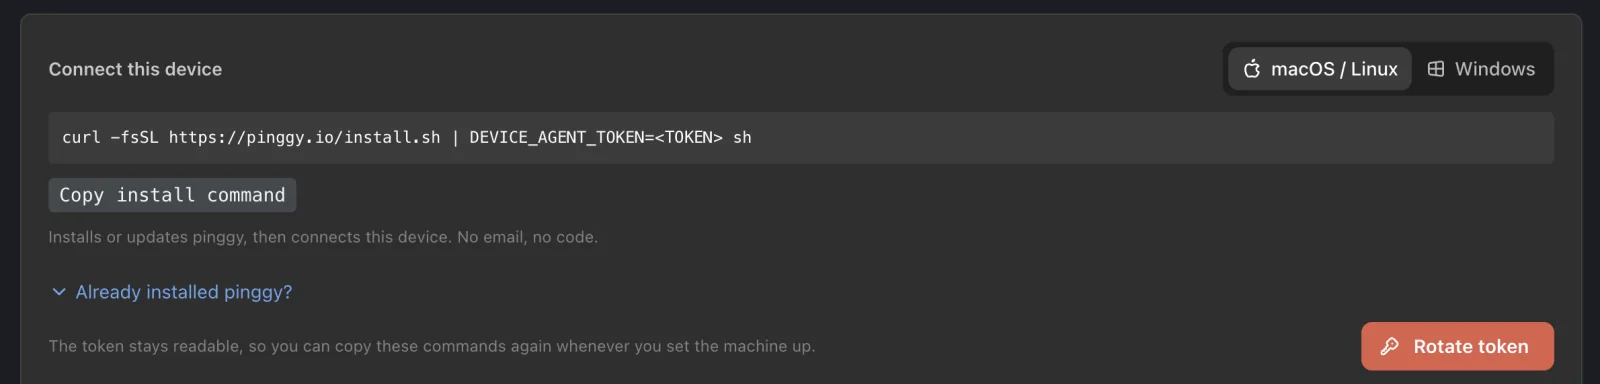
Screenshot: dashboard.pinggy.io in the dark theme, November 10, 2026. The token is a placeholder.
Run it on the machine. On a Mac that already had the CLI, it checked the version and connected straight away:
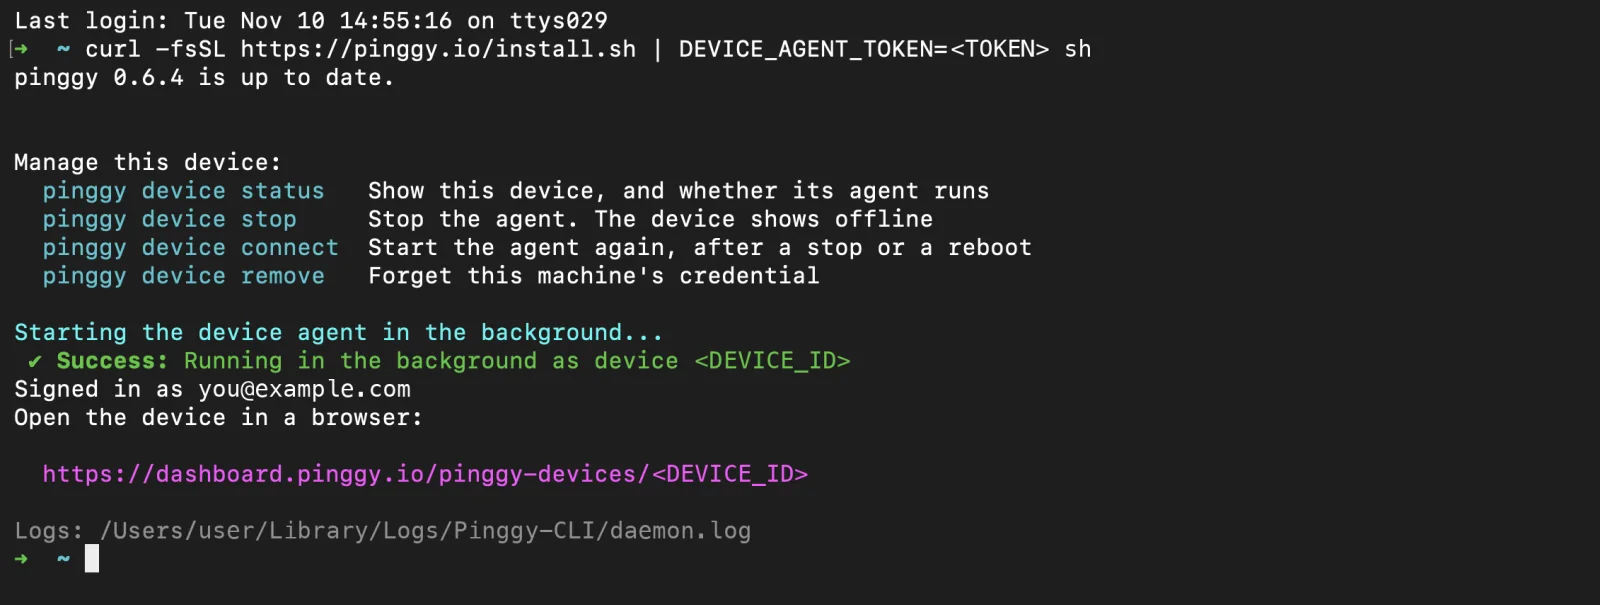
Screenshot: macOS Terminal, November 10, 2026. Token, device id, email and username are placeholders.
If the machine was already a device on another account, the CLI says so and leaves that old device in its dashboard, offline. If the CLI is already installed, pinggy device connect --token <TOKEN> does the same without the download.
Step 2: Install OpenCode on the machine
Do this at the machine, or from the browser shell in step 3:
curl -fsSL https://opencode.ai/v2/install | bashnpm install -g @opencode/cli and brew install anomalyco/tap/opencode-v2 work too. Windows package managers aren’t supported; the docs page has a standalone Windows build instead.
OpenCode 1 and 2 both install an opencode command. The v2 curl installer replaces a v1 binary, which is what happened to the OpenCode 1.3.10 on my MacBook, and a v1 installed through a package manager should be removed first. V2 kept my existing config, default model included, but V1 plugins don't run in V2.
OpenCode 1 runs in the browser terminal too. Here’s 1.3.10 in the dashboard’s dark theme:
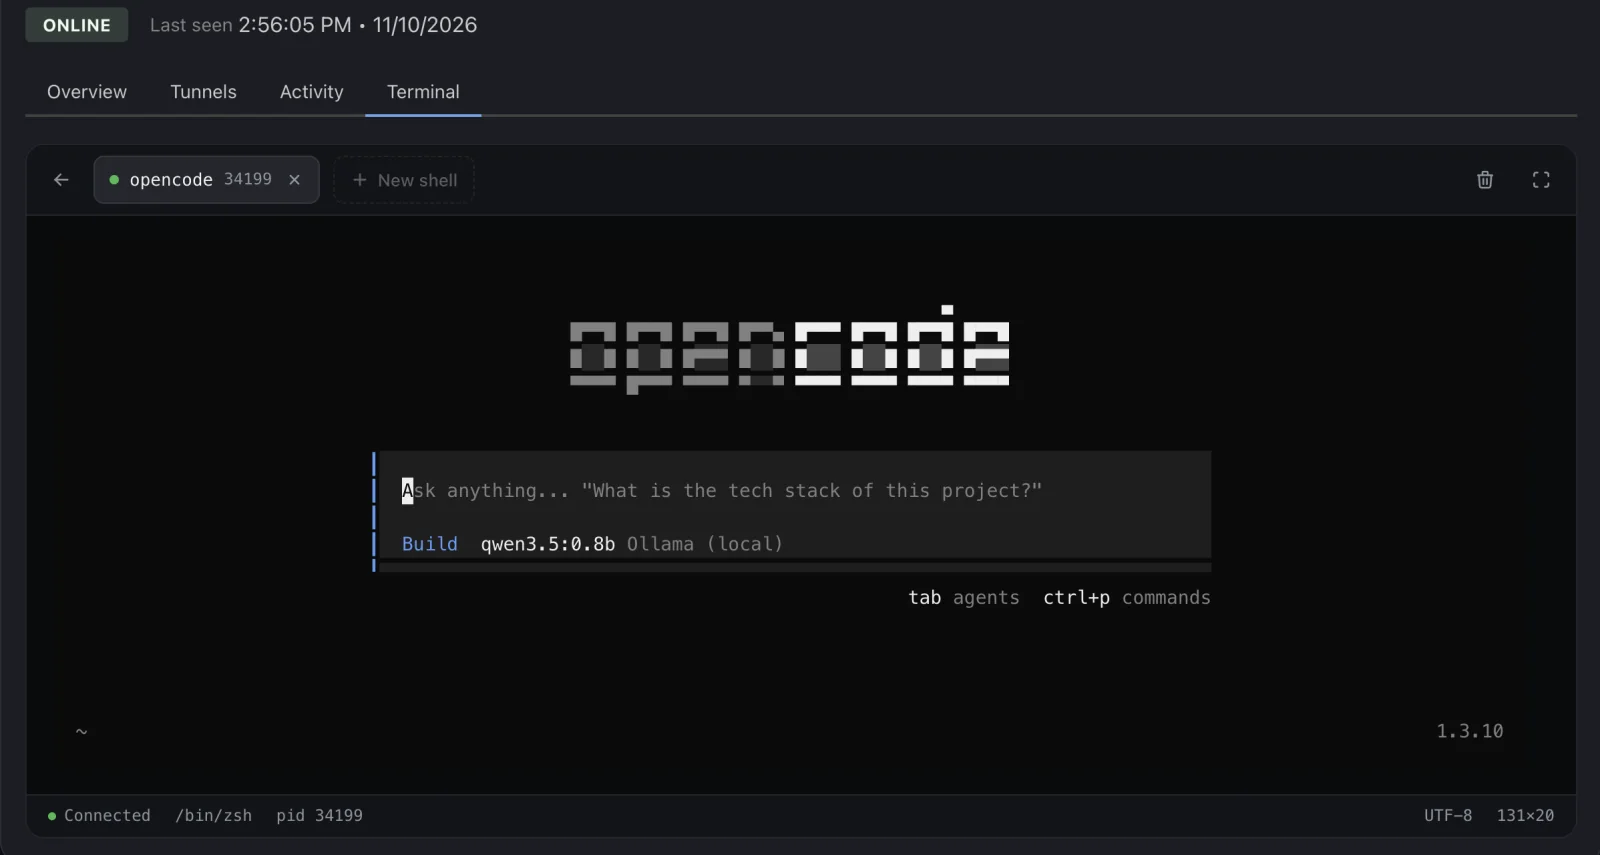
Screenshot: dashboard.pinggy.io, November 10, 2026. OpenCode 1.3.10 with a local Ollama model.
The rest of this guide uses OpenCode 2, whose background server is what keeps a session going after the shell ends.
You don’t need an account to start. On November 9, opencode models listed ten free models, Big Pickle, DeepSeek V4.1 Flash Free and GLM-5.3-Flash Free among them. OpenCode stores your data when you use them, though, so for private code connect your own provider with /connect in the TUI or opencode auth login. An API key is easy to paste in from the browser shell. For providers that log in through a browser, I’d connect while you’re still at the machine.
Step 3: Open the terminal and run OpenCode
Open the Pinggy Devices page and click your device. The Overview tab shows whether it’s online, with its hostname, OS, CPU and memory.
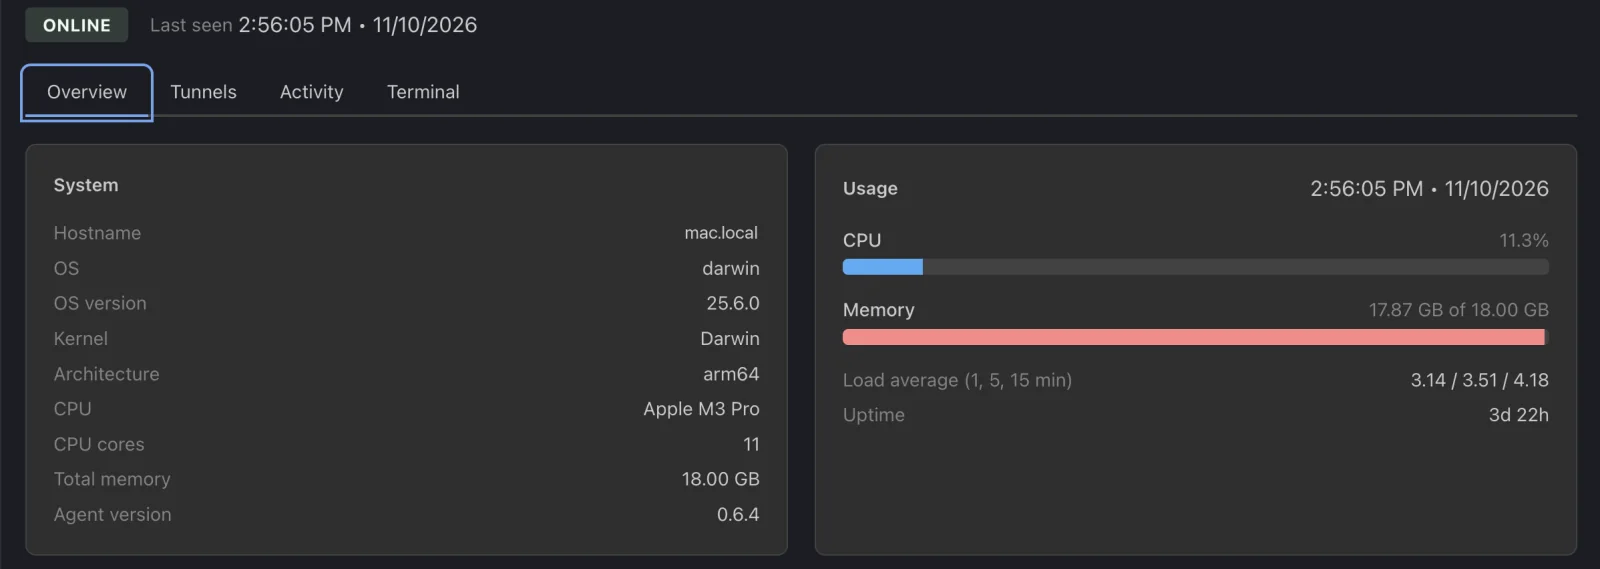
Screenshot: dashboard.pinggy.io, November 10, 2026. The hostname is a placeholder.
Open the Terminal tab and click New shell. Each shell gets its own tab, and it runs as the user who ran pinggy, so OpenCode sees that user’s files, git config and saved provider logins:
cd ~/code/storefront   # your own project folder
opencode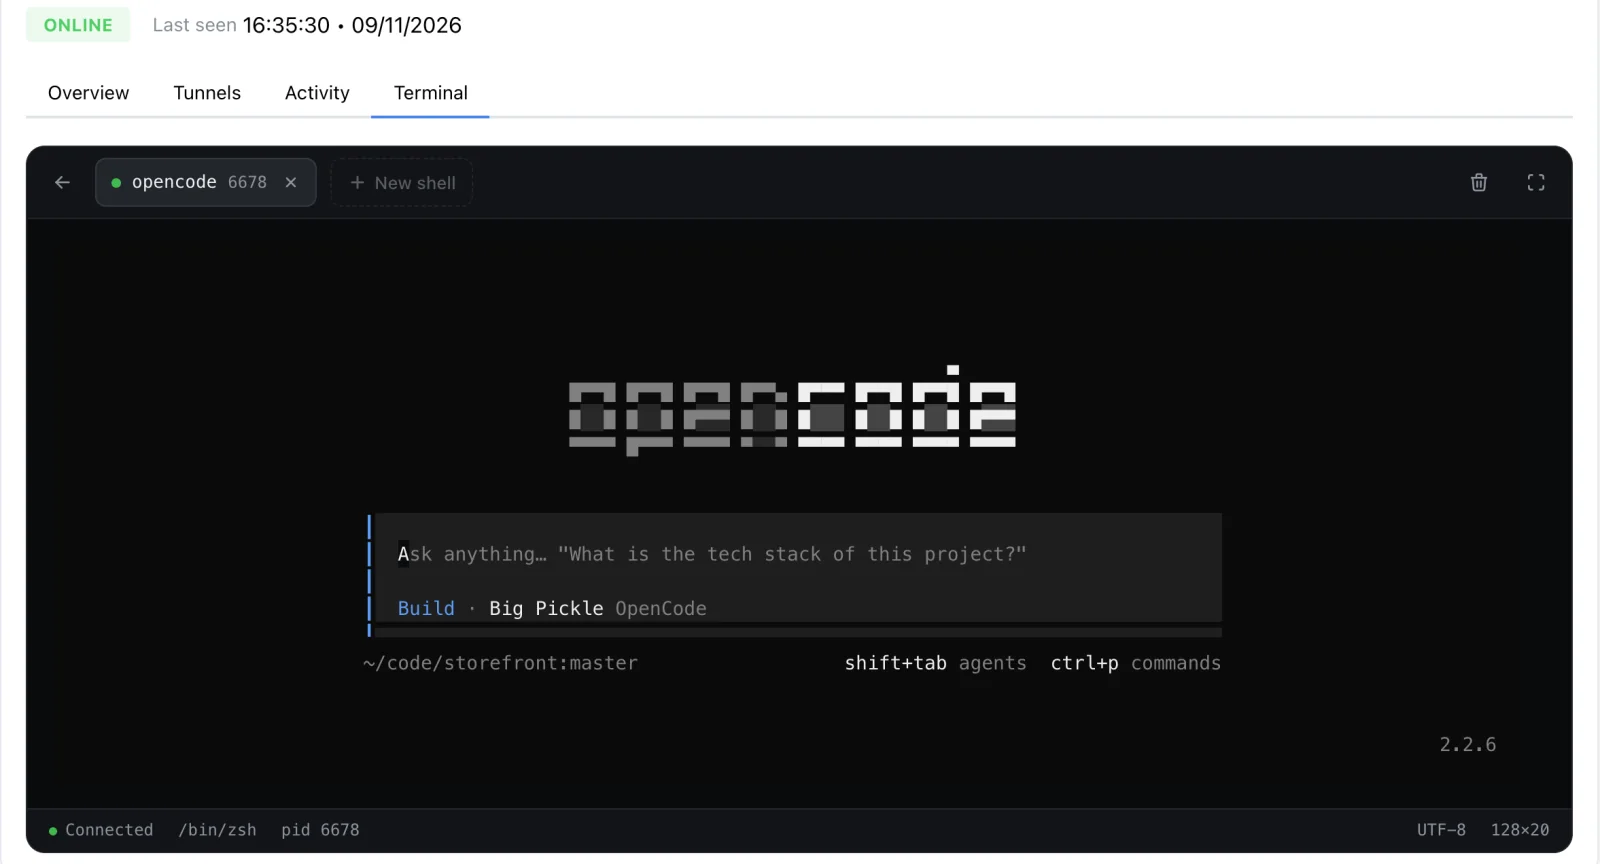
Screenshot: dashboard.pinggy.io, November 9, 2026. The shell runs on the MacBook; the browser only draws it.
OpenCode 2.2.6 shows a “What’s new” dialog the first time it starts after an update; Esc closes it. Mine opened on the local Ollama model from my old config, so I pressed Ctrl+X, then M, typed “big pickle” and pressed Enter. Ctrl+X went through the browser terminal fine. Then I asked it to “Write cart.test.js with three node:test tests for cart.js”, and Big Pickle wrote the file and ran the tests in 11.3 seconds.
Type a request and press Enter. /models picks a model, /connect adds a provider, ! at the start of an empty prompt runs a shell command, and Ctrl+P opens the command palette.
Step 4: Come back to a session later
Closing the browser tab doesn’t end the shell. The Terminal tab lists the shells still running on the device, with the program in each, and clicking one reopens it with the screen redrawn:
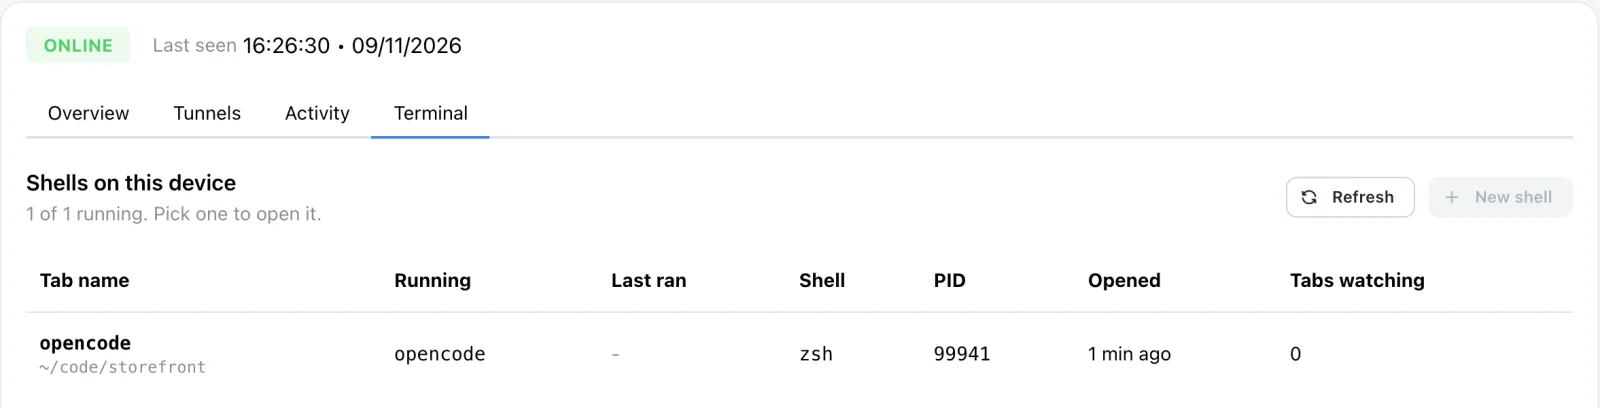
Screenshot: dashboard.pinggy.io, November 9, 2026.
A dashboard shell does end after 30 minutes with no activity, or after 8 hours regardless, and the opencode client in it ends too. To test that, I hung up the shell from the machine’s side, which is what a timeout does. The client exited with it; the session didn’t, because OpenCode’s background server holds it. In a new shell:
cd ~/code/storefront     # sessions belong to a project folder
opencode session list    # list sessions; it opens in a pager, press q to leave
opencode -c              # continue the last session
opencode session list printed the session id, title and time:
ses_e40039520ffev5jRWwjsz0uEAl Three node:test tests for cart.js 11/9/2026, 4:36:04 PMand opencode -c opened it where I’d left off:
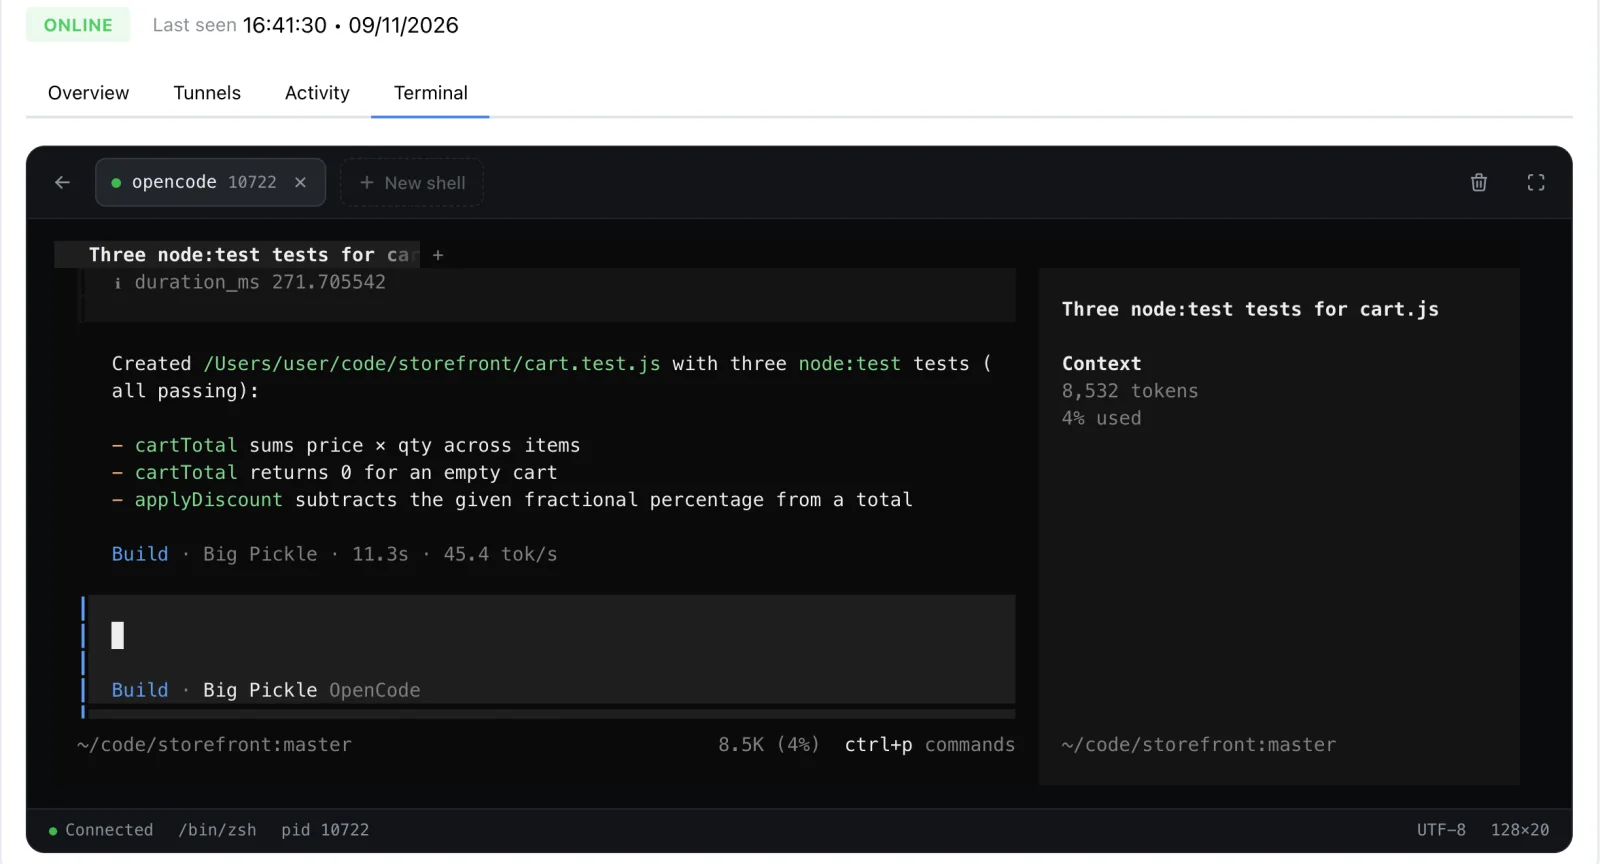
Screenshot: dashboard.pinggy.io, November 9, 2026. The username in the path is a placeholder.
opencode -s <id> opens a specific session, and inside the TUI /sessions (or Ctrl+X, then L) lists them too.
Work in progress survives as well. In a local terminal, I killed the opencode client eight seconds into a task, with the same hang-up signal a closing shell sends. The background server kept going, and the file it was writing appeared about 16 seconds later, with no client attached. So a long task doesn’t need the browser shell to stay open, as long as the machine stays awake.
OpenCode’s own remote access, and why use a shell
OpenCode has a way in of its own. opencode pair prints a one-time link and a QR code to its web UI, valid for 5 minutes, and opencode pair --remote pairs from anywhere through an OpenTunnel address. That one exposes your OpenCode server to the internet, end-to-end encrypted and behind its password, and it asks before turning that on. On a phone, OpenCode’s web UI or mobile app is nicer than a TUI in a browser tab.
A Pinggy shell is a whole terminal, though. Restart the OpenCode service, git pull, restart a dev server or run Claude Code in a seperate tab, and nothing about the OpenCode server faces the internet. Our Claude Code version of this guide covers the same setup for claude.
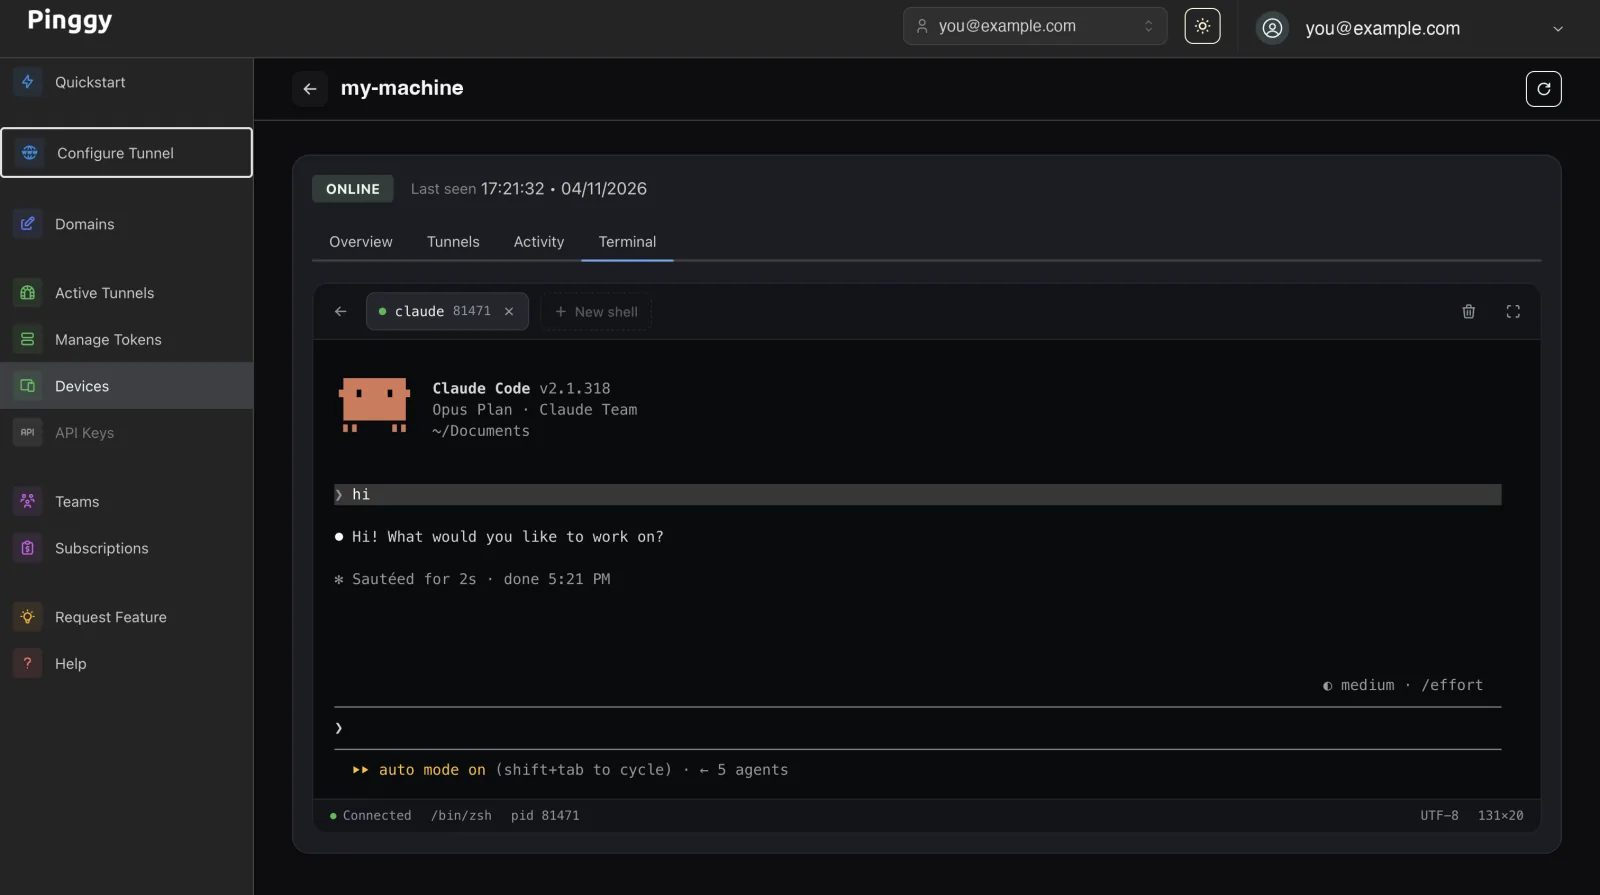
Screenshot: Claude Code 2.1.318 in the same Terminal tab, from our Claude Code guide, November 2026.
Free vs Pro
Every plan, Free included, gets the browser terminal. Free covers 1 device with 1 shell. Pro, at $2.50/month billed annually or $3/month billed monthly (checked on November 3, 2026), covers 25 devices, 3 shells per device and 10 open shells per seat. Three shells is the comfortable number: one for OpenCode, one for the dev server, one for git. See the pricing page for the rest.
Security
The device token sits in device.json under ~/.config/pinggy/, readable only by your user. Per the docs, the agent never logs what you type, and the Activity tab lists the device’s events with source IP addresses.
Anyone signed in to your Pinggy account can open a shell on your devices, as your user, and run OpenCode with your provider keys. Turn on 2-factor authentication first, and keep the dashboard’s connect commands out of screenshots and chats, since they contain the token. To cut a machine off, delete the device or rotate its token in the dashboard. pinggy device remove only forgets the token locally.
Troubleshooting
- Terminal tab is greyed out. The CLI on that machine is too old to open a shell. Run the install command again.
This machine already runs as device <id> in the background. Stop it first: pinggy device stop. A background agent already holds the connection. Stop it before runningloginorconnectwith--foreground.opencode -cshowsExpected a string starting with "ses"and an empty session. You ran it in a folder with no OpenCode sessions, which is easy to do in a fresh browser shell that starts in your home directory.cdinto the project first, or open a session by id withopencode -s <id>.- OpenCode can’t reach its server. Run
opencode service status, thenopencode service restartif it’s stuck.
Recap
curl -fsSL https://pinggy.io/install.sh | sh       # install Pinggy and sign in
curl -fsSL https://opencode.ai/v2/install | bash   # install OpenCode 2
opencode                                           # in the browser terminal
opencode -c                                        # in a later shell: continue the last session
Open the device’s Terminal tab on the Pinggy Devices page, click New shell, and start working.