Remote Desktop for Raspberry Pi and other IoT devices
Updated on May 23, 2026 · 5 mins read

RDP works on a Raspberry Pi the same way it works on Windows: install an RDP server (xrdp), connect from any RDP client. The catch is that the Pi sits behind NAT or CGNAT in nearly every realistic deployment, so the connection needs a tunnel. This post uses Pinggy as the tunnel.
One thing to know up front: current Raspberry Pi OS (Bookworm, October 2023+) defaults to Wayland with the labwc compositor, and xrdp does not work with labwc. You’ll need to switch the Pi back to X11 (one raspi-config setting) before xrdp will show you a desktop. Details below. If you don’t want to mess with compositors at all, Raspberry Pi Connect is the official Pi-team alternative and works without any tunnel - there’s a note on it at the end.
Summary
Step 1. On the Pi, switch the session back to X11 if you’re on a current Pi OS:
sudo raspi-config nonint do_wayland W1
sudo reboot
Step 2. Install and start xrdp:
sudo apt update
sudo apt install xrdp
sudo systemctl enable --now xrdp
Step 3. Open a Pinggy TCP tunnel to port 3389:
ssh -p 443 -R0:127.0.0.1:3389 tcp@free.pinggy.ioYou’ll get a URL and port like:
tcp://tljocjkijs.a.pinggy.link:40527Step 4. Open Windows App on macOS/iOS/Android (the September 2024 rebrand of “Microsoft Remote Desktop”), or Remote Desktop Connection (
mstsc.exe) on Windows. Enterhost:portto connect.
Example:tljocjkijs.a.pinggy.link:40527Sign in to https://dashboard.pinggy.io for an access token; persistent tunnel URLs show up in the dashboard.
Reaching a Raspberry Pi by RDP only works if you can route to it on layer 3, and in 2026 that’s the harder part of the problem. Home ISPs put the Pi behind NAT; cellular and many enterprise networks put it behind CGNAT (which port forwarding can’t escape). Pinggy gives you a TCP tunnel from the Pi out to a public hostname, so the RDP client connects to that hostname instead of trying to find the Pi directly.
The video above walks through it. The steps below give the same flow with the gotchas spelled out.
Step 1. Switch the Pi back to X11 (current Pi OS only)
xrdp doesn’t work with labwc, the Wayland compositor that became the default in Raspberry Pi OS Bookworm (and the only supported Wayland compositor since the Pi team dropped Wayfire). On a current Raspberry Pi OS install, opening an RDP session will give you a black or empty screen until you switch to X11.
sudo raspi-config nonint do_wayland W1
sudo reboot
W1 is the X11 option; you can verify in the GUI under Raspberry Pi Configuration > Display > Wayland. If you’re running an older Pi OS that still defaults to X11, or you’re on a non-Pi IoT device, skip this step.
Step 2. Install the RDP server
On the Pi (or any Debian-based IoT device), install xrdp and enable it as a service:
sudo apt update
sudo apt install xrdp
sudo systemctl enable --now xrdp
enable --now both starts the service and sets it to come up on boot. Verify it’s listening with ss -tlnp | grep 3389.
Step 3. Start a Pinggy TCP tunnel
To expose port 3389 over the public internet, start a Pinggy TCP tunnel from the Pi:
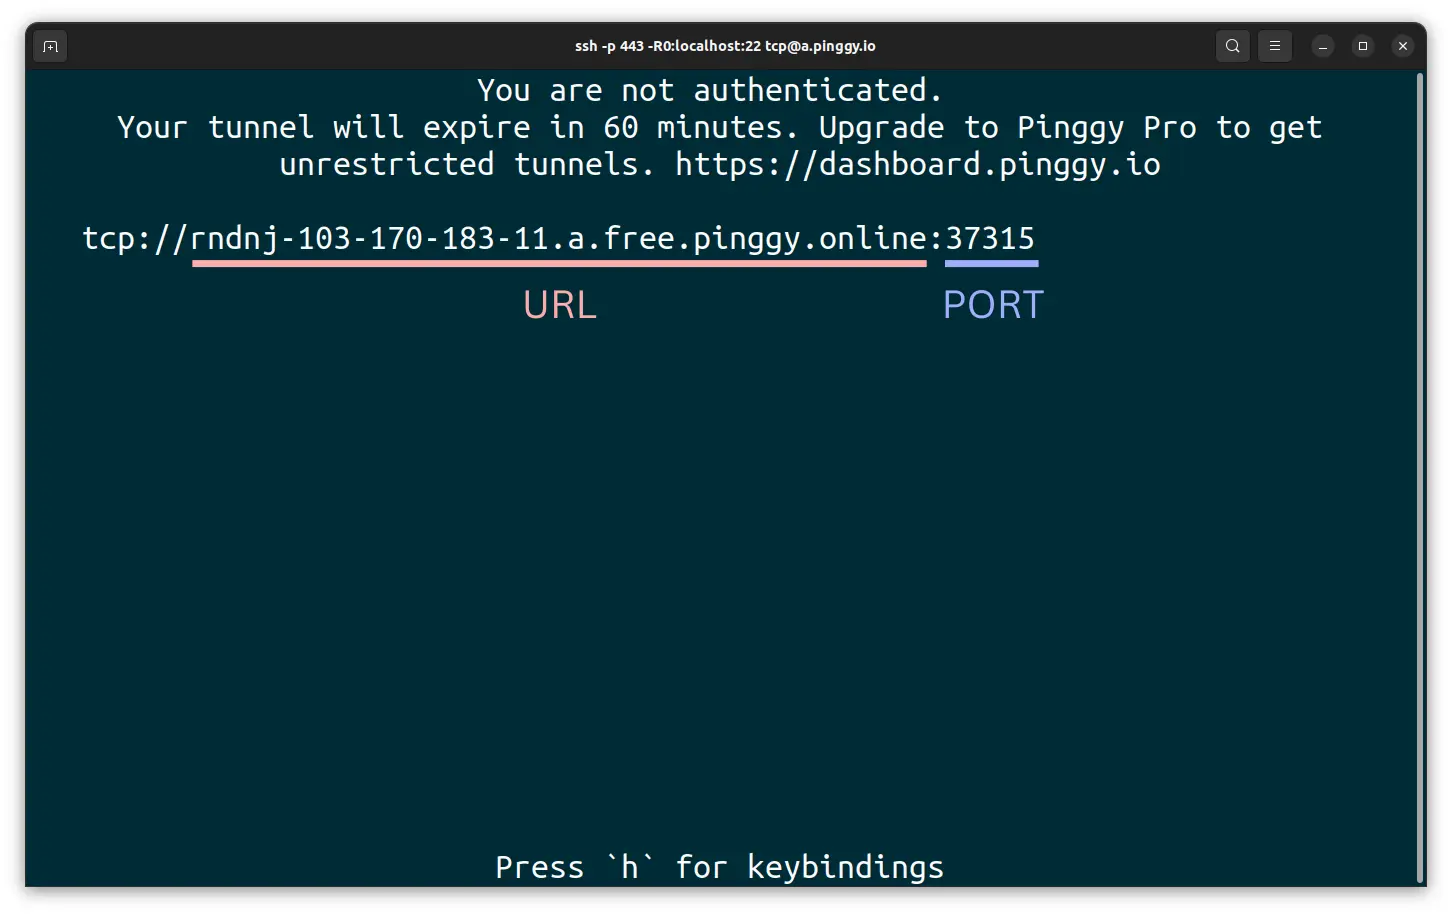
ssh -p 443 -R0:127.0.0.1:3389 tcp@free.pinggy.ioStep 4. Note the public URL
Once the SSH tunnel is up you’ll see a URL like:
tcp://tljocjkijs.a.pinggy.link:40527
The hostname (tljocjkijs.a.pinggy.link) and port (40527) are what you’ll feed to the RDP client.
If you’d rather not copy the URL each time, sign in to https://dashboard.pinggy.io for an access token. Tunnels started with that token show up in the dashboard with a persistent name.
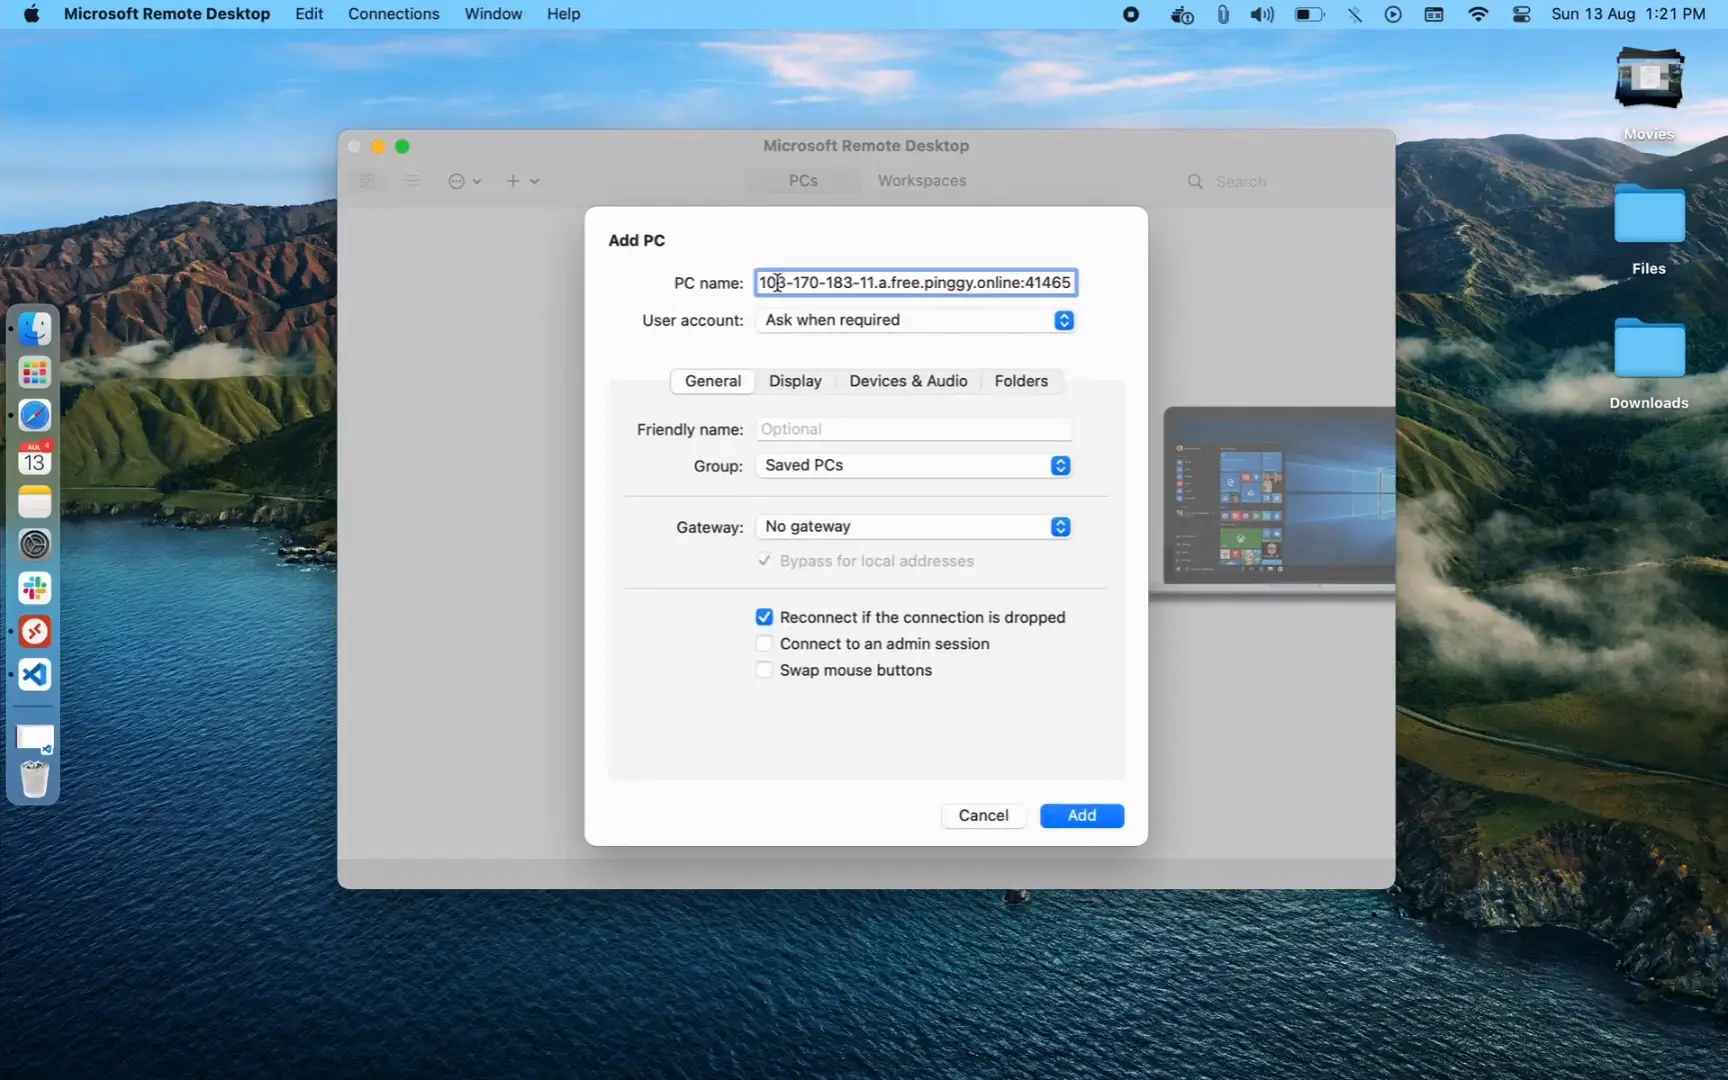
Step 5. Connect from the RDP client
On Windows, use Remote Desktop Connection (mstsc.exe, still bundled). On macOS, iOS, iPadOS, Android, ChromeOS, and the web, the client is now Windows App - Microsoft renamed the old “Microsoft Remote Desktop” app to Windows App across all non-Windows platforms in September 2024. Same client under the hood.
Enter hostname:port (e.g. tljocjkijs.a.pinggy.link:40527) as the PC name, then the Pi user credentials.
Tips
Free tunnels expire after 60 minutes and the URL changes on reconnect. For a setup you can leave running, get an access token from https://dashboard.pinggy.io and run the tunnel in auto-reconnect mode:
while true; do
    ssh -p 443 -o ServerAliveInterval=30 -R0:127.0.0.1:3389 tcp@free.pinggy.io;
    sleep 10;
done
The Pinggy dashboard lists all active tunnels for the account, so you can see the current URL without scraping it from the SSH output.
Lock the Pi user before exposing RDP to the public internet. A Pinggy URL is reachable by anyone on the internet who knows it, and xrdp authenticates against the Pi’s PAM stack, which means the default pi user is a brute-force target. At minimum, set a long password and disable the pi user if you don’t use it. For anything beyond a quick test, layer the tunnel inside a VPN or zero-trust mesh (Tailscale, Twingate, Cloudflare Access).
Alternative: Raspberry Pi Connect
If the xrdp + Wayland dance is more friction than you want, Raspberry Pi Connect is the Pi team’s own remote-access tool, launched in 2024. It uses WebRTC instead of RDP, runs through any browser, traverses NAT and CGNAT without a tunnel, and works on Wayland out of the box (no compositor switch needed). It’s free for individual makers. The 2026 release added remote OTA updates so you can patch a Pi without opening an interactive session.
For an RDP workflow that integrates with existing Windows tooling, xrdp + Pinggy is still the right answer. For “I just need a screen to my Pi,” Connect is now the path of least resistance.