Foundry VTT Self Hosting Guide
Updated on Jul 2, 2026 · 4 min read
Foundry Virtual Tabletop (VTT) runs a local web server, by default on port 30000. That’s fine for a solo test, but the moment you want players to join from outside your house, you’re stuck configuring port forwarding, poking holes in your firewall, or fighting a dynamic IP that changes every time your ISP feels like it. Pinggy skips all of that: one SSH command turns your local Foundry instance into a public URL, no router config and nothing to install.
Here’s how to set it up, plus a few options worth knowing about for locking down access once your session is live.
Summary
- Run Foundry VTT Locally
- Launch the Foundry VTT application as you normally would. By default, it runs on port
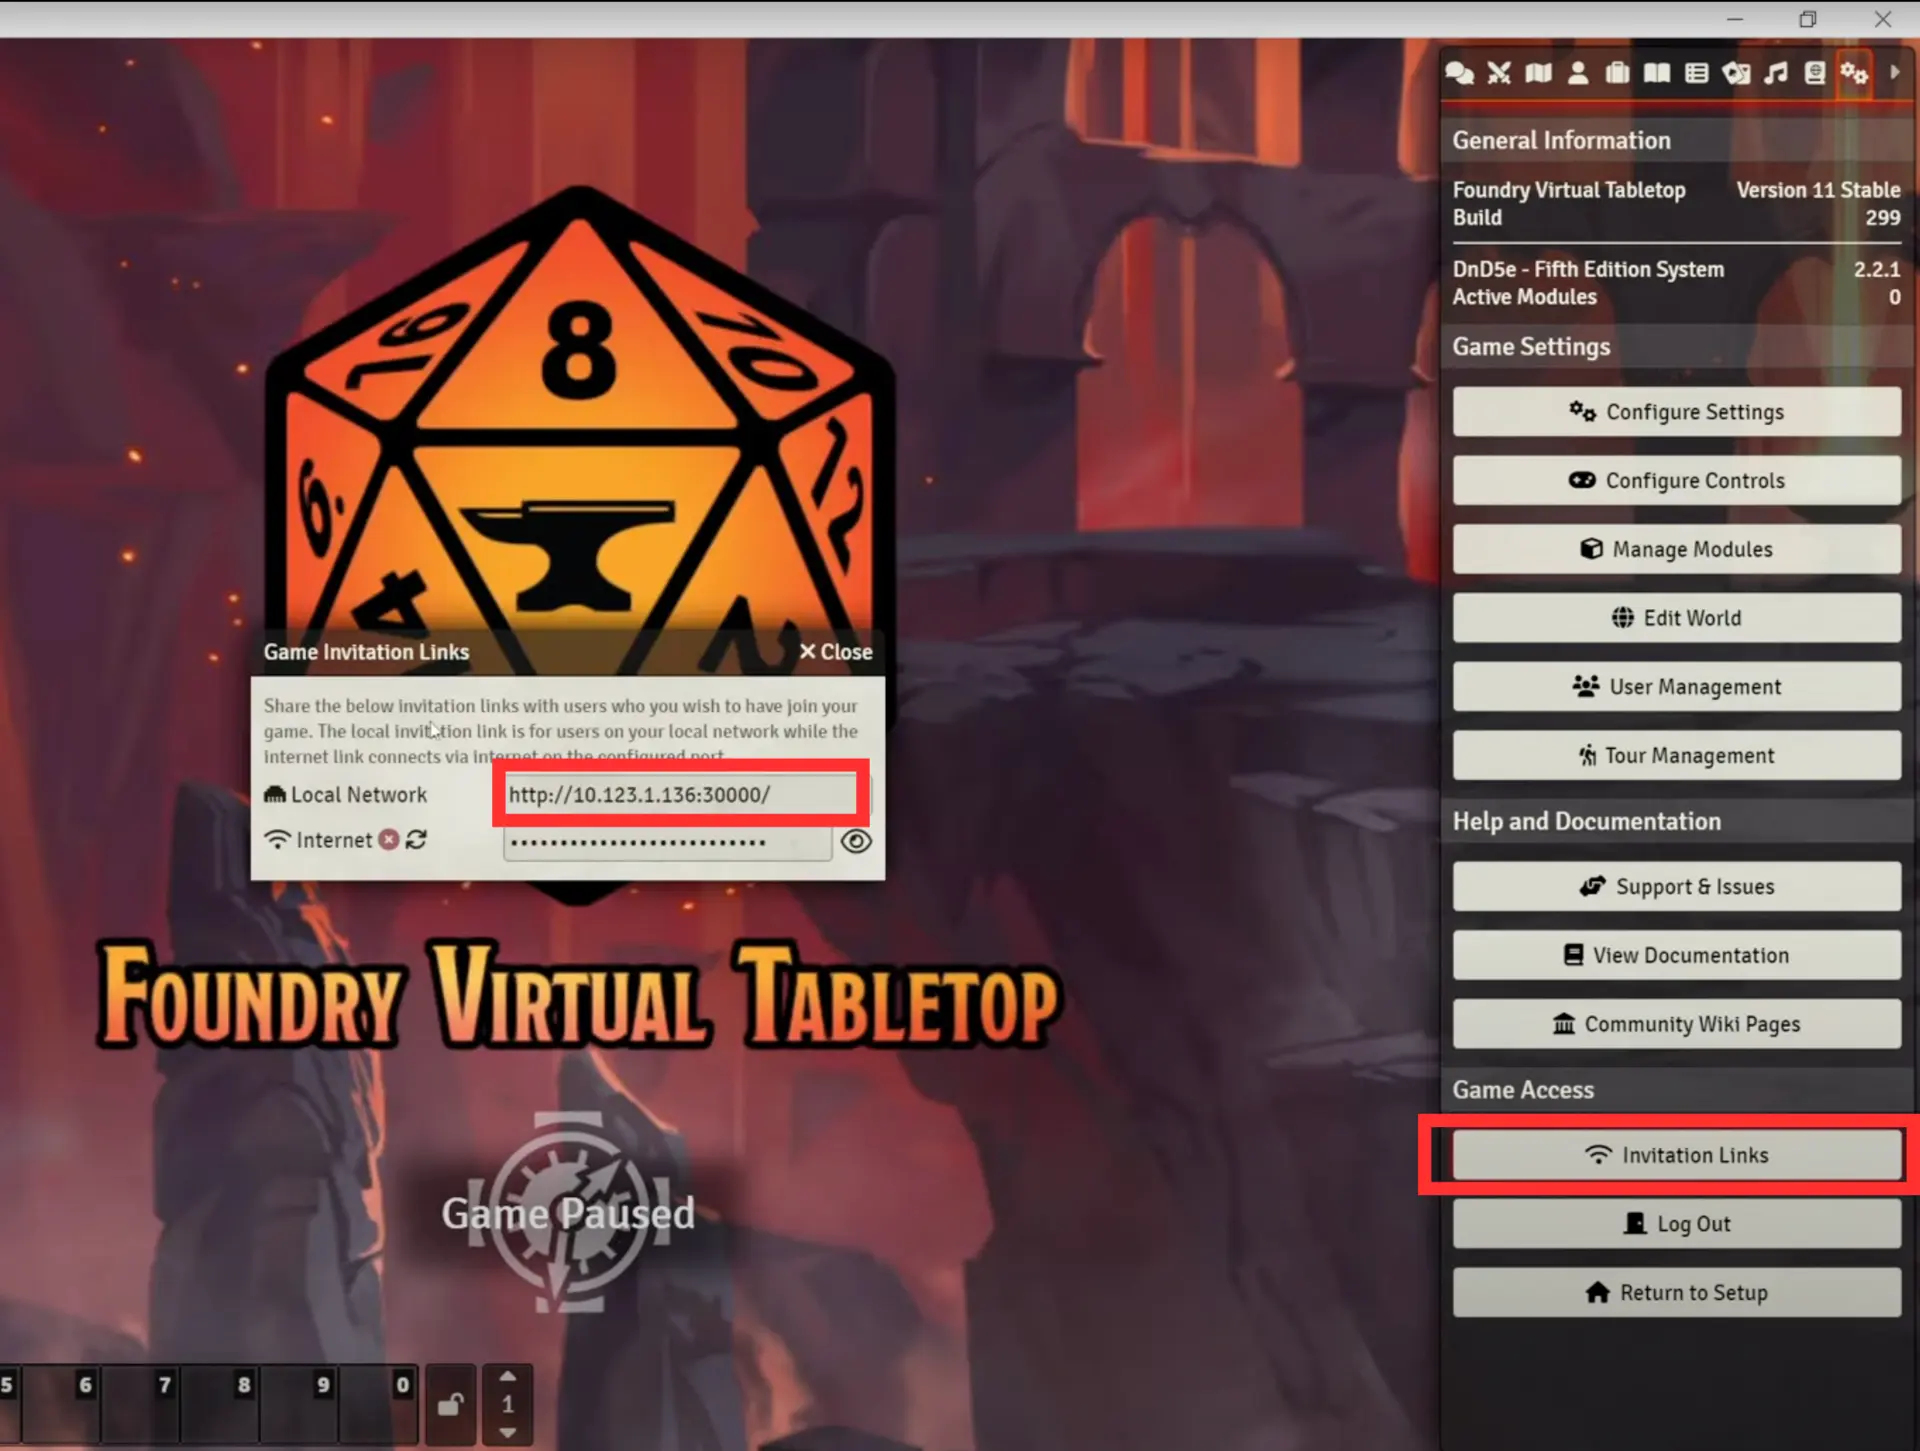
30000. - Check the local network address in Foundry under:It will look something like:
Game Access > Invitation Linkshttp://10.123.1.136:30000
- Launch the Foundry VTT application as you normally would. By default, it runs on port
- Create a Tunnel with Pinggy
- Start the Pinggy SSH tunnel (no software installation required):
ssh -p 443 -R0:localhost:30000 free.pinggy.io - Share the provided public URL
https://abc123xyz.a.pinggy.linkfrom Pinggy with your players to instantly connect to your Foundry session.
- Start the Pinggy SSH tunnel (no software installation required):
What Is Pinggy?
Pinggy makes a local port reachable from the public internet using nothing but SSH. There’s no client to download: you point an SSH command at Pinggy’s server, and it hands back a public URL that forwards to your local port.
For a Foundry session that means players can connect from anywhere without you touching your router.
Step-by-Step Guide to Self-Host Foundry VTT with Pinggy
Step 1: Launch Your Foundry VTT Server Locally
Launch Foundry VTT as you normally would. It runs on port 30000 by default.
Navigate to Game Access > Invitation Links within the Foundry interface to confirm the local network address, which looks something like http://10.123.1.136:30000.
Quick Tip for Testing (Optional):
If you want to test the tunnel before launching Foundry, spin up a basic local web server with Python instead:
Open your terminal or command prompt, and run:
python3 -m http.server 30000This will create a simple web server accessible at http://localhost:30000.
Step 2: Create a Public URL Using Pinggy (Single SSH Command)
Now open a terminal and run the tunnel command.
Execute the Following Command:
Open your terminal (macOS/Linux) or PowerShell (Windows) and run:
ssh -p 443 -R0:localhost:30000 free.pinggy.io

Explanation of this command:
-p 443: Uses port 443 for SSH, ensuring compatibility through most firewalls.-R0:localhost:30000: Requests Pinggy to forward connections from a random public URL to your local port30000.free.pinggy.io: Connects to Pinggy’s tunneling server.
Example Output:
Once you execute the above command, Pinggy will automatically assign you a unique public URL. Your terminal output will look similar to:
You can access your local server via the following URL(s):
http://abc123xyz.a.pinggy.link
https://abc123xyz.a.pinggy.link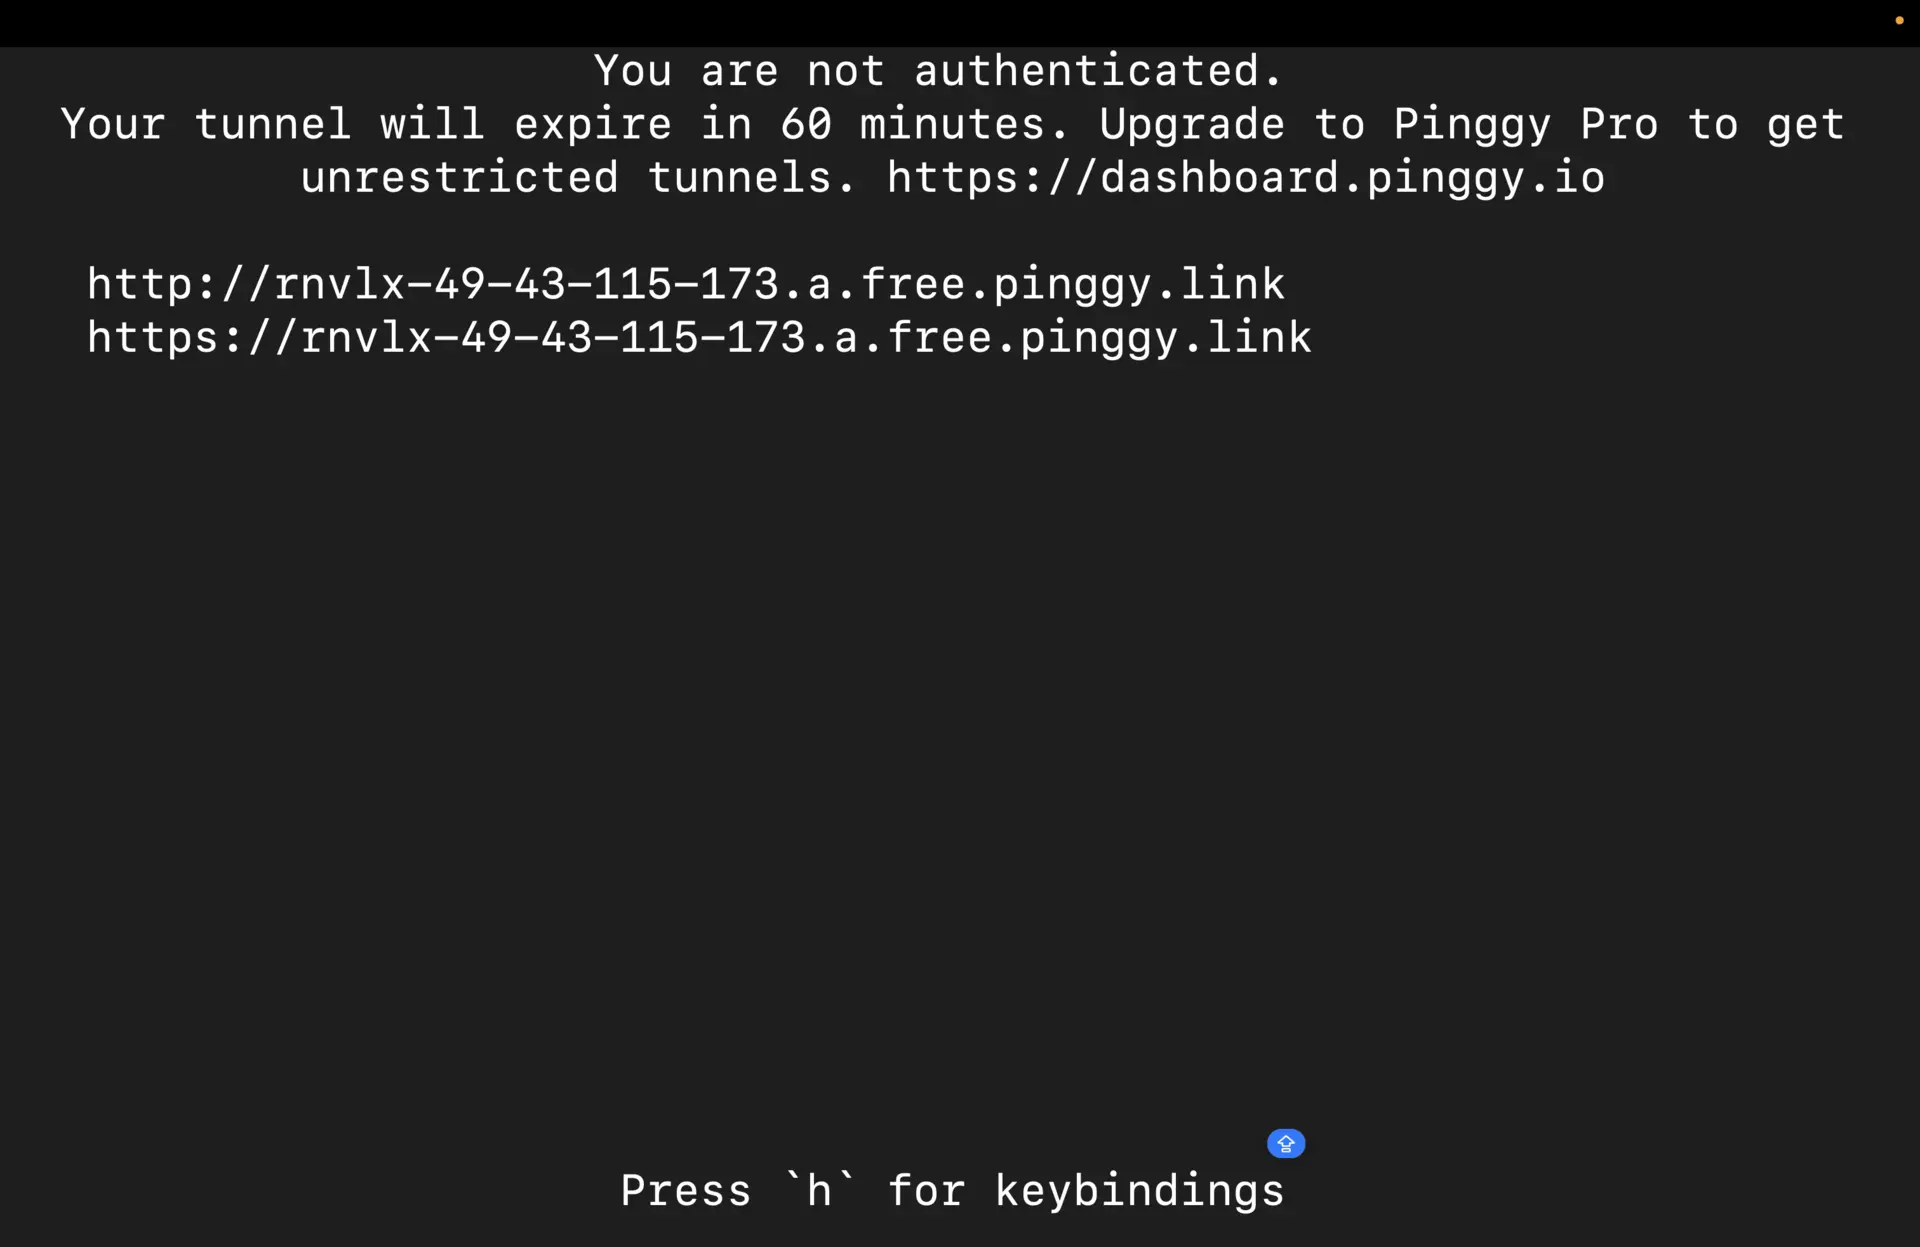
How to Share with Players:
Copy one of these URLs and send it to your players. They connect from anywhere - no port forwarding or setup required on their end.
Optional: Managing and Securing Your Tunnel
A couple of features are worth knowing about if you’re running sessions regularly rather than a one-off game night.
Manage All Your Active Tunnels Using Pinggy Dashboard
Pinggy’s dashboard shows your active tunnels, connections, and usage stats in one place.
- Visit the Pinggy Dashboard and sign up or sign in.
- Once logged in, you’ll receive a personalized access token.
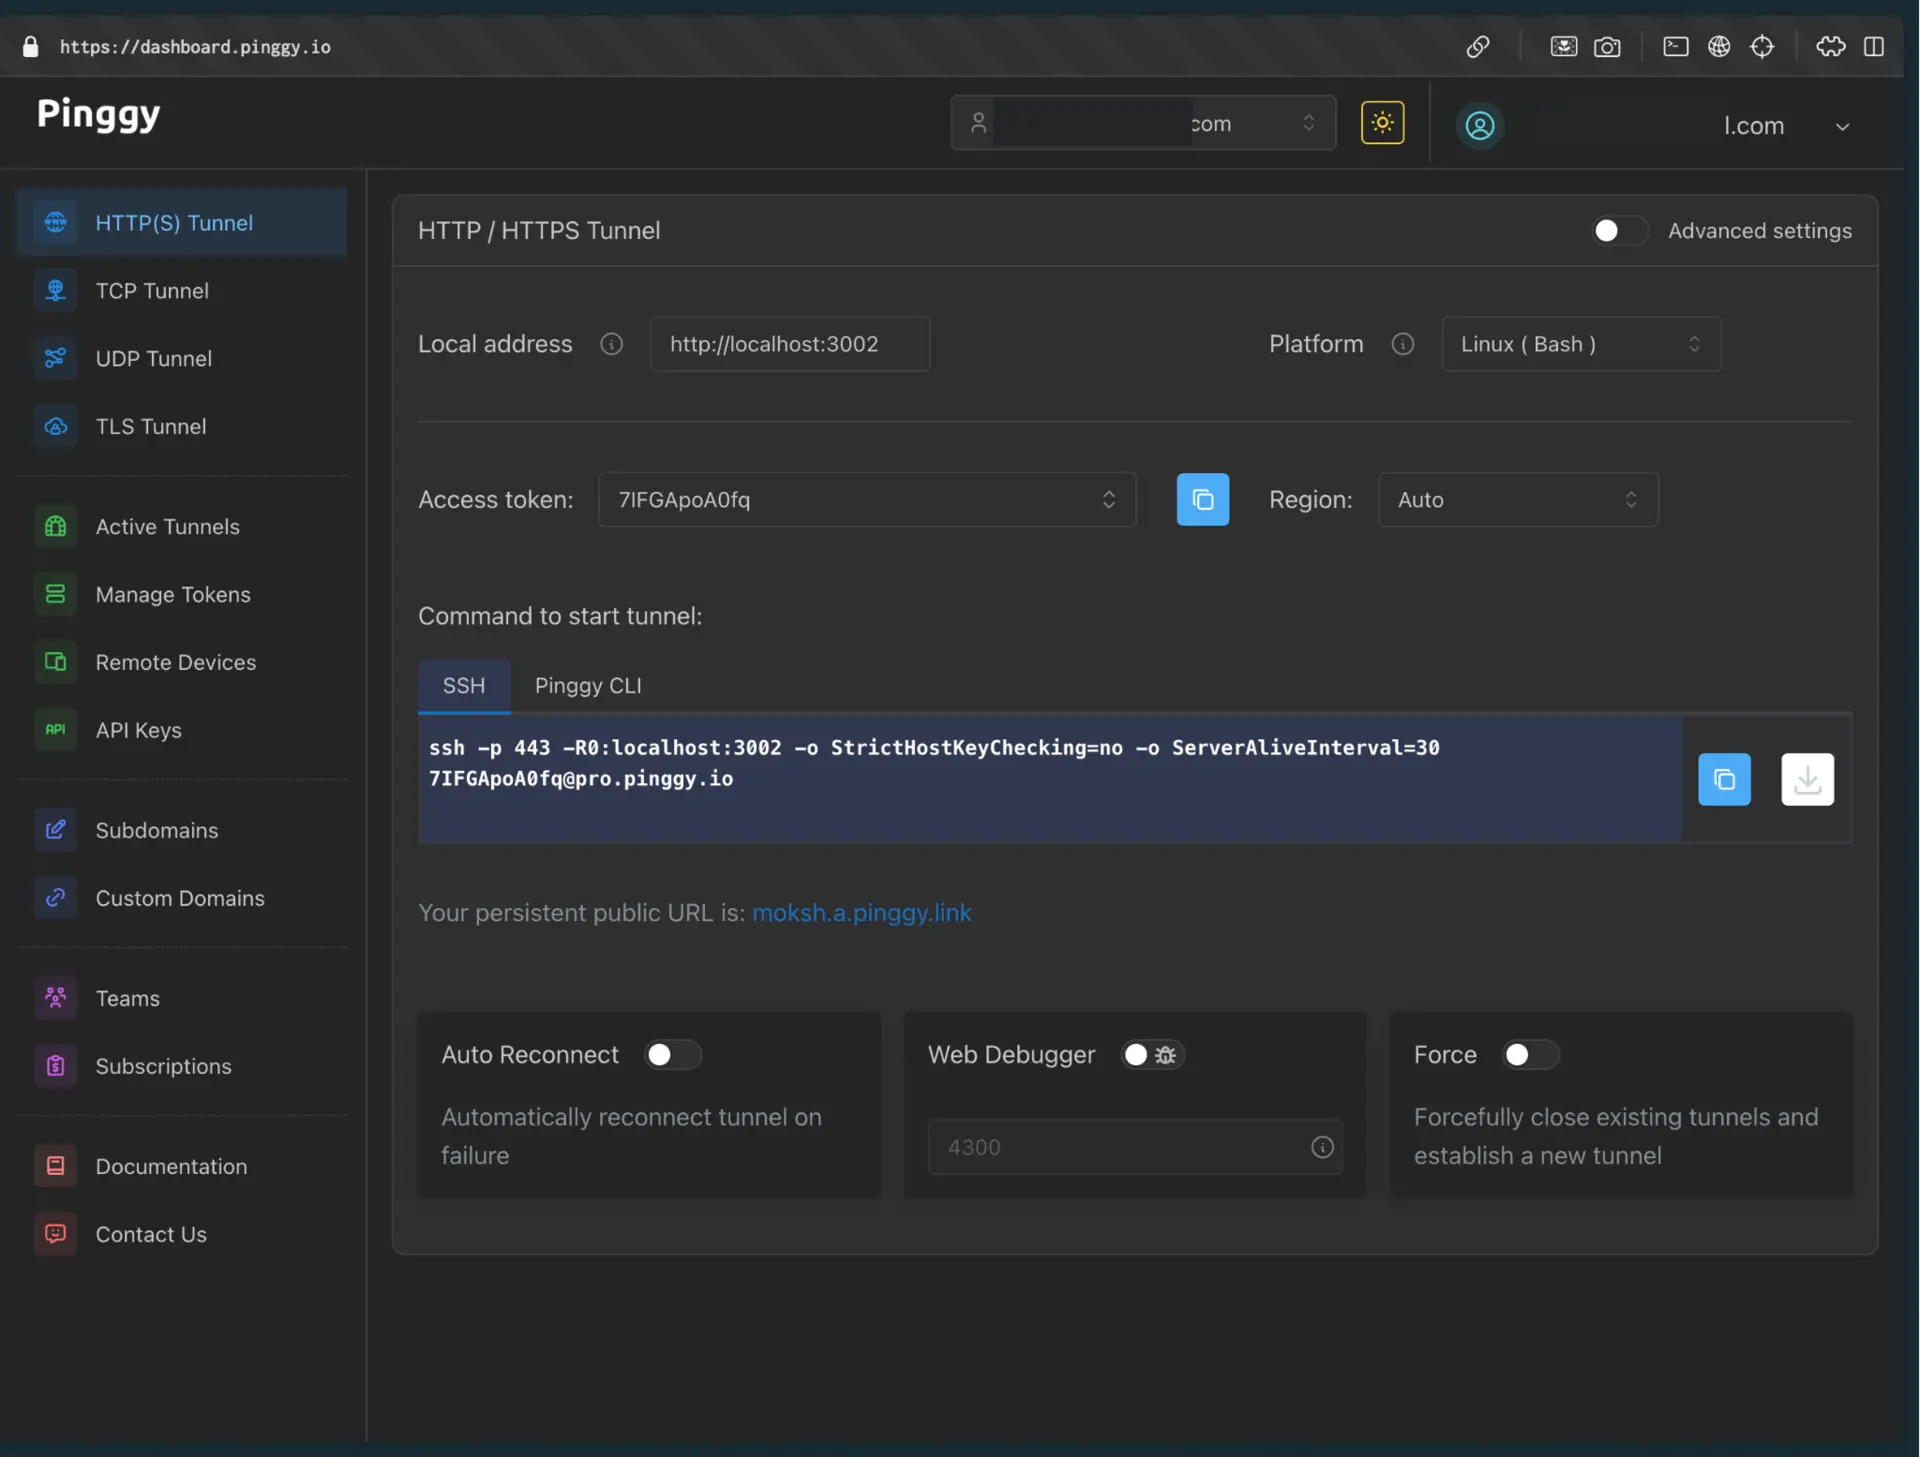
Enhanced SSH Command Using Access Token:
Add your access token to the SSH command and the tunnel shows up in your dashboard instead of running anonymously:
ssh -p 443 -R0:localhost:30000 -t yourAccessToken@pro.pinggy.ioReplace yourAccessToken with the token from your dashboard.
Enable Basic Authentication for Extra Security
If you don’t want randoms stumbling into your game, Pinggy supports basic auth: anyone hitting your public URL gets a login prompt first.
SSH Command with Basic Authentication Enabled:
ssh -p 443 -R0:localhost:30000 -t free.pinggy.io b:username:passwordReplace username and password with your own credentials.
Custom Domains & Persistent URLs with Pinggy Pro (Optional)
If you host Foundry sessions regularly, Pinggy Pro adds persistent tunnels (the URL stays the same between sessions instead of changing every time), custom domains, and more detailed usage stats.
Conclusion
Getting Foundry VTT online doesn’t require port forwarding, dynamic DNS, or a router restart. One SSH command gets you a public URL, and basic auth or a Pinggy access token cover you if you want more control over who connects and how the tunnel is tracked.
For a one-off session with friends, the free tier and a single command is all you need. For a recurring campaign, the access token plus a persistent domain saves you from sending everyone a new link every week.