This guide covers how to use pinggy.io to integrate your localhost app with WhatsApp by using webhooks. WhatsApp webhooks can be used to notify an external application whenever specific events occur in your WhatsApp account.
Step 1: Start Your App
Before we dive into the integration with Pinggy, make sure your local application is up and running.
Here’s a simple express app to get you started:
var express = require("express");
var app = express();
app.use(express.json());
const port = 3000;

app.post("/*", function (req, res) {
  console.log("-------------- New Request POST --------------");
  console.log("Headers:" + JSON.stringify(req.headers, null, 3));
  console.log("Body:" + JSON.stringify(req.body, null, 3));
  res.json({ message: "Thank you for the message" });
});

// Add support for GET requests to Facebook webhook
app.get("/*", (req, res) => {
  // Parse the query params
  var mode = req.query["hub.mode"];
  var token = req.query["hub.verify_token"];
  var challenge = req.query["hub.challenge"];

  console.log("-------------- New Request GET --------------");
  console.log("Headers:" + JSON.stringify(req.headers, null, 3));
  console.log("Body:" + JSON.stringify(req.body, null, 3));

  // Check if a token and mode is in the query string of the request
  if (mode && token) {
    // Check the mode and token sent is correct
    if (mode === "subscribe" && token === "12345") {
      // Respond with the challenge token from the request
      console.log("WEBHOOK_VERIFIED");
      res.status(200).send(challenge);
    } else {
      console.log("Responding with 403 Forbidden");
      // Respond with '403 Forbidden' if verify tokens do not match
      res.sendStatus(403);
    }
  } else {
    console.log("Replying Thank you.");
    res.json({ message: "Thank you for the message" });
  }
});

app.listen(port, function () {
  console.log(`Example Facebook app listening at ${port}`);
});
Save the above code in a file named app.js and run the following command to start the application:
Step 2: Launch Pinggy
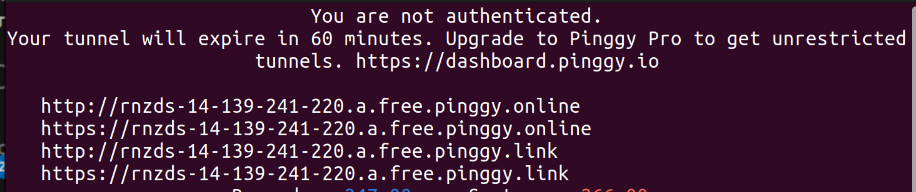
Pinggy simplifies the process of creating a secure tunnel. Use the following command to set up a tunnel to your local development server:
Note: Replace the port 3000 in the command with the port where your local development server is running.
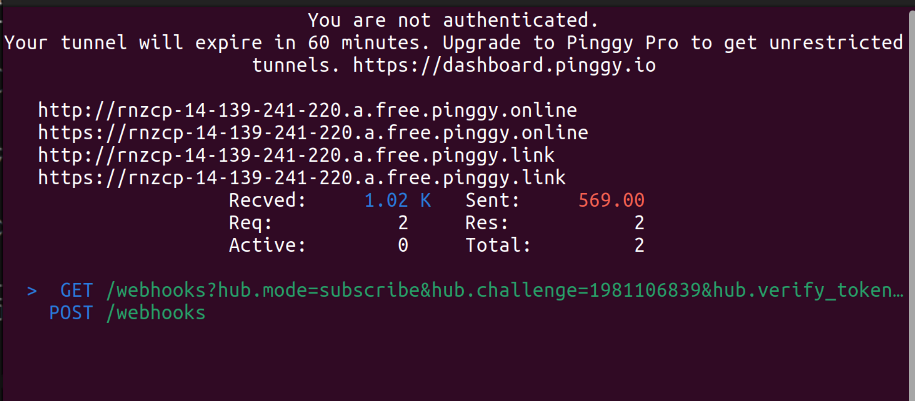
If you run the command with your specified port where your service is running, you will get an output similar to the following:
Step 3: Integrate WhatsApp
To register a webhook on your WhatsApp account follow the instructions below:
Requirements: You’ll need a Facebook app and a business phone number associated with your Facebook app. Create one before following the rest of these steps.
Connect your Facebook page with your WhatsApp account by following the instructions below:
Access the Meta for Developers page and Log in using your Facebook account.
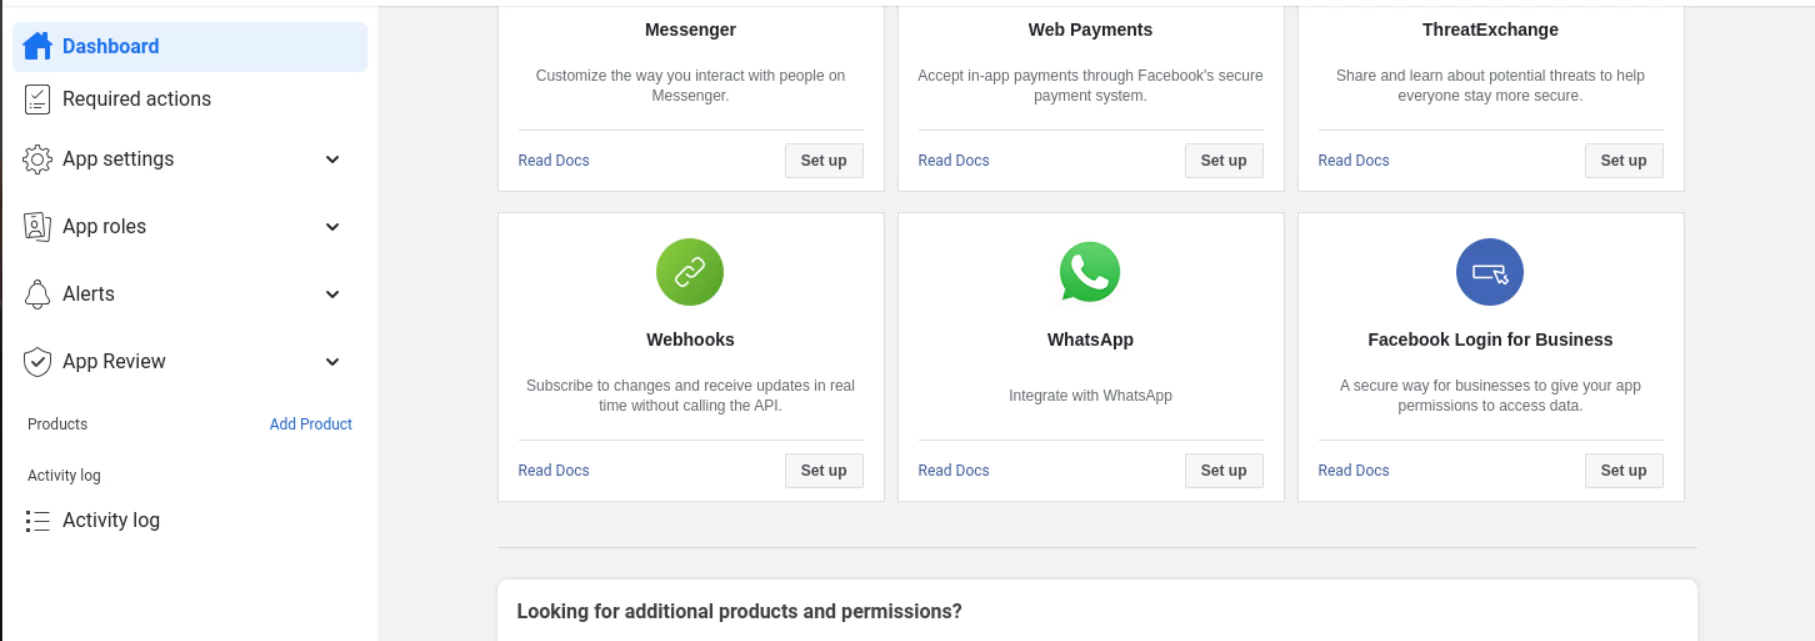
On the Developers page, click My Apps and then click your app.
On the app dashboard, click Add Product on the left menu, and then click Set up inside the WhatsApp tile.
On the left menu, click Configuration under WhatsApp and then click Edit.
In the Edit webhook’s callback URL popup, enter the URL provided by the ngrok agent to expose your application to the internet in the Callback URL field, with /webhooks at the end.
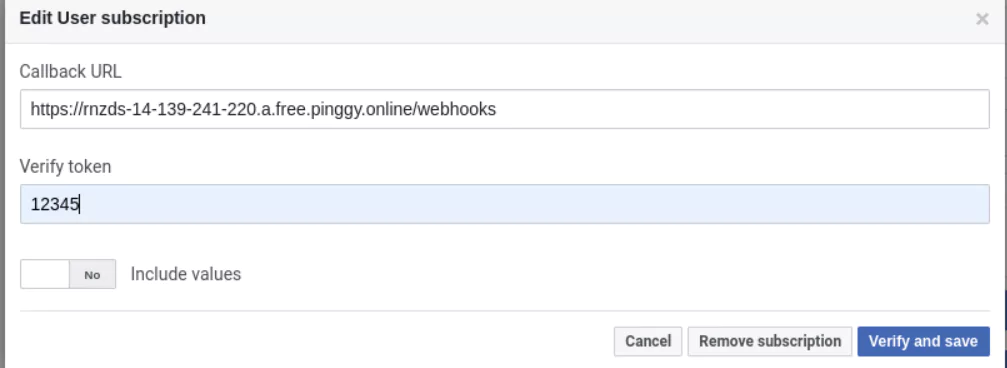
Enter 12345 in the Verify Token field and then click Verify and Save.
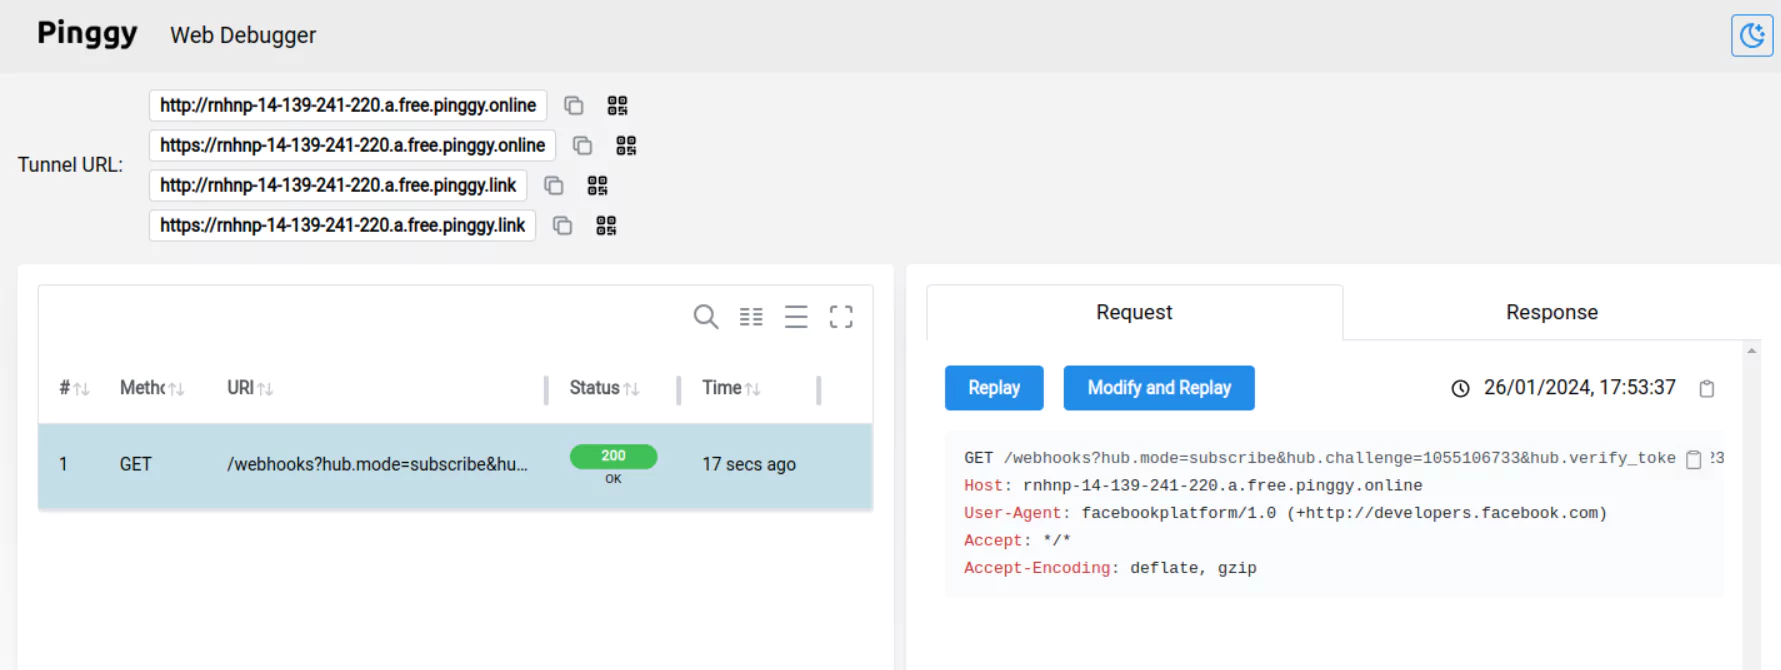
After you add a webhook to WhatsApp, WhatsApp will submit a validation post request to your application through pinggy. Confirm your localhost app receives the validation get request and logs WEBHOOK_VERIFIED in the terminal.
Back to the Configuration page, click Manage.
On the Webhook fields popup, click Subscribe to the messagess field.
Click Test for the messages field and confirm your localhost app receives a post request.
On the Webhook fields popup, click Done.
Back to the Configuration page, make sure you have a production number associated with your app. If not, click Manage phone numbers and make note of the Test Number WhatsApp provides to you.
Back to the Configuration page, on the top of your app’s page, make sure App Mode is Live.
Test your WhatsApp app with Pinggy
Use the phone number associated to your WhatsApp product or use the test number you copied before.
- Add this number to your WhatsApp app contacts and then send a message to this number.
Confirm your localhost app receives a message and logs both headers and body in the terminal.
To debug and inspect the requests made to your localhost app, you can leverage Pinggy’s Web Debugger. Keep the Web Debugger open, and when you receive the URL after starting the tunnel, visit the selected web debugger port on your local machine. This allows you to monitor and troubleshoot incoming requests, ensuring a smooth integration with WhatsApp.