Usages
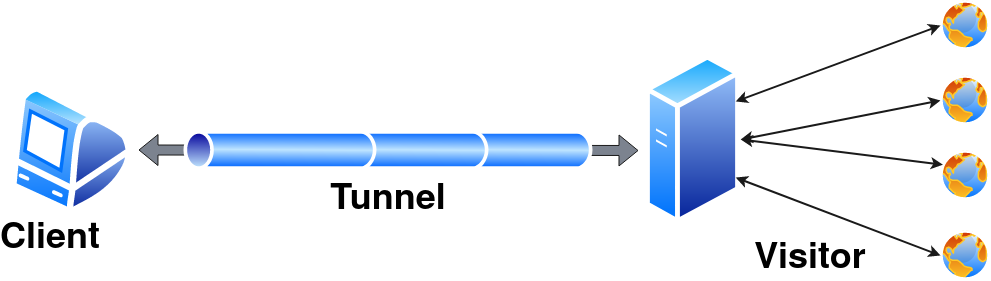
Pinggy uses the reverse tunneling feature provided by the secure-shell (ssh) program. One can use any ssh program as long as it provides the reverse tunneling feature. However, we recommend using openssh whenever possible.
Pinggy utilizes different features of the ssh protocol to provide different functionalities like web debugging, header manipulation, authentication, etc.
We directly use the options provided by the ssh command to set the tunnel and enable the live debugging.
Tunnel tokens and a few keywords are sent as the username. Few command line options to configure different options for the tunnel.
Let’s start with basic ssh options:
ssh usages
Detailed usages are available on ssh man page at https://man.openbsd.org/ssh
ssh -p443 -R0:<localhost>:<localport> [-R<domain>:0:<localhost>:<localport>[ -R<domain>:0:<localhost>:<localport>...]] [<token/keyword/tunneltype>@]a.pinggy.io <remote options>
| -R [remote_address:]remote_port:local_address:local_port |
|
| | Expose a local service running on `local_address:local_port` to `remote_address:remote_port`. While there are multiple variations of reverse tunneling, Pinggy supports only this specific version. By default, Pinggy ignores the provided remote port and assigns a domain name and port based on the subscription plan and tunnel type. Pinggy supports two types of reverse forwarding: Default Forwarding:
By default, Pinggy requires a single port to forward incoming requests—this is known as default forwarding. In this case, users should not provide any remote_address. Pinggy will forward all requests that do not match any domain forwarding rules. - Only one default forwarding is allowed per session.
- Providing multiple default forwardings is not supported, and the behavior is undefined.
Domain Forwarding:
Pinggy supports multiple port forwardings using domain forwarding. In this mode, users must provide a valid domain name (associated with their token) as the remote_address. - Multiple domain forwardings are allowed. However, they are not effective without a default forwarding.
- Domain forwarding is particularly useful with wildcard domains.
- This mode is not supported for
TCP and UDP tunnels.
|
| -p port |
|
| | Remote server port. By default ssh servers listen on port 22. However, Pinggy servers listen on 443 to overcome firewall restrictions in some networks. So, use -p443 while connecting to a Pinggy server. |
| |
| -t |
|
| | Force pseudo-terminal allocation. By default ssh command requests for pseudo-terminal as long as there is no remote option provided. Pinggy uses pseudo-terminal to provide a rich interface like this.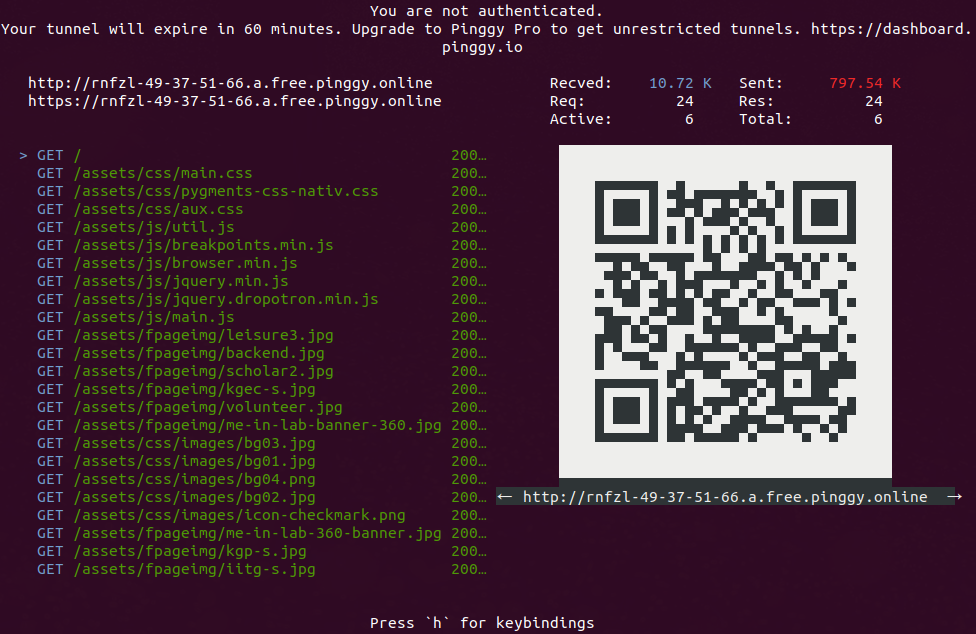 One can disable rich CLI using One can disable rich CLI using -T |
| |
| -T |
|
| | Disable pseudo-terminal. Pinggy works without a pseudo-terminal and provides basic information. |
| |
| -N |
|
| | Disable remote command execution. Pinggy uses remote command execution to enable advanced functionalities including web debugging, header manipulations, and many more. It is not recommended to use this flag. |
| |
| -L localport:localhost:4300 |
|
| | Enable local forwarding. It enables ssh client to listen on localport and forward incoming connections to the remote port. Pinggy only allows forwarding to port 4300. Where it provides web debugging UI. |
Username to ssh
Pinggy does not require any username or authentication to start the tunnel as it does not provide any access to the server. However, this information goes to the server before ssh could establish the connection. So, we use the username to send tunnel token and other keywords to the server. token can be found in <dashboard.pinggy.io>. token and keywords are separated by +. Pinggy has following keywords:
1. http/tcp/tls/tlstcp
These keywords set the tunnel type. The default tunnel is the http type.
a) http
The http tunnel works only with the HTTP server. Pinggy provides links for both HTTP and HTTPS, however, it terminates traffic at the server and read it to provide live debugging and other functionalities. Any http tunnel comes with the following functionalities.
- Live Header Manipulation
- Basic Authentication
- Key Authentication
- IP White Listing
More about these functionalities later.
A basic http tunnel can be started using
ssh -R0:localhost:<localport> a.pinggy.io
ssh -R0:localhost:<localport> <token>@a.pinggy.io
b) tcp
tcp tunnel is the simplest form of tunnel. It simply forward incoming data without doing any kind of processing. tcp tunnel also provides a server port. All the tcp tunnel also comes with IP White Listing functionality.
A basic tcp tunnel can be started using
ssh -R0:localhost:<localport> tcp@a.pinggy.io
ssh -R0:localhost:<localport> <token>+tcp@a.pinggy.io
c) tls
tls tunnel is equivalent to tcp tunnel with only one exception, the server does not allocate any TCP port, instead it forward incoming SSL/TLS traffic based on the server name indication or SNI. Instead of terminating a TLS/SSL traffic in tls tunnel, a Pinggy server forwards the traffic as it is to the client.
Basic tls tunnel can be started using
ssh -R0:localhost:<localport> tls@a.pinggy.io
ssh -R0:localhost:<localport> <token>+tls@a.pinggy.io
In perspective with privacy, a tls tunnel is the most private tunnel where Pinggy can’t even look at the tunnel content. It also makes it hard for the client, as it has to handle everything about the TLS.
d) tlstcp
tlstcp tunnel is a tcp tunnel with an option to tls wrapper for the visitor. It provides a TCP port where the Pinggy server listens for incoming TCP connections and forwards the content as it is to the client. It also provides a tls URL, where it listens at port 443 and terminates the incoming SSL connection and forward the plain text content to the client.
Basic tlstcp tunnel can be started using
ssh -R0:localhost:<localport> tlstcp@a.pinggy.io
ssh -R0:localhost:<localport> <token>+tlstcp@a.pinggy.io
tlstcp is similar to tcp tunnel with a convenience for visitors to connect to Pinggy server with an SSL connection.
It will allow a visitor behind a firewall to connect to a TCP-based service hosted on the Pinggy.
Passing multiple tunnel types is not recommended. The behavior is undefined.
2. qr/aqr
Pinggy provides an option to display a QR Code with the URL in the terminal. The qr key display a smaller unicode base QR Code on the terminal while aqr draws a larger ASCII-only QR code. Start a http tunnel with QR Code as follows:
ssh -R0:localhost:<localport> qr@a.pinggy.io
ssh -R0:localhost:<localport> <token>+qr@a.pinggy.io
3. auth
Pinggy by default tries to start a tunnel without any authentication. However, it may not works always due to the limitation of some ssh client (e.g. dropbear) implementation. Use auth keyword to stop this behavior. With this keyword, a client may ask for a password, kindly provide 0000 (or any string).
4. force
Pinggy provides force keyword to forcefully disconnect existing tunnel with the same token before creating a new connection Use it as follows:
ssh -R0:localhost:<localport> <token>+force@a.pinggy.io
It is useful only with token based connection.
Multiple Port Forwarding
Pinggy supports multiple port forwarding via Domain Forwarding. This feature is available only for Pro tunnels. If a token has multiple domain names associated with it (e.g., via a wildcard custom domain), multiple port forwarding can be used to route requests for different domains to different ports.
Let’s assume that *.example.com is registered with the token tkn. We want to forward requests to register.example.com to port 8080, while the rest of the requests should be forwarded to port 80. We can use the following ssh command to set up these forwardings:
ssh -R0:localhost:80 -Rregister.example.com:0:localhost:8080 tkn+qr@a.pinggy.io
Command line options
Pinggy has options to configure live HTTP header manipulation, HTTP authentication, and IP whitelisting in the command line only.
Syntax for a command line option is as follows
command[:CommandOption1[:CommandOption2...]]
Here is the list of command line options.
a:HeaderName:HeaderValue
It will add a header with HeaderName and HeaderValue with every HTTP request. One can put as many add the header as one want.
r:HeaderName
It would remove every header with the header name HeaderName from the HTTP request. Redunt remove header commands are silently ignored.
u:HeaderName:HeaderValue
It is the combination of remove header and add header commands. It would remove every header with the header name HeaderName and put a new header with the header name HeaderName and value HeaderValue.
2. Basic Authentication
Pinggy supports basic authentication for the visitor. It is username-password-based authentication that a browser asks for while visiting the website. The syntax to set basic authentication is as follows
b:username:password
It never sends basic auth to the client.
3. Key Authentication
Key authentication is a mechanism where a visitor send an Authorisation header with the value Bearer <key>. The request will be passed to the client only if the Key matches the provided one. The syntax to set the key is as follows:
k:key
Basic authentication and key authentication can be used together.
4. IP White Listing
IP White Listing is a feature where visitors from certain IP addresses are allowed to connect. It ignores requests from other IP addresses without responding.
The syntax to set IP white list is as follows
w:[IP1[,IP2[,IP3..]]]
5. Enforce HTTPS only
Pinggy now provides support for HTTPS only tunneling. Here, the content will the served over HTTPS only. Pinggy server. redirect any request to HTTPS. User can enable this feature using following command line argument.
x:https
The tls connection would terminate at the pinggy server only. The plain text data would be sent to client.
X-Forwarded-For is a mechanism to finding out the source of the connection. Pinggy http tunnel does not implicitly add the this flag. However, user can enable X-Forwarded-For header with following command line option.
x:xff[:<Header Name>]
X-Forwarded-For is the default header name. However one can add any header name as they want.
7. Original request url
As pinggy mangles header, it is difficult for the client to understand the real url from the request. Pinggy can provide them if user provide the following argument.
x:fullurl
If this option is provided in the command line option, Pinggy would add a extra header X-Pinggy-Url which contains the original url for that request.
8. Run tls locally
By default, we assume that the local server is a TCP server (except for TLS tunnels). However, just in case a user wants to run the local server as a TLS (for example, HTTPS) server, Pinggy can set up a TLS connection from the server. You can use the following option:
x:localServerTls[:serverName]
This option assumes that the local server expects a TLS connection. So, Pinggy will create a TLS connection to the client server instead. serverName is the SNI for the TLS connection. This is optional. By default, the Pinggy server provides SNI as localhost.
9. Pass preflight requests
In several cases, browser send preflight request before sending actually. The website never have any control over the prefight request and if it fails, original request won’t be made by the browser. Pinggy by default process request and response headers. However, it might be problem for preflight requests. Pinggy can detect preflight request and pass them without modification with following option:
x:passpreflight
10. Reverse Proxy Mode
Pinggy now supports reverse proxy which it puts X-Forwarded-For, X-Forwarded-Proto, X-Forwarded-Host, and Forwarded headers in the http requests. This is enabled by default for HTTP(S) tunnels. But to disable it, pass the x:noreverseproxy argument.
x:noreverseproxy
- Currently reverse proxy mode is supported only for
http tunnel. It will be supported for tlstcp in future.
Kindly note that a Pinggy server does not run any command in the remote server. It uses command line options to configure the tunnel.