Custom Domain
With Pinggy Pro you can configure your own domain name, such as www.mysite.com or *.example.com, to access your tunnels. Pinggy also configures TLS certificates for you automatically. The certificates are provided by Let’s Encrypt.
Get your domain
This guide assumes that you own a domain name such as example.com.
We also require you to be able to manage the DNS records for this domain.
In case you do not own a domain and wish to buy one, you can get one from any popular domain name provider such as GoDaddy, Namecheap, etc.
Configure Custom Domain in Pinggy
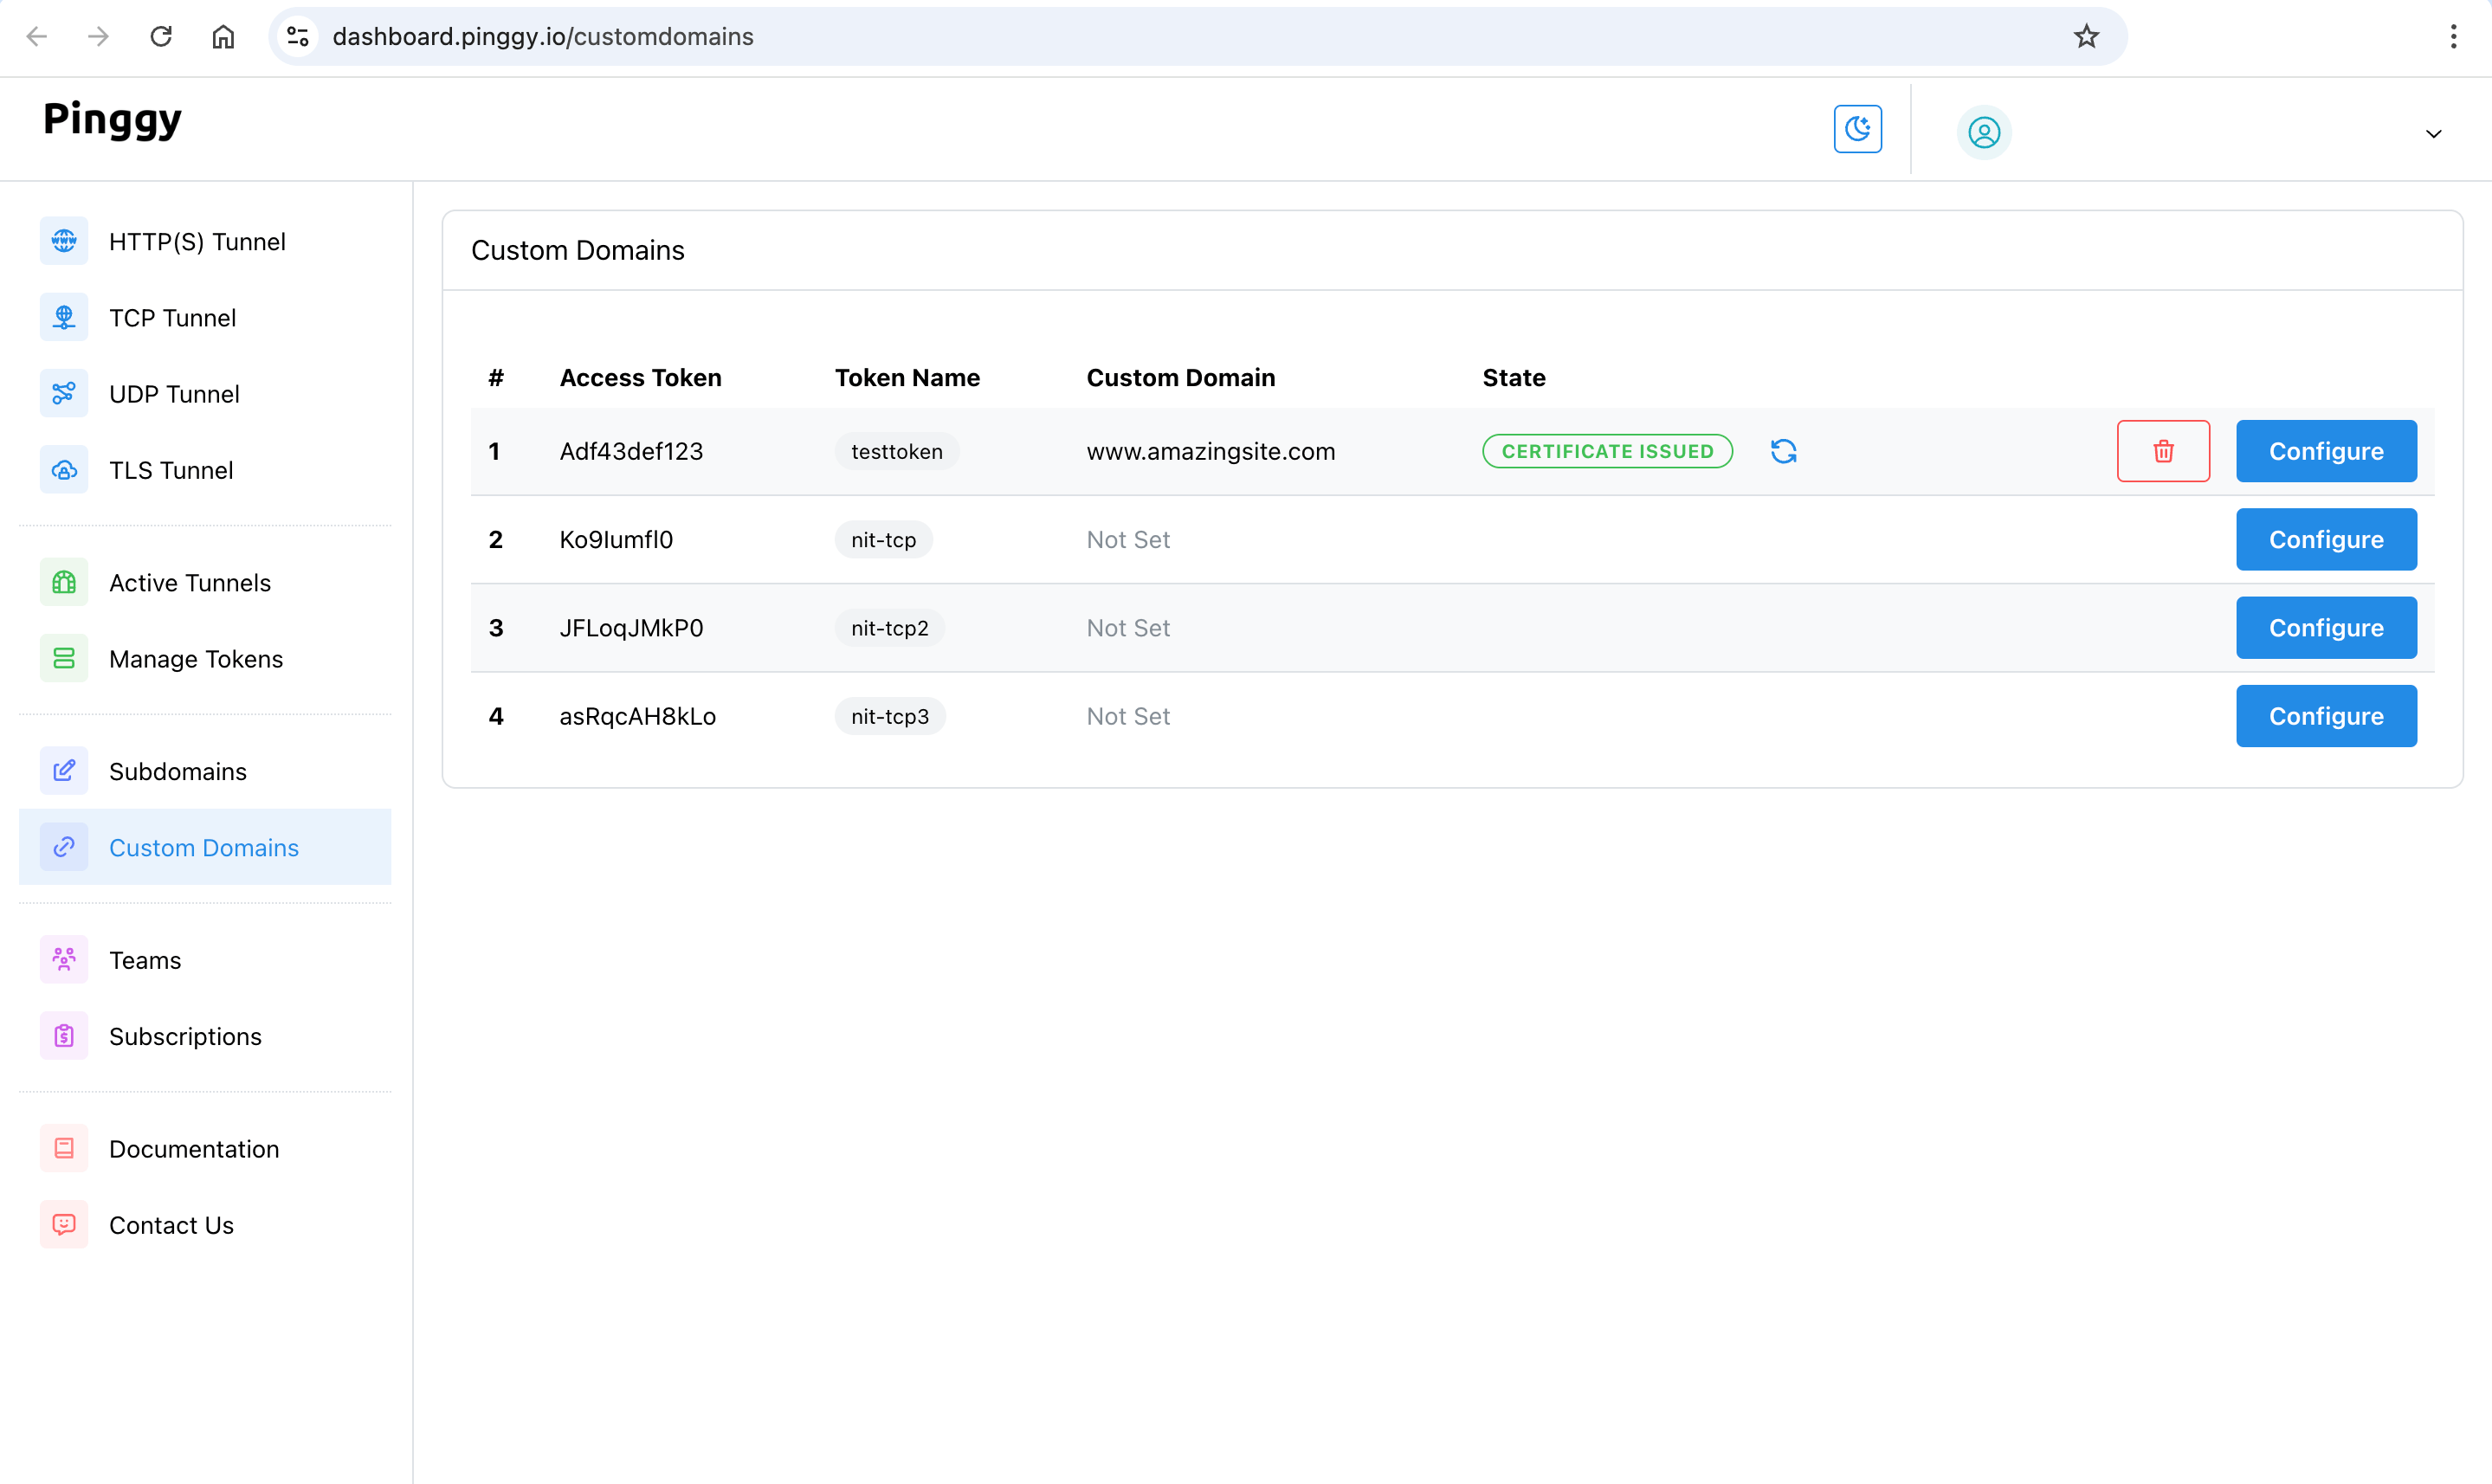
Once you have upgraded to Pinggy Pro, log in to Pinggy Dashboard -> Domains.
- Click on the edit icon for the domain for which you want to set up the custom domain.
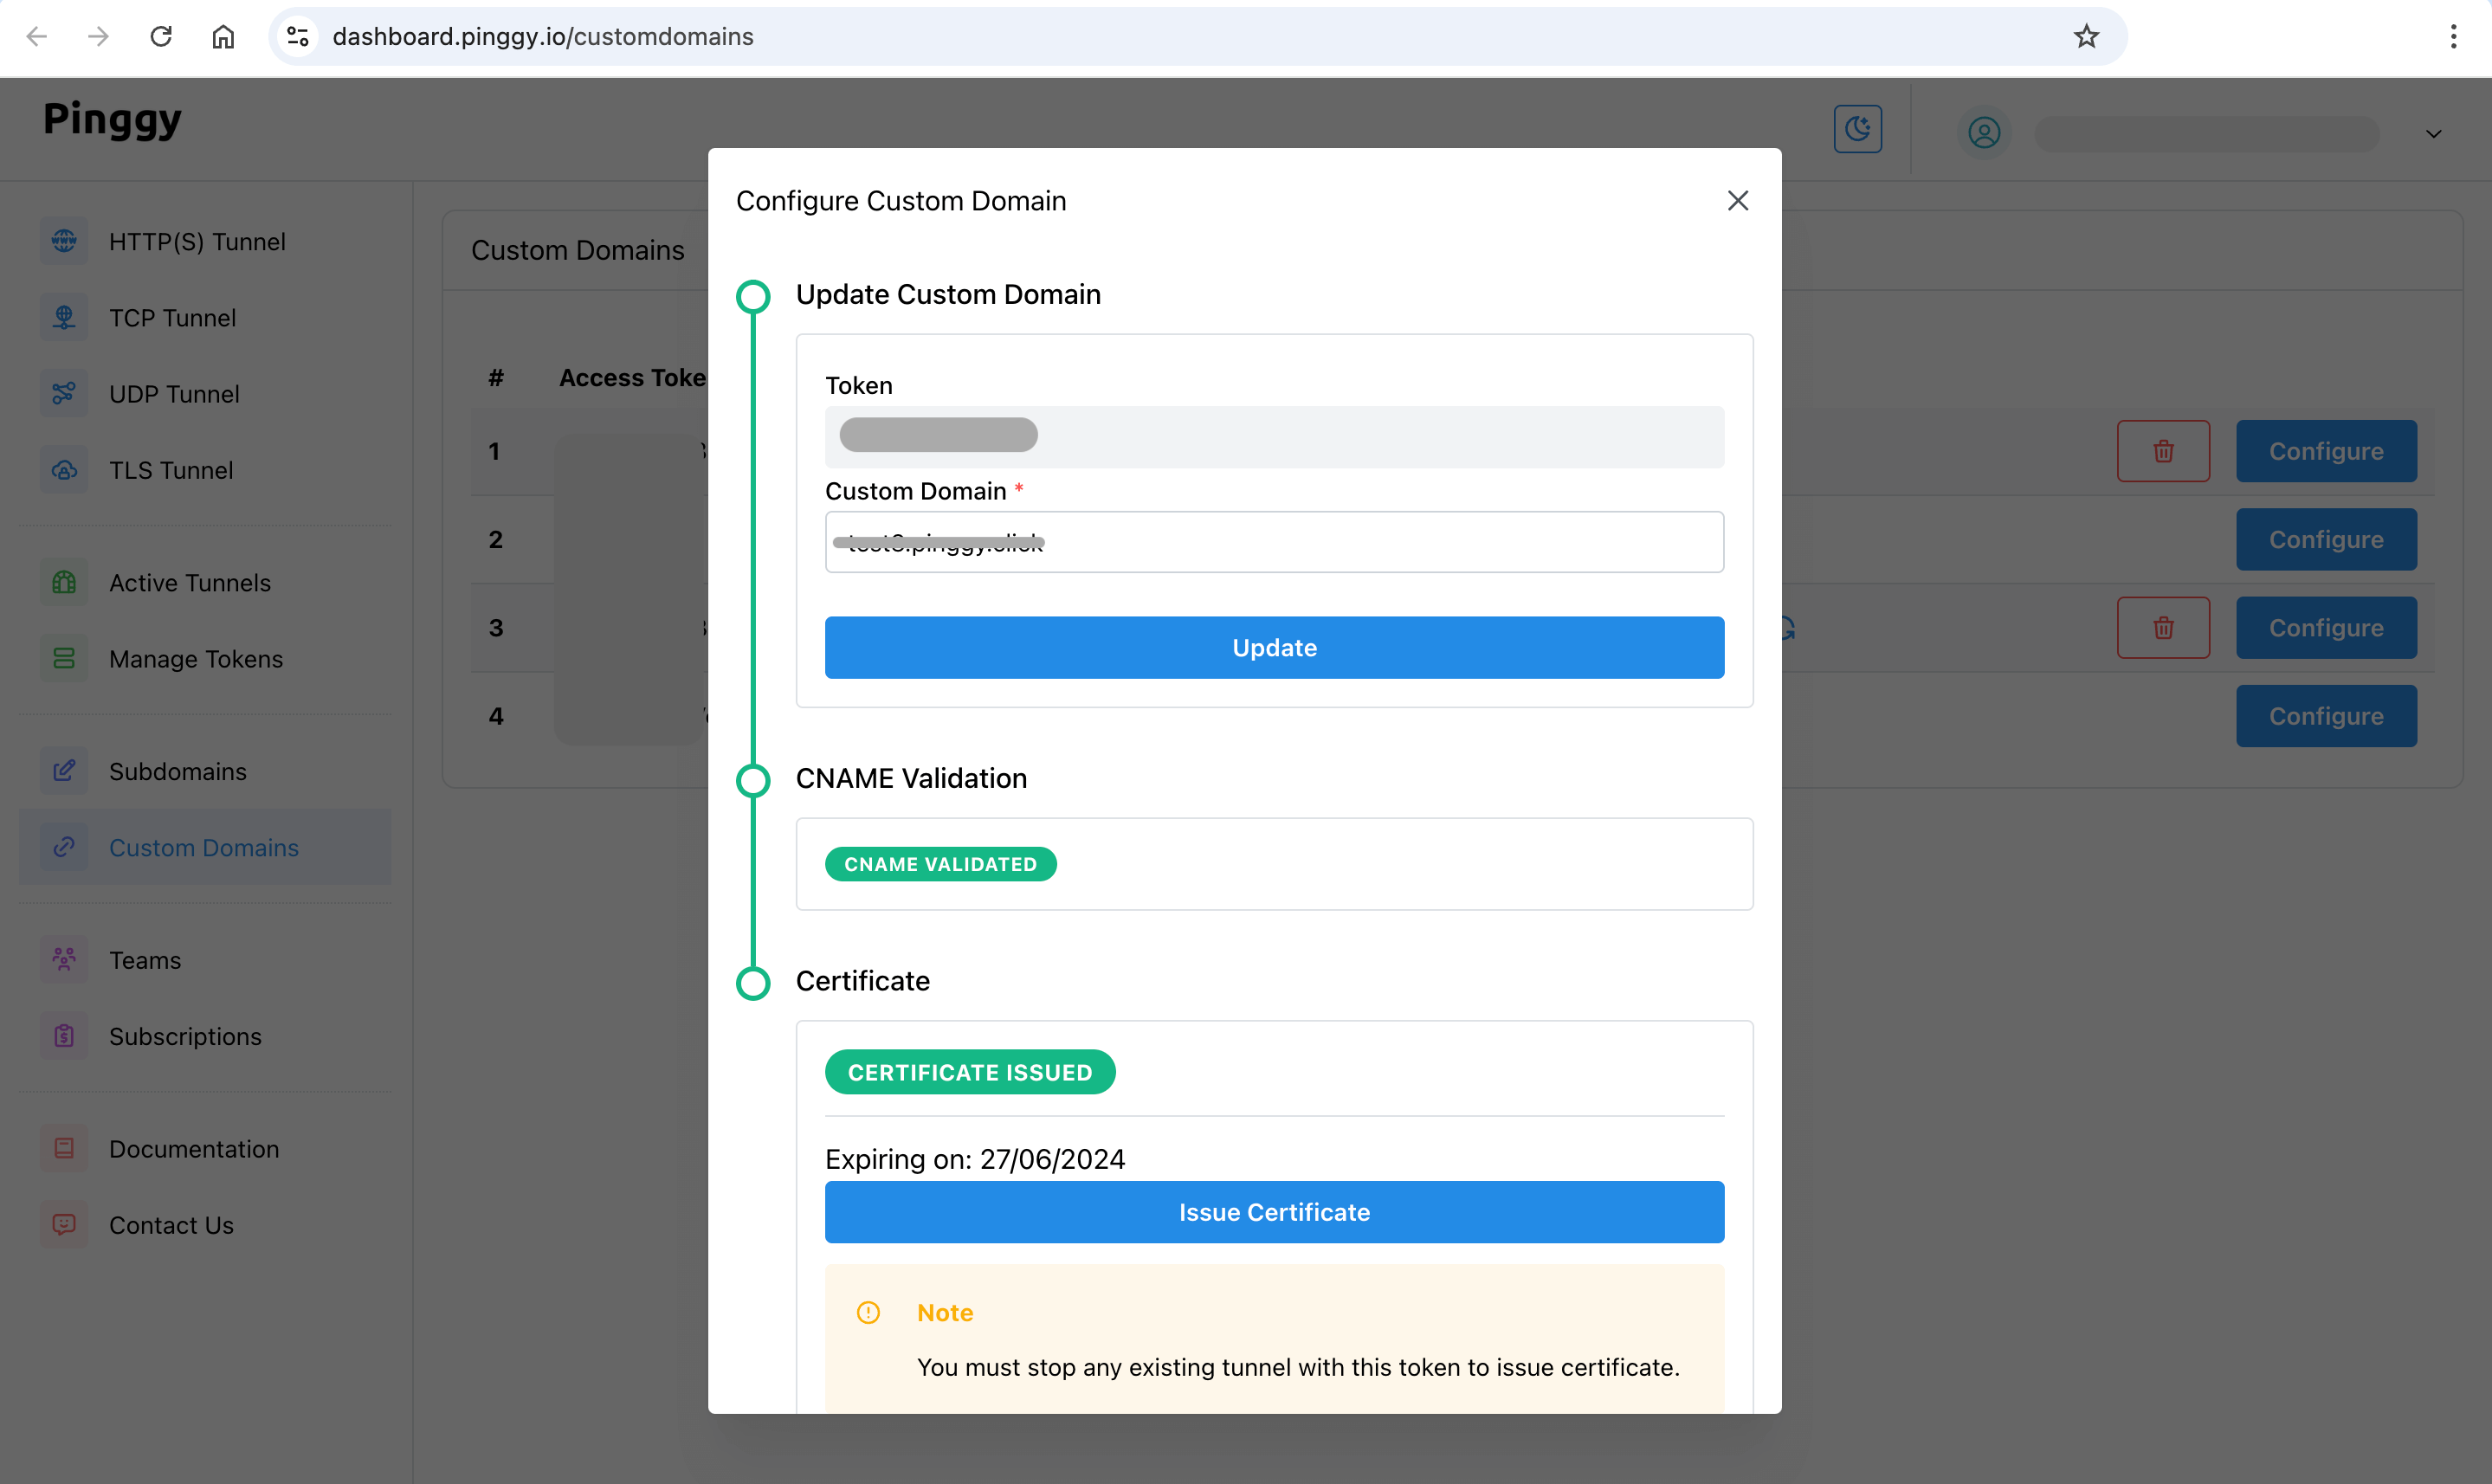
- Click on the “Custom Domain” tab.
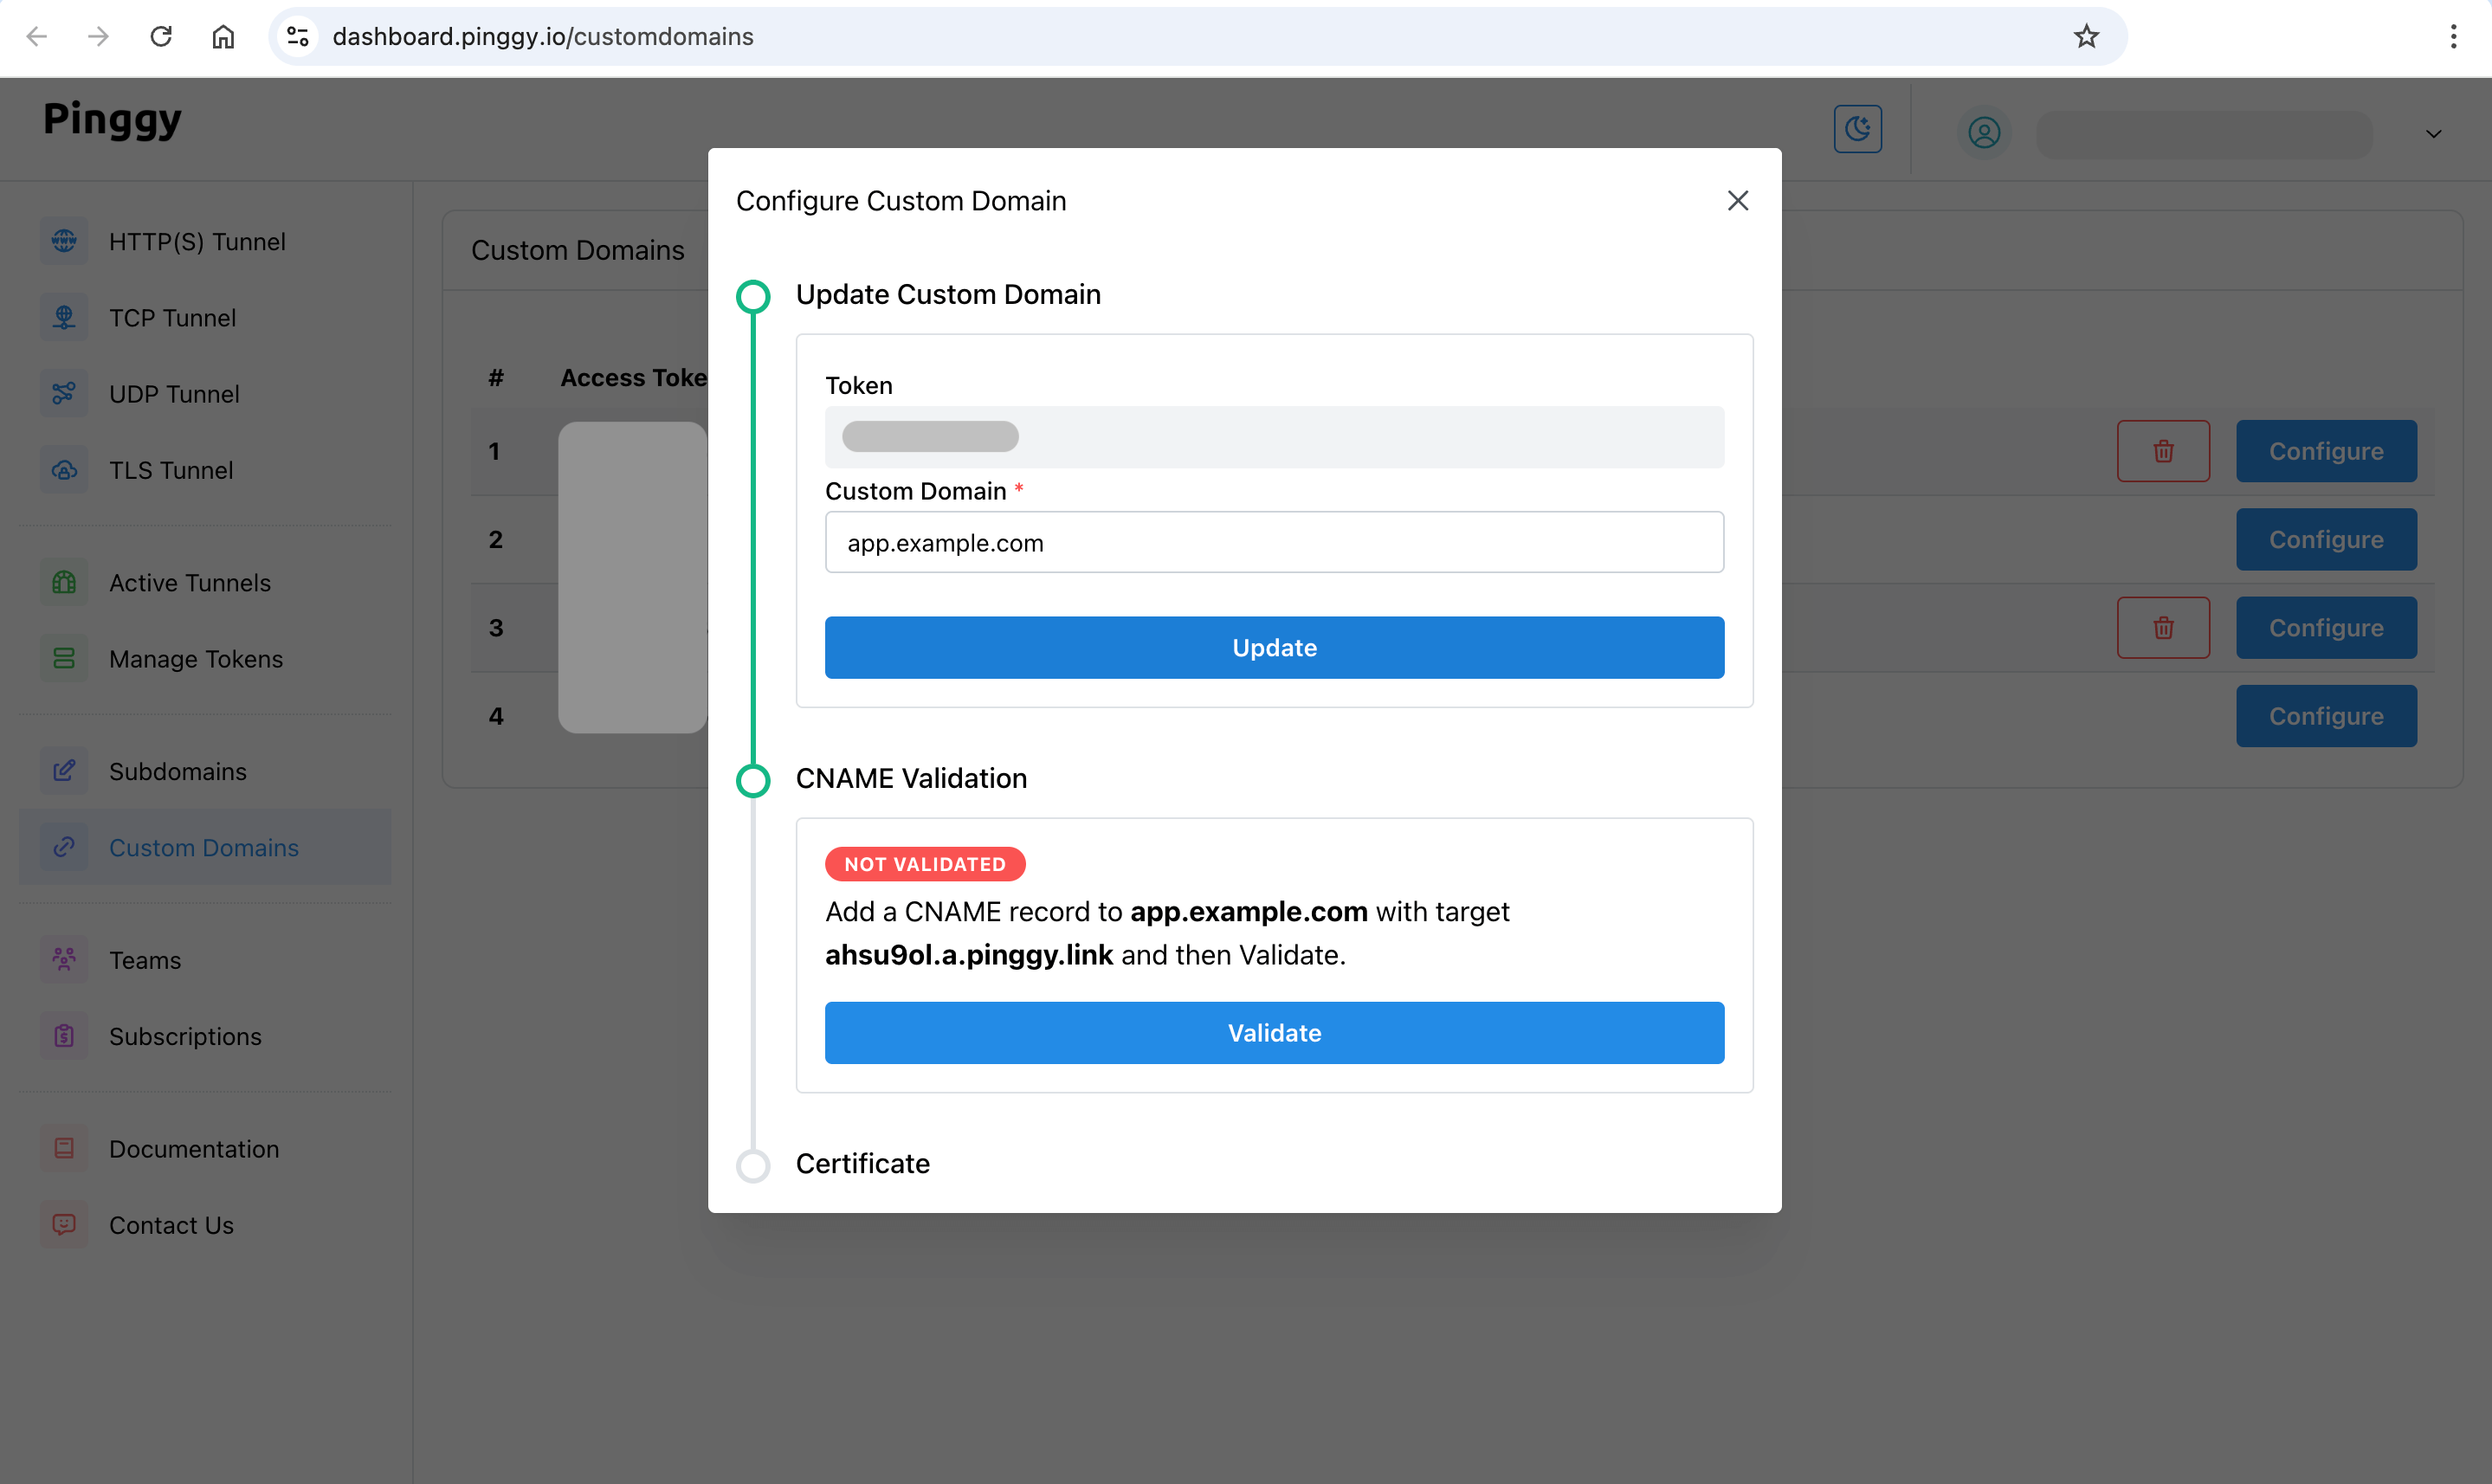
- Enter your custom domain such as
app.example.com. Then press the Update button. - You may also enter a wildcard custom domain such as
*.example.com. - After that, you will get the CNAME configuration instructions, such as:
Add a CNAME record to app.example.com with target ahsu9ol.a.pinggy.link and then Validate.
NOTE: If you use a base domain, such as mysite.com, instead of a subdomain (app.mysite.com), then you will be guided through a relay setup process. Click here to read about the relay setup process.
Set the CNAME Record
- Follow the given instructions to set the CNAME record.
- For example, for the above example, you need to set the cname record for
app.example.com with the value ahsu9ol.a.pinggy.link.. - For configuring your CNAME record, visit your domain name provider’s DNS manager.
- The record type will be
CNAME. - Host value will be the part of the domain name excluding your base domain. For example:
app in case of app.example.com. Similarly, for abc.def.example.com, host will be abc.def. - The value of the record will be the target value shown in the dashboard. For example:
ahsu9ol.a.pinggy.link. [ The dot at the end might be necessary ] - We recommend a low TTL such as
600. - If you use Cloudflare to manage DNS, then turn off “proxy” option.
- Check the CNAME record: Use the online tool: toolbox.googleapps.com/apps/dig/ to check if your CNAME record is set correctly or not.
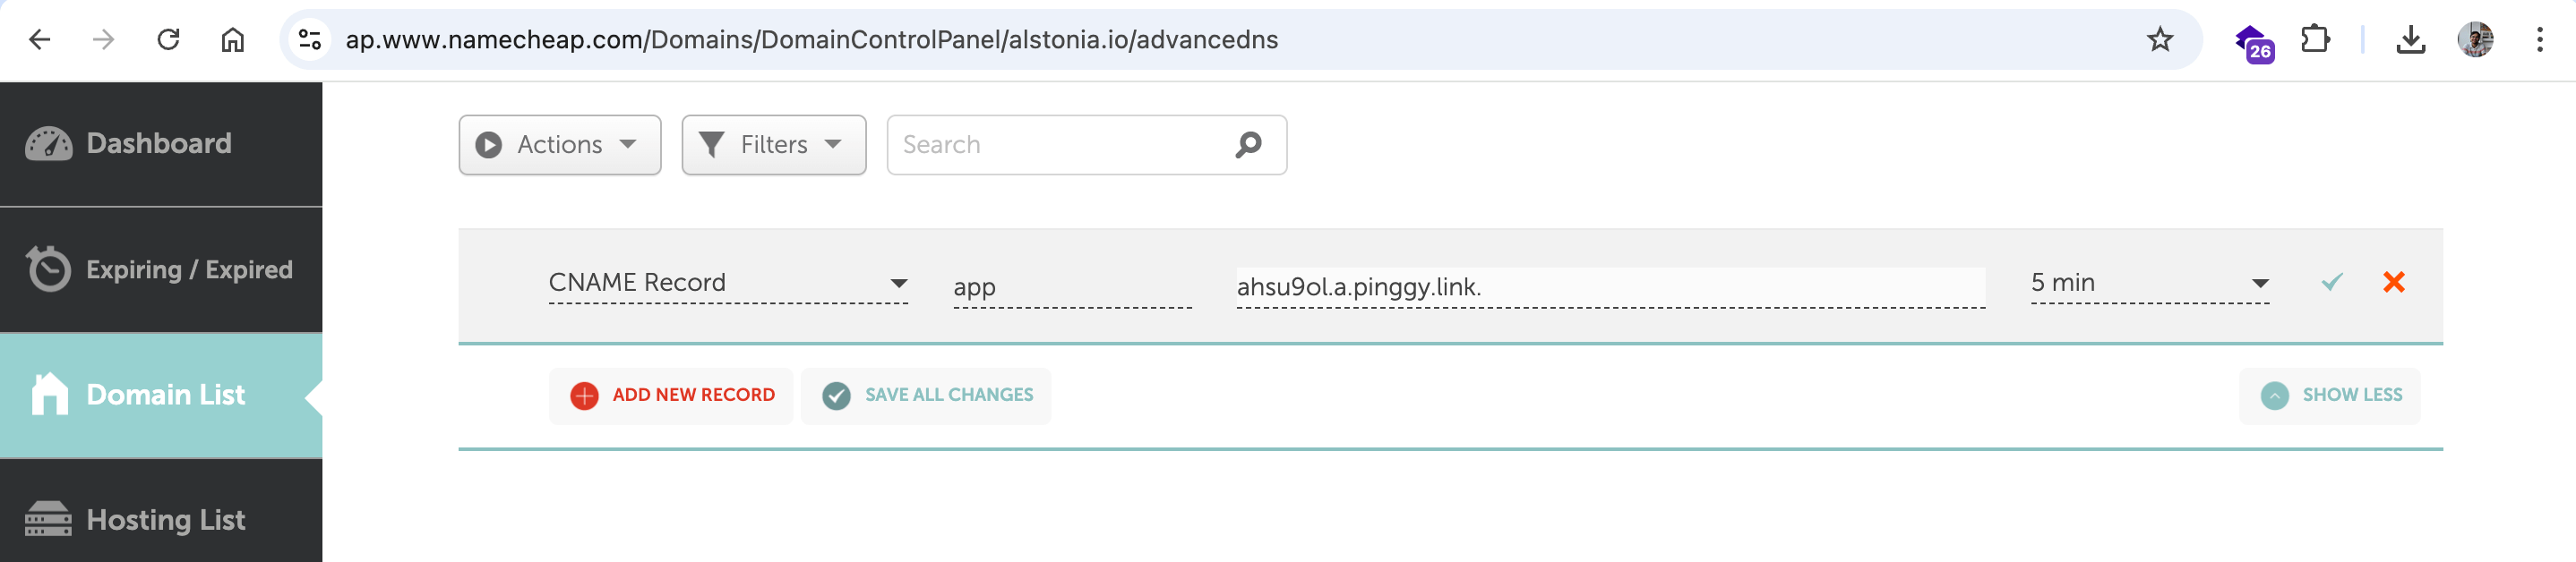
Example with Namecheap for setting up CNAME record
- Log in to Namecheap.
- Navigate to Namecheap Dashboard -> “Domain List”
- Click on the “Manage” button.
- Click on “Advanced DNS” tab.
- Click on “ADD NEW RECORD”
- Type will be
CNAME. - Assuming your domain is
app.example.com, host will be app. - Value of the record will be the target value shown in the dashboard. For example:
ahsu9ol.a.pinggy.link. - Set a low TTL such as 5 min.
Issue Certificate
- After the CNAME record is set, click on “Validate” in the Pinggy dashboard.
- Once validated, you can issue the TLS certificate.
- Make sure that no tunnel is running (with this token).
- Click on the “Issue Certificate” button.
- Certificate issuing process may take up to a minute.
- After the certificate is issued, restart your tunnels after some time. It may take up to 7 minutes for the certificate to be active.
- You can now access your tunnels with your custom domain such as
app.example.com.
Reach out to us at contact@pinggy.io if you are facing any difficulty in configuring the custom domain.