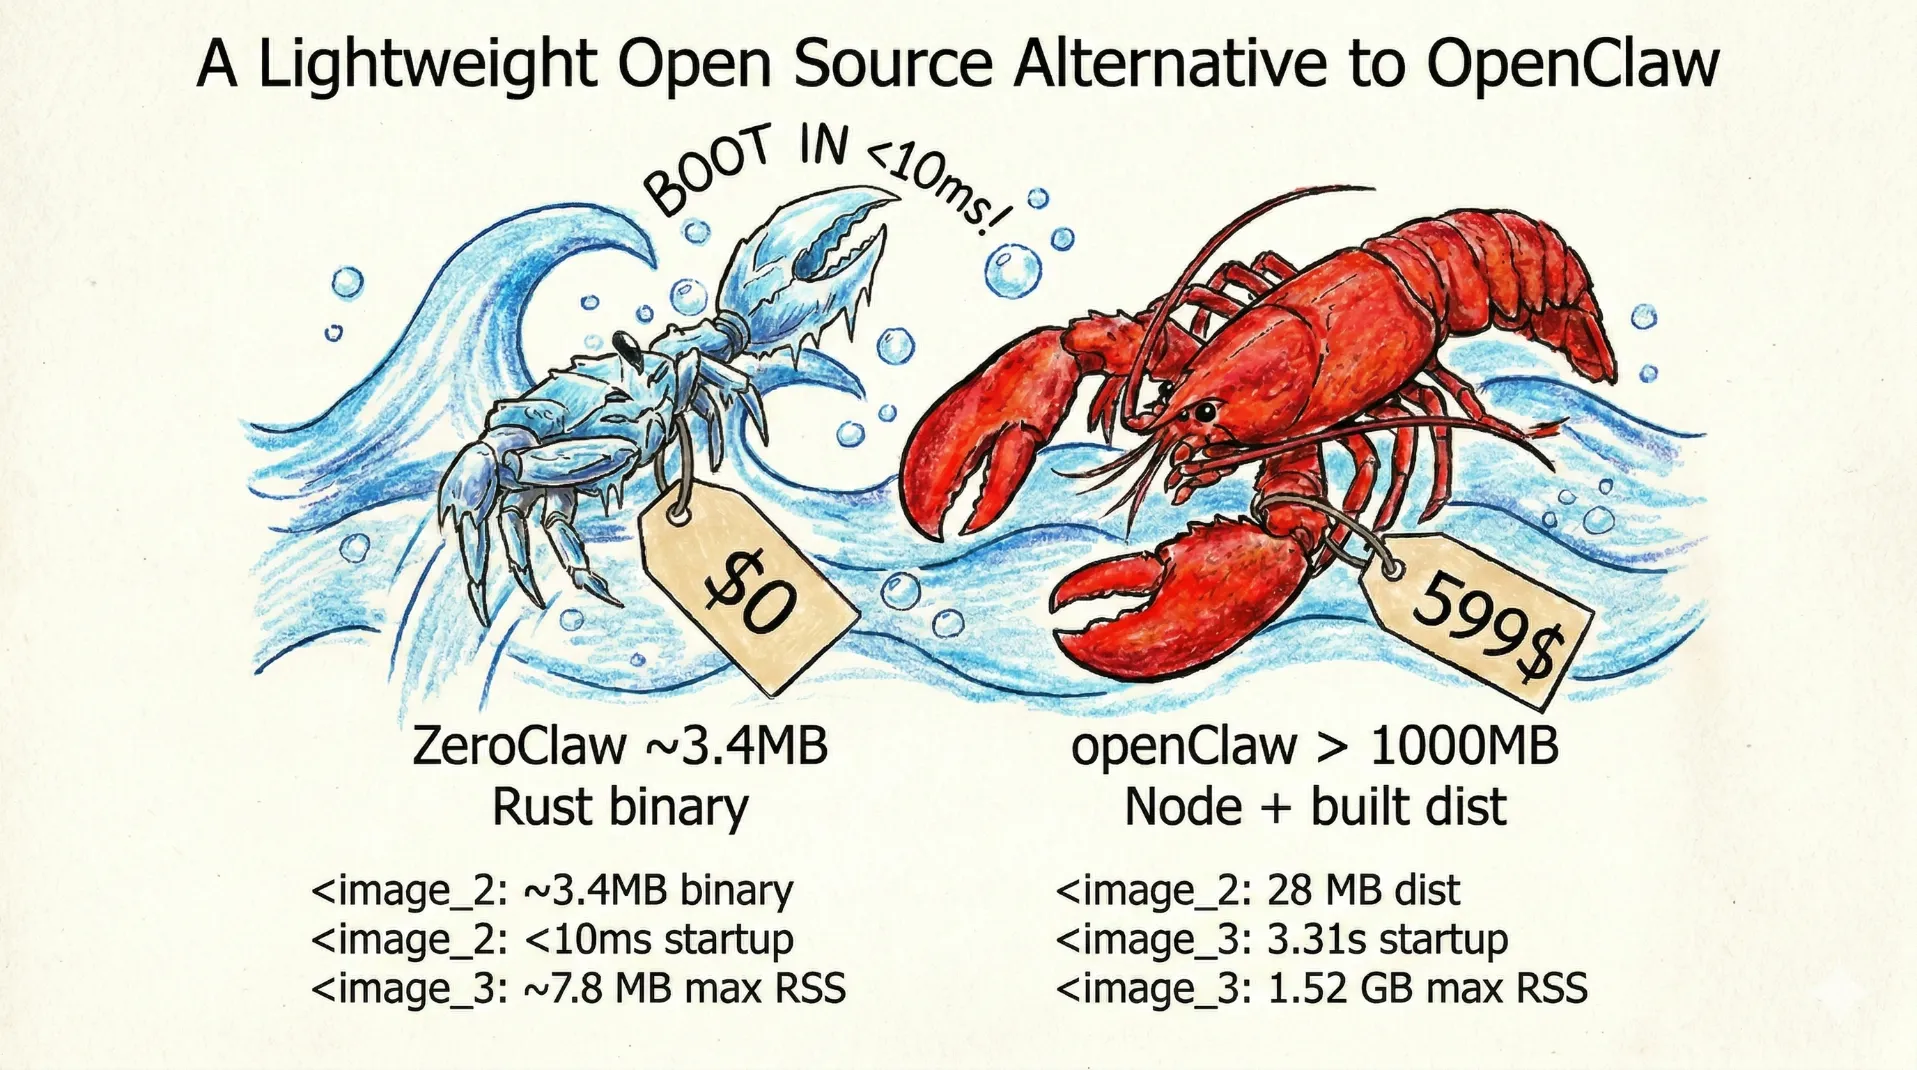
ZeroClaw is a blazing-fast, ultra-lightweight AI agent framework built entirely in Rust. OpenClaw is fantastic and has over 100,000 GitHub stars, but it’s a resource hog over 1 GB of RAM plus a TypeScript runtime overhead. ZeroClaw gives you all the same features (multi-channel messaging, persistent memory, tool execution, autonomous behavior) packed into an ~8.8 MB binary that sips less than 5 MB of RAM.
Want to run a self-hosted AI agent on a Raspberry Pi, an old laptop, or that $5 VPS you have lying around? ZeroClaw is your answer.
Summary
- Install ZeroClaw:
brew install zeroclaw - Build from source (alternative):
git clone https://github.com/zeroclaw-labs/zeroclaw.git cd zeroclaw ./bootstrap.sh - Create a Discord bot and configure the token
- Configure provider and Discord via the onboarding wizard
- Start the channel server:
zeroclaw channel start
Resources:
Why ZeroClaw Over OpenClaw?
OpenClaw proved something important: self-hosted AI agents with persistent memory, proactive messaging, and multi-channel support aren’t just possible they’re practical. But here’s the catch: it’s built on TypeScript, which means you need Node.js v22+, over 1 GB of RAM, and startup times that can take minutes on slower hardware.
ZeroClaw takes that exact vision and rebuilds it from scratch in Rust. The performance difference is wild:
| Metric | ZeroClaw | OpenClaw |
|---|---|---|
| Language | Rust | TypeScript |
| RAM Usage | <5 MB | >1 GB |
| Startup (0.8 GHz) | <10 ms | >500 ms |
| Binary Size | ~8.8 MB | ~28 MB + Node.js |
| Architecture | ARM, x86, RISC-V | x86, ARM (via Node.js) |
| Dependencies | Single binary, zero runtime | Node.js + npm packages |
ZeroClaw uses 99% less memory than OpenClaw. That’s not a typo it’s the difference between needing a dedicated server and running on hardware you already own.
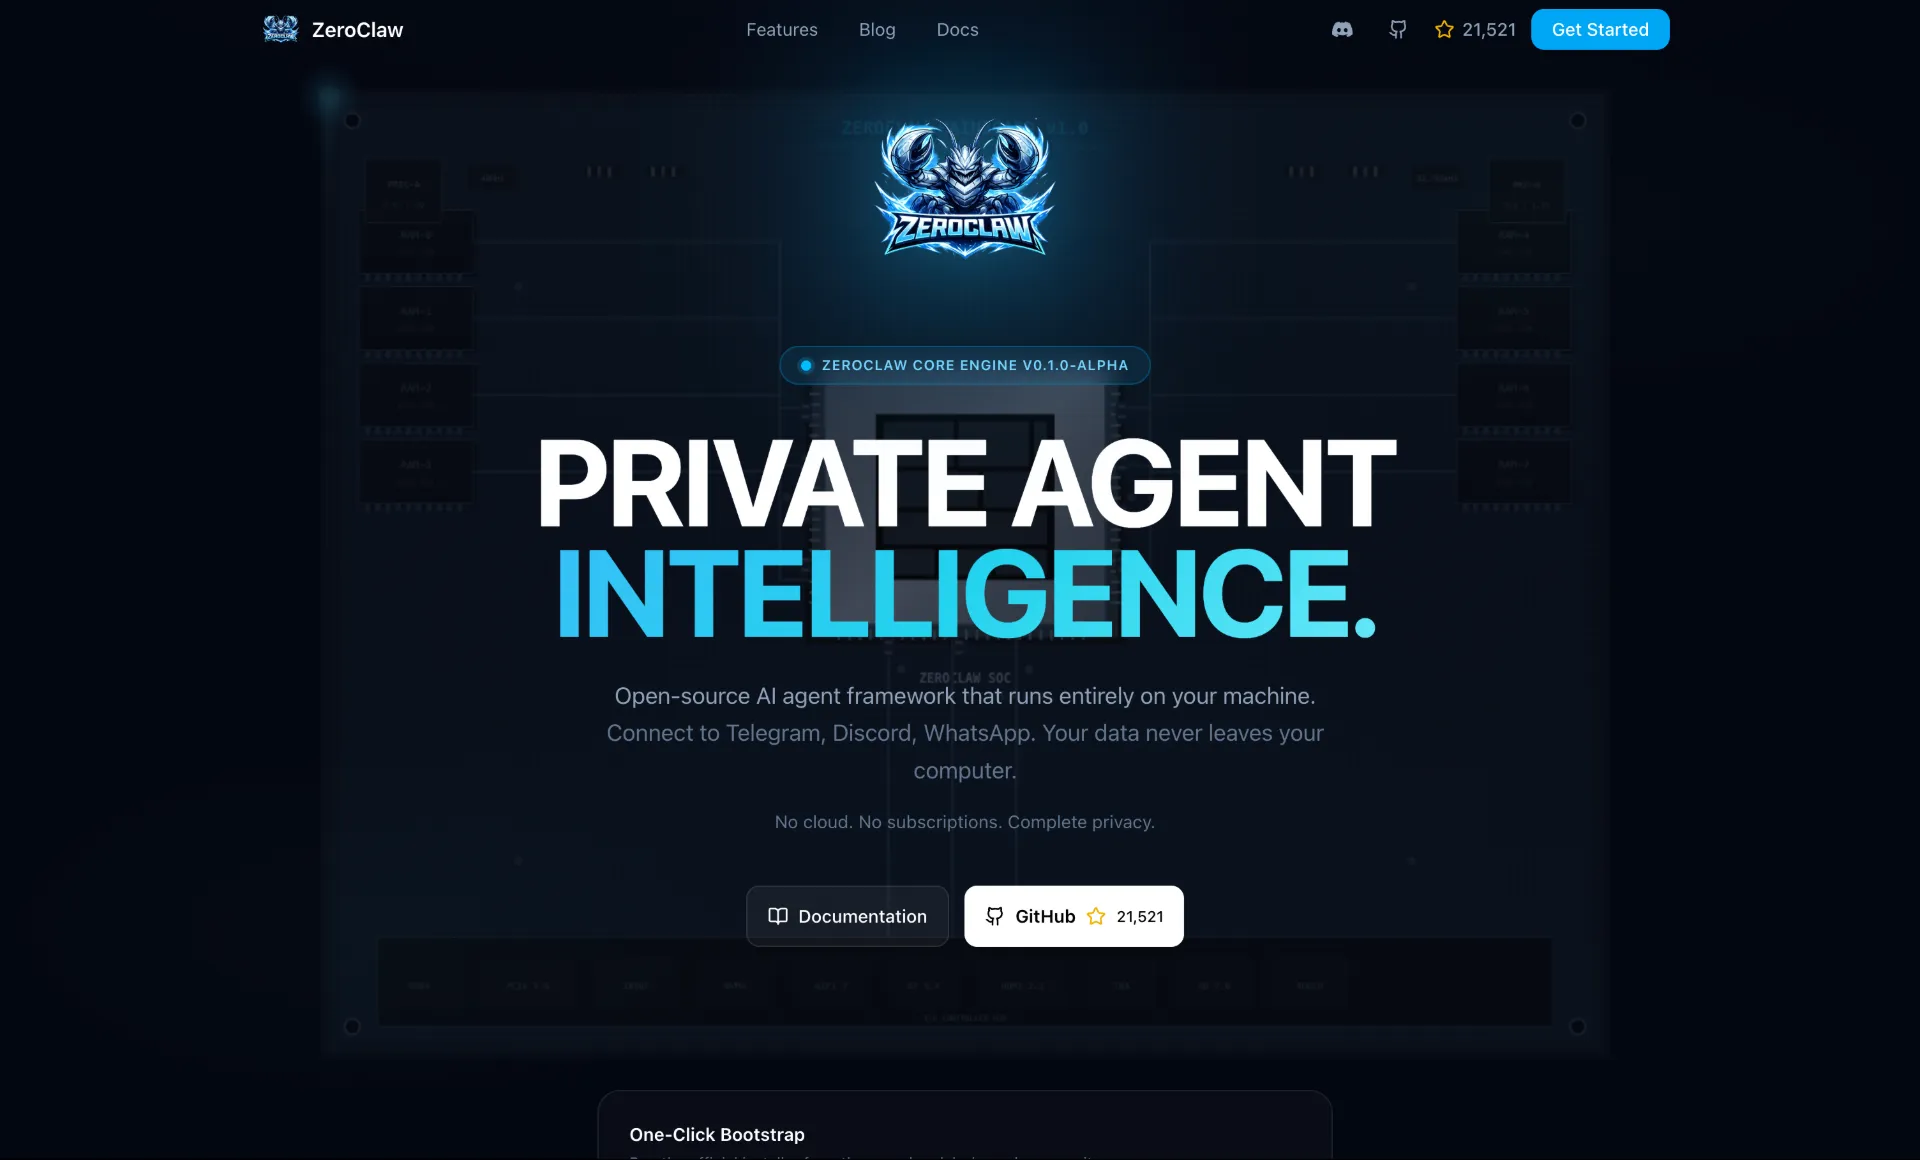
What is ZeroClaw?
ZeroClaw is an open-source runtime for building AI agents. It abstracts away the complexity of plugging in different AI models, tools, memory systems, and execution layers so you write your agent logic once and it just works wherever. The whole thing ships as a single Rust binary with zero external runtime dependencies. No Node.js, no npm, no bloat.
Key Features:
- Lean Runtime: Operates within a few-megabyte memory envelope on release builds
- Multi-Provider Support: Works with Anthropic, OpenAI, Google Gemini, OpenRouter, and any OpenAI-compatible API
- Multi-Channel Messaging: Talk to your agent via CLI, Discord, and more
- Persistent Memory: SQLite-backed memory with vector search for semantic recall
- Research Phase: Gathers information through tools before generating responses
- Secure by Default: Pairing-based authentication, sandboxing, explicit allowlists, and workspace scoping
- Trait-Driven Architecture: Swap any component (provider, channel, tool, memory) without touching others
- Cross-Platform: Runs on ARM, x86, and RISC-V
The project has already gathered over 21,000 GitHub stars and is dual-licensed under MIT and Apache 2.0.
Prerequisites
Here’s what you’ll need before diving in:
If you’re using Homebrew (easiest path):
- macOS or Linux with Homebrew
If you’re building from source:
- Rust installed (stable or nightly)
- About 2 GB RAM and 6 GB disk space for the build
- Git
An LLM API key: ZeroClaw works with Anthropic Claude, OpenAI, Google Gemini, OpenRouter, GitHub Copilot, and any OpenAI-compatible API. Grab your API key from your provider.
A Discord account: We’re setting up a Discord bot in this guide, so you’ll need one.
Step 1: Install ZeroClaw
You’ve got options here. Pick the one that fits your workflow.
Option A: Homebrew (The Lazy Way Recommended)
Fastest path to production on macOS or Linux:
brew install zeroclawVerify the installation:
zeroclaw --versionOption B: Build from Source (The Adventurous Way)
Want the bleeding edge or need to customize the build? Build it yourself:
git clone https://github.com/zeroclaw-labs/zeroclaw.git
cd zeroclaw
./bootstrap.sh
Run bootstrap.sh and it’ll walk you through it ask a few questions, then build automatically:
ZeroClaw guided installer
Answer a few questions, then the installer will run automatically.

Install system dependencies for Darwin? [y/N] y
==> Detected Rust toolchain: rustc 1.92.0-nightly
Run a separate prebuild before install? [Y/n] y
Install zeroclaw into cargo bin now? [Y/n] y
Run onboarding after install? [y/N] y
Use interactive onboarding? [Y/n] y
You’ll see an installer plan:
==> Installer plan
    docker-mode: no
    install-system-deps: yes
    install-rust: no
    build-first: yes
    install-binary: yes
    onboard: yes
    interactive-onboard: yes

Proceed with this install plan? [Y/n] y
Hit y and the build kicks off. On a normal machine, it takes about 5–6 minutes. When it finishes, the binary lands in your cargo bin:
Finished `release` profile [optimized] target(s) in 6m 08s
==> Installing zeroclaw to cargo bin
  Installing /Users/you/.cargo/bin/zeroclaw
  Installed package `zeroclaw v0.1.7`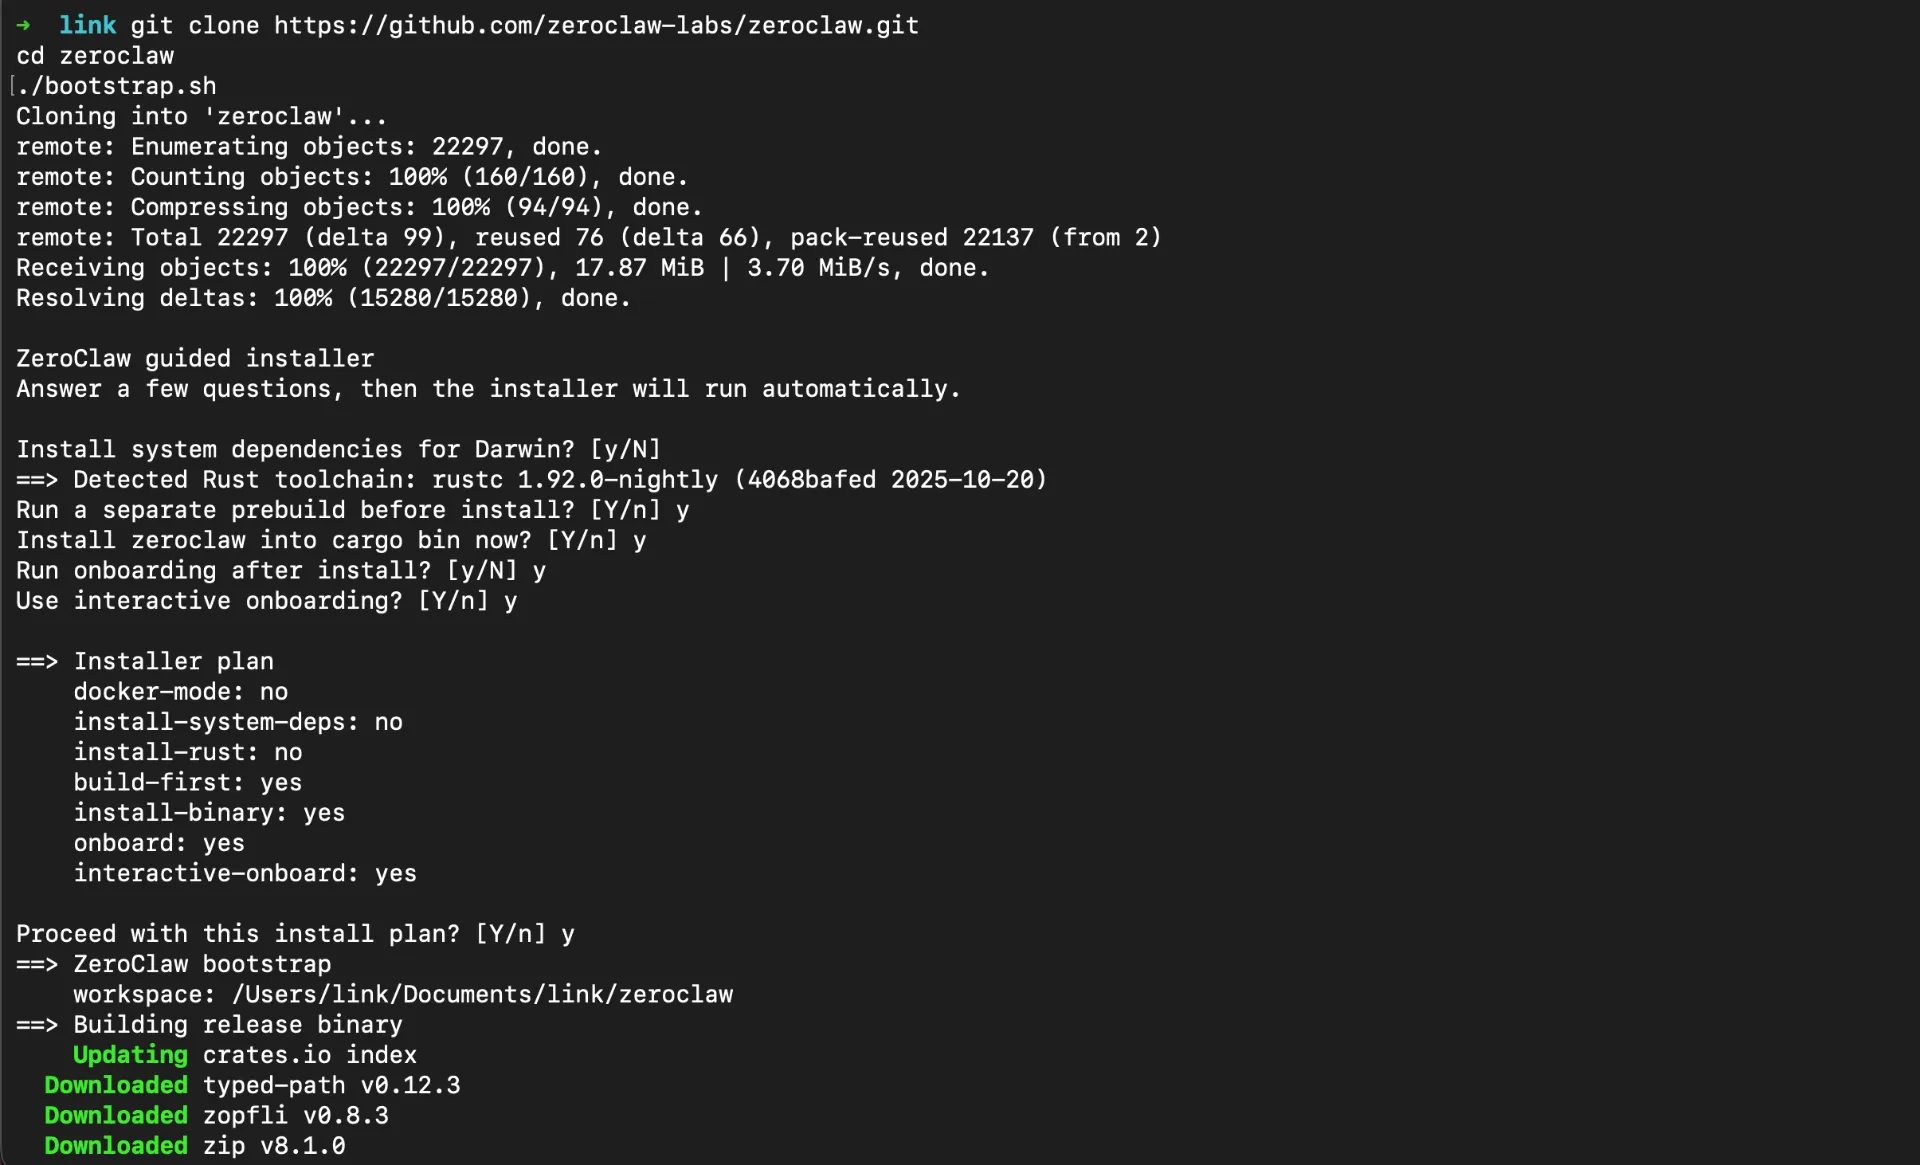
Got a potato laptop? Use the prebuilt binary:
./bootstrap.sh --prefer-prebuiltStep 2: Create a Discord Bot
Before you run the onboarding wizard, set up a Discord bot. (If you’ve set one up for OpenClaw, it’s identical you’ve got this.)
Create the Application
- Go to the Discord Developer Portal
- Click New Application and give it a name (e.g., “ZeroClaw Bot”)
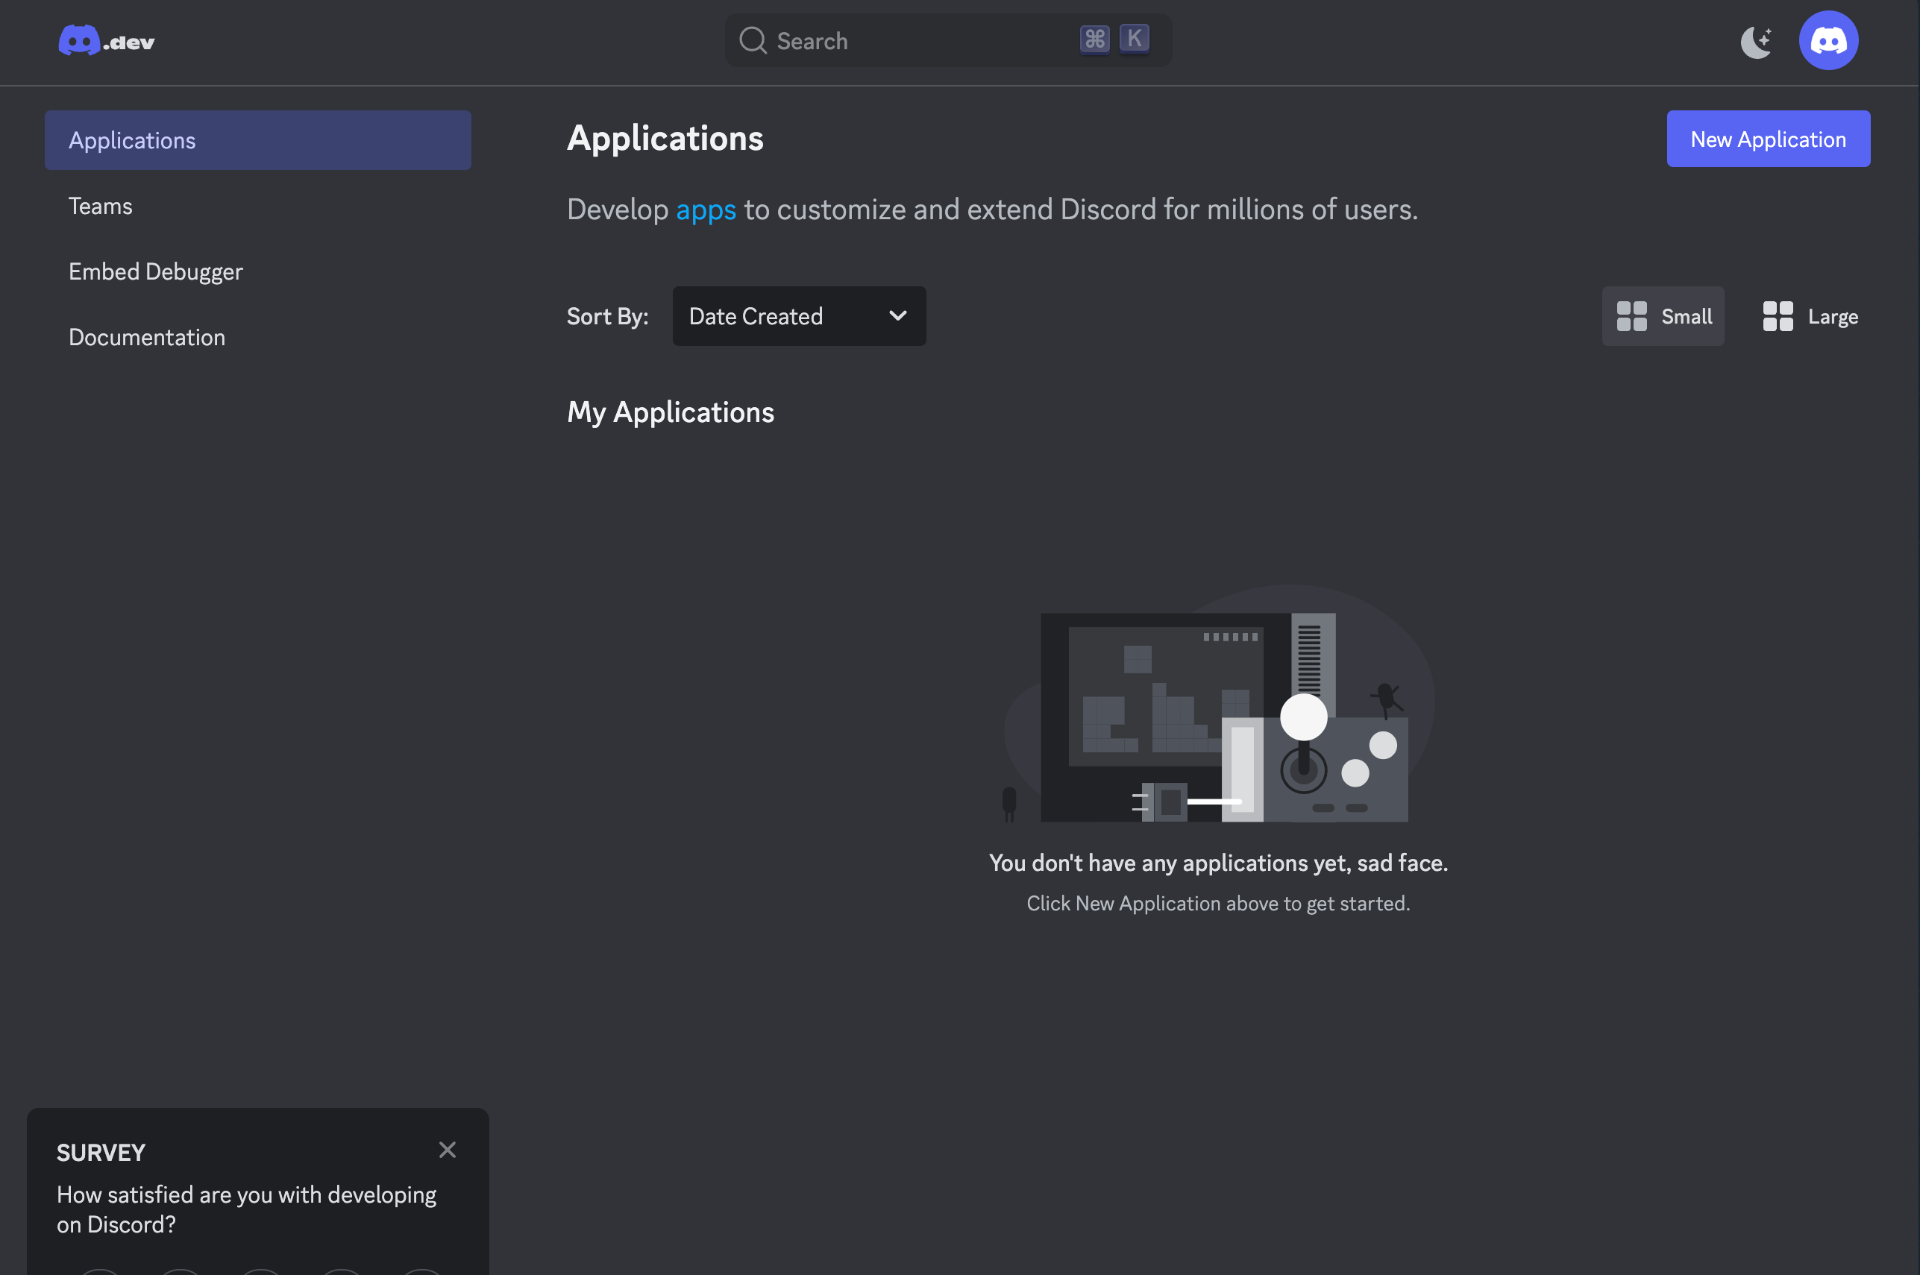
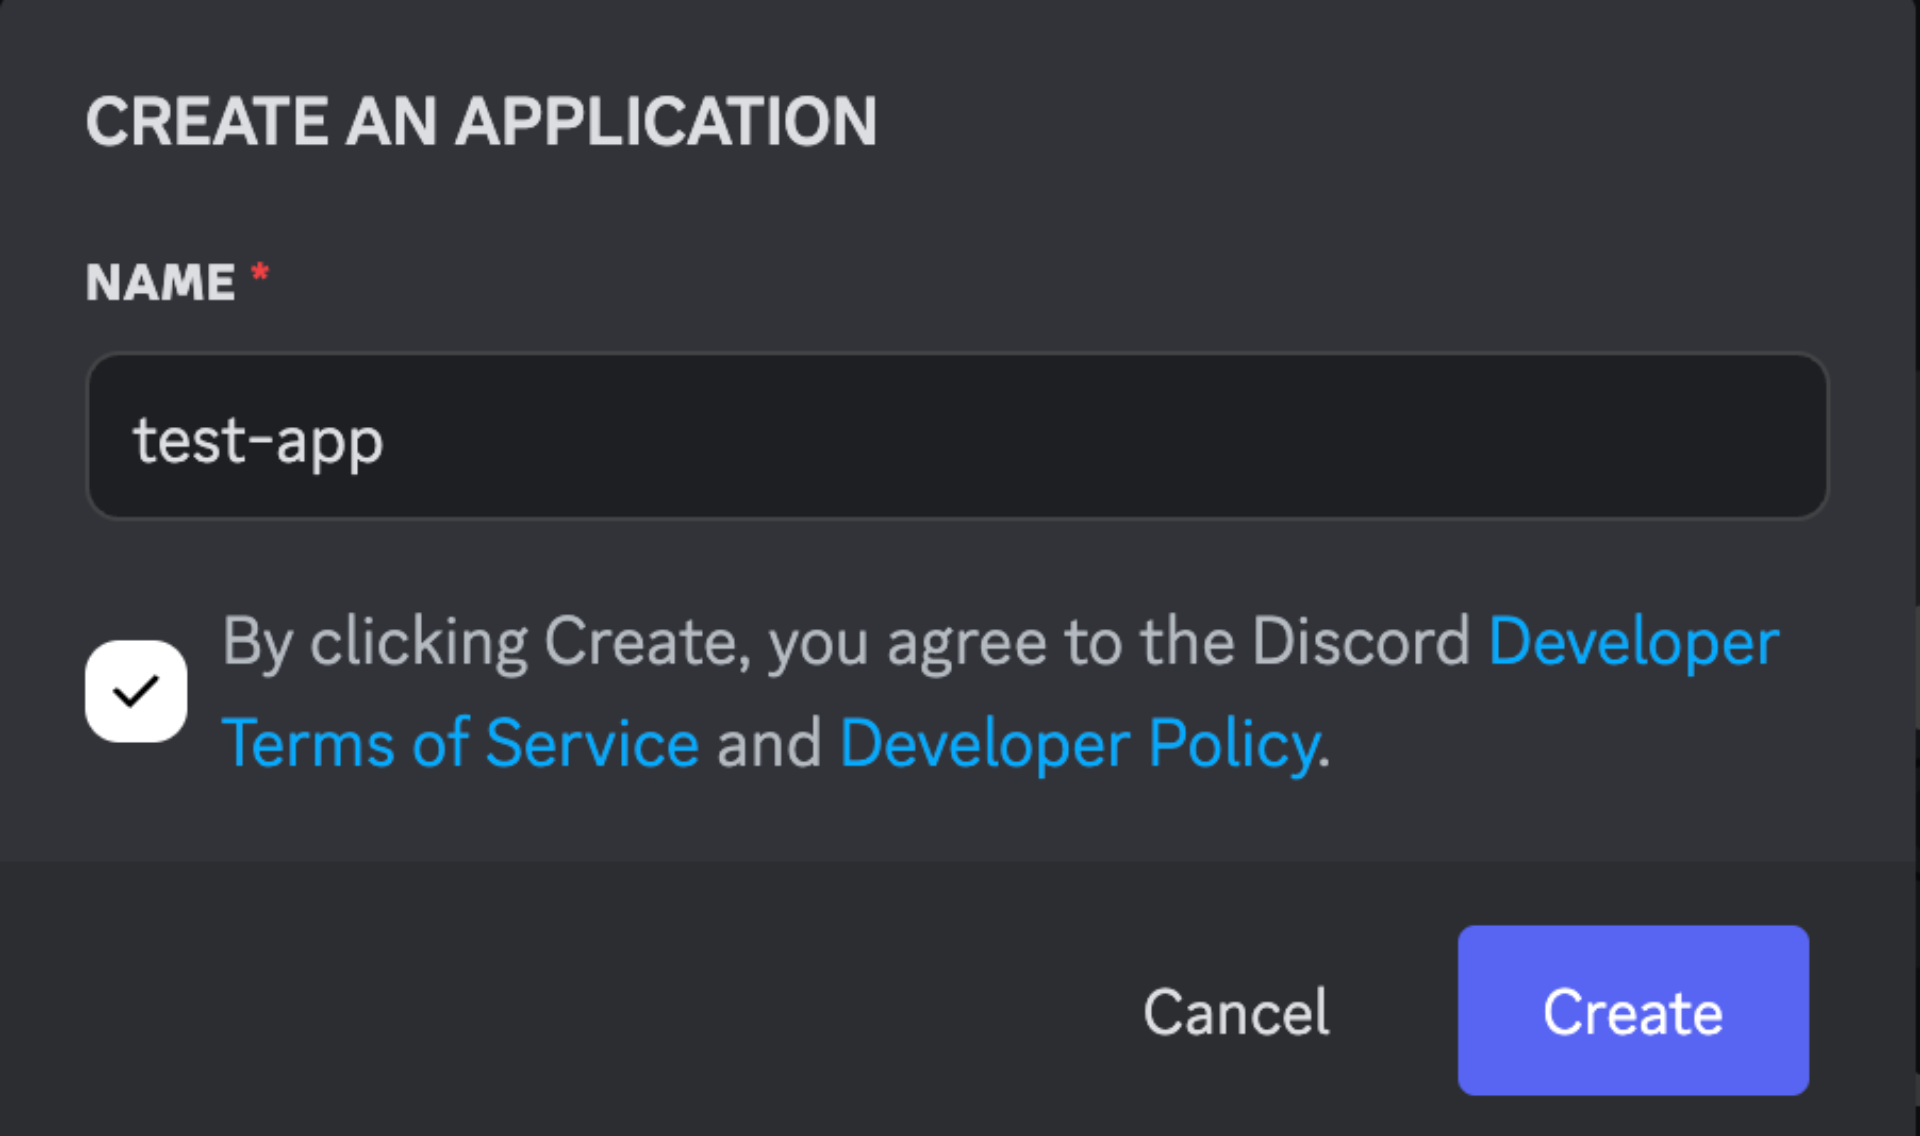
- Navigate to Bot in the left sidebar
- Click Add Bot and confirm with “Yes, do it!”
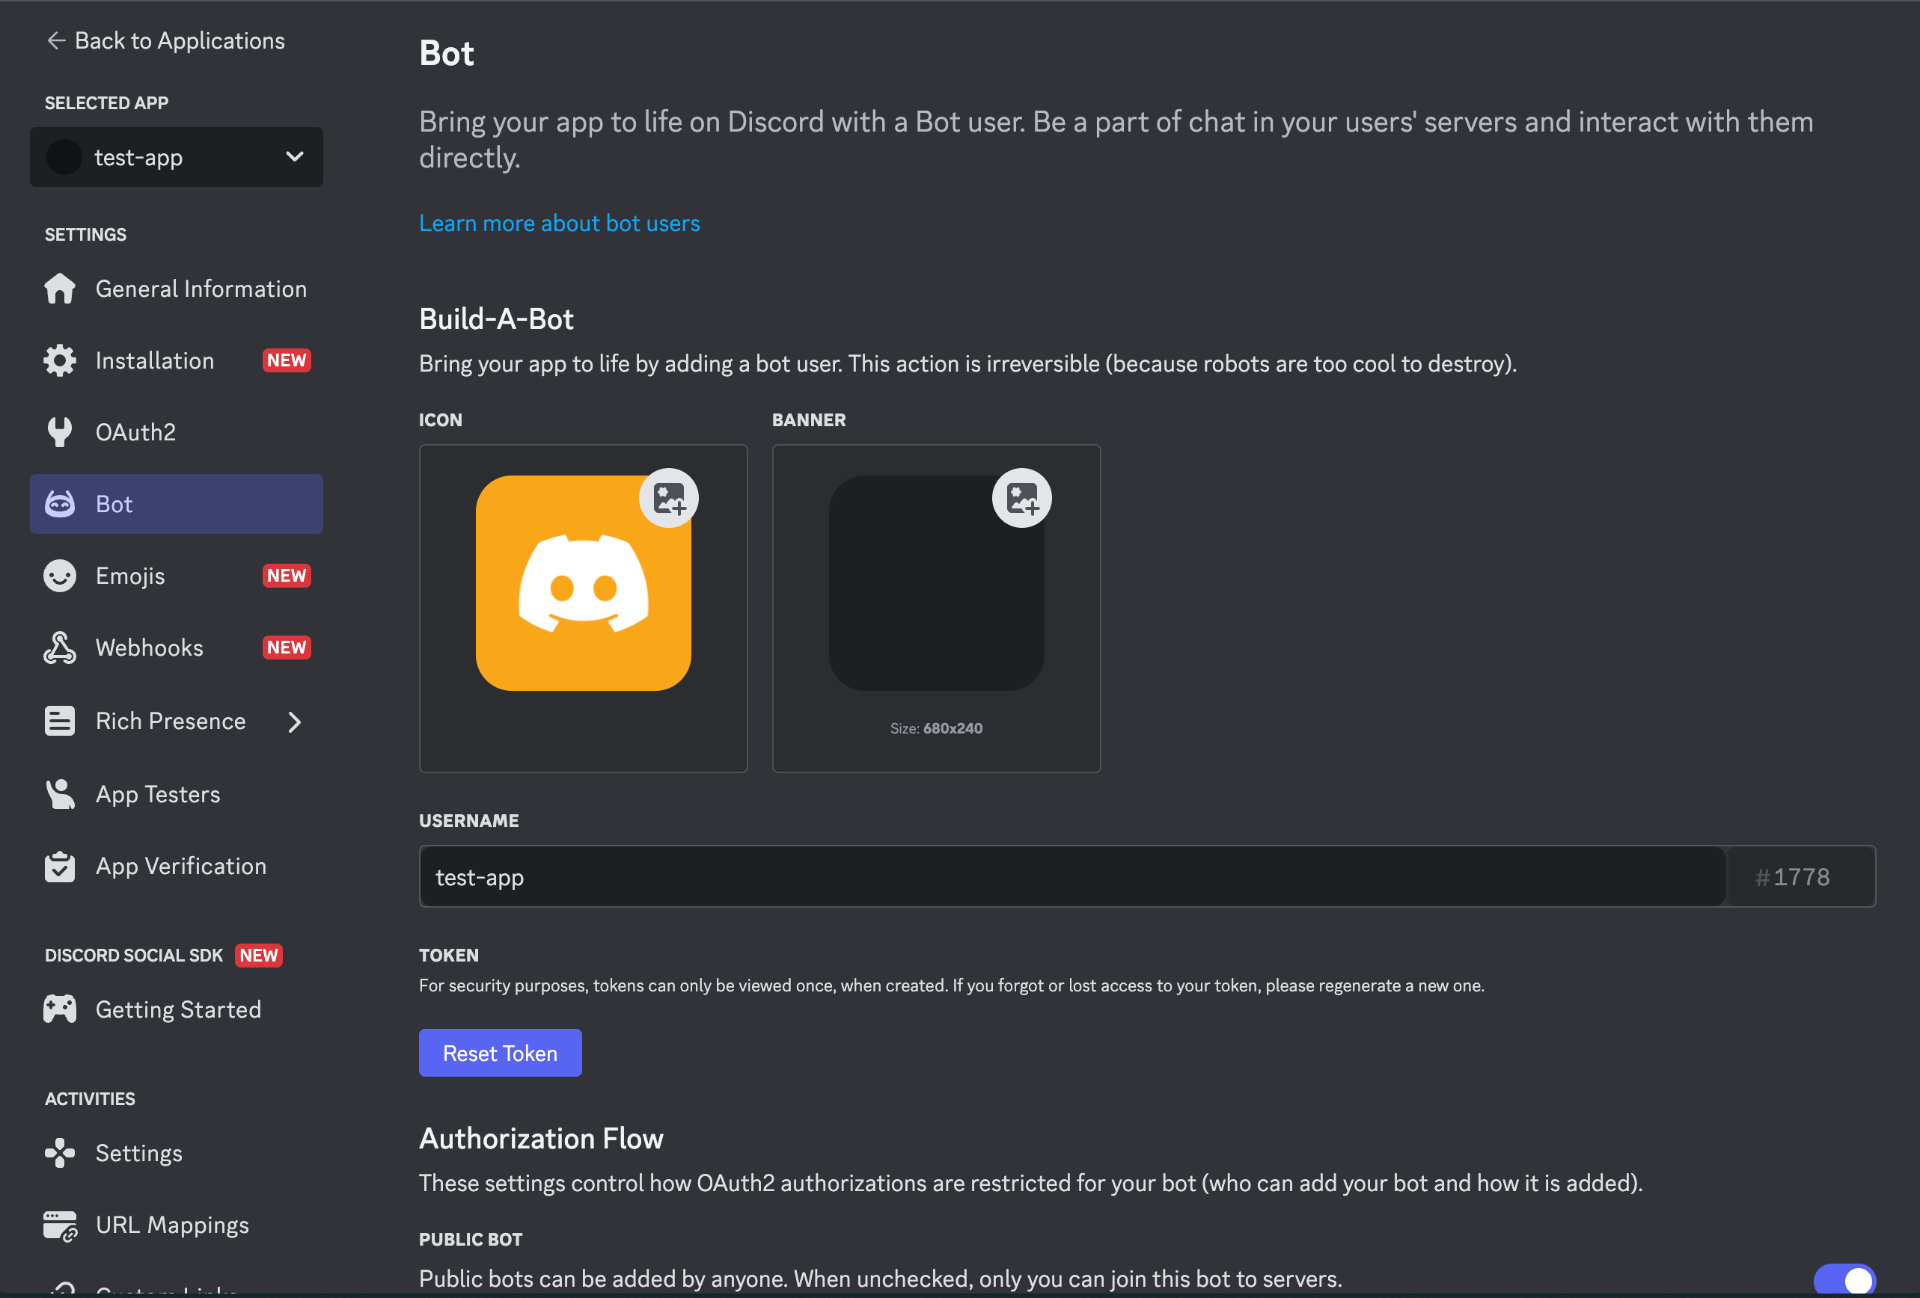
Copy the Bot Token
Click Reset Token under the Bot settings and copy it. Keep it safe you’ll paste it into the onboarding wizard next.

⚠️ Seriously: Don’t share this token publicly. Anyone with it can take over your bot.
Enable Required Intents
Scroll down to Privileged Gateway Intents and turn on:
- Message Content Intent (Mandatory): ZeroClaw needs this to actually read your messages. Skip it and you’ll get
Invalid Sessionerrors on repeat the bot will connect and disconnect in an endless loop. Trust me, enable this. - Server Members Intent (Recommended): Lets you look up members and use allowlist features.
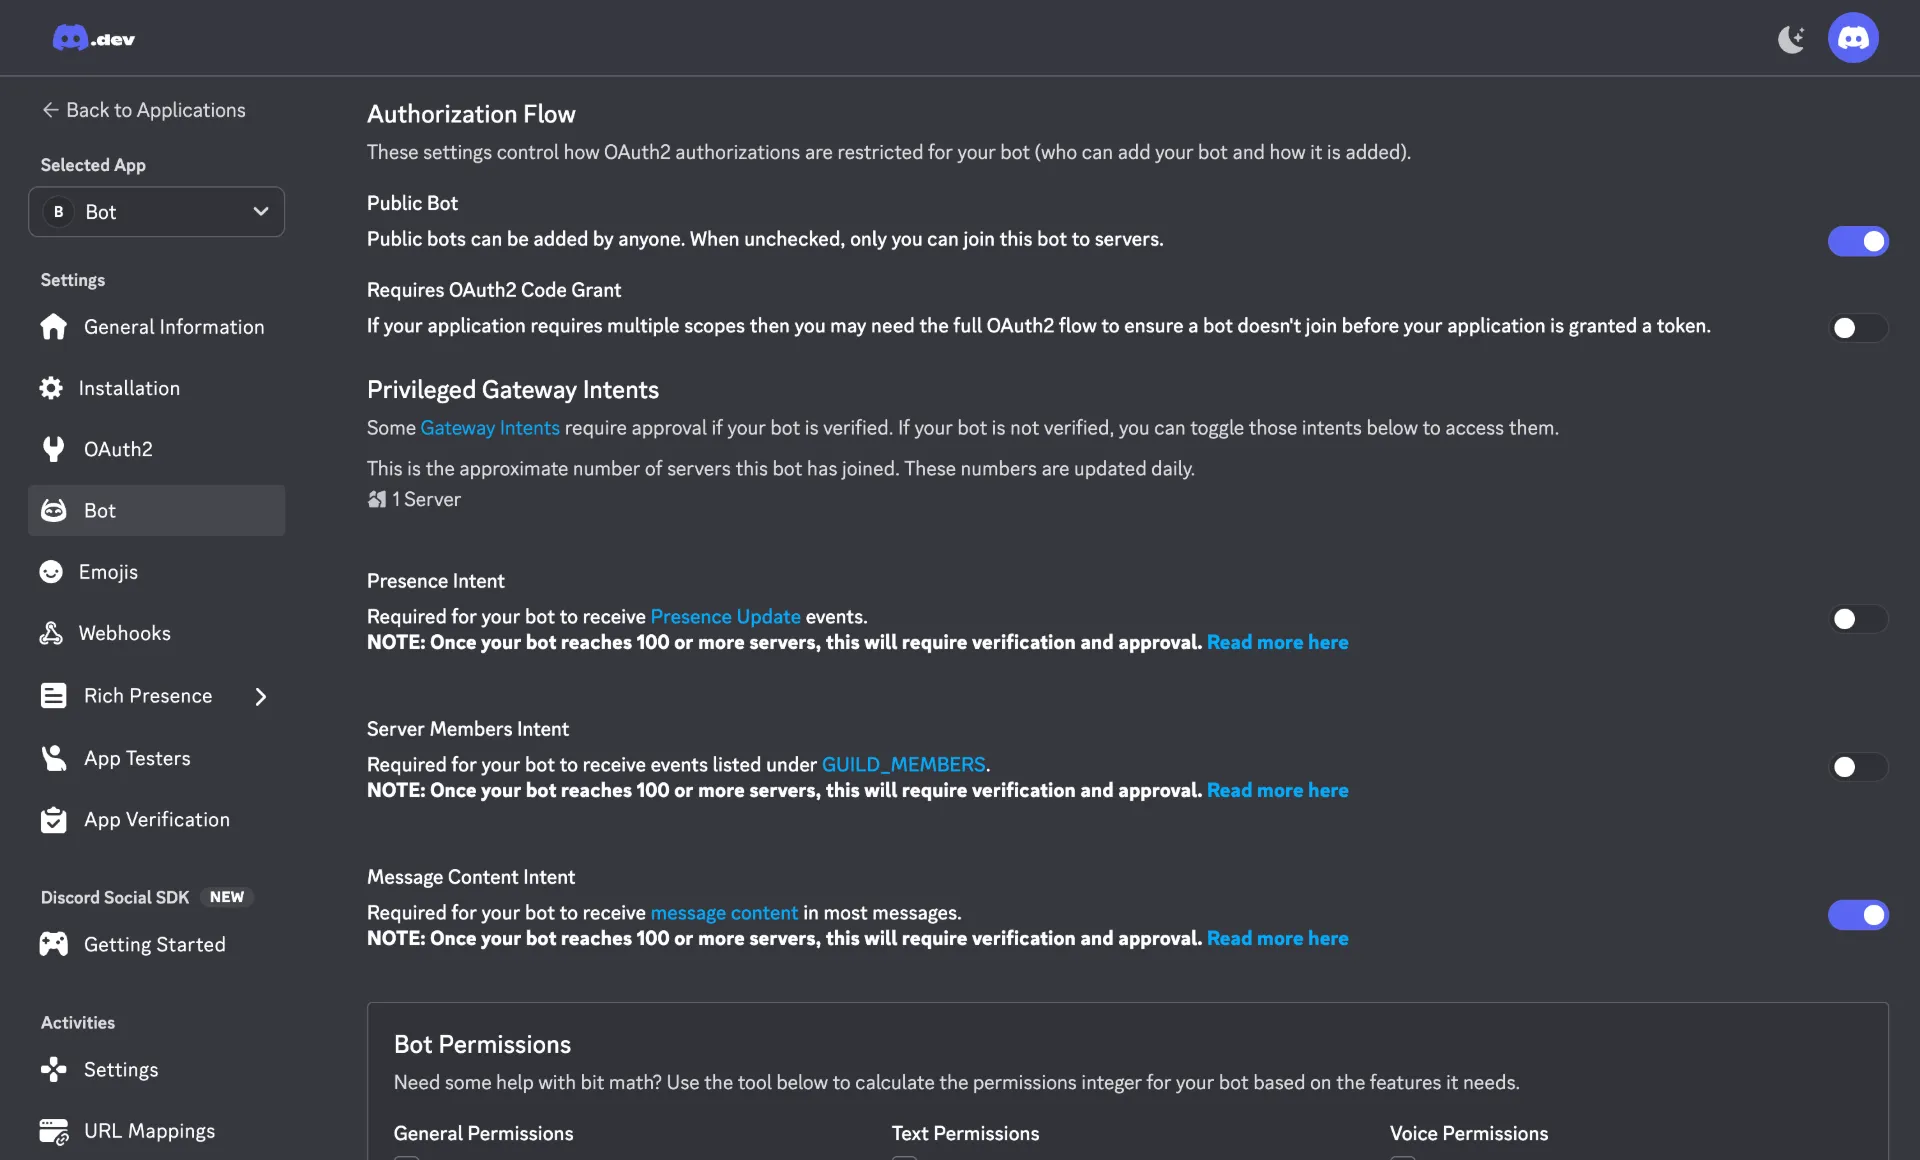
🔴 Don’t skip Message Content Intent. It’s the #1 reason people say “my bot won’t work.” Enable it.
Set the OAuth2 Redirect URL
Head to OAuth2 > General and add this redirect URL:
https://discord.com/api/oauth2/authorizeHit Save Changes.
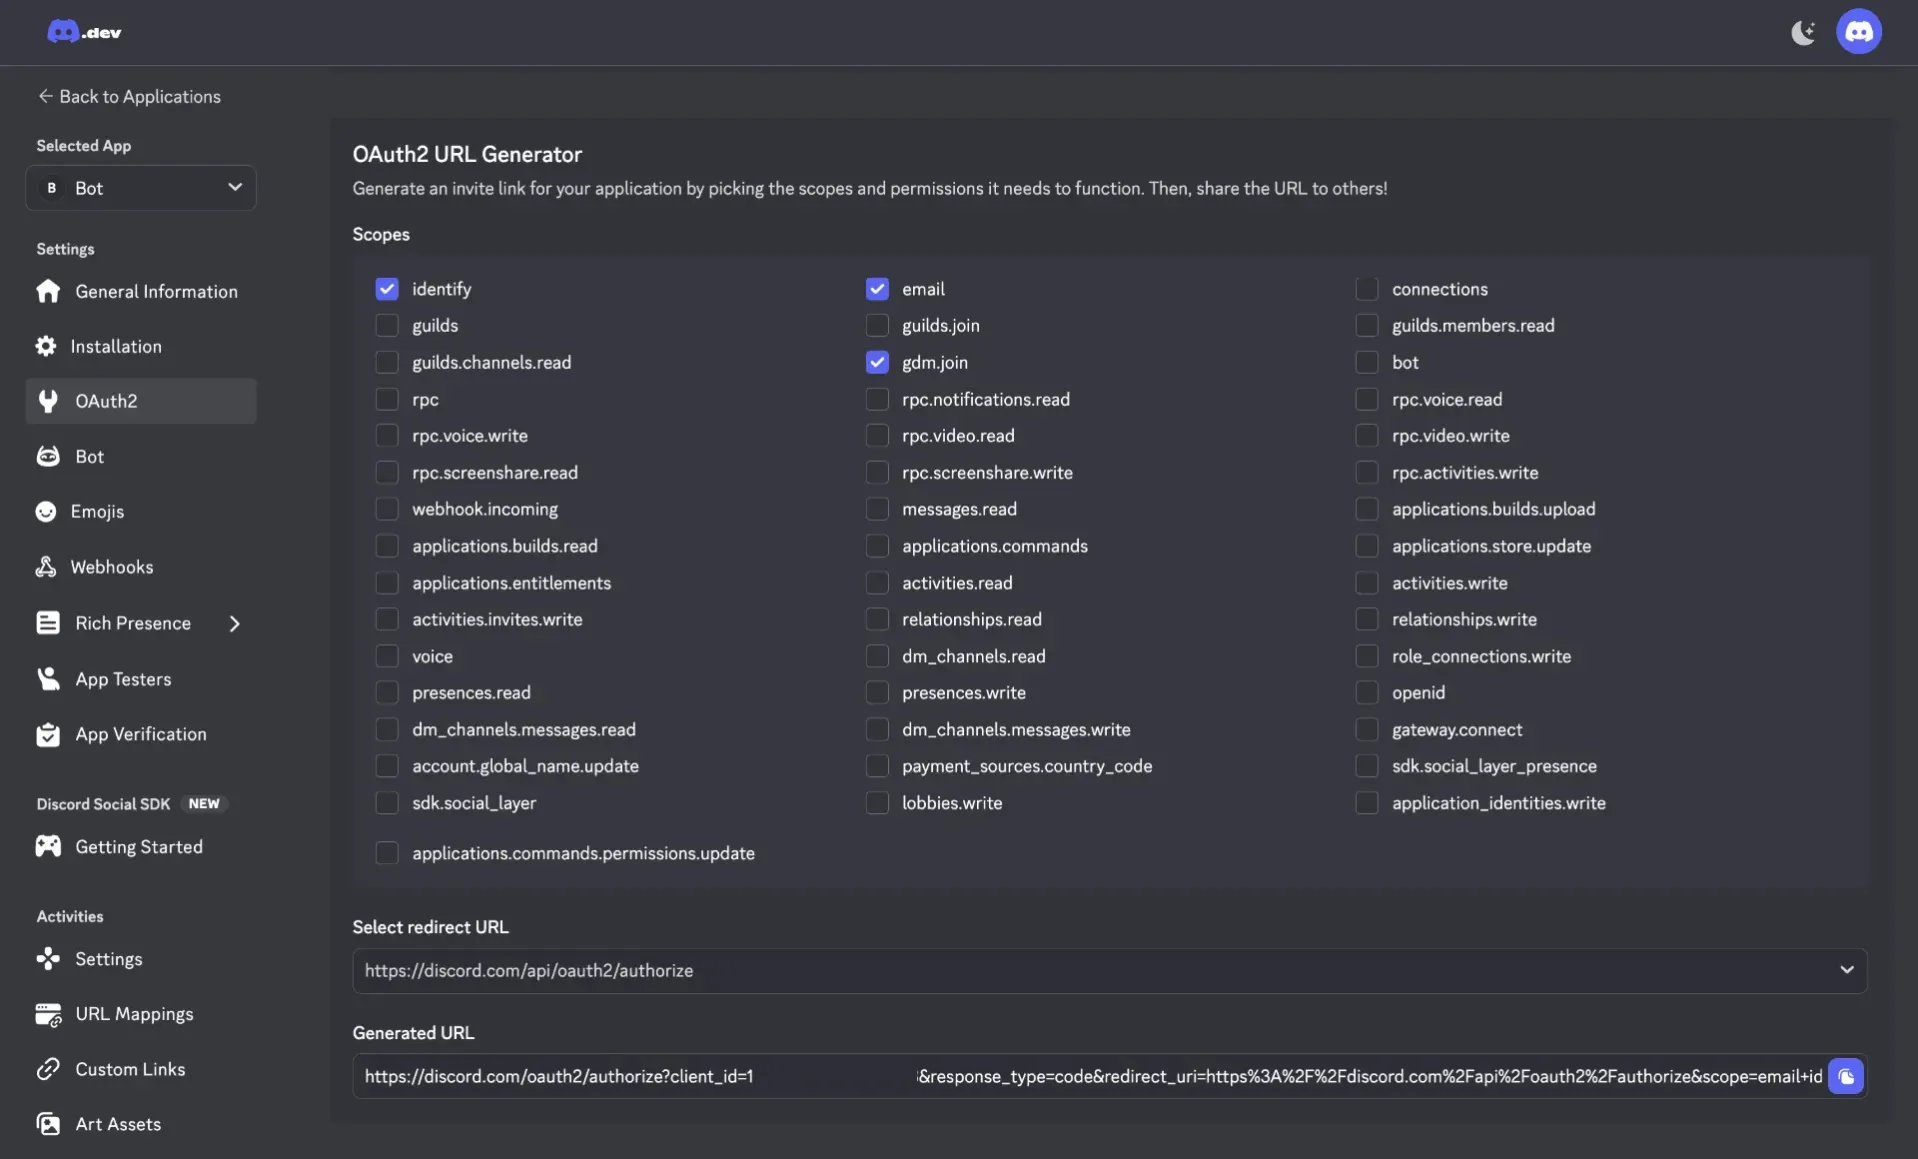
Generate the Invite URL
Navigate to OAuth2 > URL Generator and select:
Scopes:
botapplications.commands(for slash commands)
Bot Permissions (baseline):
- View Channels
- Send Messages
- Read Message History
- Embed Links
- Attach Files
- Add Reactions (optional but recommended)
- Use External Emojis/Stickers (optional)
Avoid selecting Administrator unless you’re debugging.
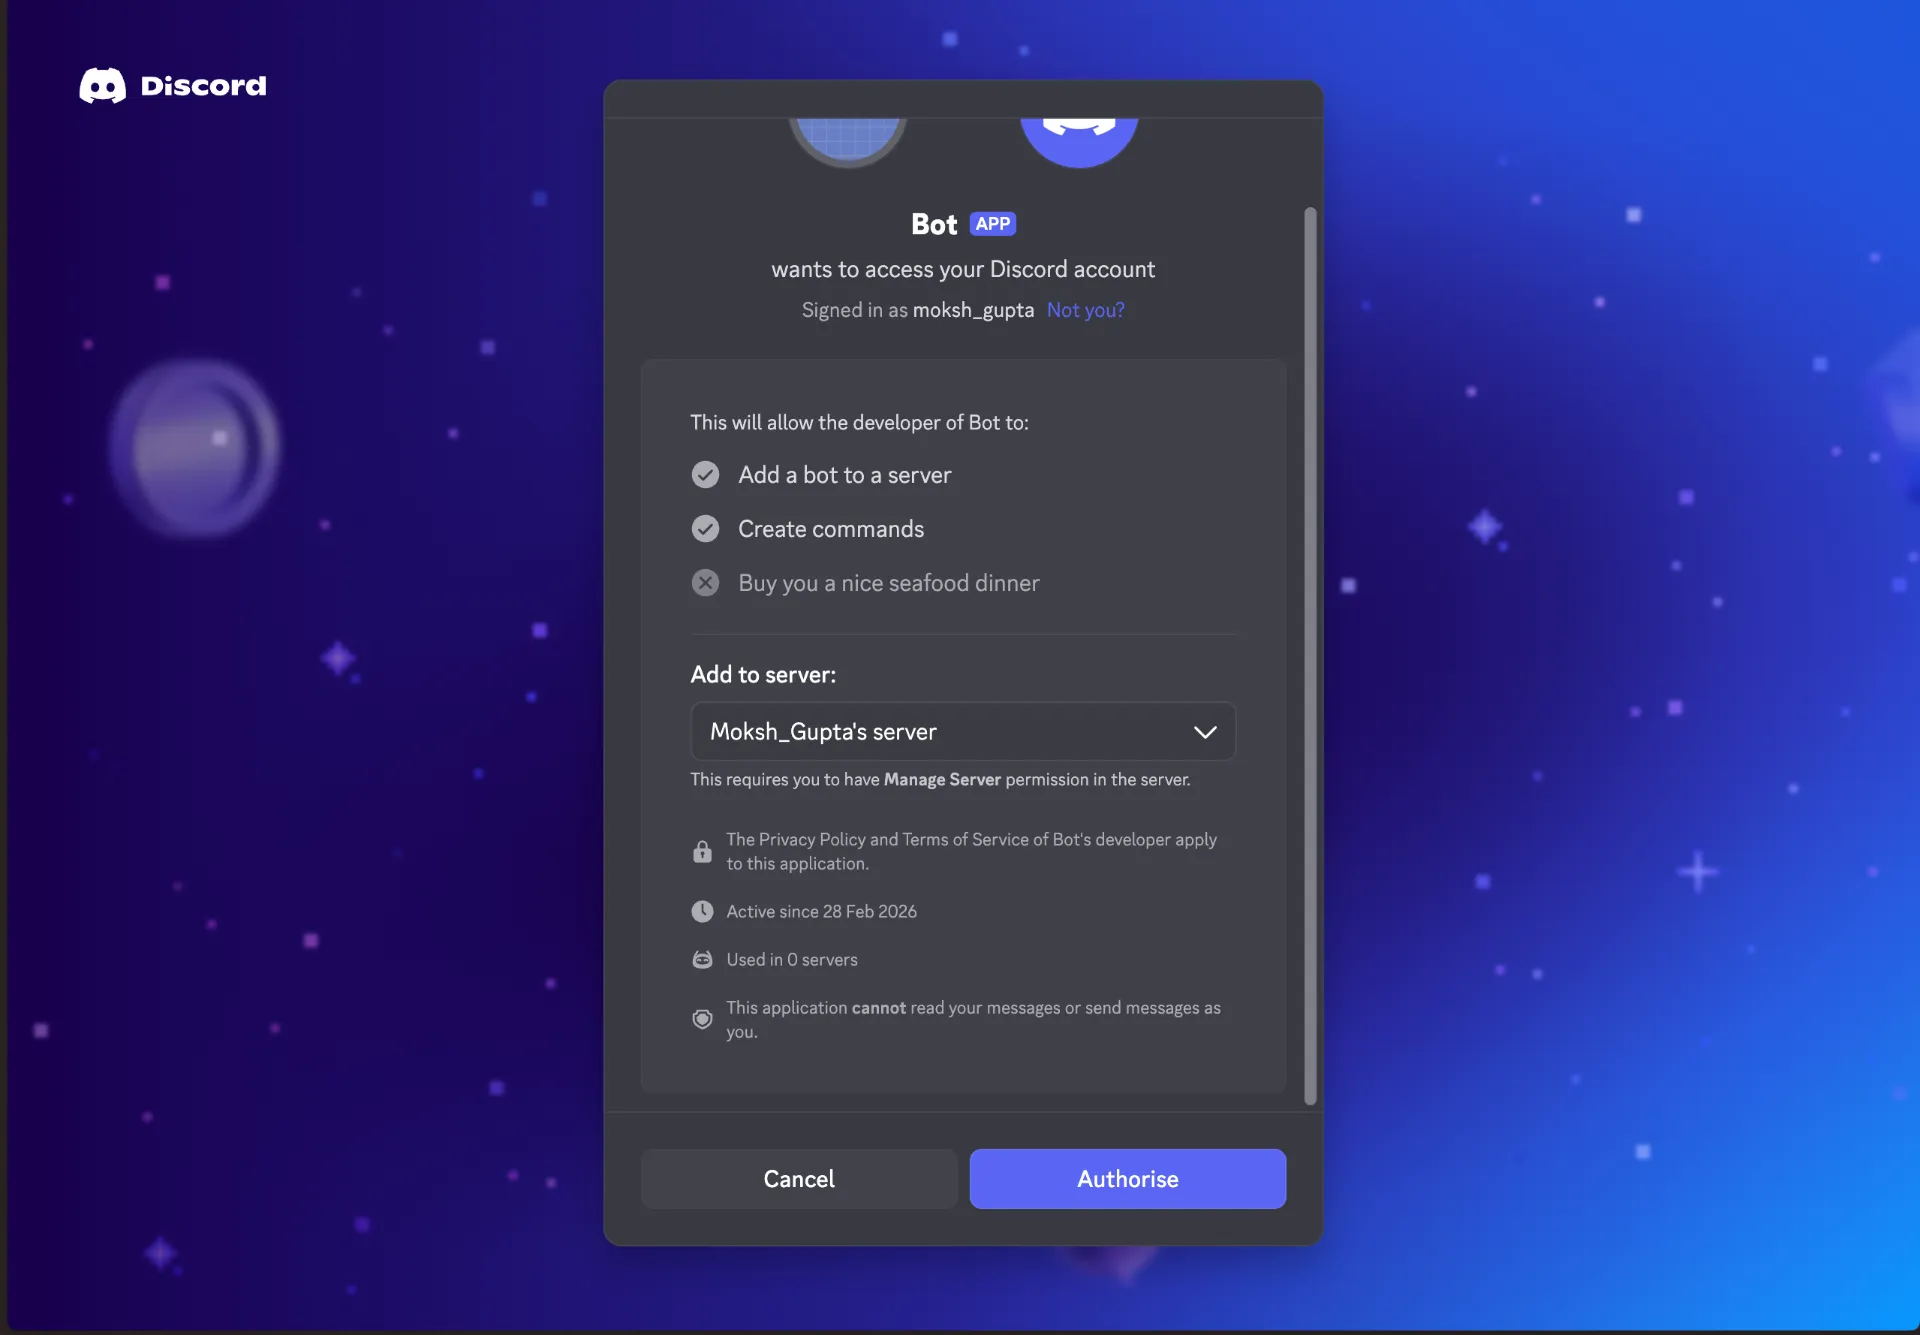
Copy the generated URL and open it in your browser to invite the bot to your Discord server. You’ll see an authorization page where you select the server and click Authorise.
Step 3: Run the Onboarding Wizard
After installation (or automatically after bootstrap), ZeroClaw launches an interactive onboarding wizard. If it didn’t run automatically, start it manually:
zeroclaw onboardThe wizard walks you through 11 configuration steps in under 60 seconds. Here’s what each step looks like:
[1/11] Workspace Setup
ZeroClaw creates a workspace directory at ~/.zeroclaw/workspace by default. This is where sessions, memory, state, cron jobs, and skills are stored.
[1/11] Workspace Setup
──────────────────────────────────────────────────
› Default location: /Users/you/.zeroclaw/workspace
Use default workspace location? yes
✓ Workspace: /Users/you/.zeroclaw/workspace
After setup, the workspace layout looks like this:
/Users/you/.zeroclaw/workspace/
├── sessions/
├── memory/
├── state/
├── cron/
├── skills/
├── IDENTITY.md
├── AGENTS.md
├── HEARTBEAT.md
├── SOUL.md
├── USER.md
├── TOOLS.md
└── BOOTSTRAP.md
[2/11] AI Provider & API Key
Select your preferred AI provider. ZeroClaw supports a wide range of providers:
- Recommended: OpenRouter, Venice, Anthropic, OpenAI, Gemini, GitHub Copilot
- Local models: Ollama, LM Studio, and any OpenAI-compatible endpoint
For this guide, we’ll use Google Gemini as an example:
[2/11] AI Provider & API Key
──────────────────────────────────────────────────
Select provider category: ⭐ Recommended (OpenRouter, Venice, Anthropic, OpenAI, Gemini, GitHub Copilot)
Select your AI provider: Google Gemini Gemini 2.0 Flash & Pro (supports CLI auth)
Paste your Gemini API key: YOUR_API_KEY_HERE
Select your default model: gemini-2.0-flash
✓ Provider: gemini | Model: gemini-2.0-flashTip: If you have existing Gemini CLI credentials, ZeroClaw can automatically detect and reuse them you can skip entering the API key manually.
[3/11] Channels Connect Discord
This is where you connect messaging platforms. CLI is always available by default. Select Discord to add it:
[3/11] Channels (How You Talk to ZeroClaw)
──────────────────────────────────────────────────
› Channels let you talk to ZeroClaw from anywhere.
› CLI is always available. Connect more channels now.

Connect a channel (or Done to continue): Discord connect your bot
The wizard will prompt you for the bot token you copied in Step 2:
Discord Setup talk to ZeroClaw from Discord
› 1. Go to https://discord.com/developers/applications
› 2. Create a New Application → Bot → Copy token
› 3. Enable MESSAGE CONTENT intent under Bot settings
› 4. Invite bot to your server with messages permission

Bot token: YOUR_DISCORD_BOT_TOKEN
✅ Connected as yourBotName
Next, configure the allowed Discord user IDs:
Server (guild) ID (optional, Enter to skip):
Allowed Discord user IDs (comma-separated, recommended: your own ID, '*' for all): YOUR_USER_IDTip: Set your specific user ID instead of
*(wildcard) for production use. Using*allows anyone to message your bot. You can enter your guild ID for server-specific access control.
Select Done to finish channel configuration:
Connect a channel (or Done to continue): Done finish setup
✓ Channels: Cli, Discord
[4/11] Tunnel (Optional)
ZeroClaw’s onboarding wizard lets you configure a tunnel to expose your gateway to the internet. You can skip this if you only use CLI or local channels. To expose your agent publicly using Pinggy, select Custom as the tunnel provider:
[4/11] Tunnel (Expose to Internet)
──────────────────────────────────────────────────
› A tunnel exposes your gateway to the internet securely.
› Skip this if you only use CLI or local channels.

Select tunnel provider: Custom bring your own (bore, frp, ssh, etc.)
Start command: ssh -T -p 443 -R 0:localhost:{port} -o StrictHostKeyChecking=accept-new free.pinggy.io
✓ Tunnel: Custom
You can also configure the tunnel directly in ~/.zeroclaw/config.toml after onboarding:
Free Pinggy tunnel:
[tunnel]
provider = "custom"

[tunnel.custom]
start_command = "ssh -T -p 443 -R 0:localhost:{port} -o StrictHostKeyChecking=accept-new free.pinggy.io"
url_pattern = ".pinggy.link"
With a Pinggy Pro token (for persistent subdomains):
[tunnel.custom]
start_command = "ssh -T -p 443 -R 0:localhost:{port} -o StrictHostKeyChecking=accept-new YOUR_TOKEN@pro.pinggy.io"
url_pattern = ".pinggy.link"
With a specific region (e.g., Australia):
[tunnel.custom]
start_command = "ssh -T -p 443 -R 0:localhost:{port} -o StrictHostKeyChecking=accept-new au.free.pinggy.io"
url_pattern = ".pinggy.link"
ZeroClaw’s custom tunnel reads stdout for a URL containing url_pattern, which works with Pinggy’s output out of the box.
[5/11] Tool Mode & Security
Choose Sovereign (local only) for maximum privacy. This means you manage all API keys locally and no data is sent to third-party orchestrators.
[5/11] Tool Mode & Security
──────────────────────────────────────────────────
Select tool mode: Sovereign (local only) you manage API keys, full privacy (default)
✓ Tool mode: Sovereign (local only) full privacy, you own every key

Enable encrypted secret storage? yes
✓ Secrets: encrypted keys encrypted with local key file
[6/11–11/11] Remaining Configuration
The remaining steps cover:
- Web & Internet Tools [6/11]: Enable/disable web search, page fetch, and HTTP request tools
- Hardware [7/11]: Enable physical device access (LEDs, sensors, motors) or keep it software-only
- Memory [8/11]: Select SQLite with Vector Search (recommended) for hybrid semantic search
- Identity Backend [9/11]: Choose OpenClaw-style markdown workspace identity files
- Project Context [10/11]: Set your name, timezone, agent name, and communication style
- Workspace Files [11/11]: Auto-generated identity and configuration files
After completing all steps, you’ll see the final summary:
━━━━━━━━━━━━━━━━━━━━━━━━━━━━━━━━━━━━━━━━━━━━━━━━━━
⚡  ZeroClaw is ready!
━━━━━━━━━━━━━━━━━━━━━━━━━━━━━━━━━━━━━━━━━━━━━━━━━━

Configuration saved to:
  /Users/you/.zeroclaw/config.toml

Quick summary:
  🤖 Provider:      gemini
  🧠 Model:         gemini-2.0-flash
  🛡️ Autonomy:      Supervised
  🧠 Memory:        sqlite (auto-save: on)
  📡 Channels:      Cli, Discord
  🔑 API Key:       configured
  🔗 Composio:      disabled (sovereign mode)
  🔒 Secrets:       configured
  🚪 Gateway:       pairing required (secure)
  🔌 Hardware:      disabled (software only)
Your configuration is saved to ~/.zeroclaw/config.toml.

Step 4: Start the Channel Server
With everything configured, launch ZeroClaw’s channel server:
zeroclaw channel startYou’ll see output confirming the server is running:
🦀 ZeroClaw Channel Server
  🤖 Model:    gemini-2.0-flash
  🧠 Memory:   sqlite (auto-save: on)
  📡 Channels: discord

  Listening for messages... (Ctrl+C to stop)

  🚦 In-flight message limit: 8
Once the Discord channel connects successfully, you’ll see:
INFO zeroclaw::channels::discord: Discord: connecting to gateway...
INFO zeroclaw::channels::discord: Discord: connected and identified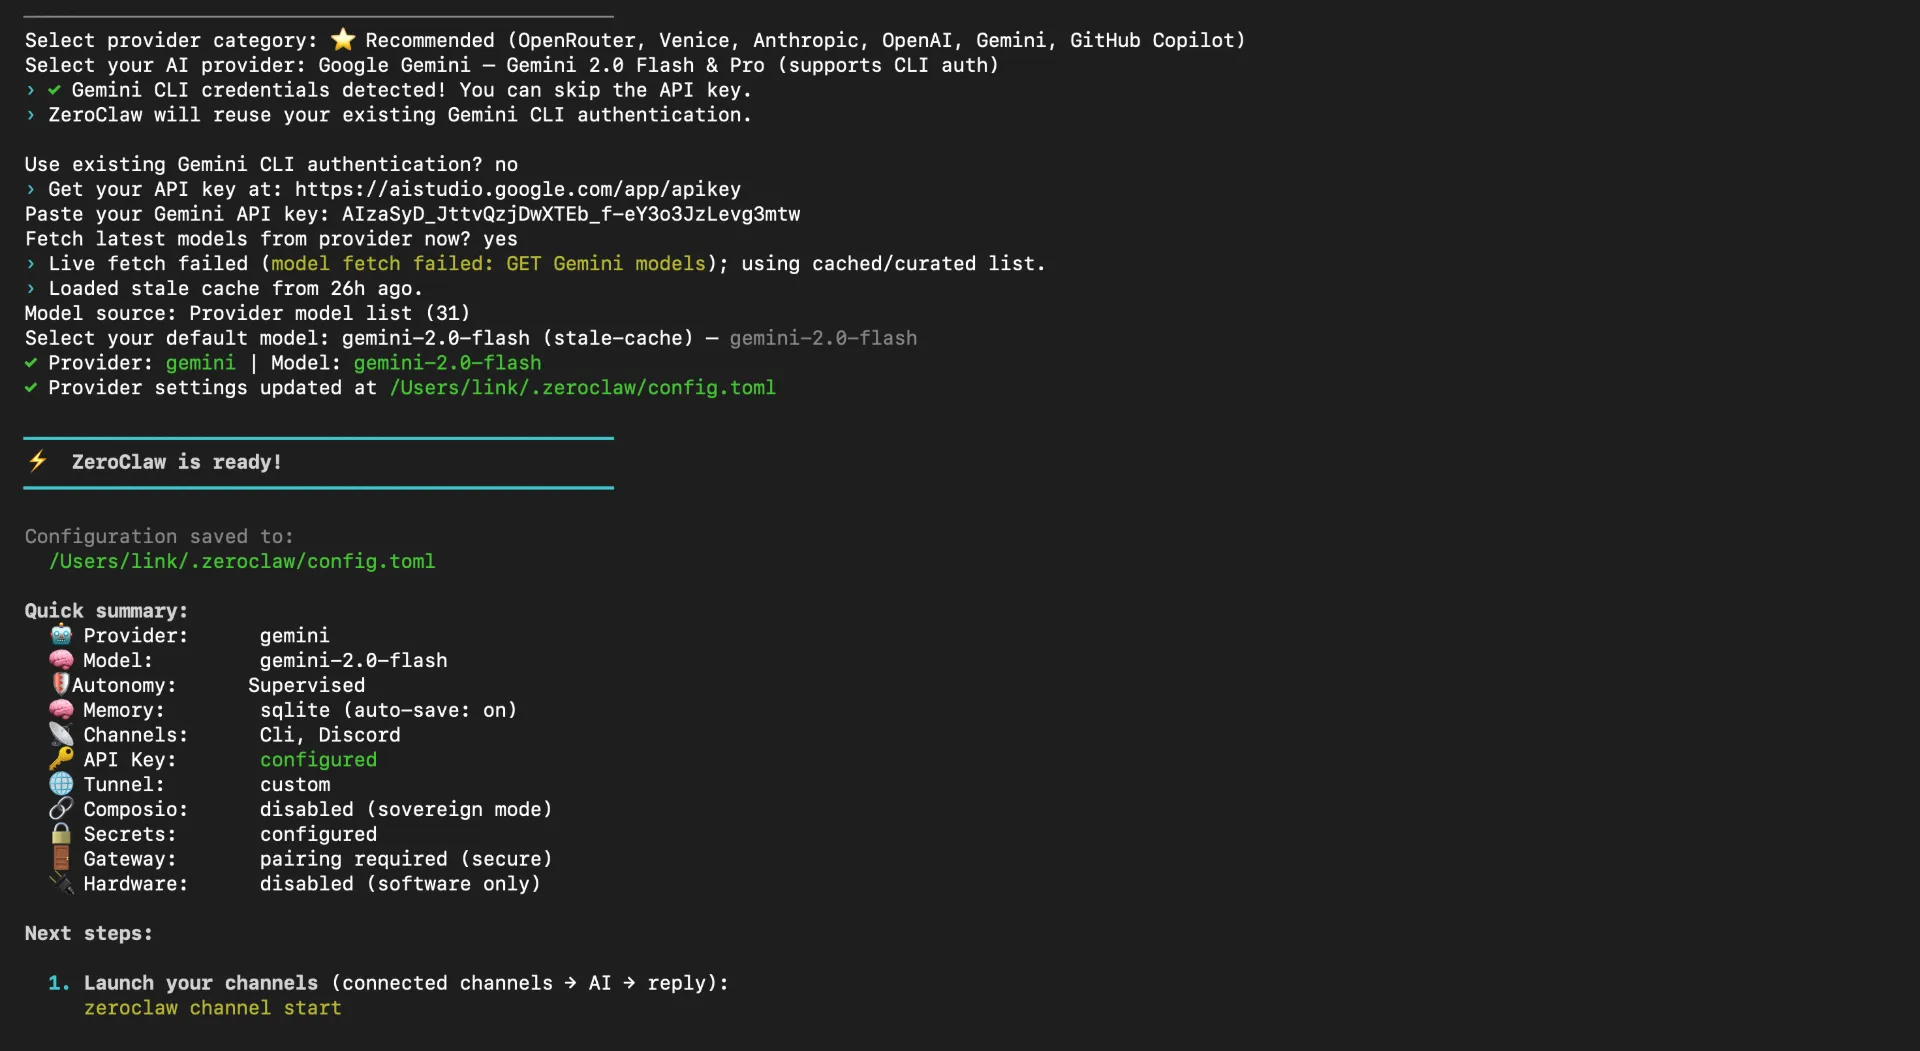
Alternative: Launch the Gateway Dashboard
If you prefer a web-based interface:
zeroclaw gatewayThis starts the dashboard at http://localhost:3000/. The dashboard lets you monitor sessions, view memory, and configure settings through a browser.
Quick CLI Chat
For a quick test without Discord:
# Single message
zeroclaw agent -m "Hello, ZeroClaw!"

# Interactive mode
zeroclaw agent
Step 5: Test Discord Integration
With the channel server running:
- Open Discord and navigate to your server
- Mention your bot in any channel:
@YourBotName Hello Zero Claw - The bot should process the message and respond
You’ll see the interaction in the terminal logs:
💬 [discord] from 880399002976272455: Hello Zero Claw <@1477341607677263973>
⏳ Processing message...
🤖 Reply (2161ms): Hey moksh! 👋 What's up?
And on the Discord side, you’ll see the bot reply in your channel:
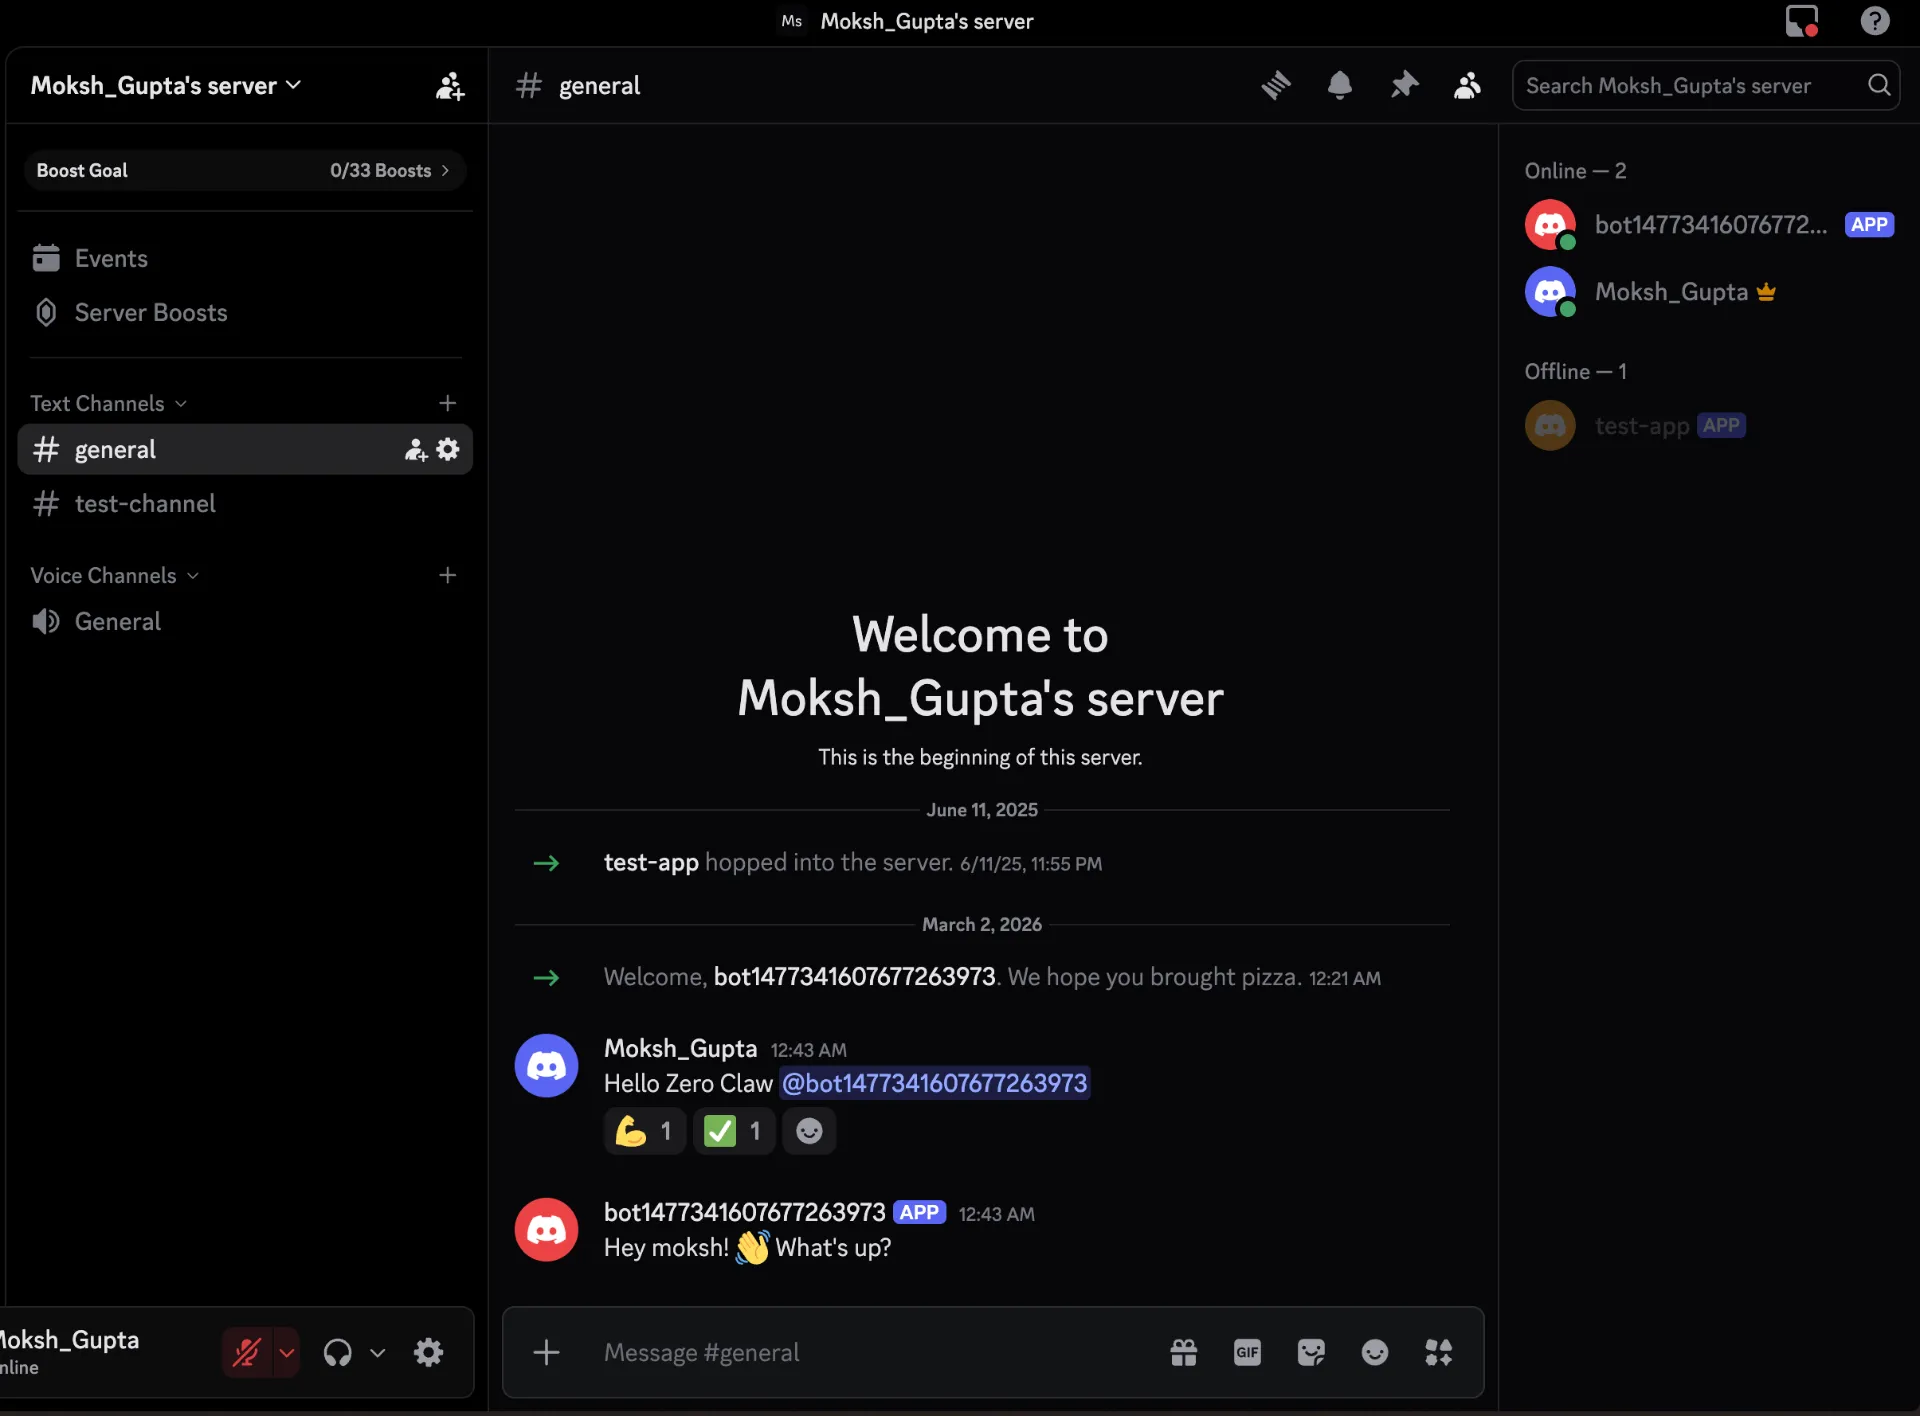
For DMs, if you’re using the default pairing policy, ZeroClaw will prompt you to approve a pairing code:
zeroclaw pairing approve discord <code>Troubleshooting
Discord Channel Keeps Restarting in a Loop
If you see Invalid Session (op 9) errors and the Discord channel keeps reconnecting, enable Message Content Intent and Server Members Intent in the
Discord Developer Portal under Bot > Privileged Gateway Intents. Restart the channel server after.
API Key Expired
If you get API key expired. Please renew the API key. errors, update it via CLI:
zeroclaw config set api_key "YOUR_NEW_API_KEY"
zeroclaw channel start
Bot Connects but Doesn’t Reply
- Verify Message Content Intent is enabled
- Confirm bot has Send Messages and Read Message History permissions
- Check if
require_mentionis set and you’re @mentioning the bot
Manual Discord Configuration
If you need to edit Discord settings after onboarding, open ~/.zeroclaw/config.toml:
[channels.discord]
enabled = true
token = "YOUR_DISCORD_BOT_TOKEN"

[channels.discord.dm]
enabled = true
policy = "pairing"

[channels.discord.guilds.YOUR_GUILD_ID]
users = ["YOUR_USER_ID"]
require_mention = true
Check Status
zeroclaw statusZeroClaw vs OpenClaw: When to Use Which?
Both projects serve the same goal a private, self-hosted AI assistant but they target different use cases:
Choose ZeroClaw if:
- You’re running on resource-constrained hardware (Raspberry Pi, old laptop, cheap VPS)
- You want a single binary with no runtime dependencies
- You prefer Rust’s performance and memory safety guarantees
- You need cross-architecture support (ARM, x86, RISC-V)
Choose OpenClaw if:
- You want the most mature ecosystem with the largest community (100K+ stars)
- You need WhatsApp, Telegram, Slack, Signal, or iMessage support today
- You prefer TypeScript and want to extend with JavaScript tools
- Resource usage is not a concern
Both projects are actively developed and open source. ZeroClaw is rapidly catching up on features while maintaining its tiny footprint.
What You Can Do with ZeroClaw
Once your ZeroClaw agent is running with Discord, you have a powerful personal AI assistant:
Chat from Anywhere: Message your AI through Discord DMs or server channels, from your phone, tablet, or any device.
Persistent Memory: ZeroClaw remembers your conversations, preferences, and context using SQLite with vector search. Ask about something from weeks ago and it recalls the details.
Research Mode: ZeroClaw’s unique research phase gathers information through tools before responding, giving you more accurate and grounded answers.
Encrypted Secrets: API keys and tokens are encrypted with a local key file, protecting against accidental leaks.
Custom Skills: Drop skill files into the ~/.zeroclaw/workspace/skills/ directory to extend your agent’s capabilities.
Conclusion
ZeroClaw proves a full-featured AI agent doesn’t need to be a resource hog. Built in Rust and running on practically anything from a Raspberry Pi to a full server while using minimal memory and starting in milliseconds.
If you want a lean alternative to OpenClaw, need an AI agent on low-power hardware, or value privacy and efficiency, ZeroClaw is worth a serious look. It’s open source, fast, tiny, and it works.