Creating a local WordPress site is a routine for most developers, though sharing a live preview with clients or multiperson collaboration in real-time without having to waste time on complicated networks and open ports is always a big problem. That’s where Pinggy comes into play – a simple and lightweight tool for sharing local WordPress sites, that works in harmony with
LocalWP by Flywheel tool, helps to tunnel your site in order not to trouble yourself with its remote accessibility. This tutorial will help you to find out how you can make the most of Pinggy if you have a local WordPress environment set up.
Summary
Configure Pinggy Pro:
- Step 1: Get a persistent subdomain from Pinggy, such as
mysite.a.pinggy.link. - Step 2: Set this subdomain as the site domain in LocalWP.
Run Command: Open terminal and run:
ssh -p 443 -L4300:localhost:4300 -o StrictHostKeyChecking=no -o ServerAliveInterval=30 -t -R0:your-subdomain.a.pinggy.link:80 <your-token>@a.pinggy.io
Access Site: Use the generated Pinggy URL to access your local WordPress site remotely.
Why Use Pinggy for Local WordPress Site Sharing?
Pinggy allows you to connect to Local sites from outside your network without the need for a VPN, or even to change firewalls. It’s especially useful for developers working with LocalWP by Flywheel, what helps to solve usual issues like reverse proxying, secure connections or mixed content. Pinggy in one way or another provides its users with the means to remotely access local WordPress setups, and as such, is an essential tool for developers to create and test their sites.
Prerequisites
To get started with Pinggy for Creating a
LocalWP site sharing, you’ll need the following:
- LocalWP by Flywheel: This tool downloads an environment to develop and test wordpress sites on your own computer whether you have internet connection or not.
- Pinggy Pro Account: To use a persistent subdomain Pinggy Pro account is required. This subscription unlocks features like subdomain setup, essential for reliable, continuous access to your local WordPress site.
With these tools, developers can easily get started, using Pinggy’s tunneling power to share their local site with clients, gather feedback, showcase to friends, host hobby projects, and more
Setting Up Pinggy for LocalWP
Pinggy allows the user to securely share out the LocalWP setup allowing them to access and manage their WordPress site from any location. Below is the procedure on configuring Pinggy for LocalWP with screenshot being included for clarity.
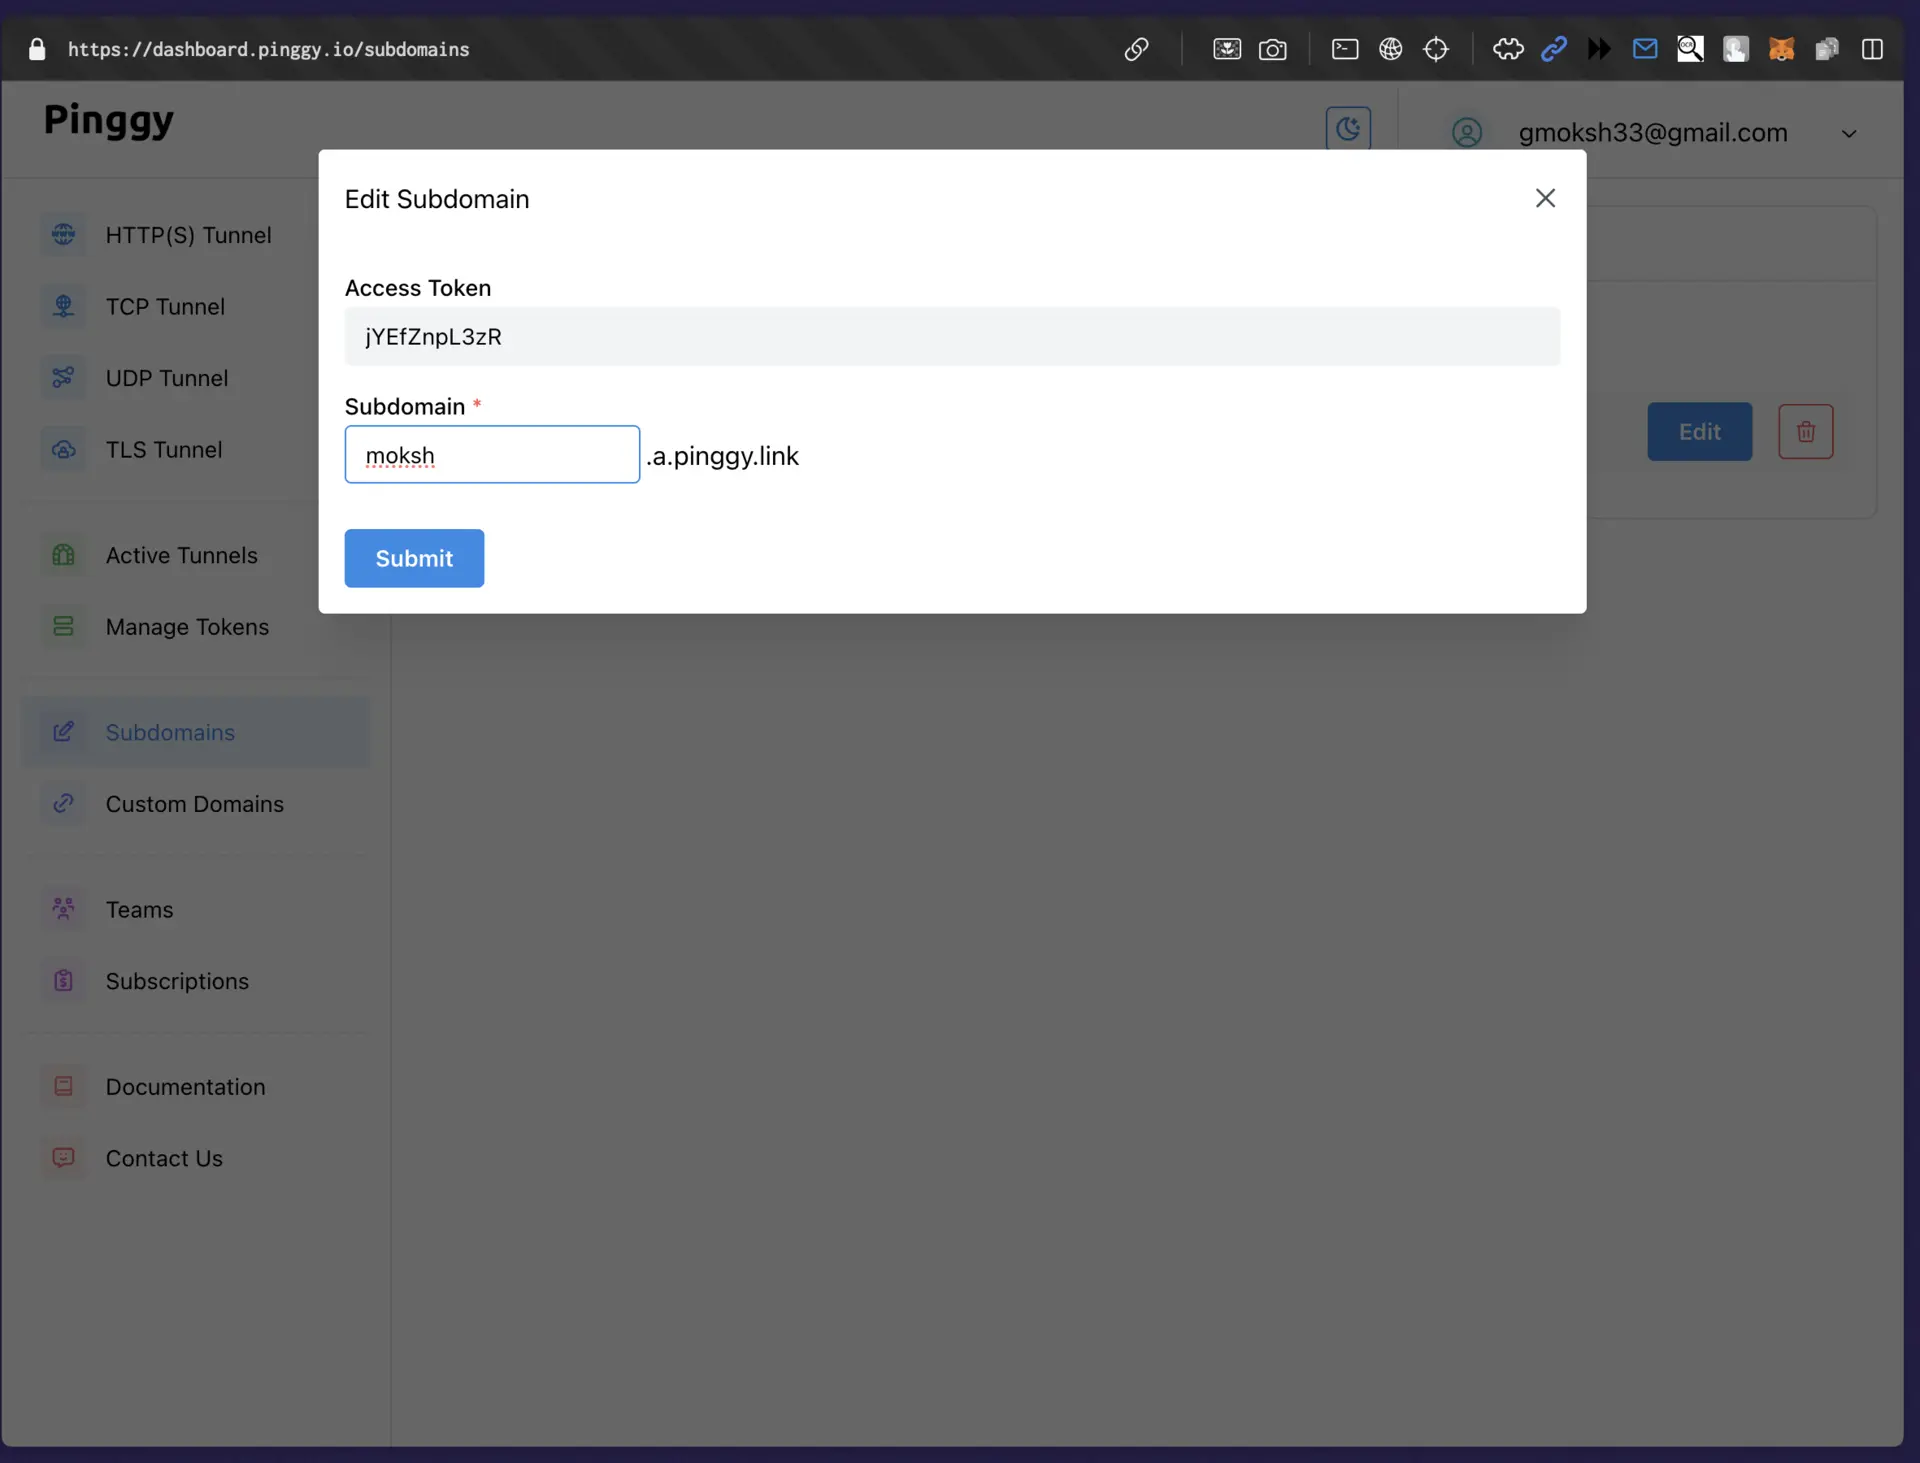
if you have recently purchased a Pinggy Pro subscription, please enter the Pinggy dashboard. Go to Subdomain settings – it is located at the bottom of the left menu – then click Edit under the ‘Subdomain’ heading and enter the subdomain you wish to use.

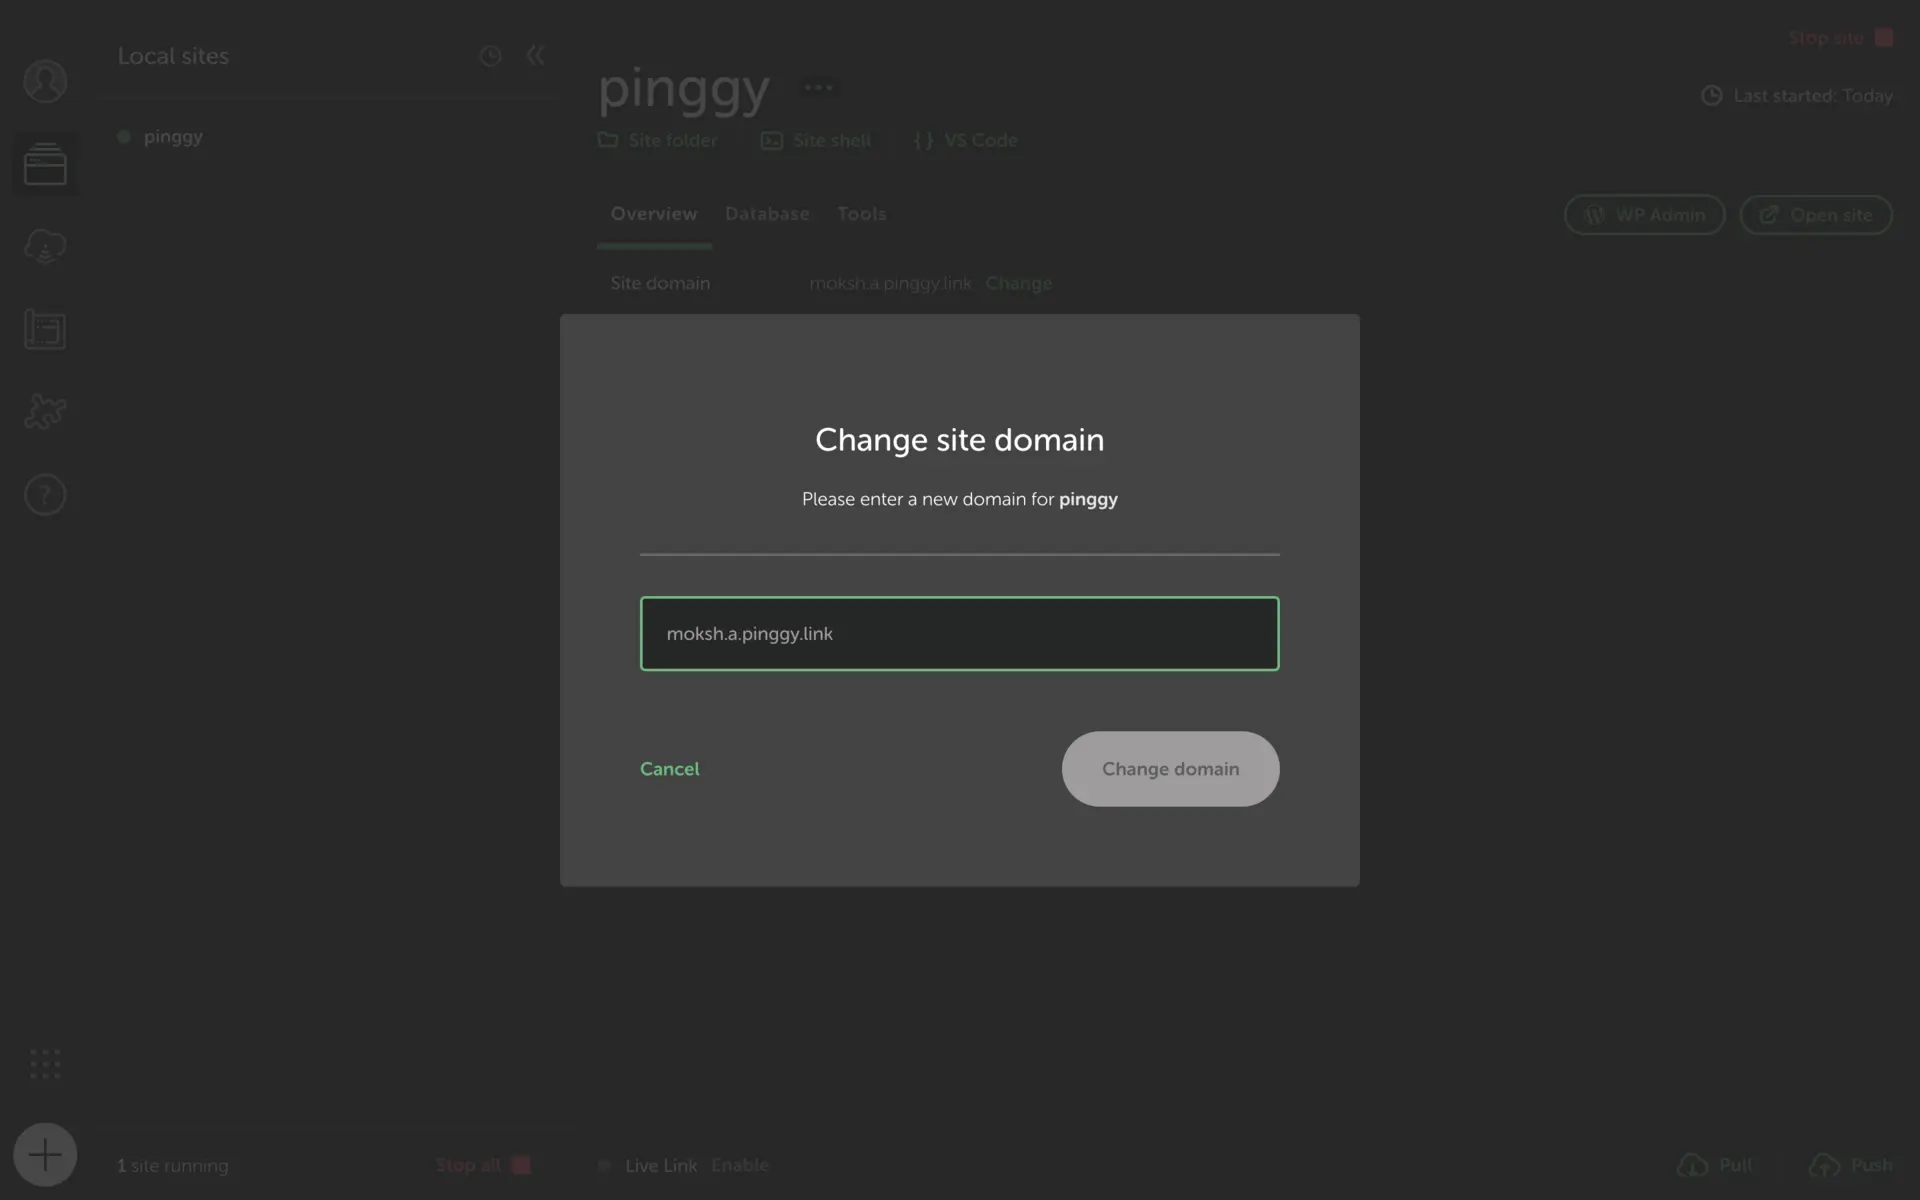
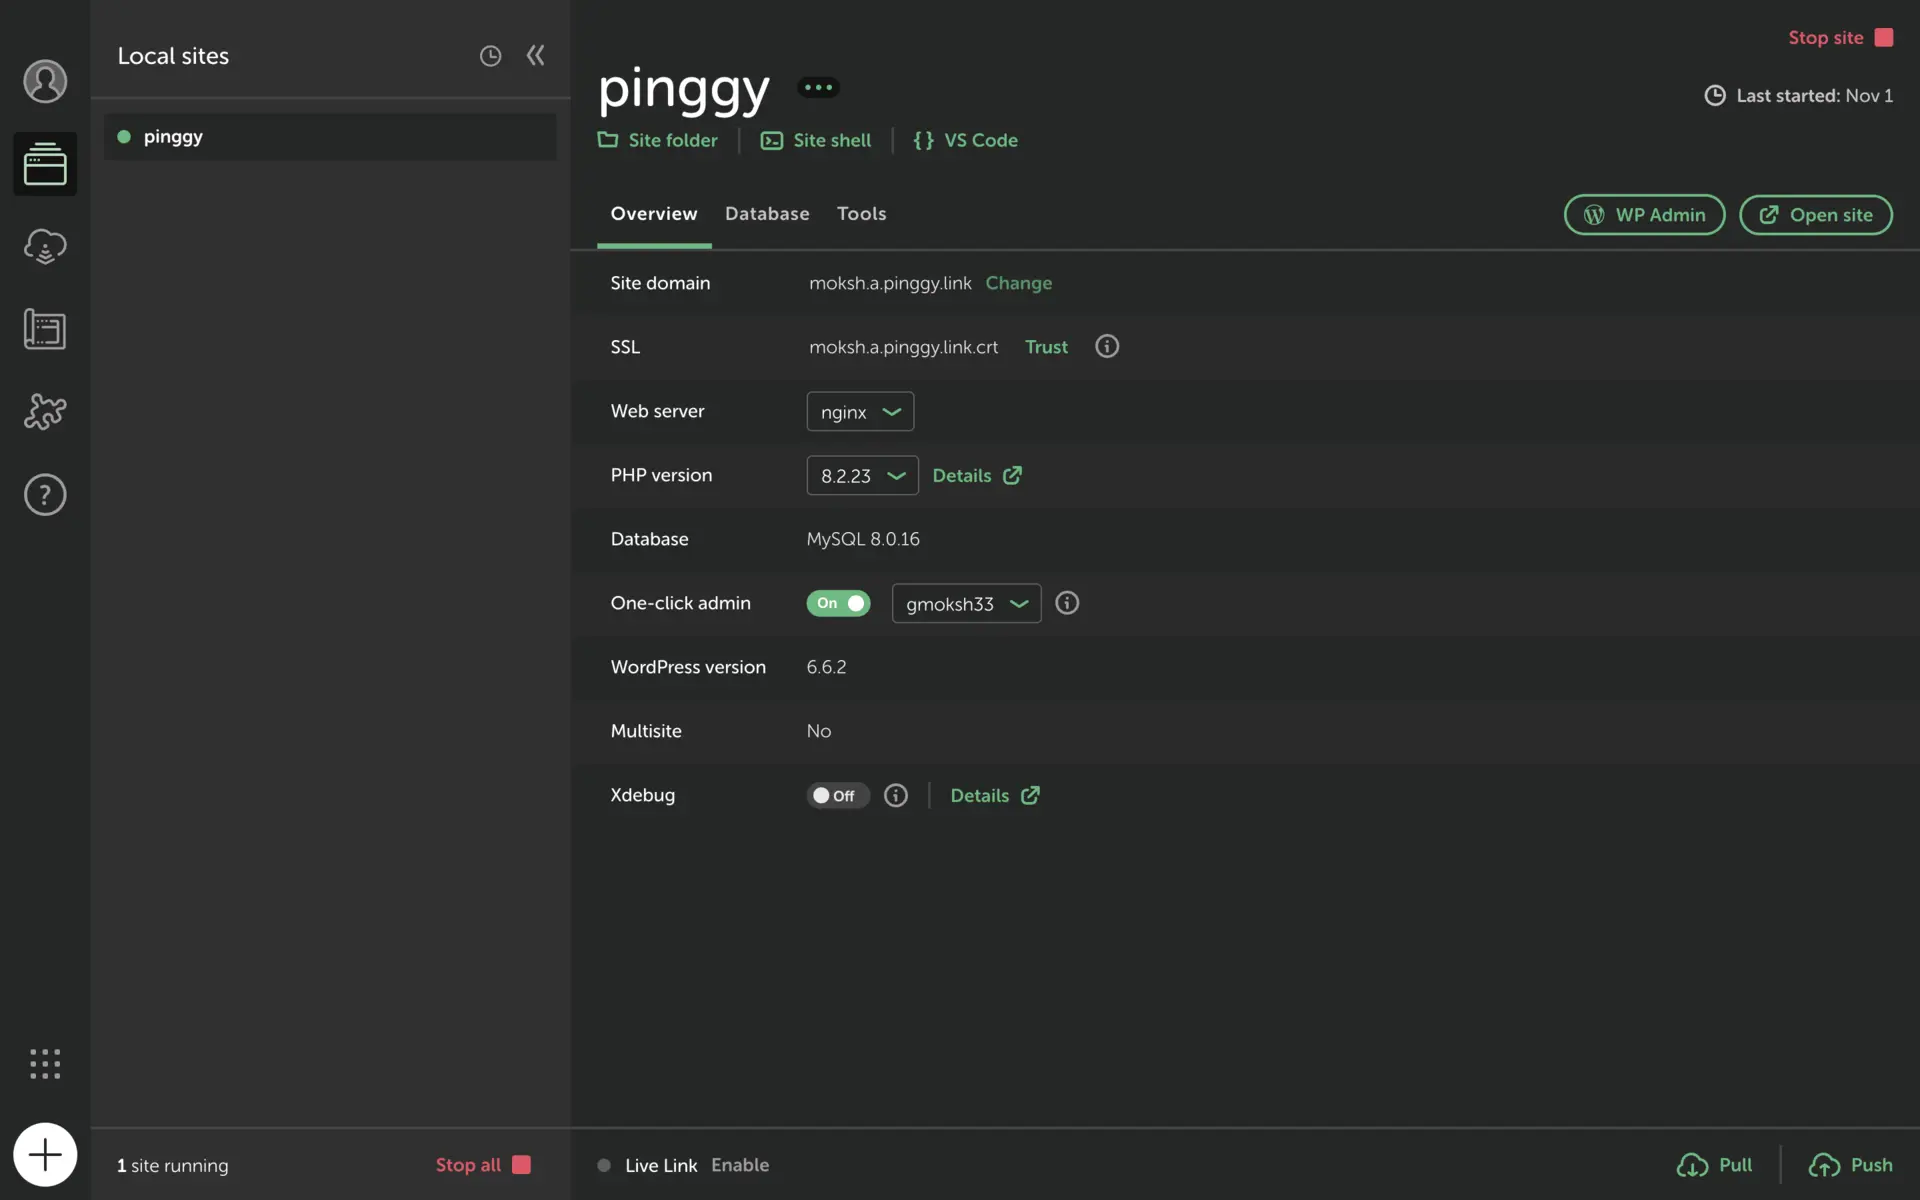
Secondly, using LocalWP go to the Site Domain section and paste the subdomain obtained from Pinggy.

Step 2: Launch Your LocalWP Site
Open LocalWP by Flywheel and select your WordPress site. Click the “open Site” button to launch the site Locally.

Step 3: Open Command Prompt and Enter the Updated Pinggy Command
In the terminal, use the updated Pinggy command, which now includes a token from your Subdomain setup. Replace moksh.a.pinggy.link with your chosen subdomain.
ssh -p 443 -t -R0:moksh.a.pinggy.link:80 jYEfZnpL3zR@a.pinggy.io u:Host:moksh.a.pinggy.link
This command establishes a secure SSL connection from your local server to Pinggy’s server, making the site available for remote access.
Explanation of the Command Parameters
- -p 443: Specifies port 443, commonly used for HTTPS, allowing secure tunneling over this port.
- -t: Forces a pseudo-terminal, enabling interactive command execution if needed during the connection.
- -R0:moksh.a.pinggy.link:80: Sets up reverse tunneling from your Pinggy subdomain (
moksh.a.pinggy.link) on port 80, allowing the LocalWP site to be accessed through this subdomain. - jYEfZnpL3zR@a.pinggy.io: Your unique Pinggy authentication token (replace with your actual token), required to authorize the tunnel connection.
- u:Host:moksh.a.pinggy.link: Sets the host header on the remote Pinggy server to align with your local setup, ensuring requests are directed correctly to the LocalWP site.
Finalizing Your Remote Access
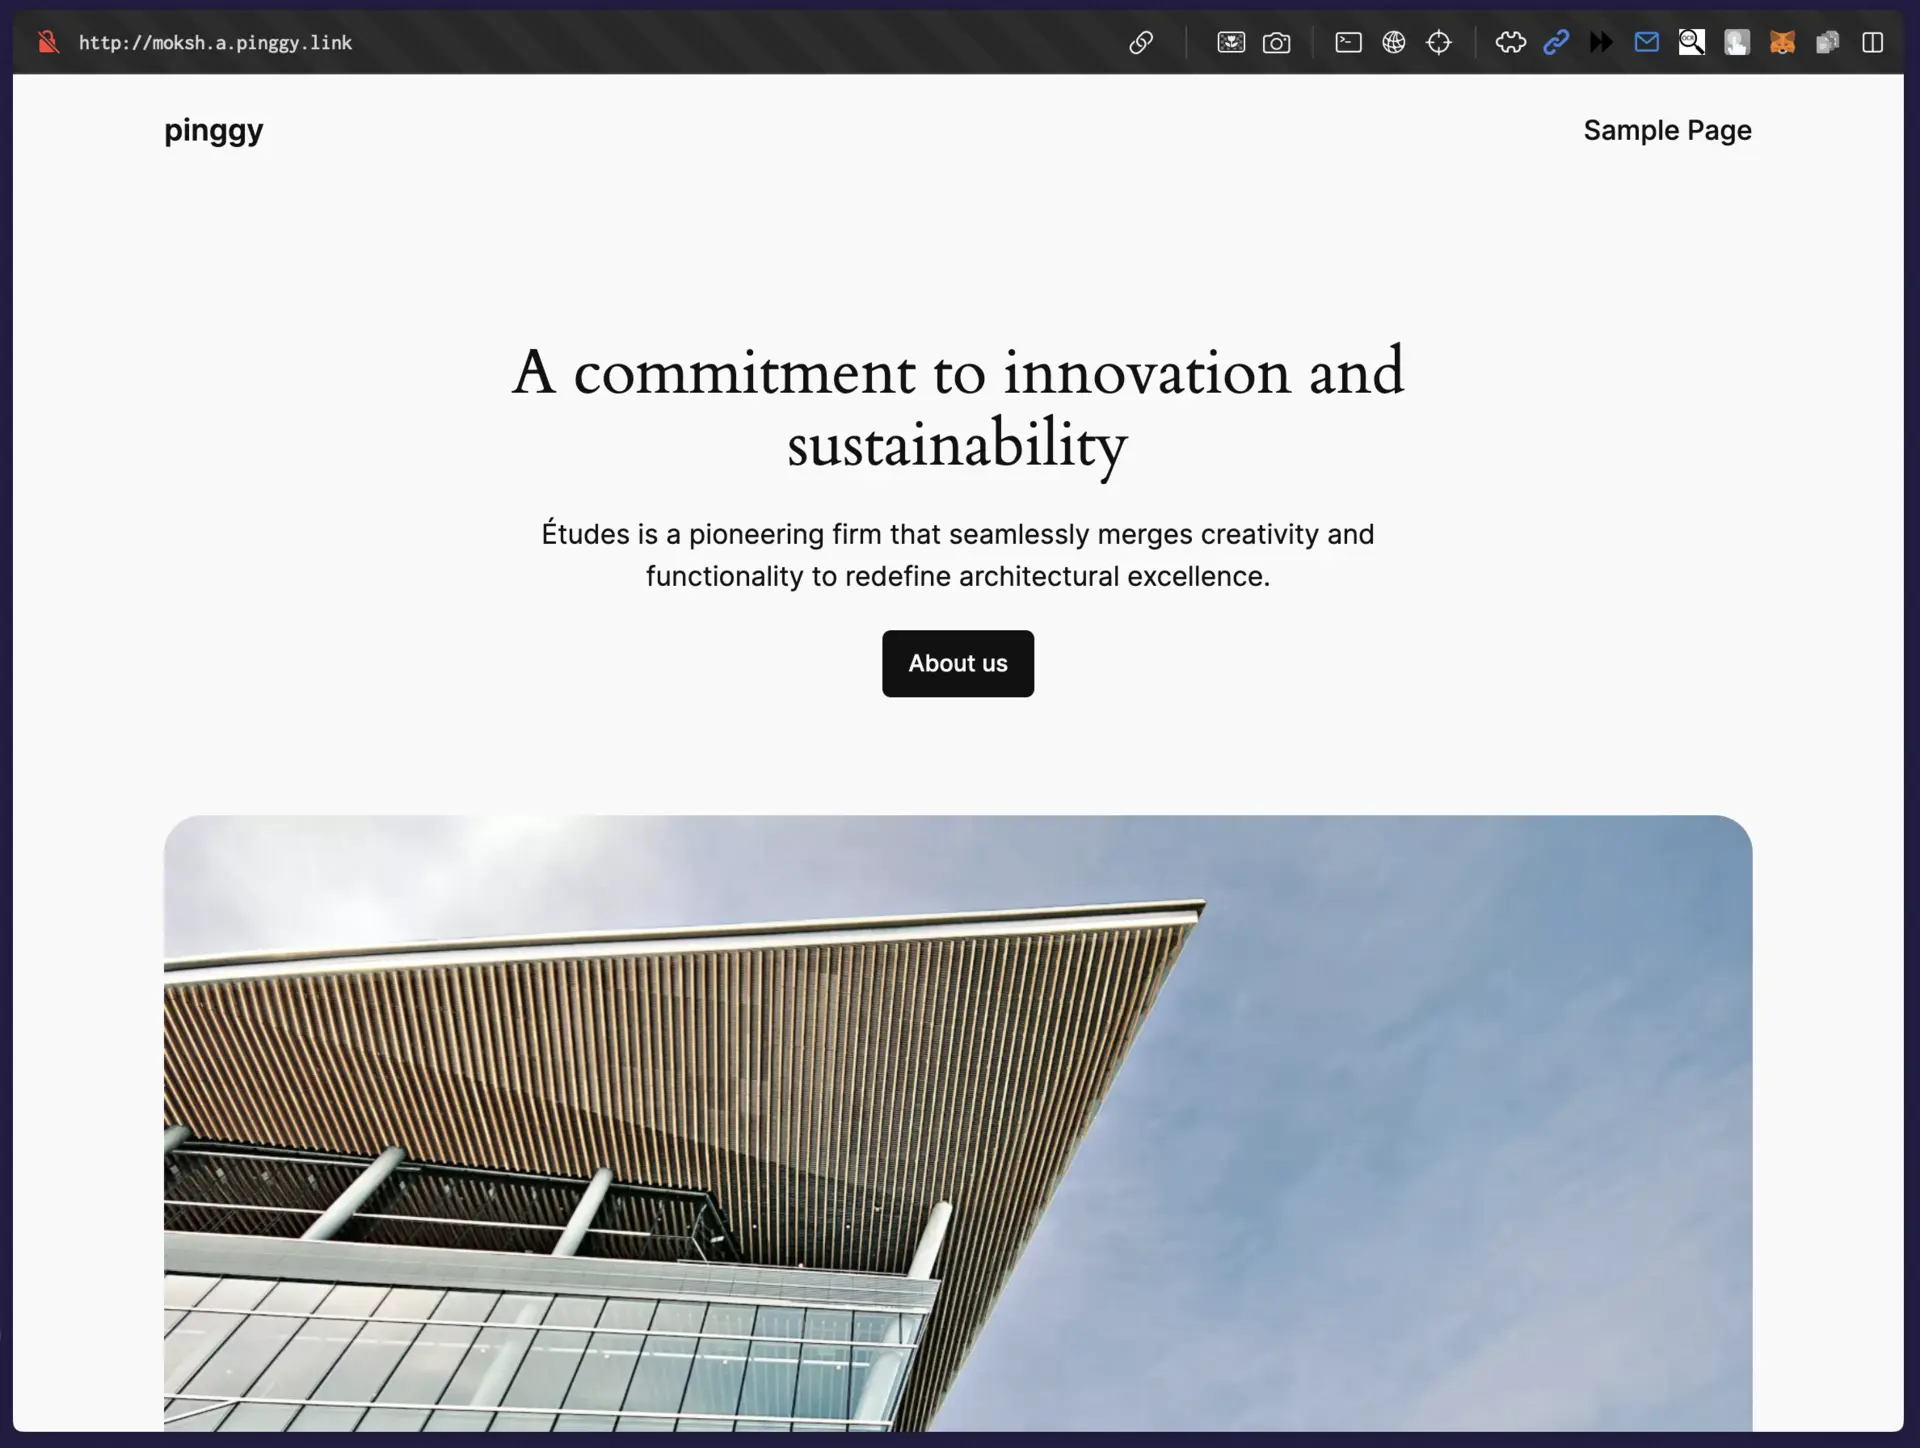
Once the Pinggy tunnel is live, you can access your LocalWP site from anywhere using the URL generated by Pinggy.
- Open a web browser.
- Enter the Pinggy URL provided in the terminal output (e.g.,
https://moksh..pinggy.link). - Your locally developed WordPress site should now appear as though it’s hosted on a live server.


By following these steps, you can efficiently set up and manage remote access for your LocalWP WordPress site using Pinggy.
Troubleshooting Common Issues
As with any tool, there may be occasional issues when using Pinggy with LocalWP. Here are some common problems and solutions.
1. Mixed Content Issues
If your site is hosted over HTTPS, but some of the resources that are being called, for instance images or scripts are in HTTP, then you may get mixed content messages. This can distort order of loading of assets and affects the look and feel of the site.
- Solution: You should use the HTTPS version of your Pinggy URL, or all links on your WordPress site should use HTTPS. This can be done in WordPress by changing the settings of WordPress URL and Site URL to HTTPS.
2. Site Not Loading Assets
It is mainly attributed to improper headers or wrong site locations.
- Solution: Again, if you are using Pinggy command check the HOST header value specified in your Pinggy command (for example
u:Host:testping.local) and verify that this value is the same as your local site address.
3. LocalWP Port Conflicts
LocalWP usually sets the site to run on port 80 and sometimes this may result to conflicts.
- Solution: In the configuration file of LocalWP, set a different port for the site. Set the Pinggy command to be based on the new port.
Following these instructions as well as tips on troubleshooting you can successfully configure and use Pinggy for providing remote access to your LocalWP WordPress site.
Additional Tips for Smooth Functioning
Here are some additional recommendations to prevent issues when working with Pinggy and LocalWP:
- Use HTTPS Server Setting: If your server is hosted locally on the HTTPS, enable the option Connect to HTTPS Server in Pinggy in order to avoid errors in certificates.
- Enable Reverse Proxy Mode: This setting is particularly useful for the LocalWP project as it rewrites the hostname and passes requests to the correct server.
- Adjust Headers: If the site expects a hostname in the request then we need to change it as per the site requirements in the headers.
Advantages of Using Pinggy with LocalWP
- Remote Access: Pinggy will allow you to access your local sites regardless of the geographic location – no need to fine-tune your networks.
- Client Collaboration: Pinggy allows you displaying the improvements to clients or colleagues without having to post to a live site.
- Enhanced Security: Pinggy has tunnelling that keeps your local server safe from access by unauthorized persons.
Quick Hack
Note that you may experience connectivity problems In that cas you append `ServerAliveInterval=10’ at the Pinggy command-Function:. It sends a “heartbeat” every 10 seconds to keep the session alive and useful for avoiding timeout issues while working through long sessions during development.
Pinggy makes LocalWP site share as easy as possible and gives developers the chance to get real feedback, discuss and test.