Self-hosting
n8n opens up a world of workflow automation possibilities, giving you complete control over your data and integrations. While setting up n8n itself is refreshingly straightforward, configuring Google Sign-In authentication can feel like navigating a maze of OAuth settings and redirect URLs. Additionally, receiving webhooks in self-hosted n8n is also tricky such as from Telegram, Slack, and other services that need to send data to your workflows. The good news? Once you understand the key pieces especially the crucial WEBHOOK_URL environment variable and the proper sequence of setup the process becomes much more manageable.
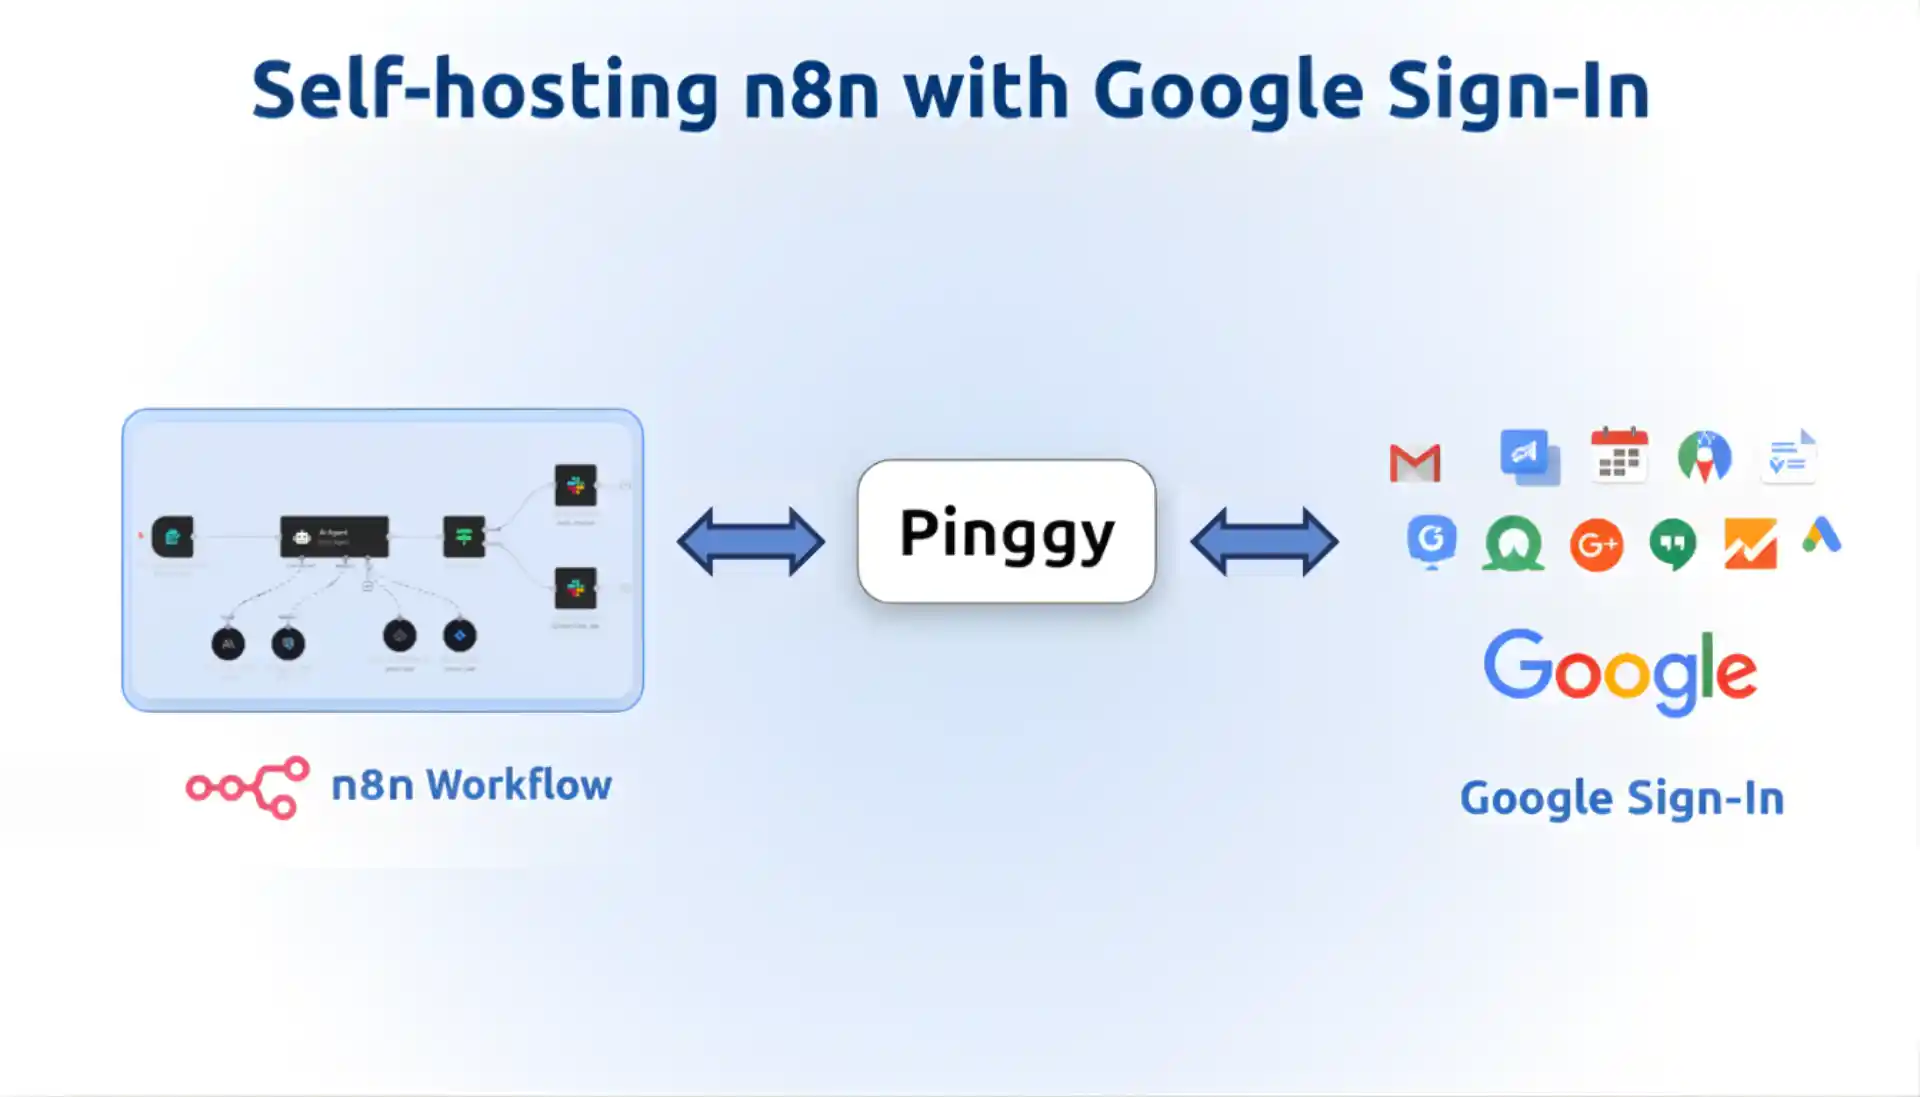
In this comprehensive guide, we’ll walk through self-hosting n8n using the npm approach and then tackle the trickier part: enabling Google Sign-In authentication with the help of
Pinggy for secure HTTPS access. Note that for OAuth integration, you’ll need
Pinggy Pro to ensure stable redirect URLs. Whether you’re building internal workflows for your team or creating automated processes that need Google integration, this setup will have you up and running with enterprise grade authentication.
Summary
Install n8n via npm
- Install Node.js (version 18.10 or higher)
- Install n8n globally:
npm install -g n8n (or use npx n8n start to run without installing)
Create HTTPS tunnel with Pinggy
- Run:
ssh -p 443 -R0:localhost:5678 a.pinggy.io - Note the generated HTTPS URL (requires Pinggy Pro for OAuth)
Start n8n with WEBHOOK_URL
- Set
WEBHOOK_URL to your Pinggy HTTPS URL - Start n8n:
WEBHOOK_URL="https://your-pinggy-url.a.free.pinggy.link" n8n start
Set up Google service in n8n
- Access n8n via Pinggy URL and create account
- Create workflow with Google service (Drive, Sheets, Gmail, etc.)
- Copy the OAuth redirect URL from n8n credential setup
Configure Google Cloud Console
- Create project and OAuth 2.0 credentials
- Add Pinggy URL to authorized origins and redirect URIs
- Enable required Google APIs and configure OAuth consent screen
Complete OAuth setup
- Add Client ID and Secret to n8n
- Test Google Sign-In and authorize app access
Why Self-Host n8n?
Before diving into the technical setup, let’s understand why self-hosting n8n makes sense.
n8n is a powerful workflow automation tool that connects different services and automates repetitive tasks. While
n8n Cloud offers convenience, self-hosting provides several compelling advantages.
Self-hosting gives you complete control over your data and workflows. Your sensitive information never leaves your infrastructure, which is crucial for businesses handling confidential data or operating in regulated industries. You also avoid the limitations and costs of cloud plans no restrictions on workflow executions, data retention, or the number of active workflows.
Additionally, self-hosting allows for unlimited customization. You can install custom nodes, modify the interface, and integrate with internal systems that might not be accessible from n8n Cloud. For teams that need Google Sign-In integration, self-hosting becomes even more attractive since you can configure OAuth exactly how your organization requires it.
Prerequisites
Before we begin, ensure you have the following ready:
- Node.js (
version 18.10 or higher) installed on your system - npm (comes with Node.js)
- A
Google account for setting up OAuth credentials
- Basic familiarity with command line operations
- An internet connection for downloading packages and creating tunnels
You can verify your Node.js installation by running node --version in your terminal. If you need to install or update Node.js, visit the
official Node.js website and download the latest LTS version for your operating system.
Step 1: Installing n8n via npm
The npm installation method is the most straightforward way to get n8n running on your local machine. Unlike Docker setups, this approach gives you direct access to n8n’s configuration and makes it easier to manage environment variables.
Start by installing n8n globally on your system:
This command downloads and installs n8n along with all its dependencies. The global installation means you can run n8n from any directory on your system.
Alternative: If you prefer not to install n8n globally, you can use npx n8n start instead, which will download and run n8n without installing it permanently on your system. This approach is particularly useful for testing or one-time usage.
At this point, we have n8n ready to run but we won’t start it yet—we need to set up the public tunnel first to get the proper WEBHOOK_URL.
Step 2: Creating an HTTPS Tunnel with Pinggy
Before starting n8n, we need to create a public HTTPS URL that Google OAuth can use for redirects. Google requires HTTPS for security, and this is where Pinggy becomes essential.
Important Note: For OAuth integration with Google services, you’ll need
Pinggy Pro
Run the following command in your terminal:
This command creates a secure tunnel from Pinggy’s servers to your local port 5678 (where n8n will run). Within seconds, you’ll see output showing your public HTTPS URL, something like
https://mysite.a.pinggy.link.
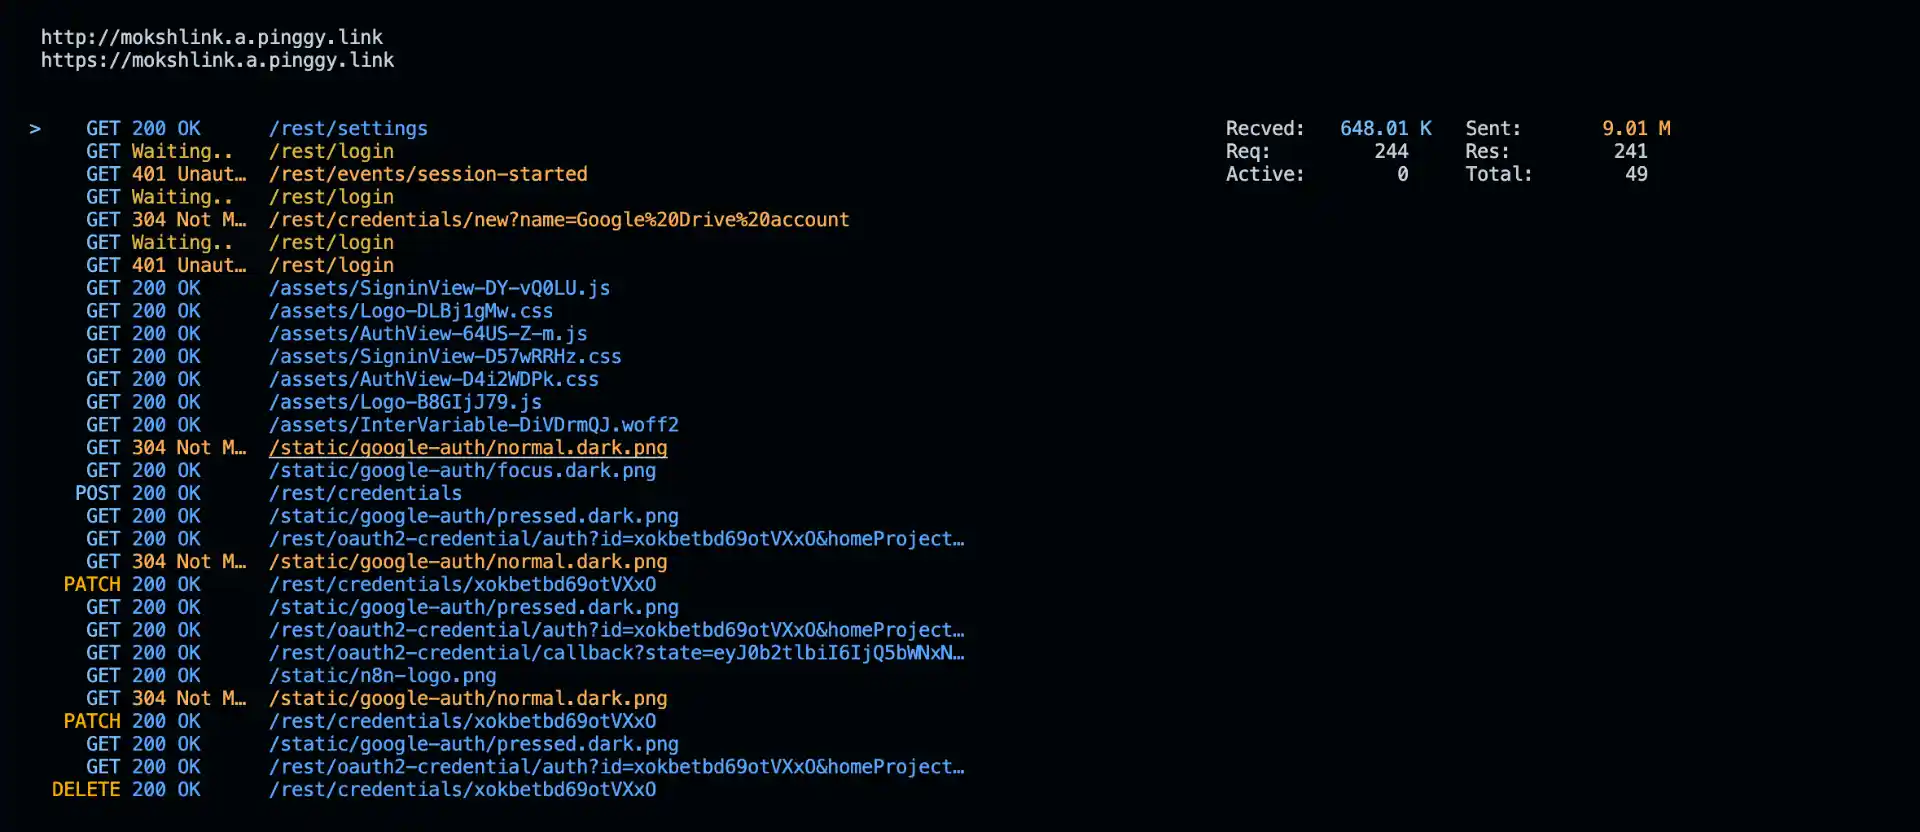
Copy this URL carefully—you’ll need it for the next step. Keep this terminal window open throughout the entire process, as closing it will terminate the tunnel and break your OAuth setup.
Step 3: Starting n8n with WEBHOOK_URL
Now that you have your Pinggy URL, you can start n8n with the crucial WEBHOOK_URL environment variable. This tells n8n what its public address is, which is essential for OAuth redirects to work properly.
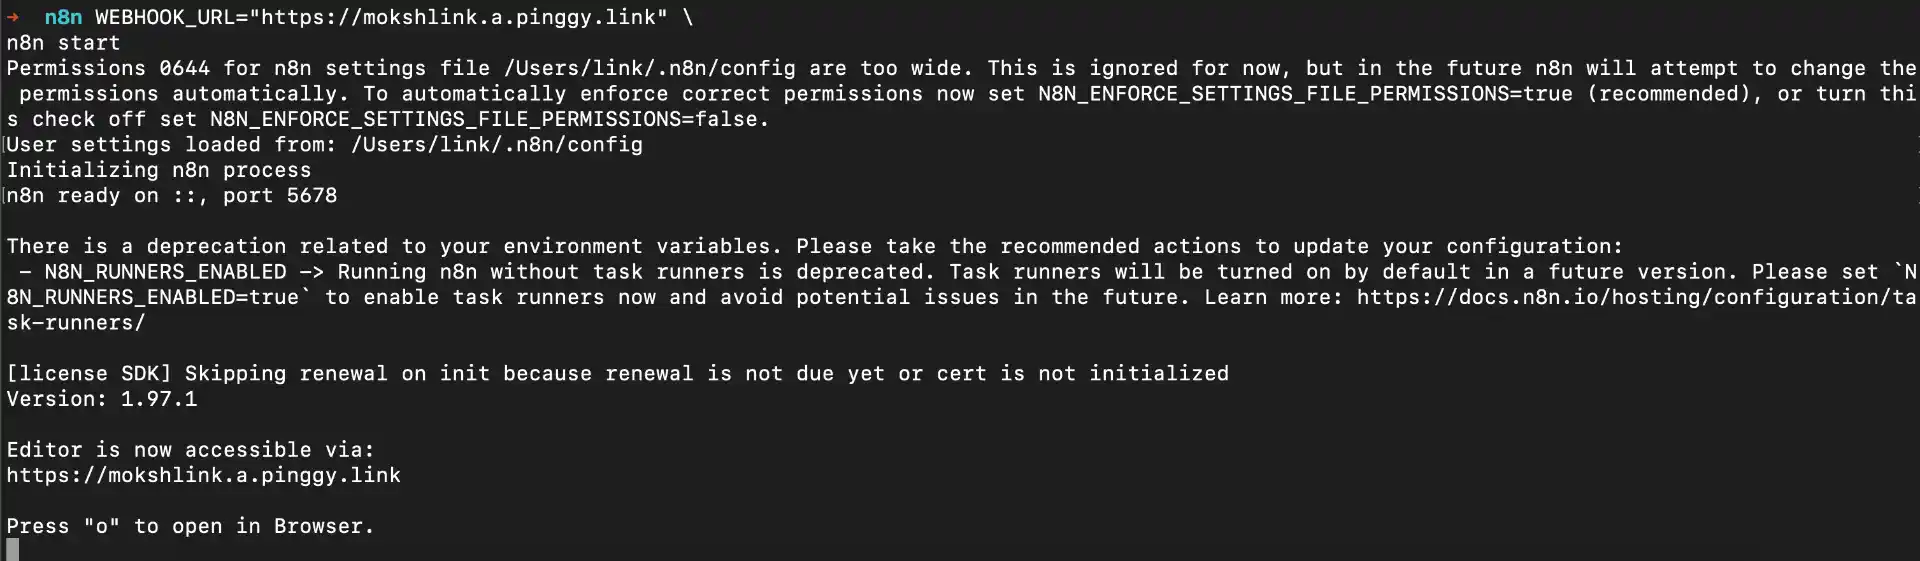
In a new terminal window (keeping the Pinggy tunnel running), start n8n with:
# If you installed n8n globally
WEBHOOK_URL="https://mysite.a.pinggy.link" n8n start

# Or if using npx (without global installation)
WEBHOOK_URL="https://mysite.a.pinggy.link" npx n8n start
Replace the URL with your actual Pinggy URL. n8n will start on port 5678 and be accessible via your Pinggy URL. You’ll see output indicating that n8n is running and ready to accept connections.
Step 4: Setting Up n8n and Getting the OAuth Redirect URL
Now comes the interesting part we need to access n8n through the Pinggy URL and set up a Google service to get the proper redirect URL that we’ll use in Google Cloud Console.
Open your Pinggy URL in a web browser (e.g., https://mysite.a.pinggy.link). If this is your first time accessing n8n, you’ll be prompted to create an account. Set up your email and password credentials.
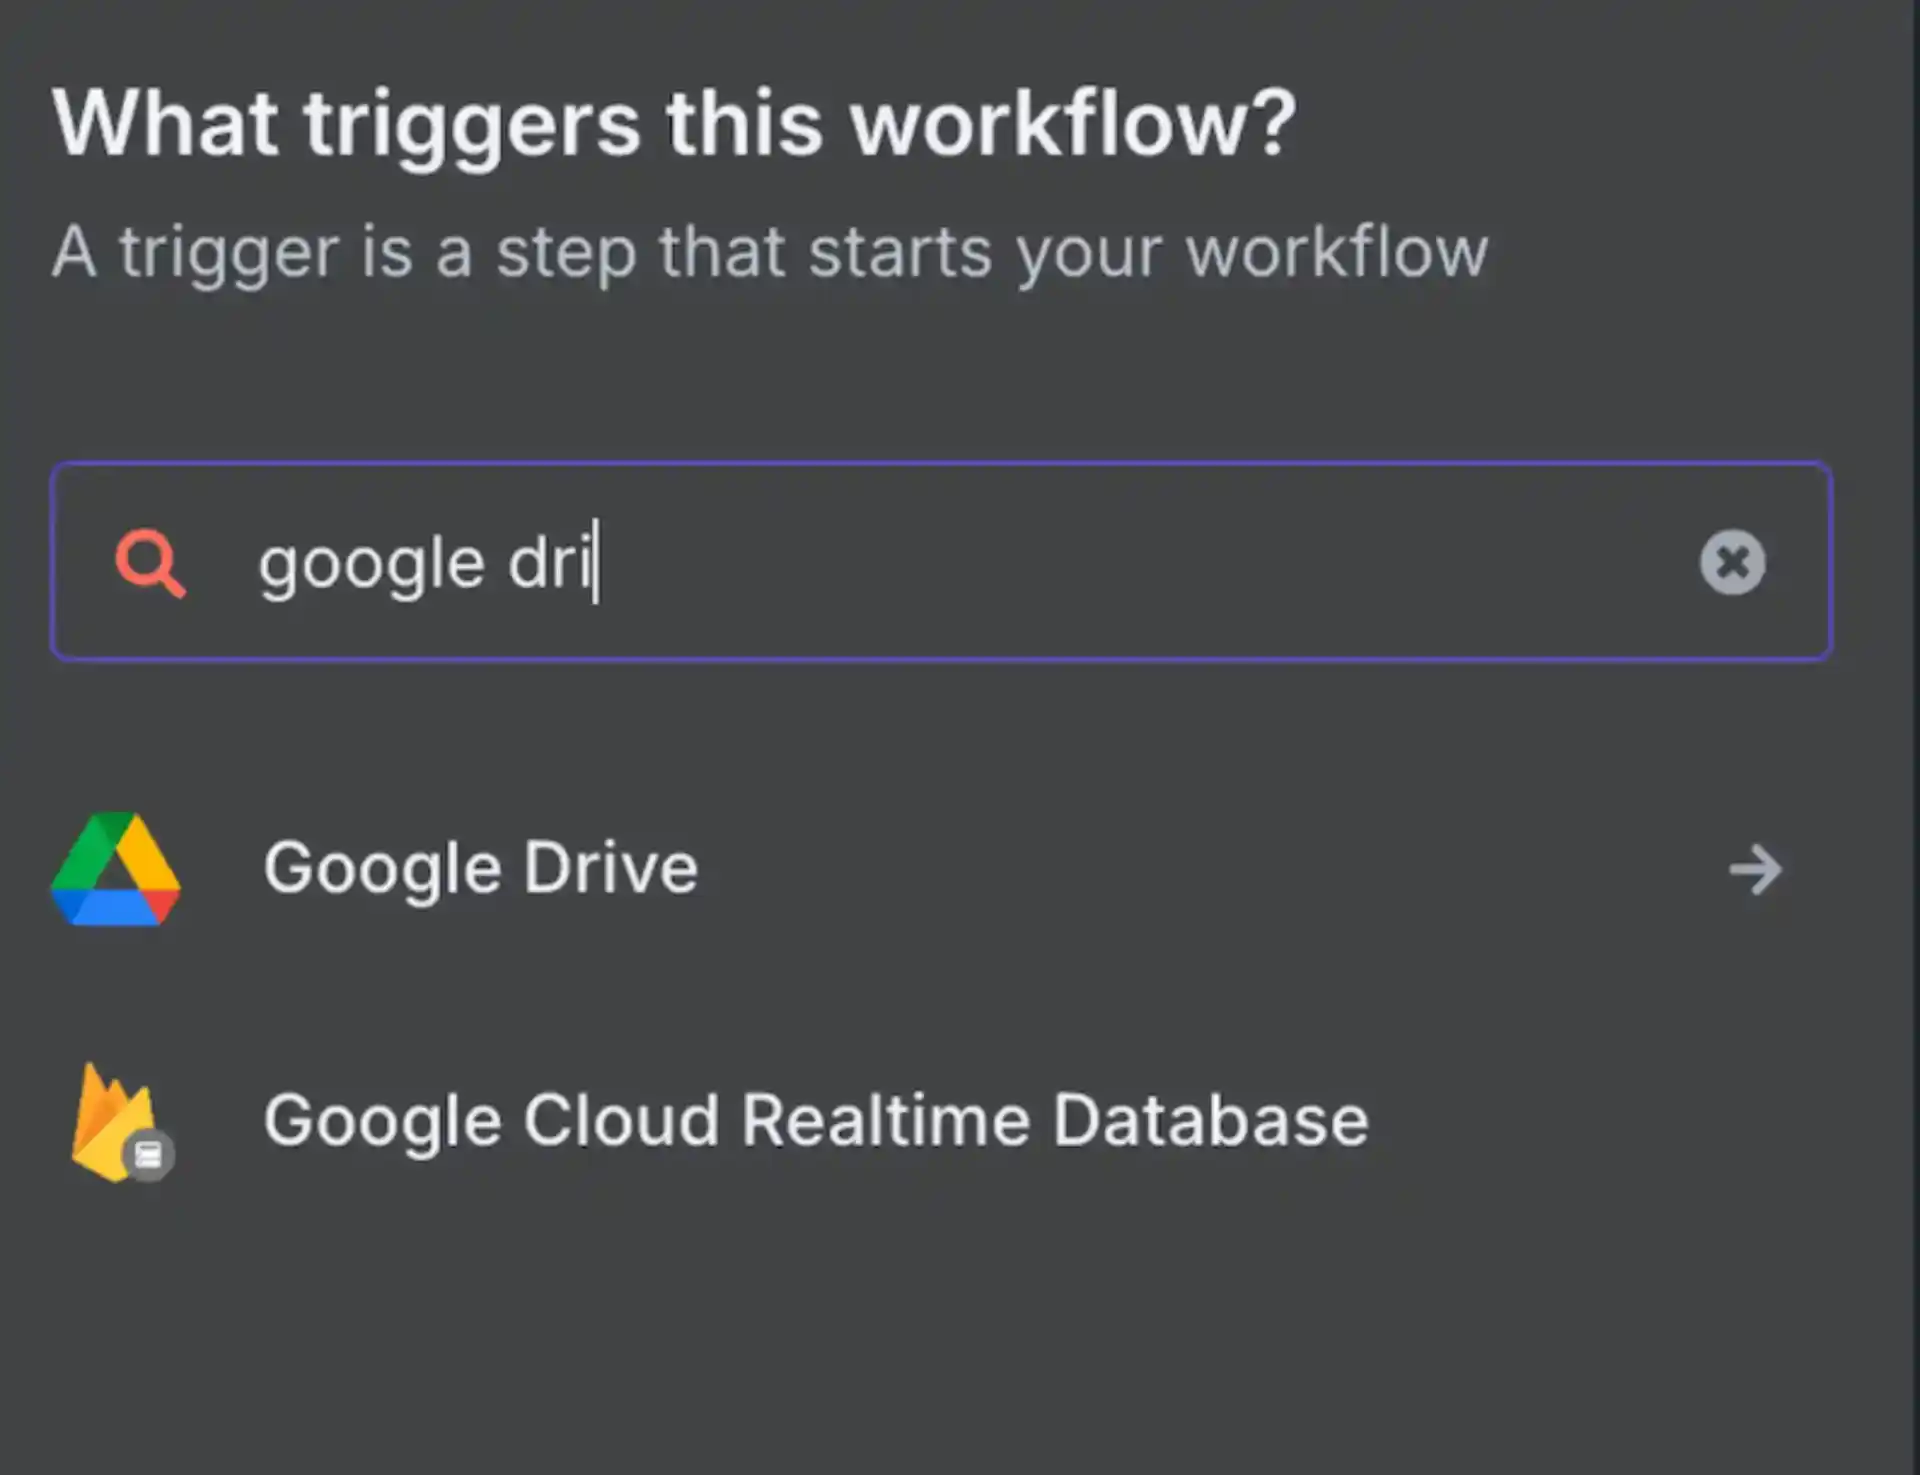
Once logged in, click “Create workflow” to start building your first automation. For this setup, we’ll add a Google service trigger to generate the OAuth configuration. Click on the “+” button to add a new node, then search for and select any Google service like “
Google Drive,” “
Google Sheets,” or “
Gmail.”
After selecting your Google service node, you’ll see a “Credential to connect with” dropdown. Click “Create New” to set up new credentials. This is where the magic happens—n8n will show you the exact redirect URL you need for Google OAuth configuration.
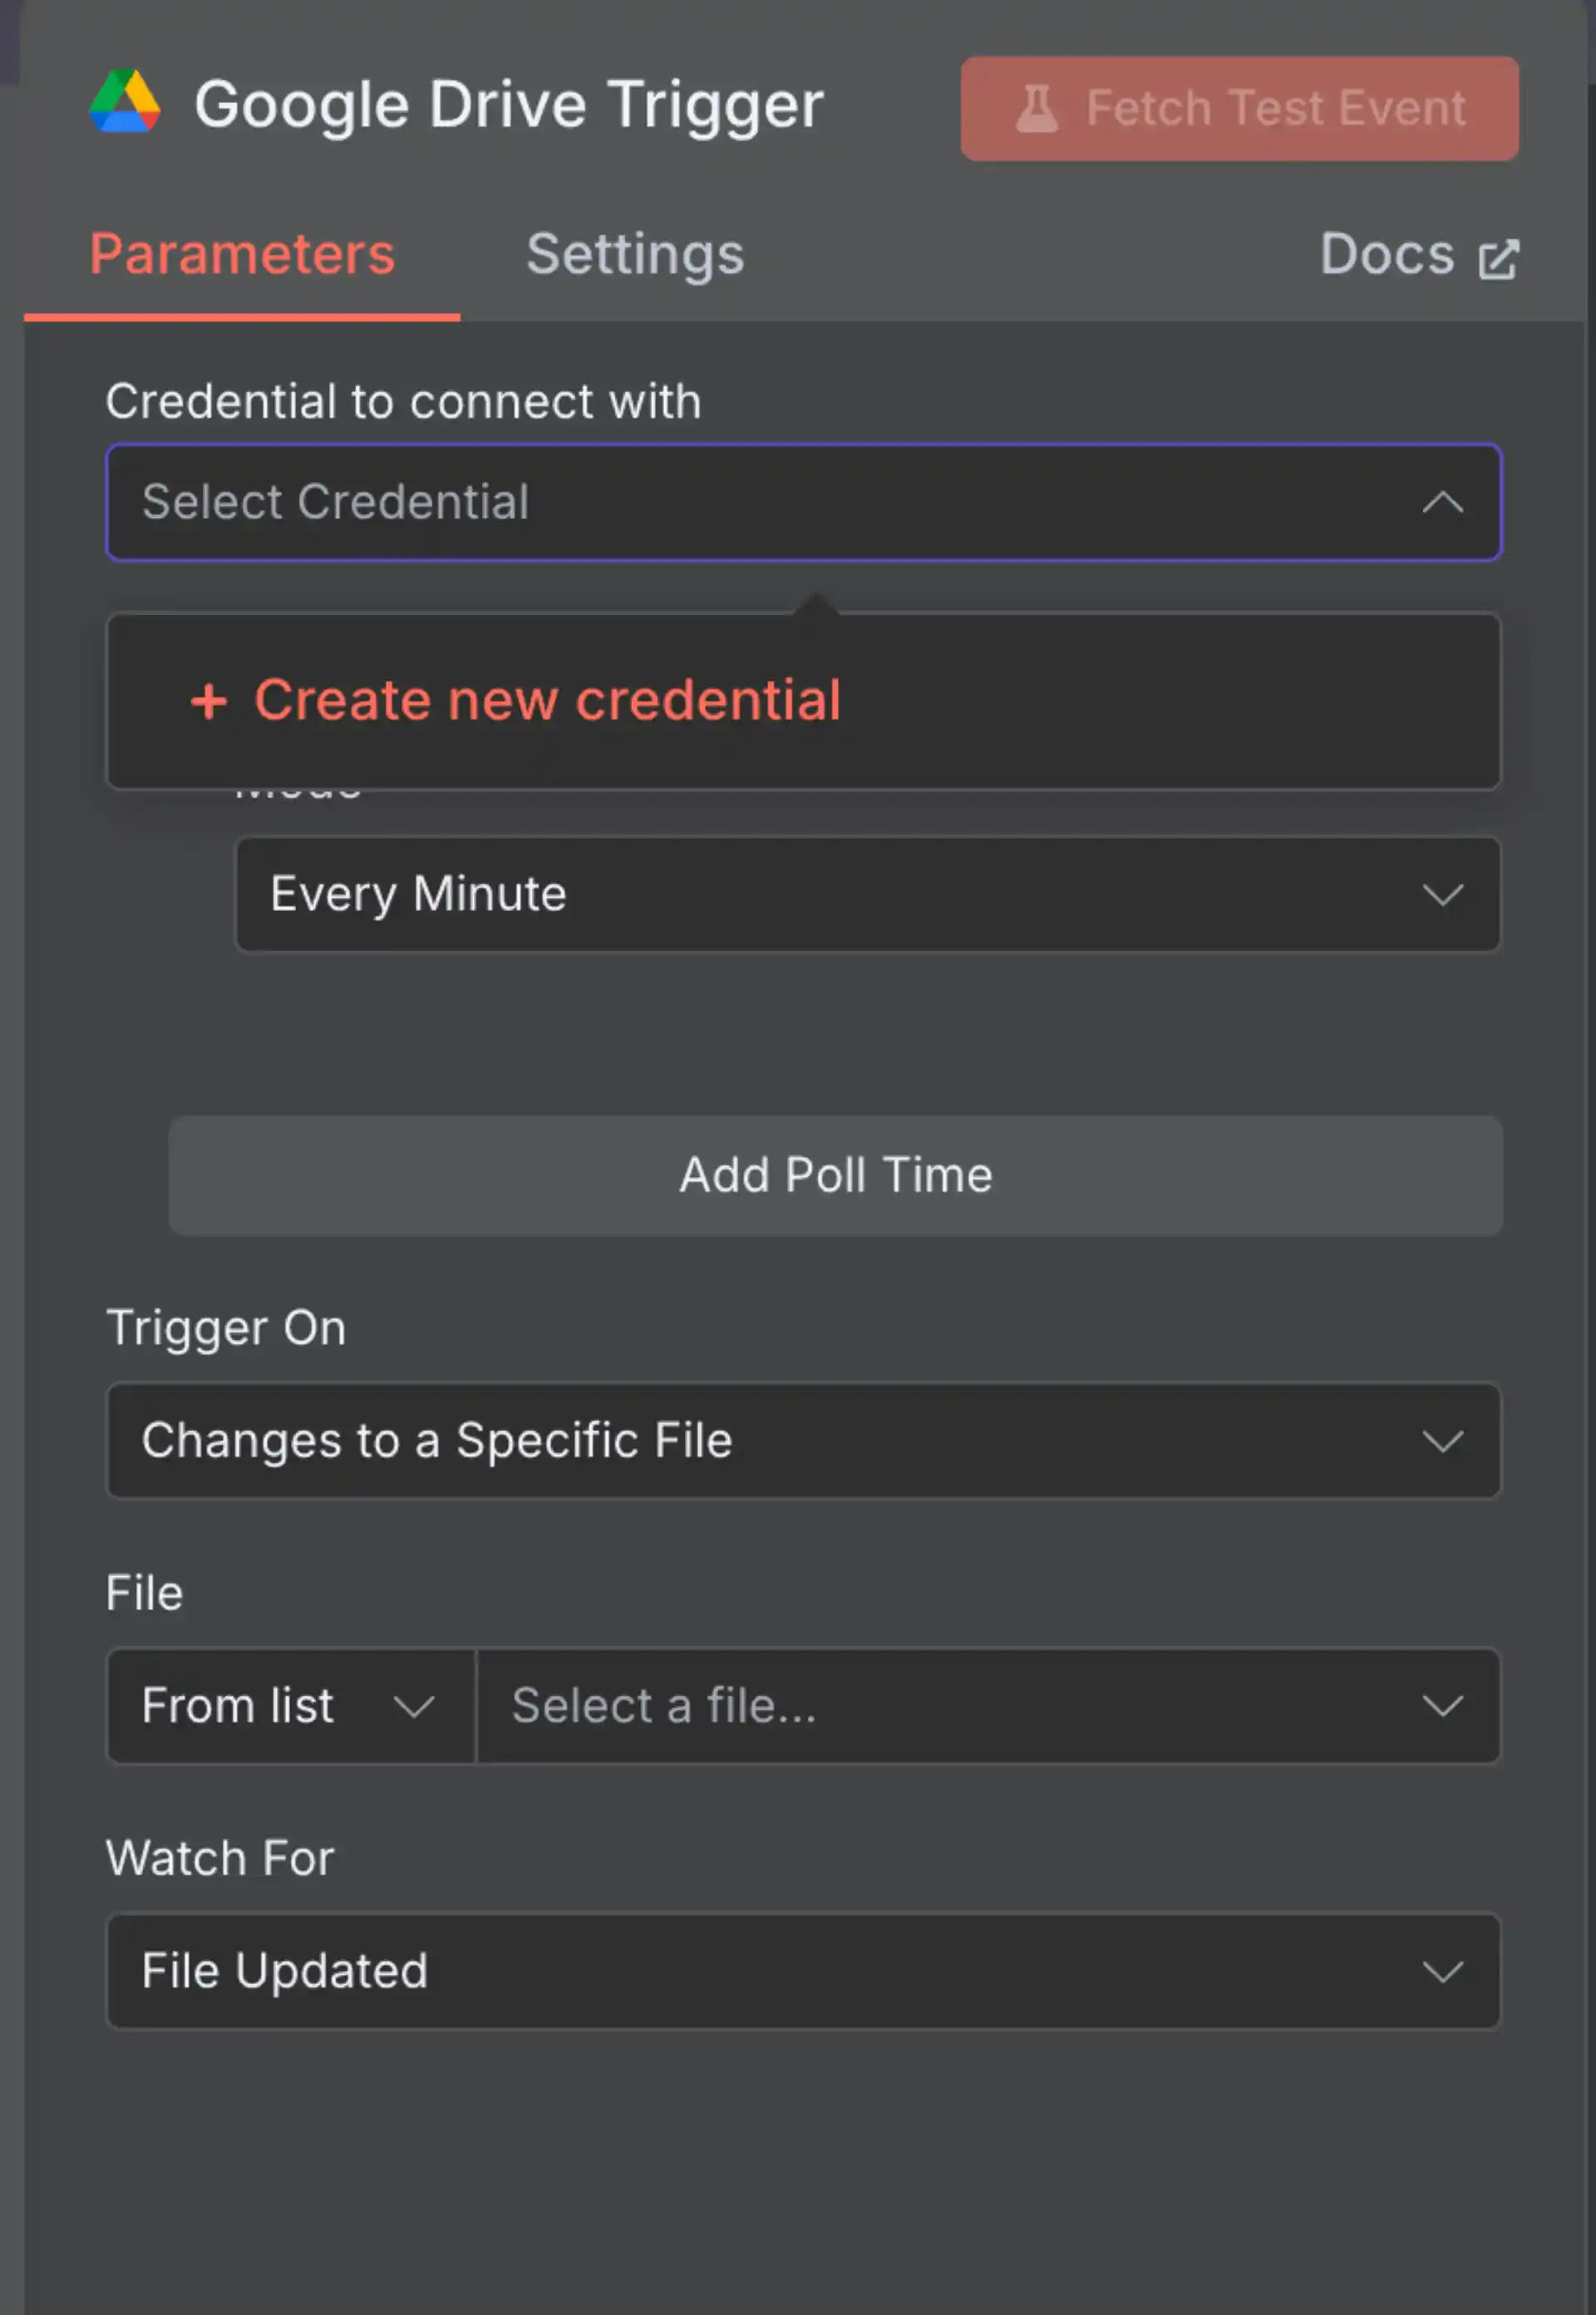
Copy the redirect URL that appears, which will look something like:
https://mysite.a.pinggy.link/rest/oauth2-credential/callback
Keep this URL handy—you’ll need it in the next step when configuring Google Cloud Console.
Step 5: Setting Up Google Cloud Console
Now that you have the redirect URL from n8n, it’s time to configure Google Cloud Console to enable OAuth authentication. This process involves creating a new project, setting up OAuth credentials, and configuring the necessary permissions.
Creating a New Project
Navigate to
Google Cloud Console and sign in with your Google account. On the main dashboard, you’ll see “Quick access” section where you can find “APIs & Services”—click on it, or use the search bar to find it.
If you don’t have an existing project suitable for this integration, create a new one by clicking “Select a project” at the top, then “New Project.” Give your project a meaningful name like “n8n-oauth-integration” and click “Create.”
Setting Up OAuth Credentials
In the left sidebar, navigate to “Credentials.” Click “Create Credentials” and select “OAuth 2.0 Client IDs.” If you haven’t configured the OAuth consent screen yet, you’ll be prompted to do so first.
For the OAuth client setup:
- Application type: Select “Web application”
- Name: Give it a descriptive name like “n8n Google Integration”
- Authorized JavaScript origins: Add your Pinggy public URL (e.g.,
https://mysite.a.pinggy.link) - Authorized redirect URIs: Paste the redirect URL you copied from n8n (e.g.,
https://mysite.a.pinggy.link/rest/oauth2-credential/callback)
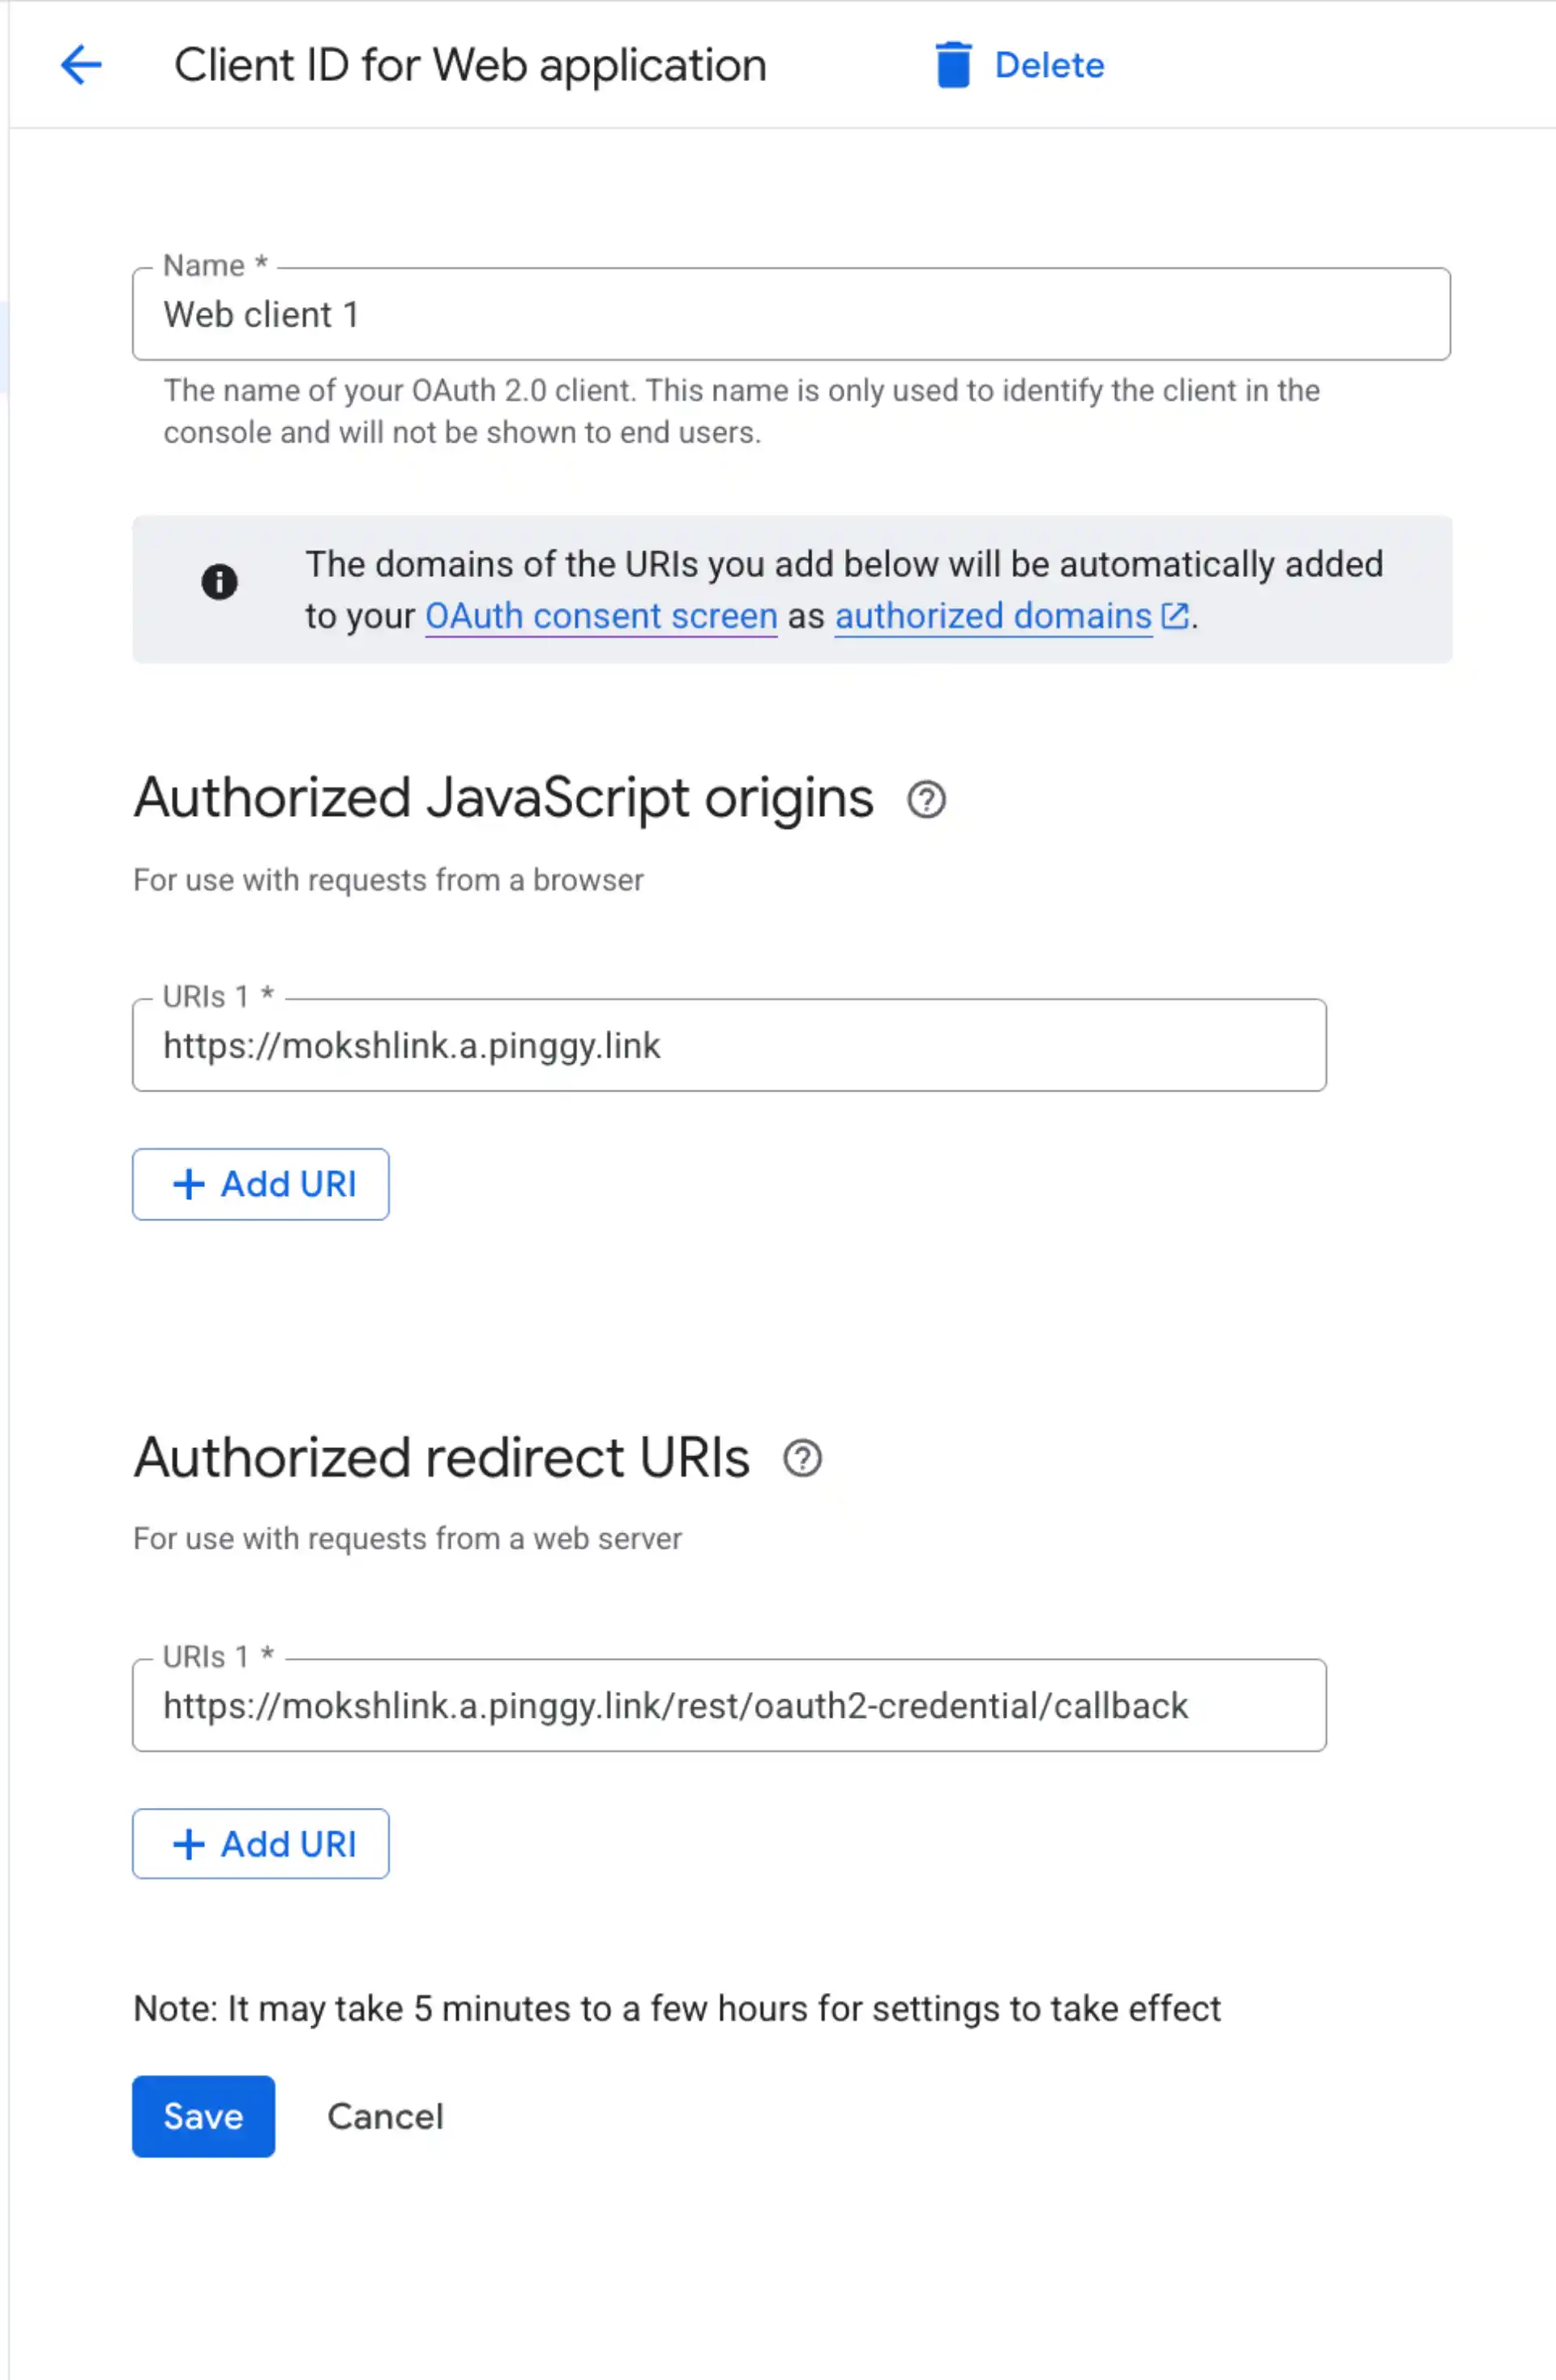
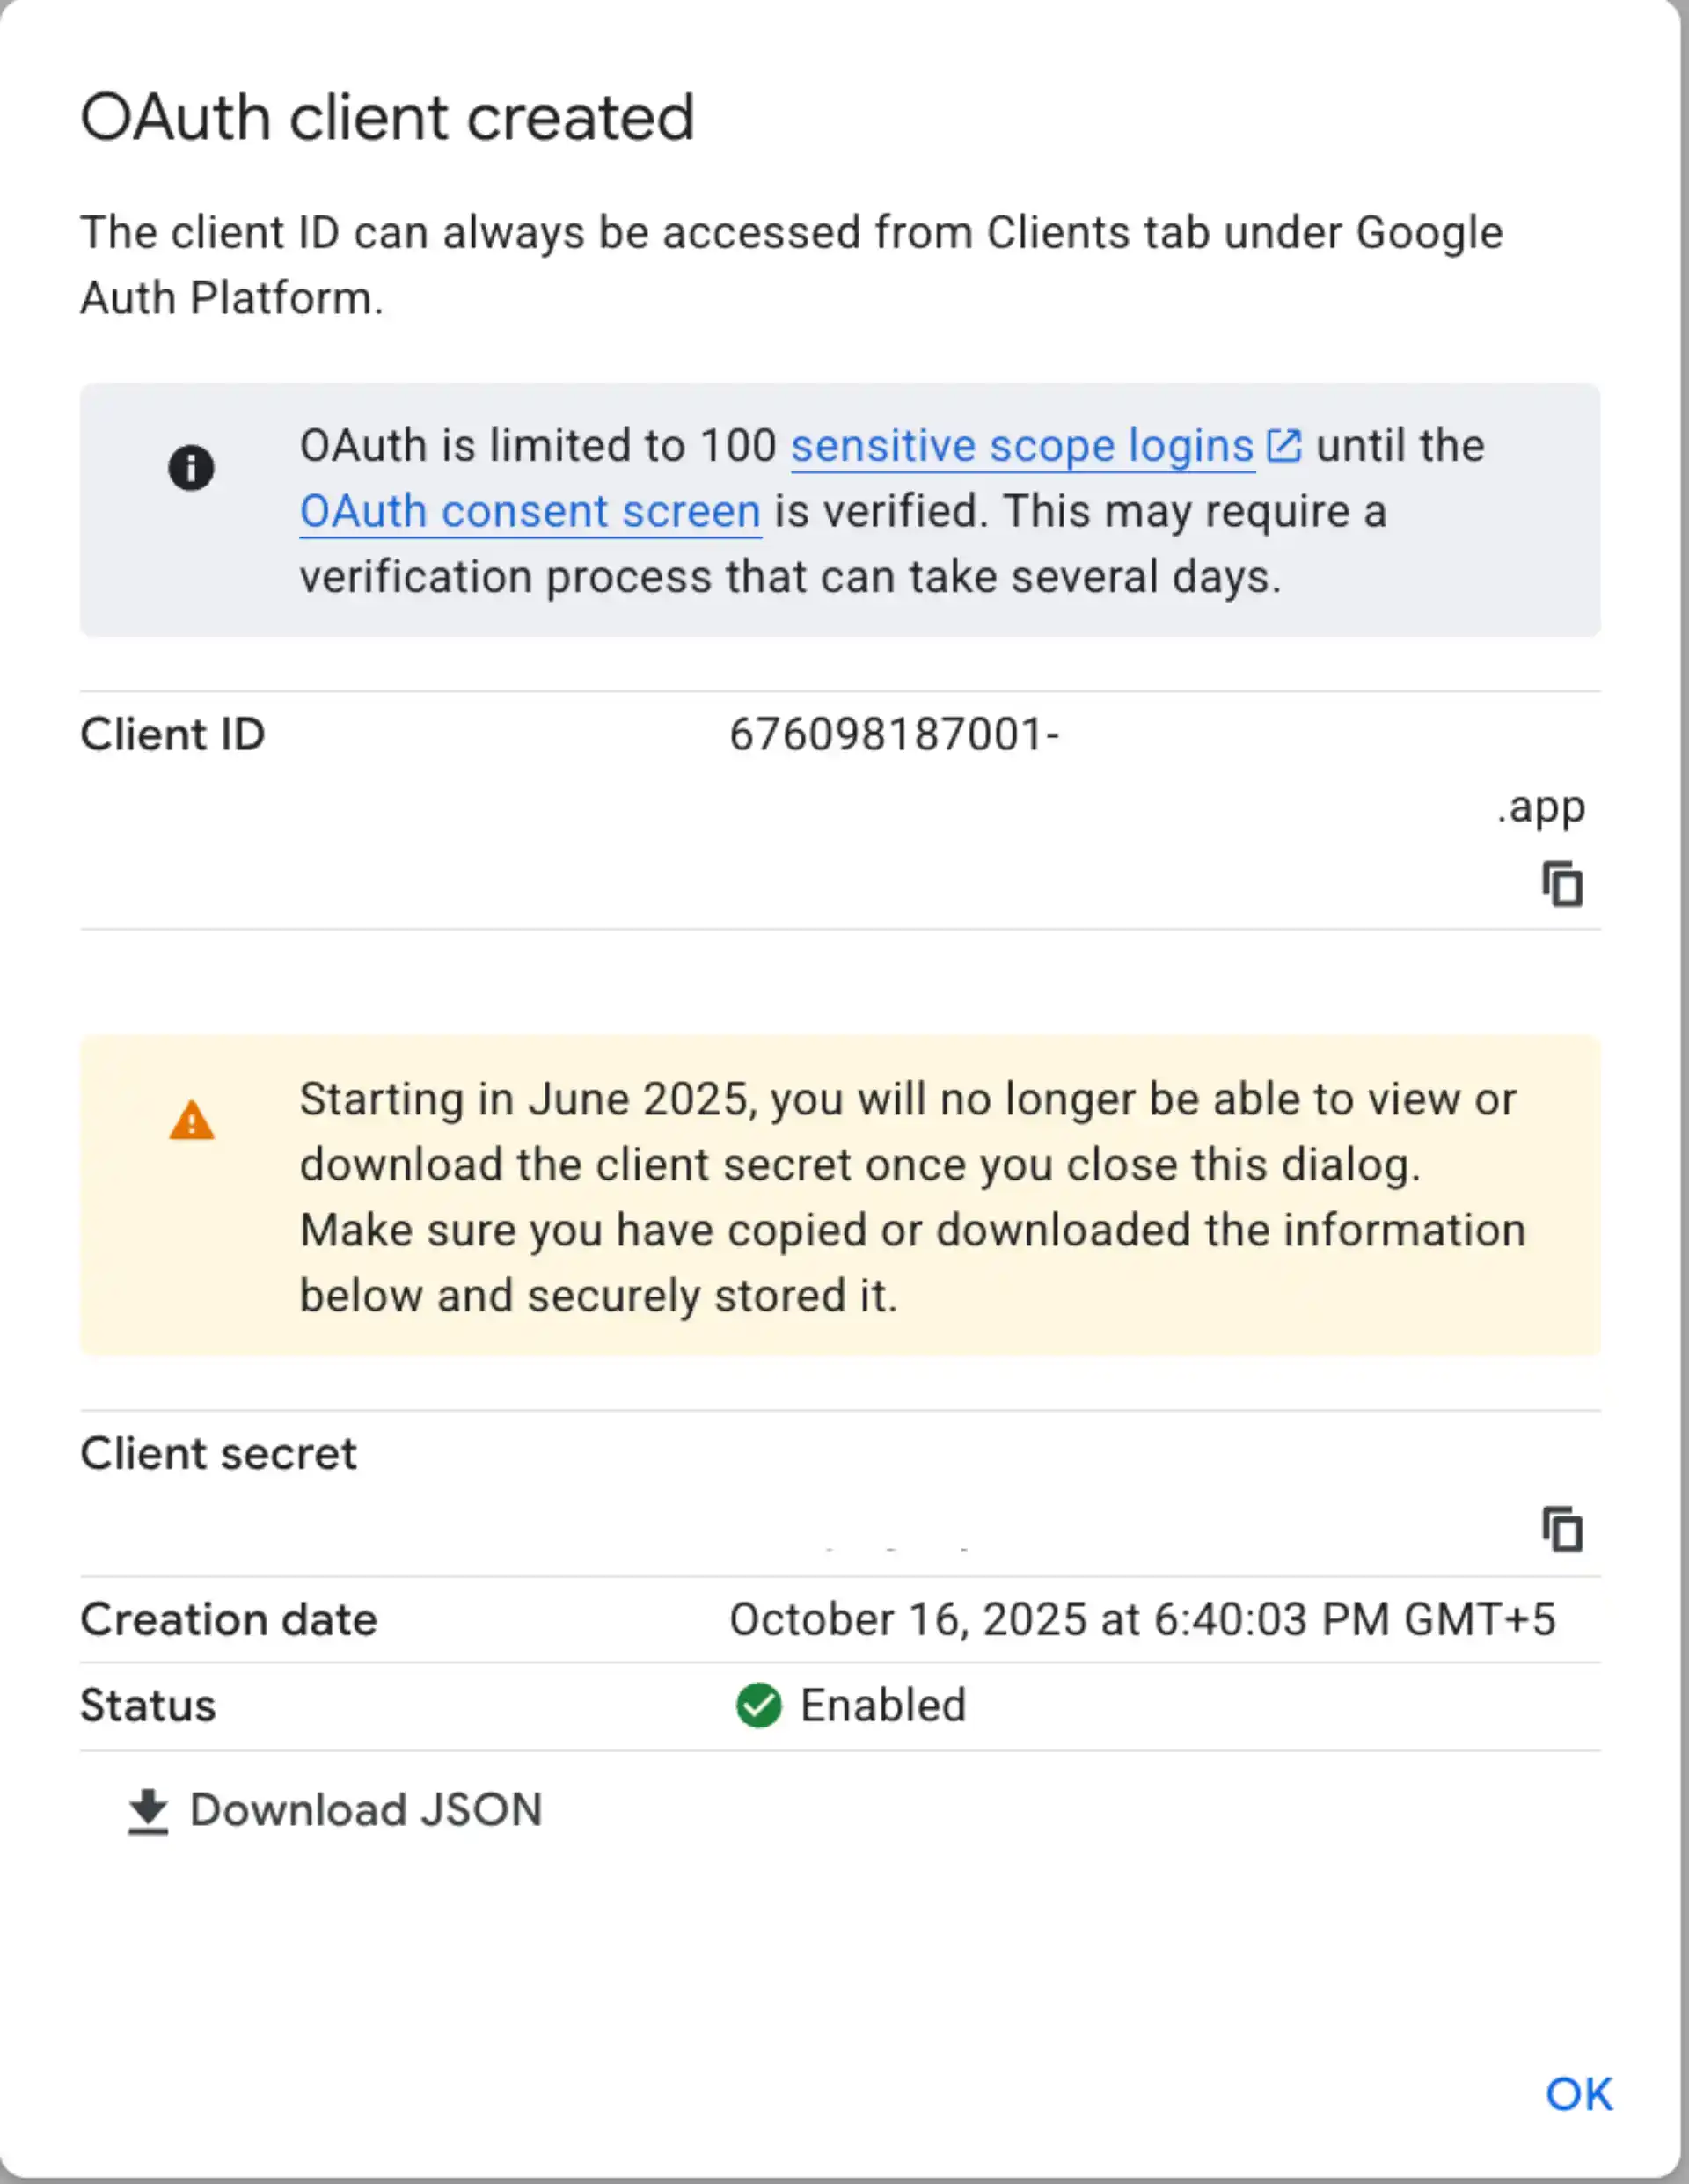
Click “Save” and you’ll receive your Client ID and Client Secret. Copy both of these values you’ll need them for the n8n configuration.
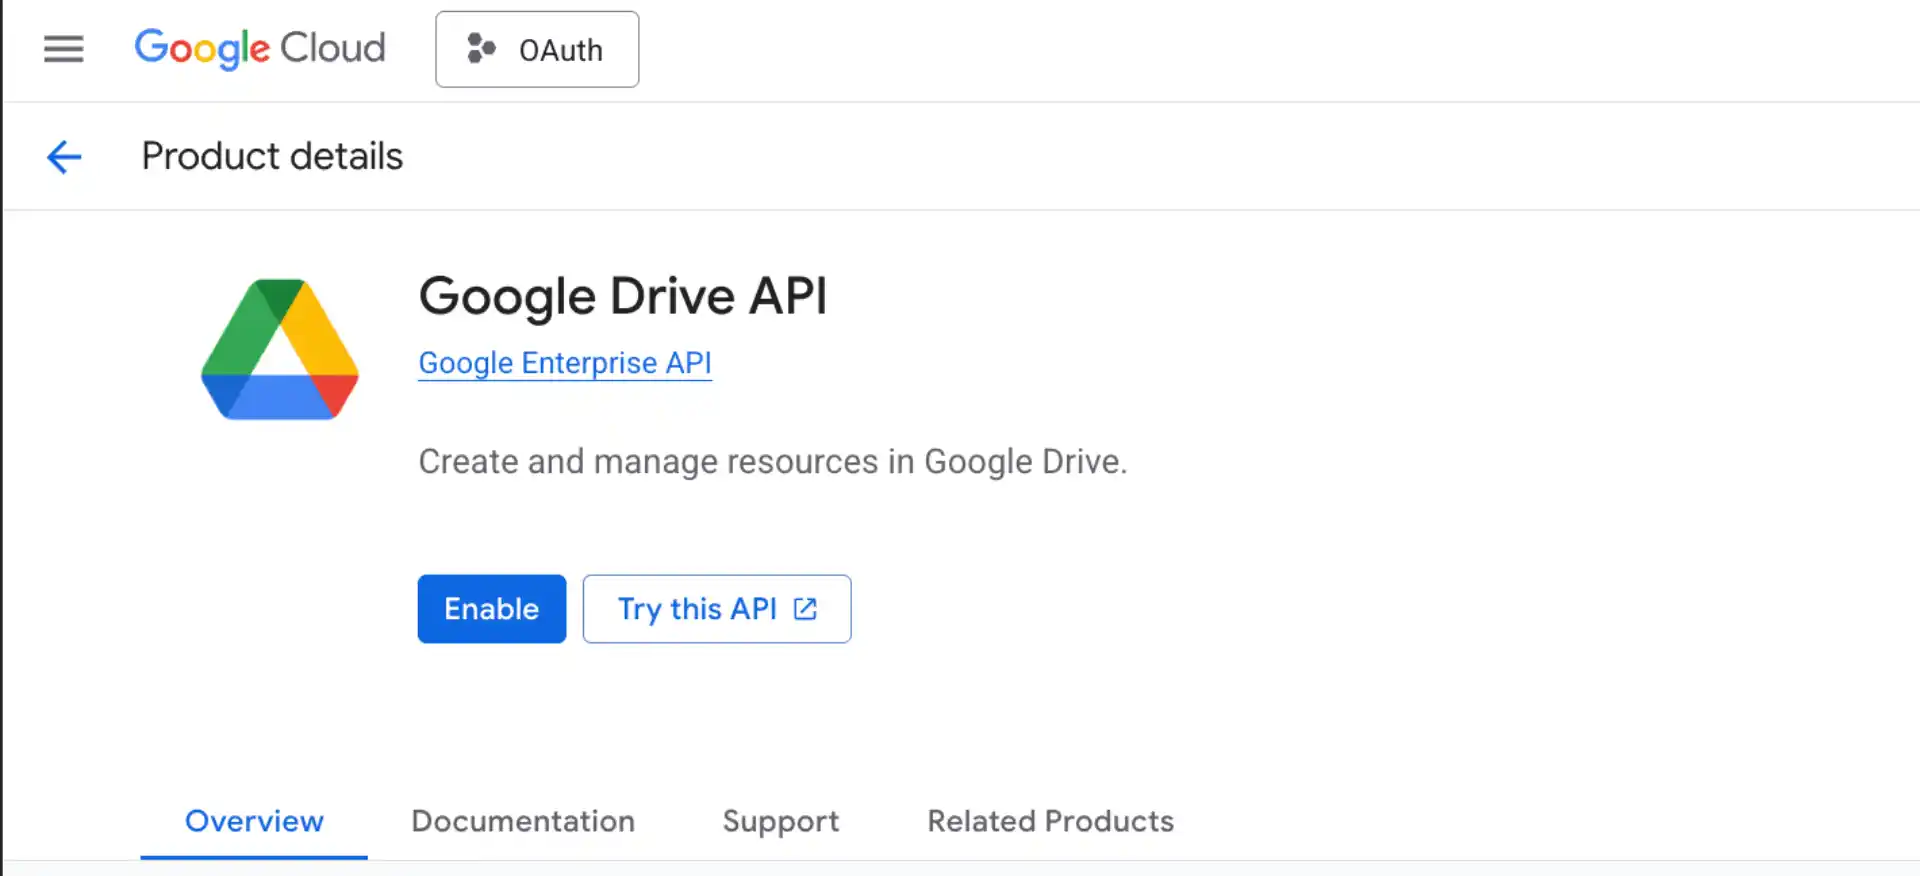
Enabling Required APIs
Next, you need to enable the specific Google service you want to use. In the left sidebar, go to “Library” and search for the service you selected in n8n (e.g., “
Google Drive API” if you chose Google Drive). Click on the service and then click “Enable.”

Configuring OAuth Consent Screen
This step is crucial for making your OAuth integration work properly. In the left sidebar, click on “
OAuth consent screen” or search for it. Here you’ll configure how users see your application when they’re asked to grant permissions.

- User Type: Choose “External” (unless you’re using
Google Workspace)
- App Information: Fill in your app name, user support email, and developer contact information
- Scopes: Click “Add or Remove Scopes” and select all the permissions your n8n workflow will need (e.g., for Google Drive, you might need “See and download all your Google Drive files”)
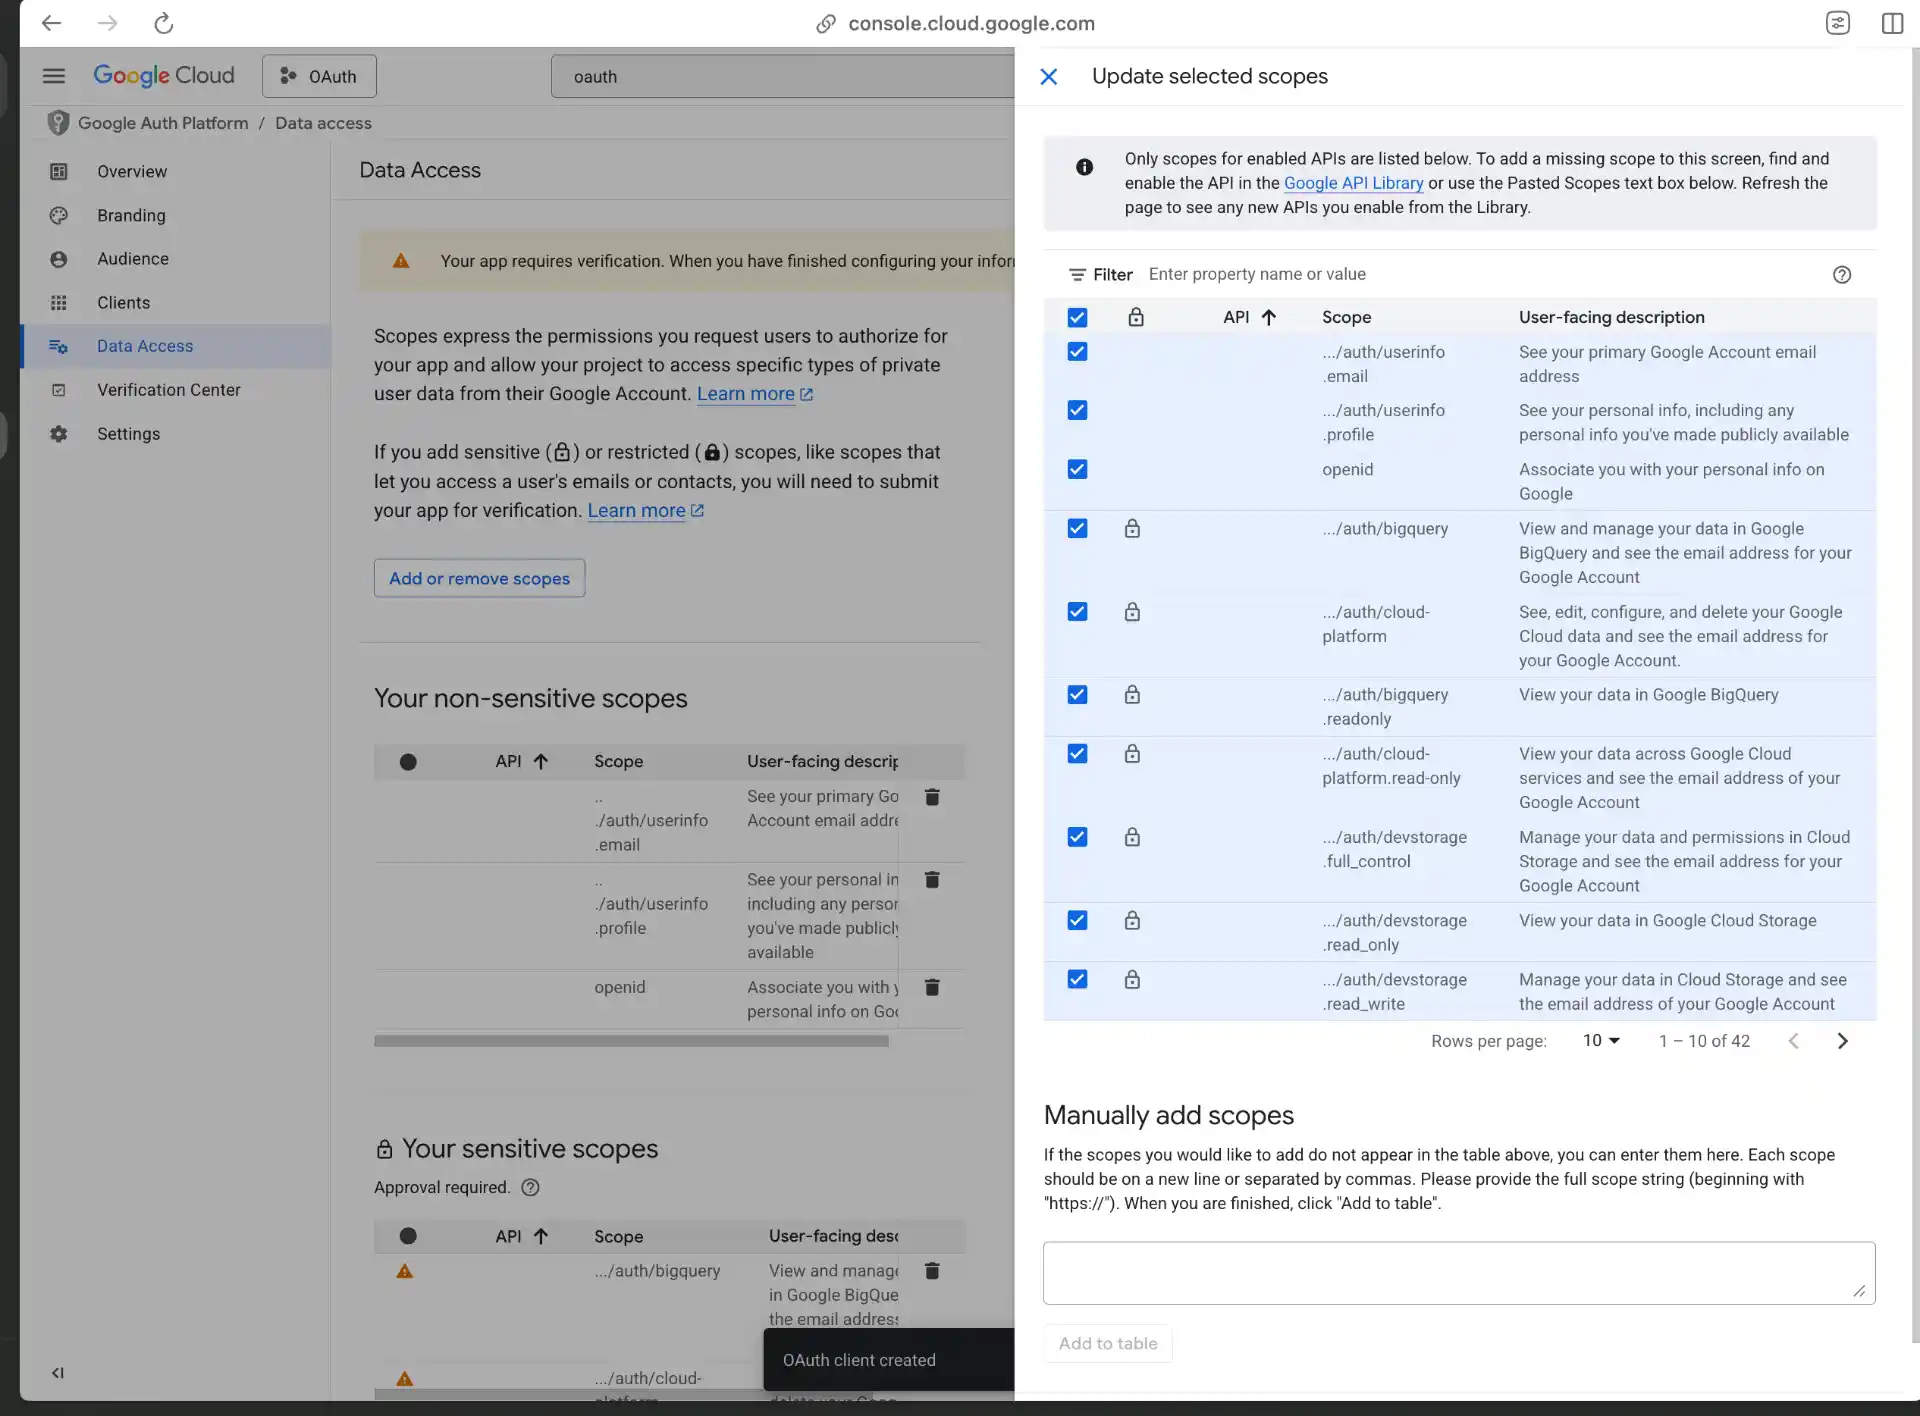
- Test Users: Add your email address as a test user
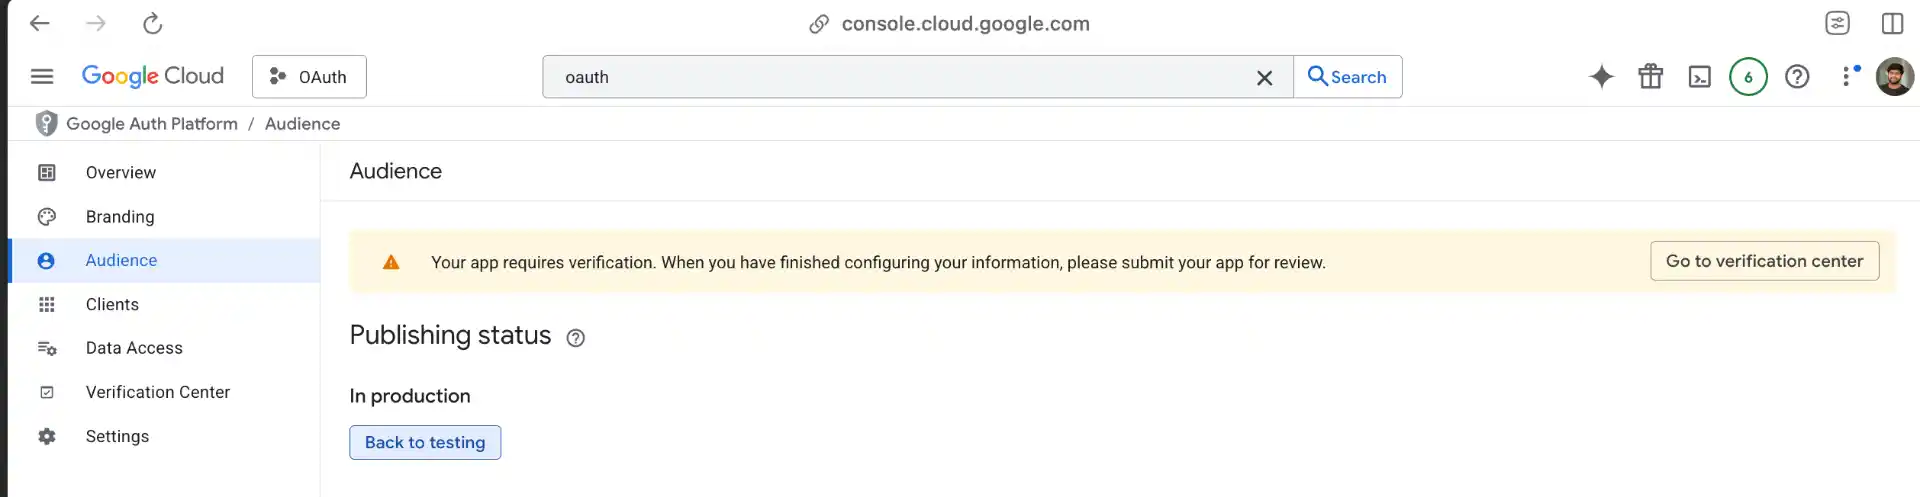
Publishing Your App
In the “Audience” section, you’ll see options to publish your app. For testing purposes, click “Publish App” to make it available. Don’t worry about the verification process for now you can skip the warning during OAuth by clicking “Go to unsafe app” when testing.
Step 6: Completing the OAuth Setup in n8n
Now that you have your Google OAuth credentials, return to your n8n instance (accessible via your Pinggy URL) to complete the connection setup.
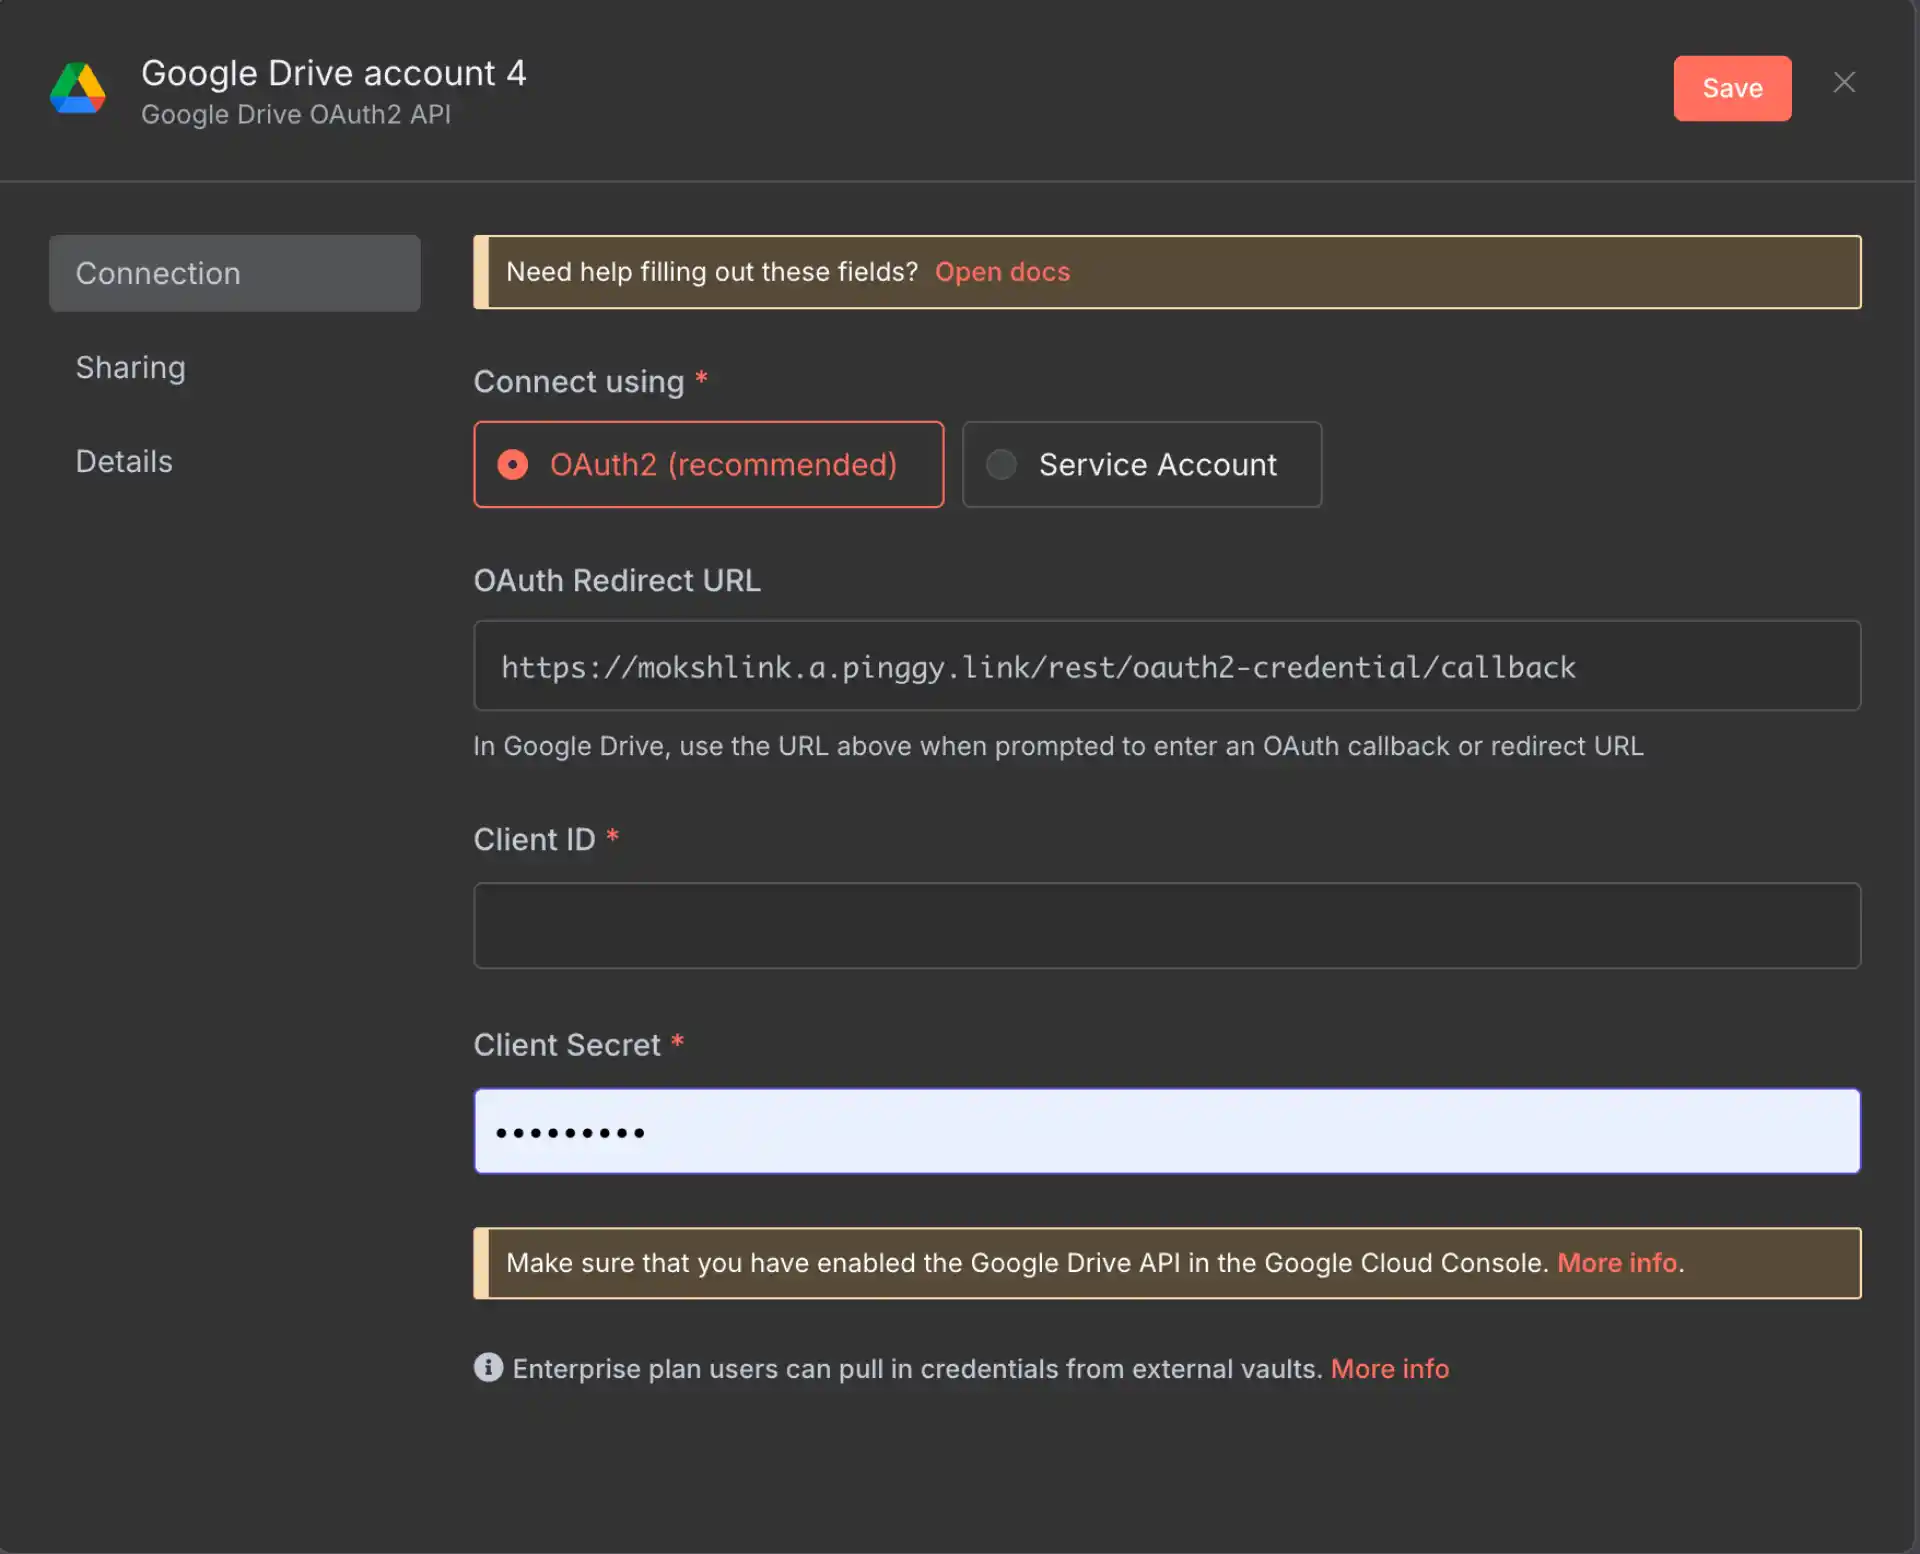
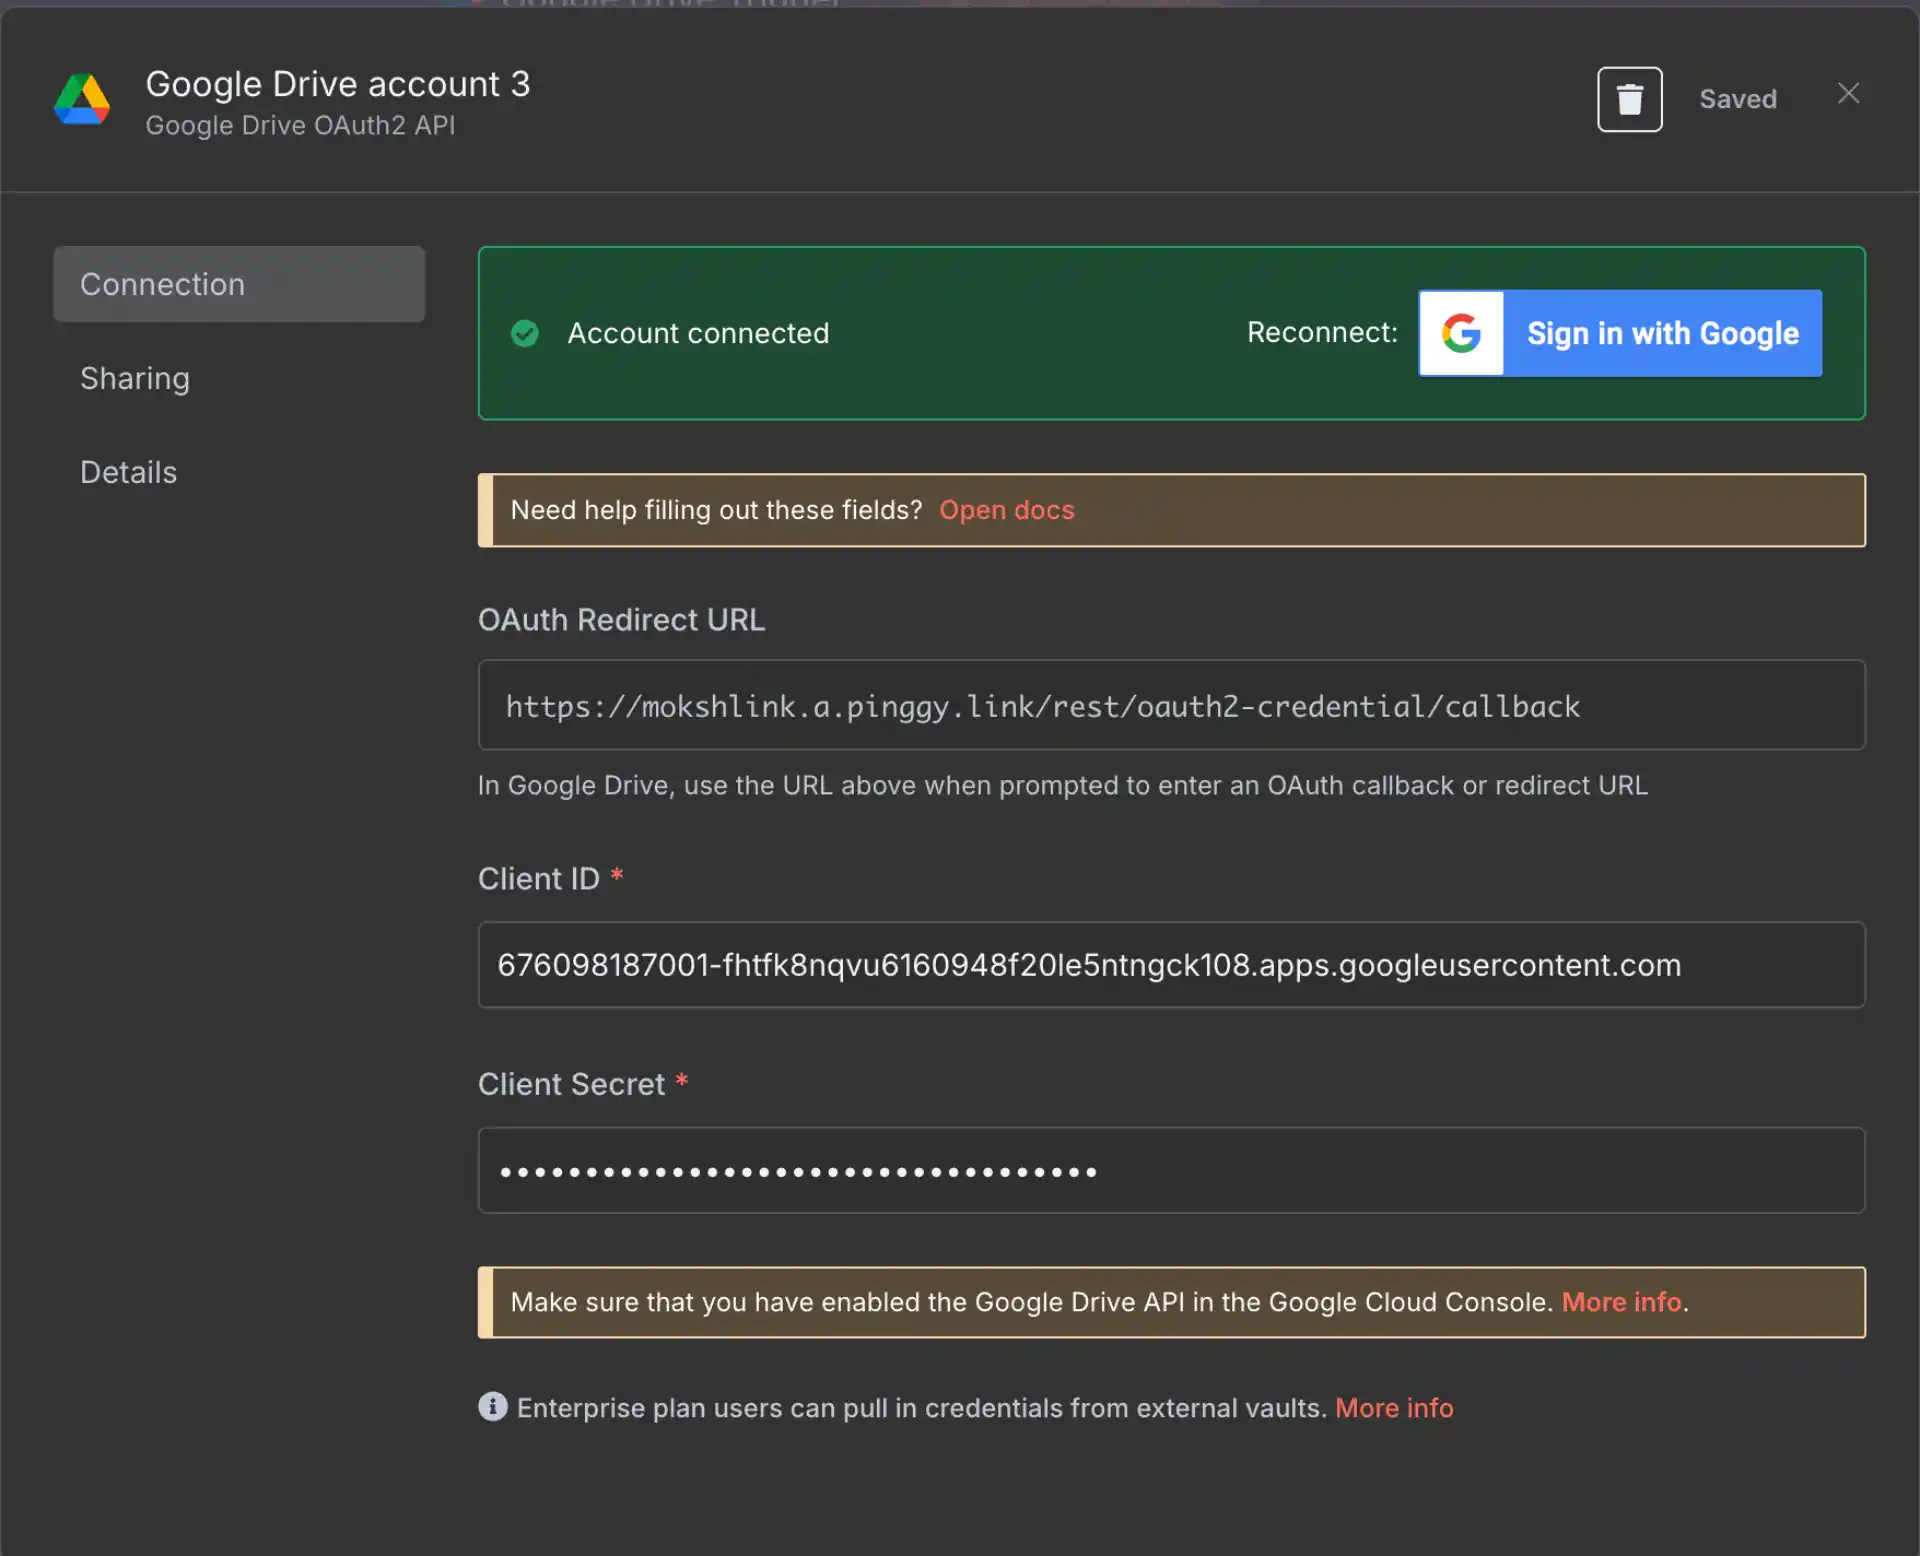
Adding Credentials to n8n
Go back to the Google service node you created earlier in n8n. In the credential setup screen where you copied the redirect URL, you’ll now see fields for:
- Client ID: Paste the Client ID from Google Cloud Console
- Client Secret: Paste the Client Secret from Google Cloud Console
After entering these credentials, click “Connect my account” or “Sign in with Google.” This will initiate the OAuth flow.
Testing the OAuth Flow
You’ll be redirected to Google’s authentication page. Sign in with your Google account (the same one you added as a test user in the OAuth consent screen).
Important: Since your app is in testing mode, Google will show a warning that “Google hasn’t verified this app.” This is normal for development setups. Click “Advanced” and then “Go to unsafe app” to continue.
Google will then ask you to authorize the permissions you configured in the consent screen. Select the access levels you want to grant (usually you’ll want to select all the scopes you configured) and click “Continue.”
After successful authorization, you’ll be redirected back to your n8n instance, and the OAuth connection will be complete. You should see a success message indicating that the credentials have been saved.
Testing Your Complete Setup
With everything configured, your Google service integration is now ready to use. You can test it by:
- Completing your workflow: Add additional nodes to your n8n workflow to actually use the Google service (e.g., list files from Google Drive, read data from Google Sheets)
- Running the workflow: Click the “Execute Workflow” button to test that the Google API calls work correctly
- Checking the results: Verify that n8n can successfully communicate with Google services using your OAuth credentials
If everything works correctly, you now have a fully functional self-hosted n8n instance with Google OAuth integration, accessible securely via HTTPS through your Pinggy tunnel.
Conclusion
Self-hosting
n8n with Google OAuth integration might seem complex at first, but following the correct sequence makes the process much more manageable. The key insights are starting with the
Pinggy tunnel first to get your public HTTPS URL, then using that URL consistently throughout the n8n and
Google Cloud Console configuration.
This setup gives you a powerful, secure workflow automation platform with seamless Google service integration. You maintain complete control over your data and workflows while leveraging the convenience of Google’s authentication and APIs. The combination of
npm installation, Pinggy tunneling for HTTPS access, and proper OAuth configuration creates a robust foundation for building sophisticated automation workflows.
Whether you’re automating document processing with
Google Drive, managing spreadsheet data with
Google Sheets, or integrating email workflows with
Gmail, this self-hosted setup provides the flexibility and security that cloud-based solutions often can’t match. Remember to consider
Pinggy Pro for production use to ensure stable, persistent URLs that won’t break your OAuth configuration.