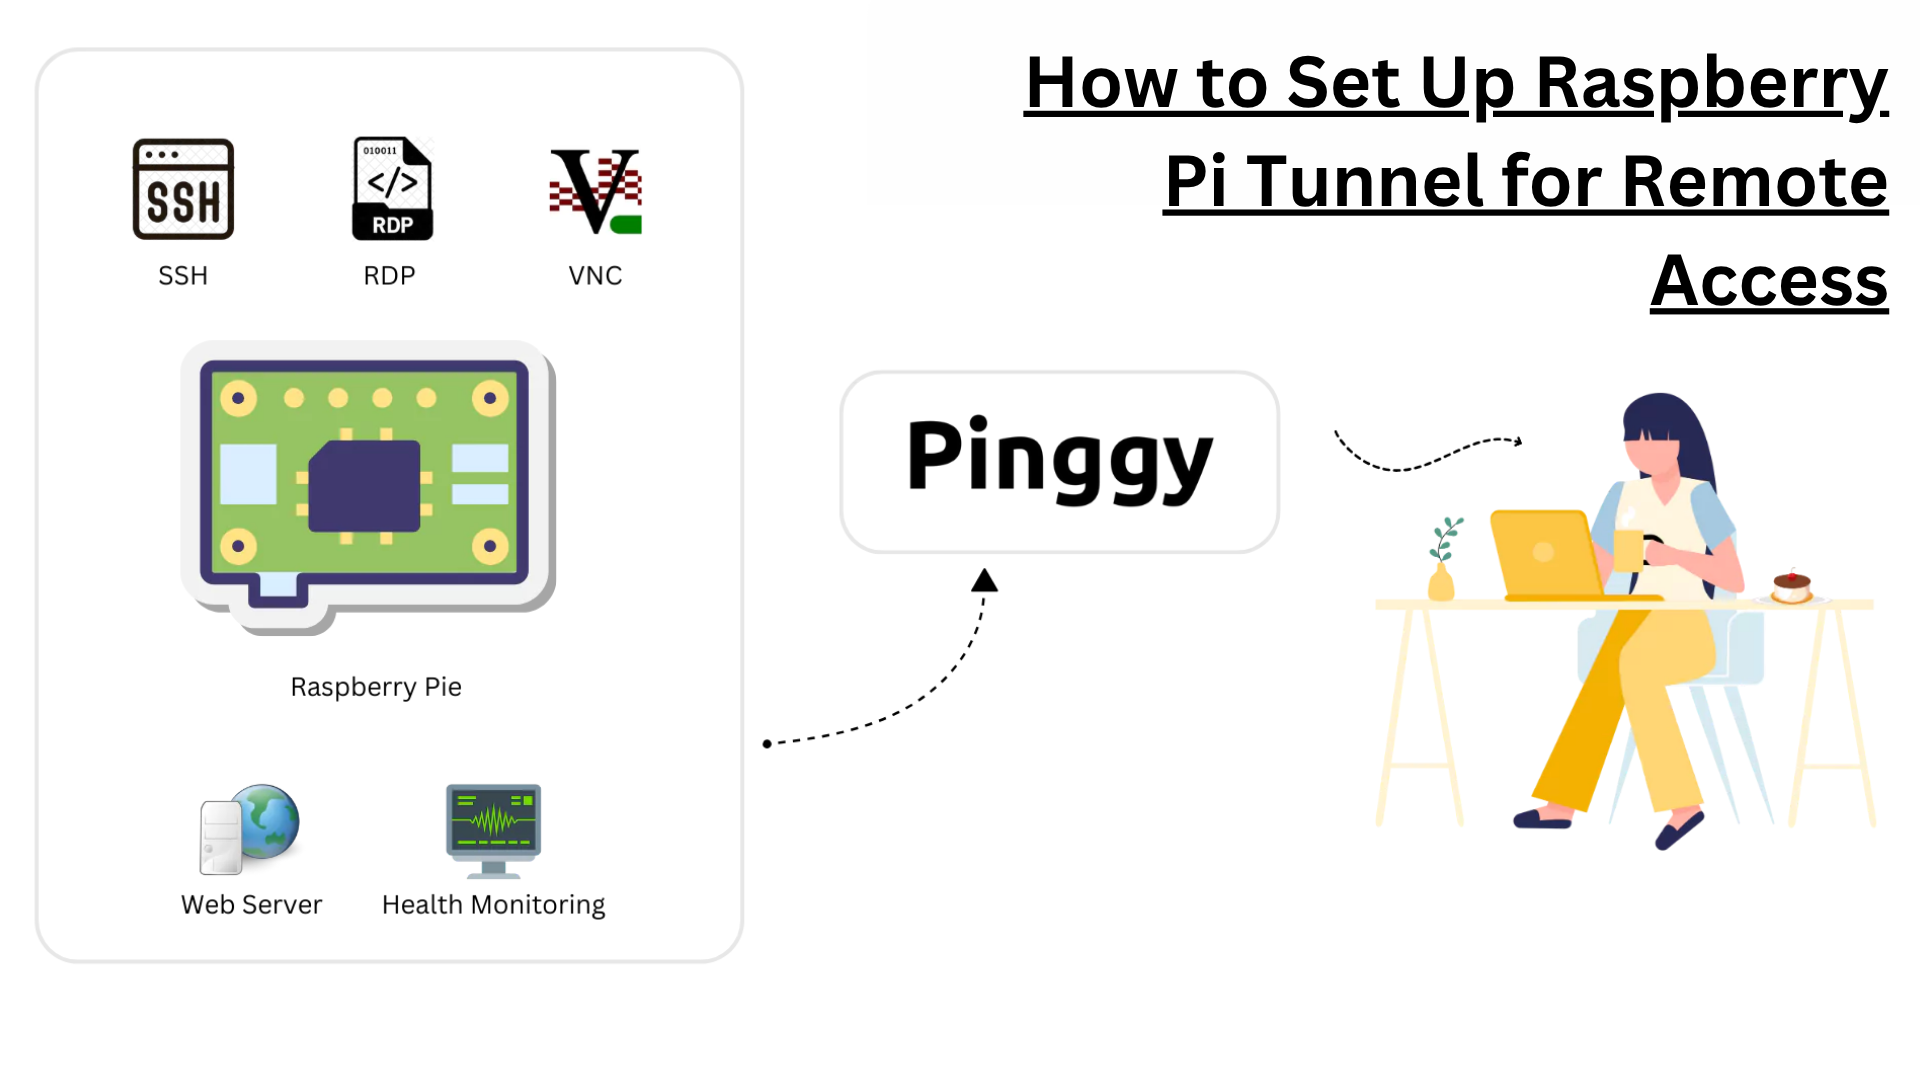
Your Raspberry Pi is a powerful little computer that can run web servers, IoT applications, home automation systems, and much more. But there’s one challenge that many Pi enthusiasts face: accessing their device remotely when they’re not on the same network. Whether you want to check your home security camera, manage your smart home setup, or simply SSH into your Pi from work, setting up a reliable tunnel is the key to seamless remote access.
Traditional methods like port forwarding can be complex and often don’t work with modern ISPs that use CG-NAT. That’s where tunneling solutions come in handy, providing a simple way to create secure connections to your Raspberry Pi from anywhere in the world.
Summary
Enable SSH on your Raspberry Pi:
sudo systemctl enable ssh
sudo systemctl start ssh
Create an HTTP tunnel (replace 8080 with your port):
ssh -p 443 -R0:localhost:8080 qr@free.pinggy.io
Create an SSH tunnel for remote terminal access:
ssh -p 443 -R0:localhost:22 tcp@free.pinggy.io
Use the public URL provided by Pinggy to access your Raspberry Pi from anywhere on the internet.
Sign in to dashboard.pinggy.io for persistent URLs and enhanced features.
What is a Raspberry Pi tunnel?
A Raspberry Pi tunnel is a secure connection that allows you to access your Pi remotely over the internet, bypassing network restrictions like firewalls and NAT (Network Address Translation). Think of it as creating a private pathway from the internet directly to your Pi, even when it’s sitting behind your home router.
There are two main types of tunnels you’ll commonly use with a Raspberry Pi:
HTTP tunnels are perfect for accessing web applications, dashboards, or any service that runs on HTTP/HTTPS. If you’re running a web server, home automation interface, or monitoring dashboard on your Pi, an HTTP tunnel makes it accessible via a public URL.
SSH tunnels provide secure terminal access to your Pi’s command line. This is essential for system administration, file management, and running commands remotely. SSH tunnels can also forward other TCP services like databases or custom applications.
Why traditional port forwarding doesn’t work
Most home networks use NAT, which means your Pi doesn’t have a direct public IP address. Traditional port forwarding requires configuring your router to forward specific ports to your Pi, but this approach has several limitations:
- Many ISPs now use CG-NAT, which prevents port forwarding entirely
- Router configuration can be complex and varies by manufacturer
- Security risks from exposing ports directly to the internet
- Dynamic IP addresses that change frequently
- Firewall restrictions in corporate or public networks
Tunneling solutions solve these problems by establishing outbound connections from your Pi to a tunnel service, which then provides public access points that forward traffic back to your device.
Setting up SSH on your Raspberry Pi
Before creating any tunnels, you need to ensure SSH is enabled on your Raspberry Pi. SSH (Secure Shell) is the foundation for both accessing your Pi remotely and creating secure tunnels.
Enable SSH service
Connect to your Pi locally (via keyboard/monitor or local network) and run these commands:
sudo systemctl enable ssh
sudo systemctl start ssh
To verify SSH is running:
sudo systemctl status ssh
Secure your SSH configuration
For better security, consider changing the default SSH port and disabling password authentication in favor of key-based authentication. Edit the SSH configuration:
sudo nano /etc/ssh/sshd_config
After making changes, restart the SSH service:
sudo systemctl restart ssh
Creating a Raspberry Pi HTTP tunnel
HTTP tunnels are ideal when you want to access web-based services running on your Pi. This could be a web server, IoT dashboard, security camera interface, or any application that serves content over HTTP.
Step-by-step HTTP tunnel setup
Start your web service on your Pi. For example, if you’re running a Python web server (replace 8080 with your desired port):
python3 -m http.server 8080
Create the HTTP tunnel using Pinggy (replace 8080 with your actual port):
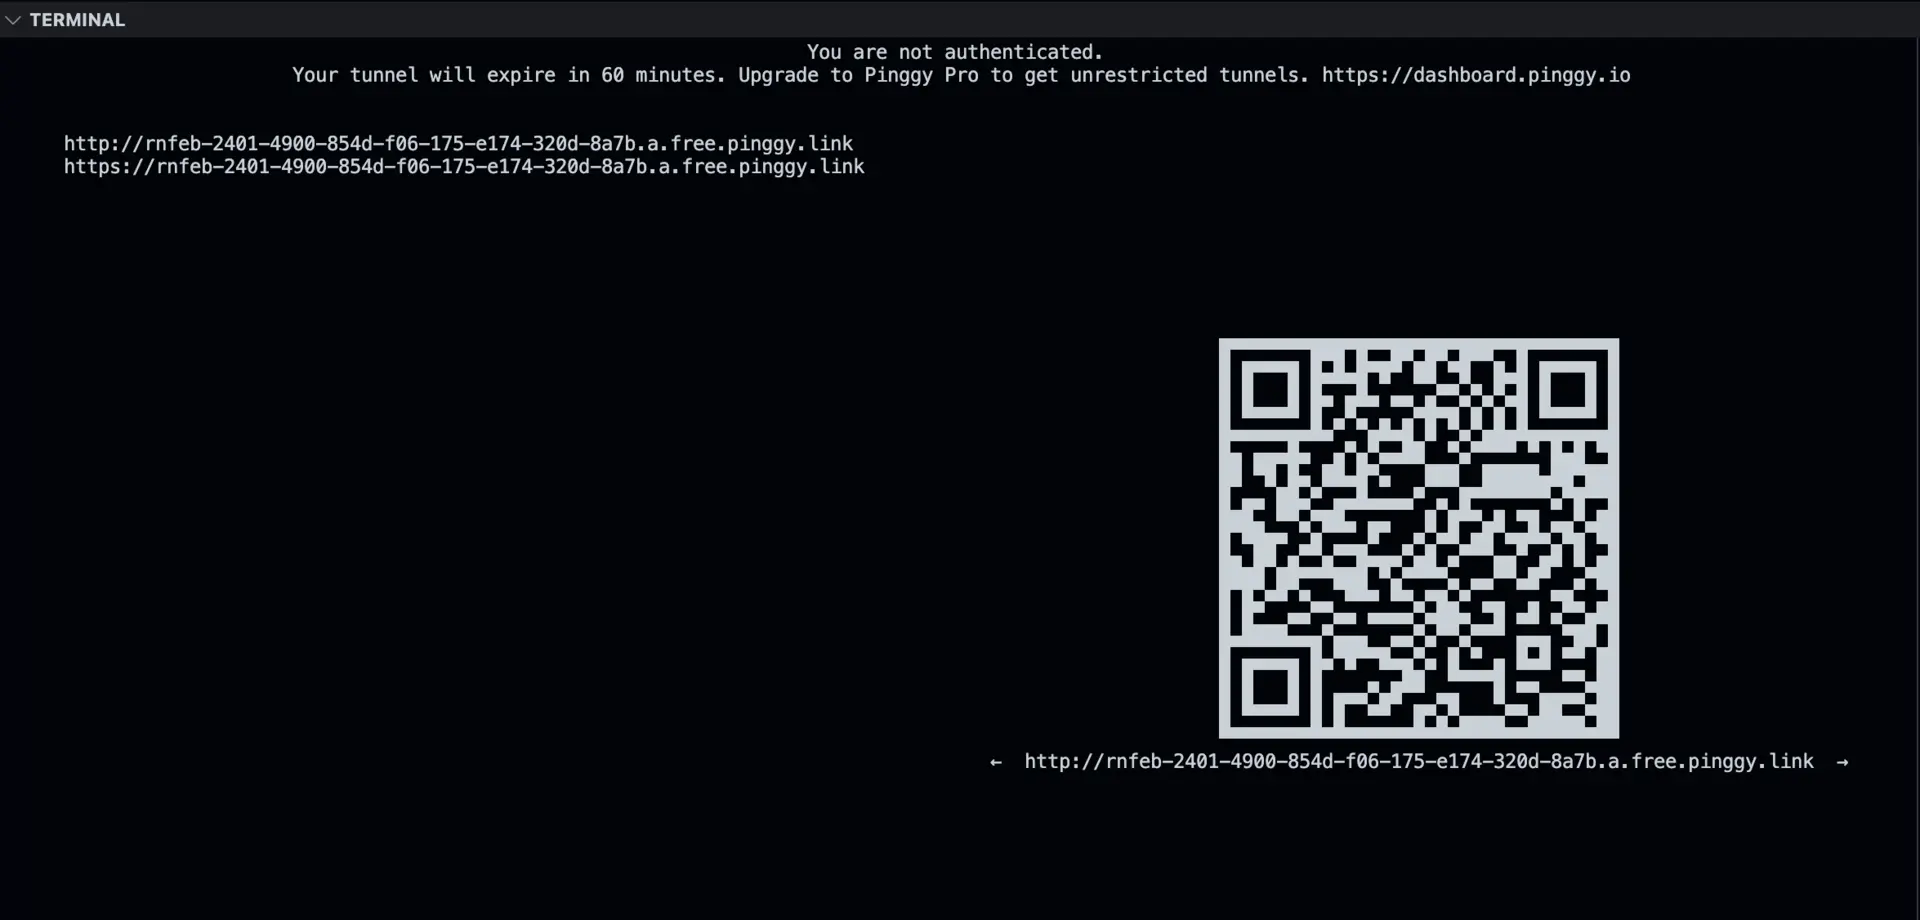
ssh -p 443 -R0:localhost:8080 qr@free.pinggy.io
Access your Pi remotely using the public URL provided by Pinggy. The URL will look something like:
https://randomstring.a.pinggy.link
HTTP tunnel use cases
HTTP tunnels are perfect for:
- Home automation dashboards like Home Assistant or OpenHAB
- Security camera feeds and monitoring systems
- IoT device management interfaces
- Personal cloud storage web interfaces
- Development servers for testing web applications
- File sharing through web-based file managers
Setting up SSH tunnel for Raspberry Pi
SSH tunnels provide secure command-line access to your Pi from anywhere. This is essential for system administration, troubleshooting, and managing your Pi remotely.
Creating an SSH tunnel
Create the SSH tunnel using this command:
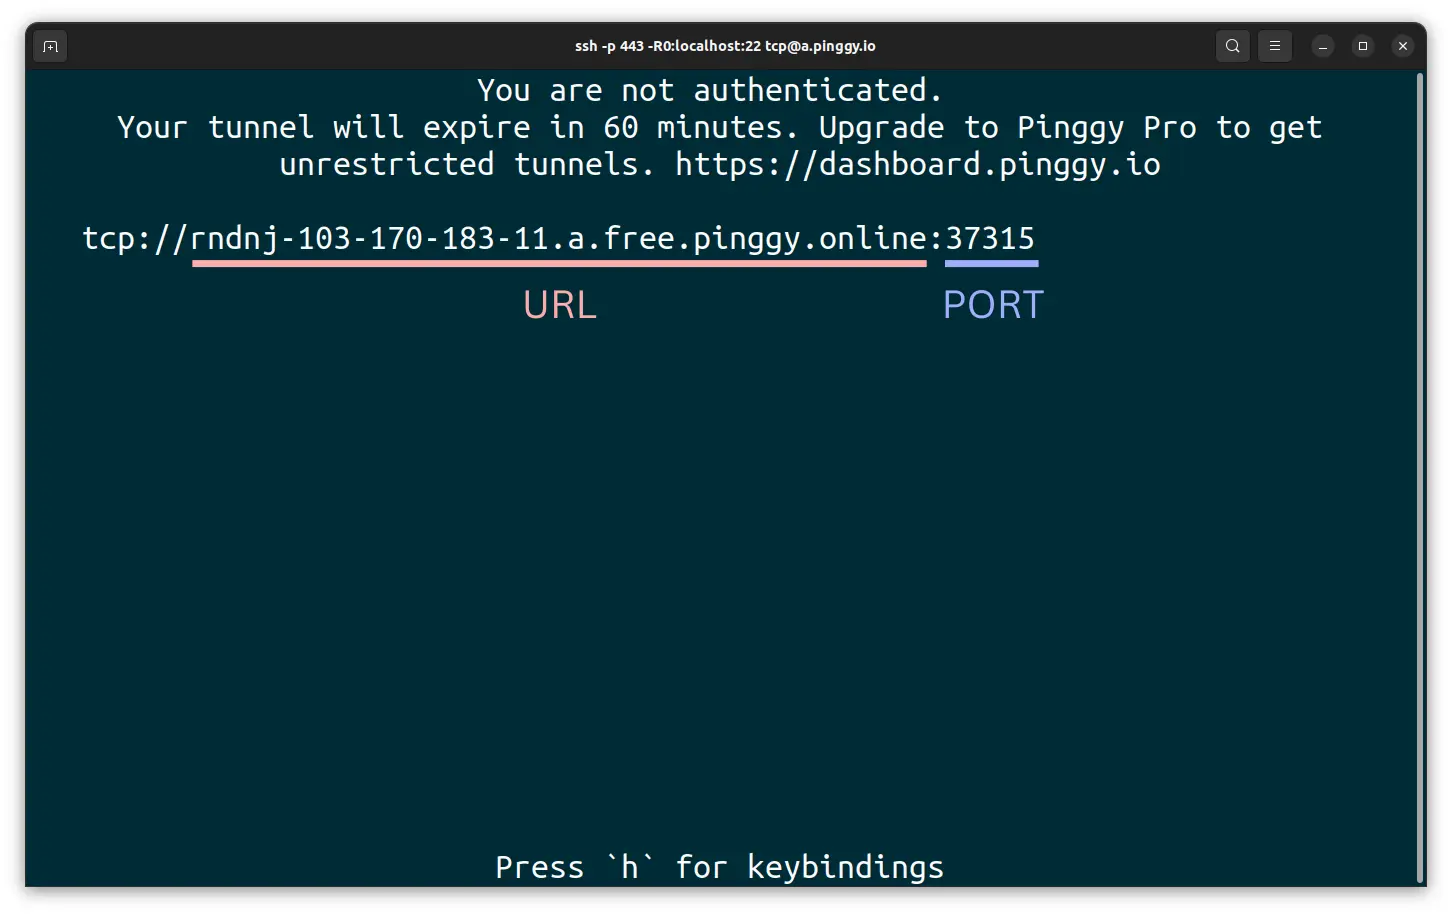
ssh -p 443 -R0:localhost:22 tcp@free.pinggy.io
You can customize the command with additional options:
Note the connection details provided by Pinggy. You’ll receive something like:
tcp://randomstring.a.pinggy.link:40527
Connect to your Pi remotely using the provided address (replace pi with your username):
ssh pi@randomstring.a.pinggy.link -p 40527
Conclusion
Setting up tunnels for your Raspberry Pi opens up a world of possibilities for remote access and management. Whether you need HTTP tunnels for web services or SSH tunnels for command-line access, the process is straightforward and doesn’t require complex network configuration.
With
Pinggy, you can create secure, reliable tunnels to your Pi in seconds, bypassing the limitations of traditional port forwarding and CG-NAT restrictions. The combination of ease of use, security, and reliability makes tunneling the ideal solution for accessing your Raspberry Pi projects from anywhere in the world.
Start with the basic commands provided in this guide, then explore advanced features like persistent URLs, custom domains, and automated tunnel management as your needs grow. Your Raspberry Pi projects are now just a URL away, no matter where you are.