Building AI-powered applications is exciting, but hosting them can quickly become expensive. Between GPU costs, server infrastructure, and bandwidth charges, running even a simple AI app can drain your budget. What if you could build and host a complete AI application with a beautiful web interface, all for free? That’s exactly what we’re going to do using
Google Colab,
Ollama, and
Pinggy.
In this guide, we’ll build an AI Blog Writer application that uses
Llama 3.2 to generate blog content. You’ll learn how to set up the entire stack on Google Colab’s free tier, create a Flask web interface, and make it publicly accessible to anyone on the internet. No credit card required, no server management headaches.
Summary
Setup Google Colab with GPU
- Create new notebook and enable GPU runtime
- Install Ollama and required dependencies
Configure Ollama Server
- Install:
!curl https://ollama.ai/install.sh | sh - Start server in background with proper logging
- Verify server is listening on port 11434
Download AI Model
- Pull lightweight model:
!ollama pull llama3.2:1b - Perfect for Colab’s free tier GPU
Create Pinggy Tunnel
- Install:
!pip install pinggy - Setup tunnel:
pinggy.start_tunnel(forwardto="localhost:8000")
Deploy Flask Application
- Build AI-powered web app with custom UI
- Access from anywhere via public URL
Open in Colab: 
Complete Code: Get the full working notebook from GitHub repository
Why Host AI Apps on Google Colab?
The traditional approach to hosting AI applications involves renting expensive GPU instances from cloud providers, which can easily cost hundreds of dollars per month. Even the cheapest GPU instances start at around $0.50 per hour, which adds up quickly if you’re running experiments or building prototypes.
Google Colab changes this equation entirely. It provides free access to Tesla T4 GPUs with enough power to run modern language models like Llama 3.2. While Colab is primarily designed for machine learning research and education, it’s perfectly capable of hosting lightweight AI applications for development, testing, and even small-scale production use.
The real magic happens when you combine Colab’s free compute with Pinggy’s tunneling service. Colab instances run in Google’s cloud but aren’t directly accessible from the internet. Pinggy solves this by creating secure tunnels that give you public URLs pointing to your Colab instance. This means you can share your AI app with anyone, test it on different devices, or integrate it with other services.
This setup is particularly valuable for developers who want to prototype AI features, students learning about LLM applications, or anyone who needs to demonstrate AI capabilities without infrastructure costs. You get the full power of modern language models with a professional web interface, all running on free infrastructure.
Setting Up Your Colab Environment
Start by creating a new Google Colab notebook. While you can technically run very small models on CPU, we strongly recommend enabling GPU acceleration for any practical AI application. Go to Runtime > Change runtime type and select GPU as your hardware accelerator. The performance difference is substantial, and you’ll avoid timeout issues when generating longer responses.
The first step is installing Ollama, which will handle our LLM inference. Ollama provides a convenient installation script that works perfectly in Colab environments:
!sudo apt-get install -y pciutils
!curl https://ollama.ai/install.sh | sh
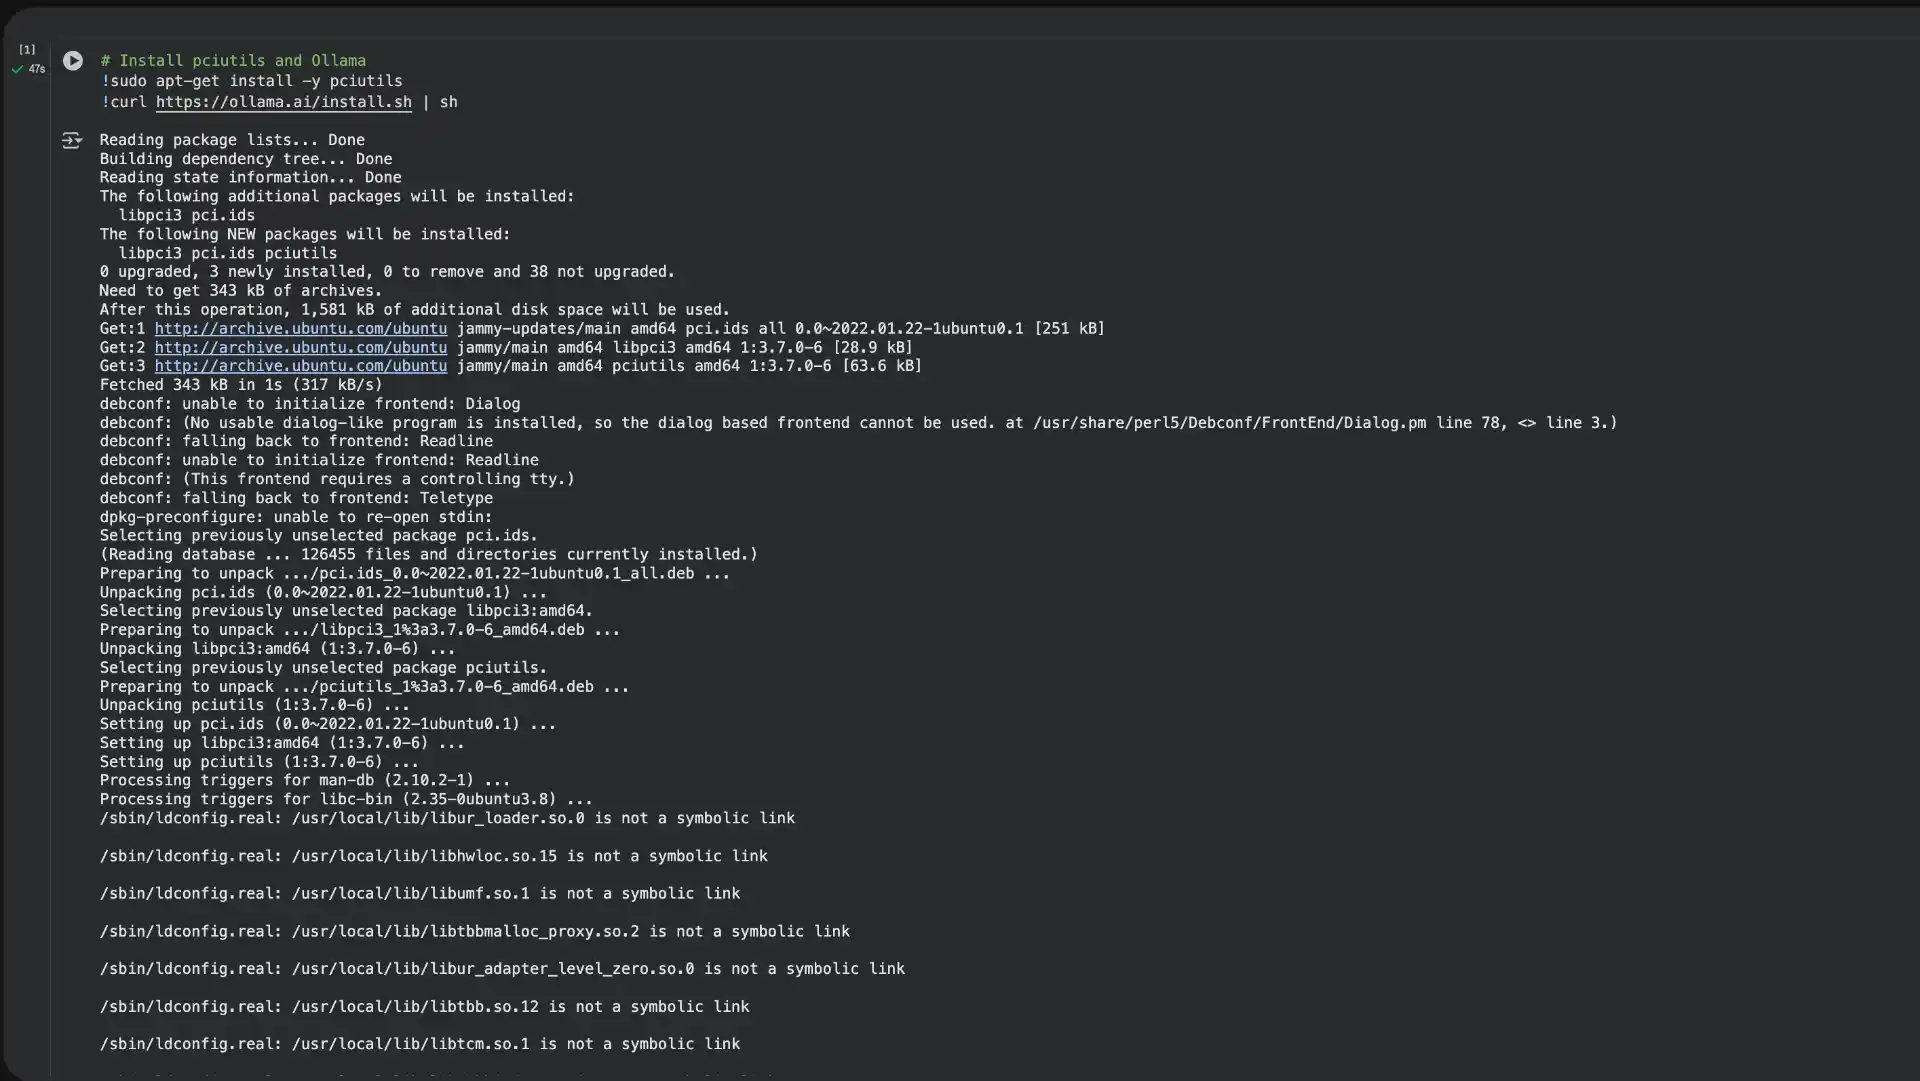
The pciutils package helps Ollama detect and utilize the GPU properly. The installation script downloads the Ollama binary and sets up everything needed to run language models. This process typically takes a couple of minutes, and you’ll see various installation messages as it configures the environment.
Once Ollama is installed, we need to start the Ollama server as a background process. This is crucial because we want the server to keep running while we execute other cells in our notebook. Here’s a robust way to start the server with proper logging:
import subprocess
import os

def start_ollama_server():
    # Use nohup to run ollama serve in the background and redirect output to a file
    subprocess.Popen(['nohup', 'ollama', 'serve'],
                     stdout=open('ollama.log', 'w'),
                     stderr=open('ollama_error.log', 'w'),
                     preexec_fn=os.setsid)
    print("🚀 Ollama server launched successfully in the background!")

# Start the Ollama server in the background
start_ollama_server()

This approach uses nohup to ensure the server continues running even if the cell execution completes. The output and error logs are redirected to files, which is helpful for debugging if something goes wrong. The os.setsid creates a new session, preventing the process from being terminated when the parent process ends.
Verifying Your Ollama Installation
Before proceeding, it’s important to verify that Ollama is actually running and listening on the correct port. Here’s a handy function that checks if the server is ready:
# Check if Ollama is listening on port 11434
def check_ollama_port(port='11434'):
    try:
        output = subprocess.run(['sudo', 'lsof', '-i', '-P', '-n'],
                              capture_output=True, text=True).stdout
        if f":{port} (LISTEN)" in output:
            print(f"✅ Ollama is actively listening on port {port}")
        else:
            print(f"⚠️ Ollama not detected on port {port}")
    except Exception as e:
        print(f"❌ Error checking port: {e}")

check_ollama_port()

This function uses lsof (list open files) to check which processes are listening on network ports. If everything is working correctly, you should see a confirmation that Ollama is listening on port 11434, which is its default API port.
Downloading Your AI Model
With Ollama running, we can now download a language model. For Colab’s free tier, we’ll use Llama 3.2 1B, which is a compact but capable model that fits comfortably within the available GPU memory:

The 1B parameter version is perfect for this use case. It’s small enough to load quickly and run efficiently on the free T4 GPU, yet powerful enough to generate coherent and useful text. The download typically takes a few minutes depending on your connection speed.
If you have access to Colab Pro or want to experiment with more powerful models, you could use larger variants like llama3.2:3b or even llama3.1:8b. Just keep in mind that larger models require more memory and will generate responses more slowly.
Creating Public Access with Pinggy
Now comes the exciting part - making your Colab instance accessible from the internet. Pinggy’s Python SDK makes this incredibly straightforward. First, install the package:

Then create a tunnel with just a few lines of code:
import pinggy

tunnel1 = pinggy.start_tunnel(
    forwardto="localhost:8000",
)

print(f"Tunnel1 started - URLs: {tunnel1.urls}")

This creates both HTTP and HTTPS endpoints that forward traffic to your local Flask server running on port 8000.
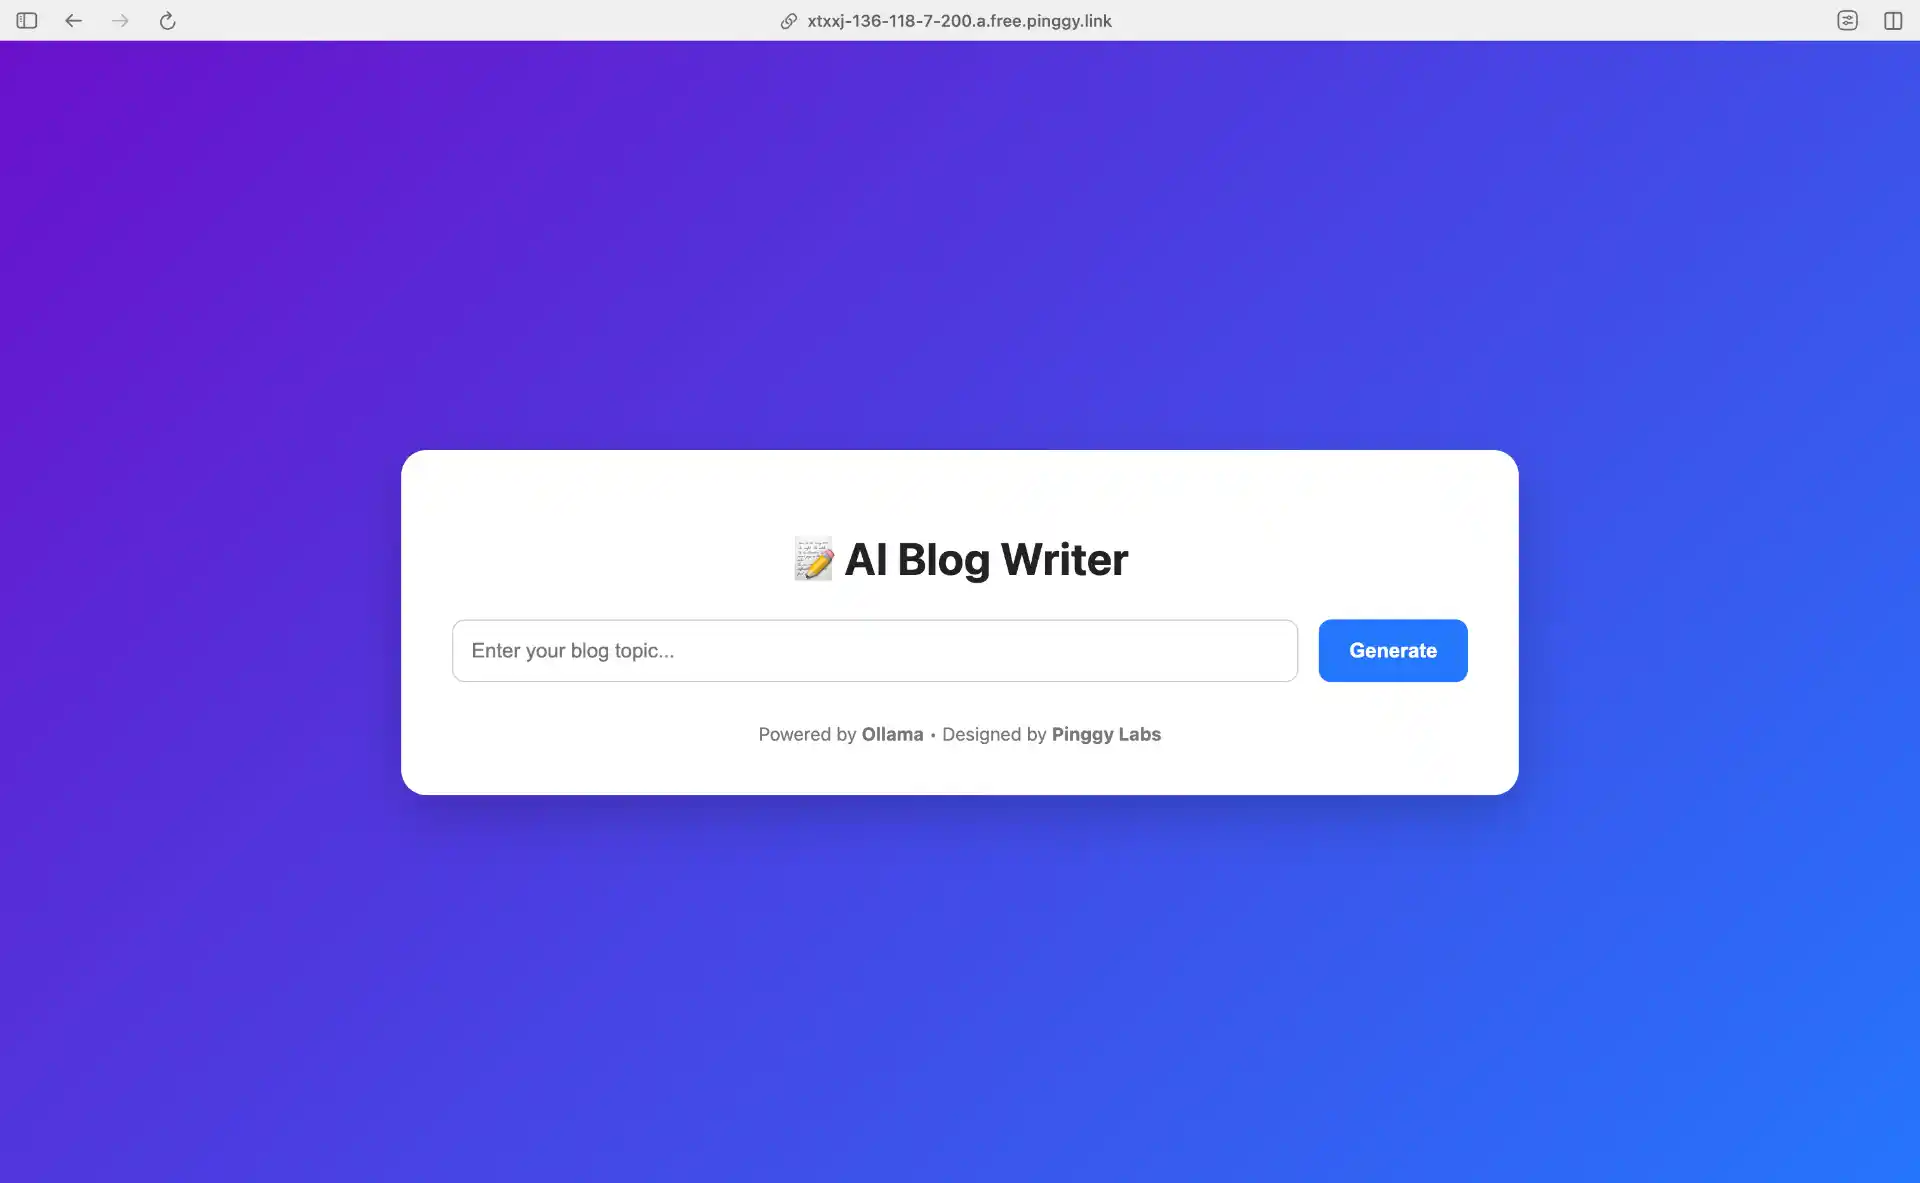
The tunnel URLs will look something like https://randomstring.a.pinggy.link, and they remain active for the duration of your Colab session. These URLs are publicly accessible, meaning anyone with the link can access your application from anywhere in the world.
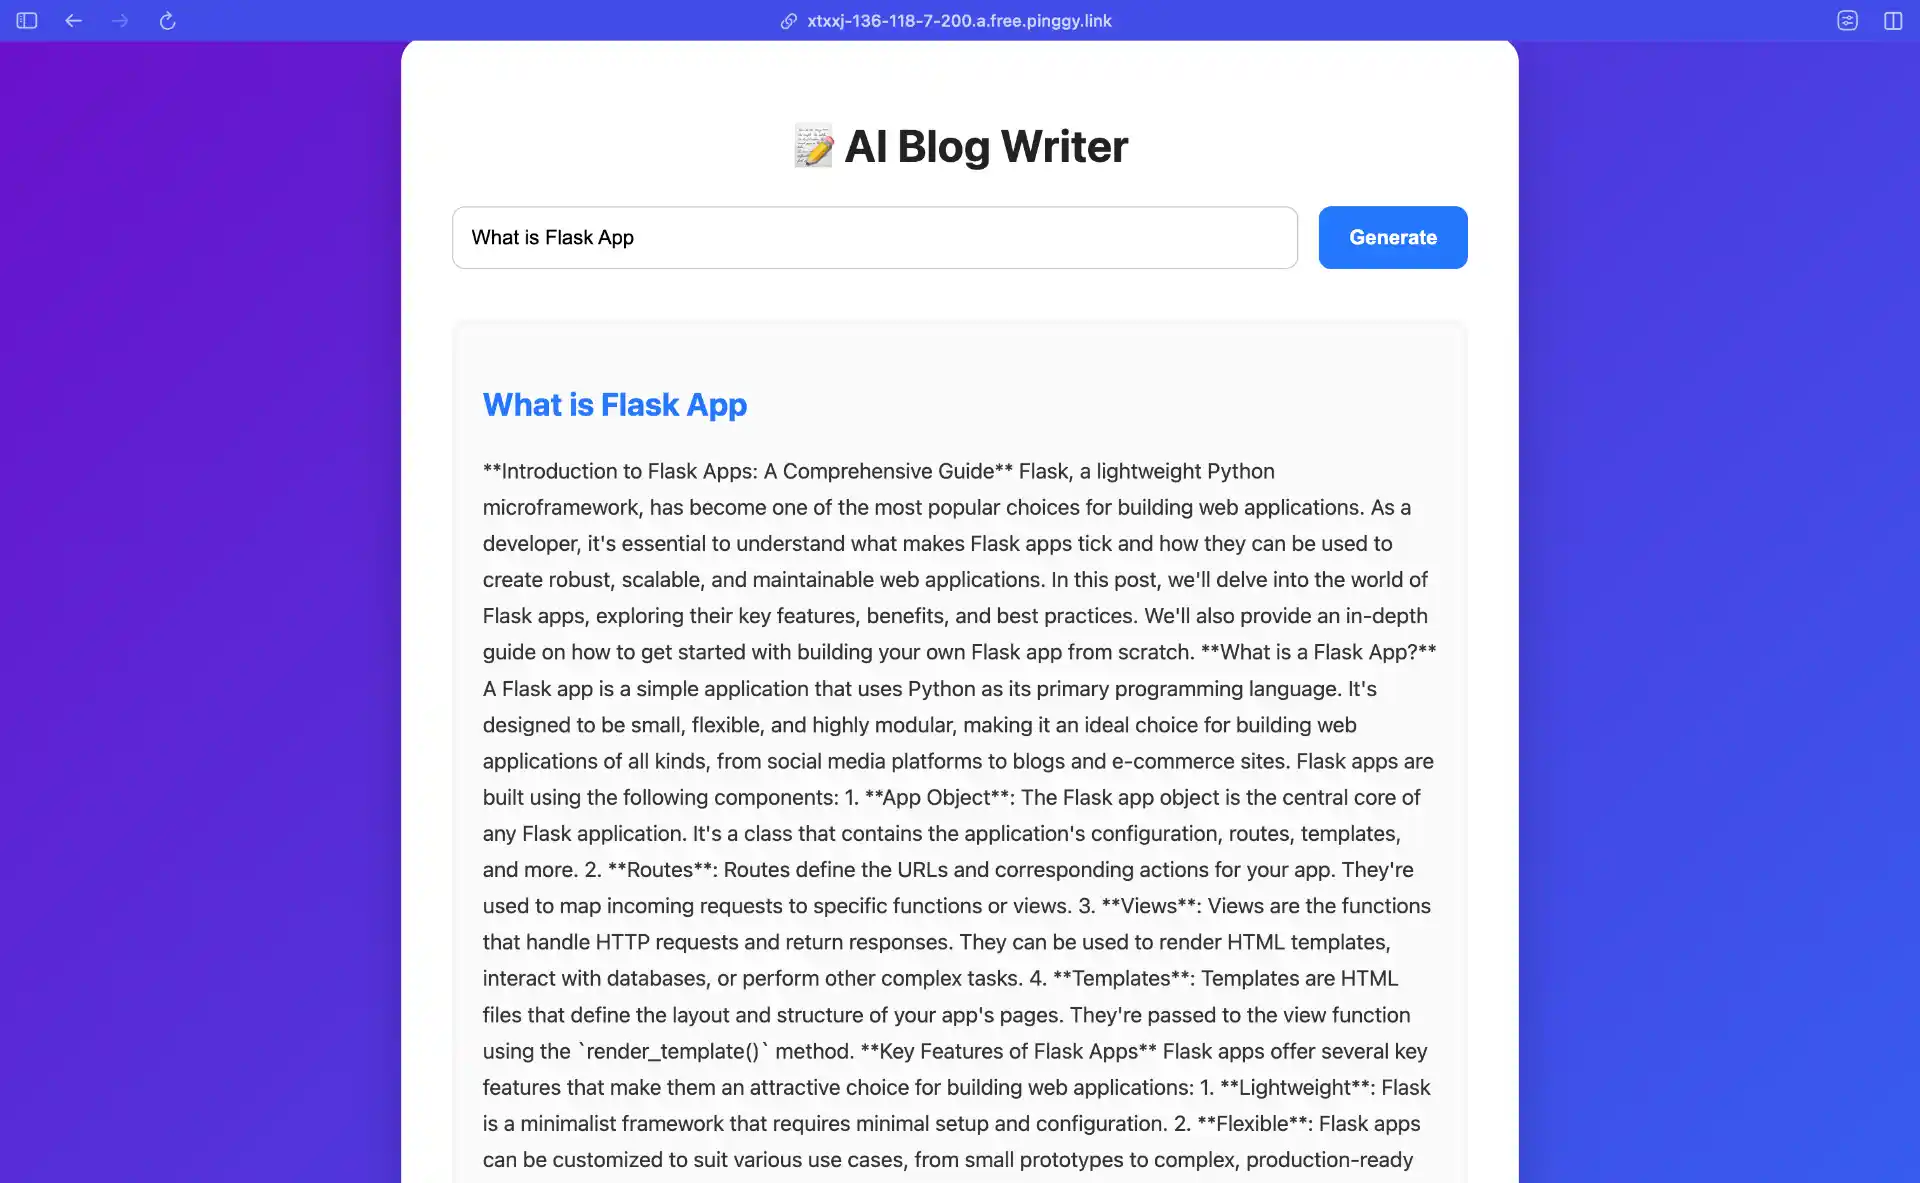
Building the AI Blog Writer Application
Now for the main event - building our AI-powered web application. We’ll create a Flask app with a beautiful, modern interface that lets users generate blog posts on any topic. Here’s the complete application:
from flask import Flask, request, render_template_string
import requests
import json

app = Flask(__name__)

HTML_TEMPLATE = """
<!DOCTYPE html>
<html lang="en">
<head>
    <meta charset="UTF-8">
    <meta name="viewport" content="width=device-width, initial-scale=1.0">
    <title>AI Blog Writer</title>
    <style>
        body {
            font-family: 'Inter', system-ui, sans-serif;
            background: linear-gradient(135deg, #6a11cb 0%, #2575fc 100%);
            margin: 0;
            padding: 0;
            color: #333;
            min-height: 100vh;
            display: flex;
            align-items: center;
            justify-content: center;
        }
        .container {
            background: #fff;
            padding: 2.5rem;
            border-radius: 20px;
            box-shadow: 0 15px 40px rgba(0,0,0,0.2);
            width: 90%;
            max-width: 800px;
            animation: fadeIn 0.6s ease;
        }
        @keyframes fadeIn {
            from { opacity: 0; transform: translateY(20px); }
            to { opacity: 1; transform: translateY(0); }
        }
        h1 {
            text-align: center;
            color: #222;
            margin-bottom: 1.5rem;
            font-size: 2.2rem;
        }
        form {
            display: flex;
            gap: 1rem;
        }
        input[type=text] {
            flex: 1;
            padding: 0.9rem;
            border-radius: 10px;
            border: 1px solid #ccc;
            font-size: 1rem;
        }
        button {
            padding: 0.9rem 1.5rem;
            background-color: #2575fc;
            border: none;
            border-radius: 10px;
            color: white;
            font-weight: bold;
            font-size: 1rem;
            cursor: pointer;
            transition: 0.3s;
        }
        button:hover {
            background-color: #1b5edc;
        }
        .loading {
            text-align: center;
            margin-top: 2rem;
            font-style: italic;
            color: #666;
        }
        .blog {
            margin-top: 2.5rem;
            background: #fafafa;
            padding: 1.5rem;
            border-radius: 12px;
            line-height: 1.7;
            font-size: 1.05rem;
            box-shadow: inset 0 0 5px rgba(0,0,0,0.05);
        }
        .blog h2 {
            color: #2575fc;
            margin-bottom: 1rem;
        }
        .footer {
            text-align: center;
            margin-top: 2rem;
            font-size: 0.9rem;
            color: #777;
        }
    </style>
    <script>
        function showLoader() {
            document.getElementById('loading').style.display = 'block';
        }
    </script>
</head>
<body>
    <div class="container">
        <h1>📝 AI Blog Writer</h1>
        <form method="post" onsubmit="showLoader()">
            <input type="text" name="title" placeholder="Enter your blog topic..." required value="{{ title or '' }}">
            <button type="submit">Generate</button>
        </form>

        <div id="loading" class="loading" style="display:none;">
            🚀 Generating your blog... please wait.
        </div>

        {% if blog %}
            <div class="blog">
                <h2>{{ title }}</h2>
                <p>{{ blog }}</p>
            </div>
        {% endif %}

        <div class="footer">
            Powered by <strong>Ollama</strong> • Designed by <strong>Pinggy Labs</strong>
        </div>
    </div>
</body>
</html>
"""

@app.route("/", methods=["GET", "POST"])
def index():
    blog = None
    title = None

    if request.method == "POST":
        title = request.form.get("title")
        prompt = f"Write a detailed and engaging blog post about: '{title}'."

        try:
            response = requests.post(
                "http://localhost:11434/api/generate",
                json={"model": "llama3.2:1b", "prompt": prompt},
                stream=True,
                timeout=120
            )

            blog_parts = []
            for line in response.iter_lines():
                if line:
                    try:
                        data = json.loads(line.decode("utf-8"))
                        if "response" in data:
                            blog_parts.append(data["response"])
                    except json.JSONDecodeError:
                        continue

            blog = "".join(blog_parts).strip()

        except Exception as e:
            blog = f"⚠️ Error: Could not reach Ollama API ({e})"

    return render_template_string(HTML_TEMPLATE, blog=blog, title=title)


if __name__ == "__main__":
    app.run(host='0.0.0.0', port=8000)
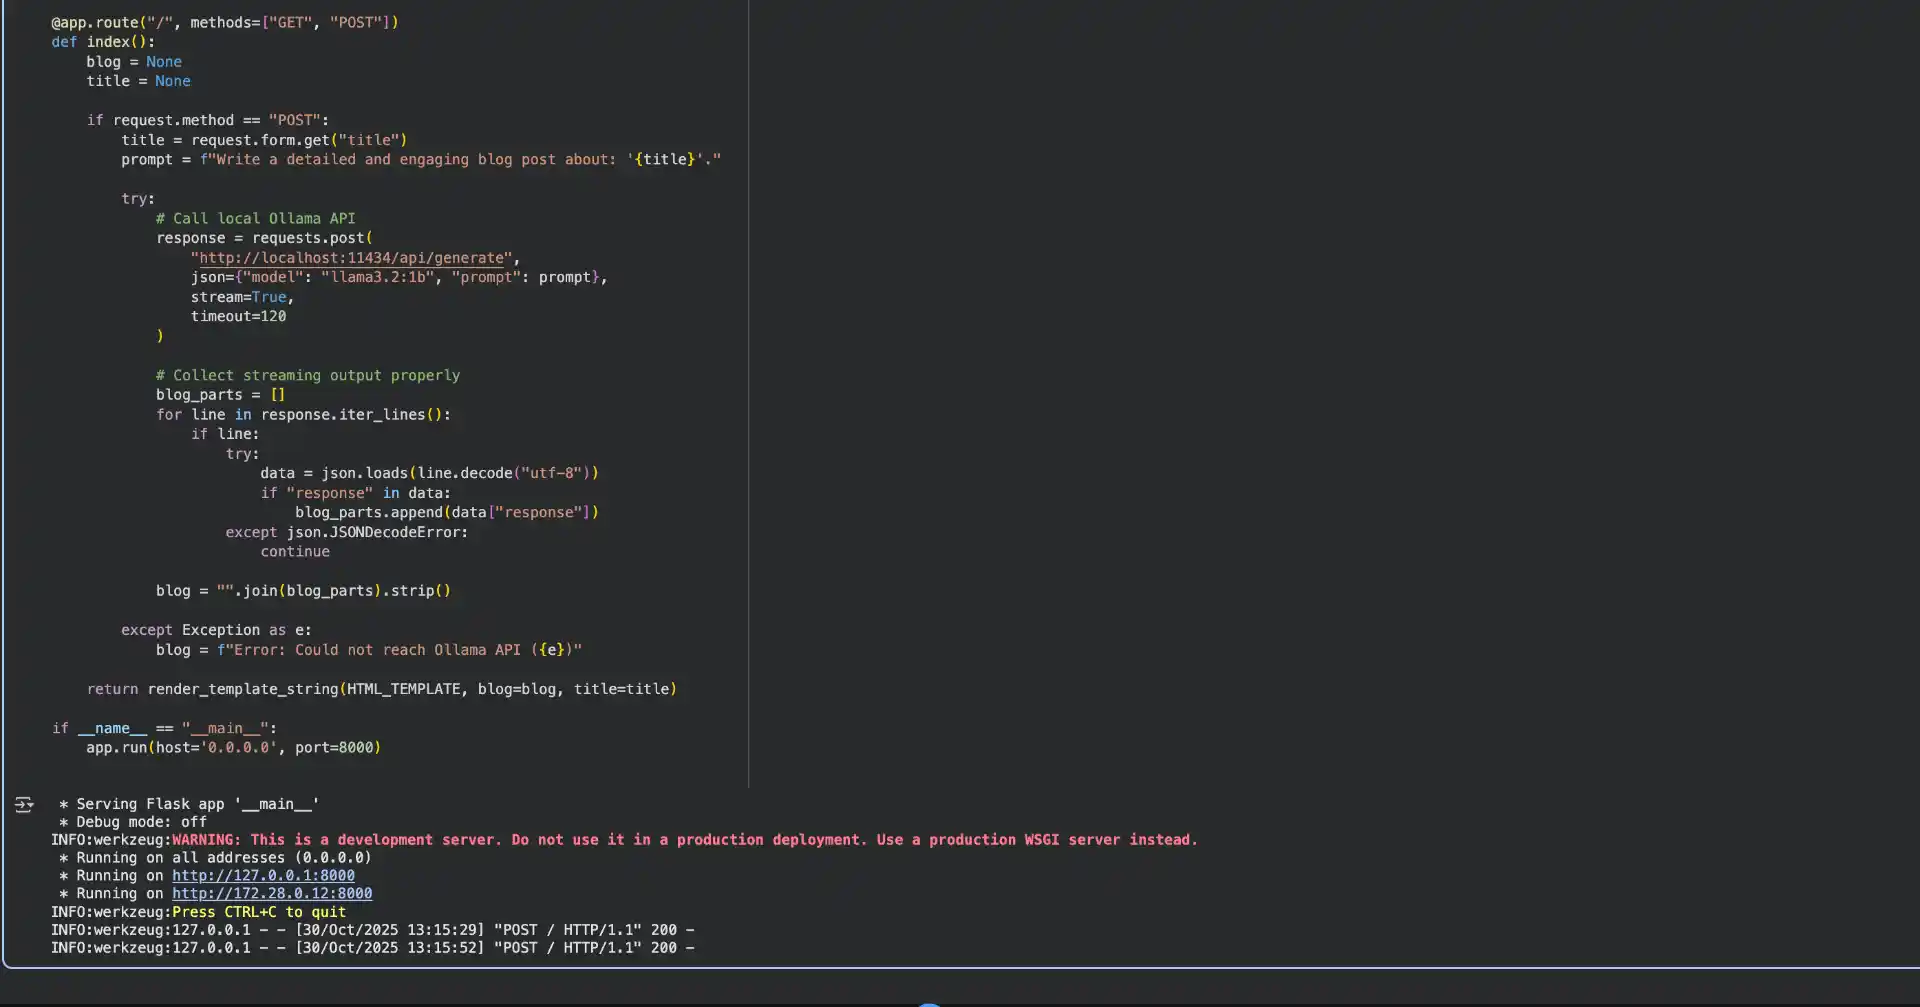
This application demonstrates several important concepts. The Flask route handles both GET and POST requests - GET displays the form, while POST processes the blog generation request. When a user submits a topic, the app sends a request to the local Ollama API with a carefully crafted prompt.
The Ollama API returns responses as a stream, which we collect piece by piece. This streaming approach is important because it allows the model to start generating immediately rather than waiting for the entire response to be ready. We parse each JSON line and extract the response fragments, then join them together to create the final blog post.
The HTML template includes modern CSS with a beautiful gradient background, smooth animations, and a responsive design that works on both desktop and mobile devices. The loading indicator provides user feedback while the AI generates content, which is important since generation can take several seconds.
Running Your Application
With everything in place, simply run the Flask application cell. The server will start on port 8000, and you can access it using the Pinggy URL that was generated earlier. Open the URL in your browser, and you’ll see your AI Blog Writer interface ready to use.
Try entering different blog topics and watch as the AI generates content in real-time. The quality of the output depends on your prompt and the model’s capabilities, but Llama 3.2 1B is surprisingly capable for its size.
Notebook Source Code
You can find the complete Colab notebook with all the code in the GitHub repository:
Host your AI App on Google Colab.
Want to try it right away? Click the button below to open the notebook directly in Google Colab:
Conclusion
You can host AI applications for free by combining Google Colab (for GPU), Ollama (for LLM serving), and Pinggy (for tunneling). This setup is ideal for prototyping, learning, or demos, offering a cloud-based, accessible, and professional interface without infrastructure costs. While Colab’s free tier has usage limits, it’s perfect for development and low-traffic apps. The same approach can power chatbots, image generators, or AI tools, making it a flexible and cost-effective platform for bringing AI ideas to life.