Hosting your
Foundry Virtual Tabletop (VTT) game sessions online traditionally involves complicated steps like configuring port forwarding, firewall settings, or dealing with dynamic IP addresses. Fortunately, Pinggy simplifies this entire process by instantly exposing your locally running Foundry instance through a public URL, without needing to download or install additional software or configure your router.
In this comprehensive guide, I’ll provide detailed steps on how to effortlessly host Foundry VTT using Pinggy, and I’ll also explore some useful advanced options you can take advantage of for better session management and security.
Summary
- Run Foundry VTT Locally
- Create a Tunnel with Pinggy
- Start the Pinggy SSH tunnel (no software installation required):
ssh -p 443 -R0:localhost:30000 a.pinggy.io
- Share the provided public URL
https://abc123xyz.a.pinggy.link from Pinggy with your players to instantly connect to your Foundry session.
What Exactly is Pinggy?
Pinggy is a robust, easy-to-use tunneling tool that lets you instantly create secure, publicly accessible URLs for your locally hosted applications (such as Foundry VTT). Pinggy doesn’t require any software downloads. Instead, it works directly via a single, straightforward SSH command from your terminal or command prompt.
This makes Pinggy perfect for quick sessions, easy demonstrations, gaming, or testing purposes.
Step-by-Step Guide to Self-Host Foundry VTT with Pinggy
Step 1: Launch Your Foundry VTT Server Locally
To begin, ensure your Foundry VTT instance is running on your local machine. By default, Foundry operates on port 30000.
Start the Foundry VTT Application
Launch the Foundry VTT application as you normally would.
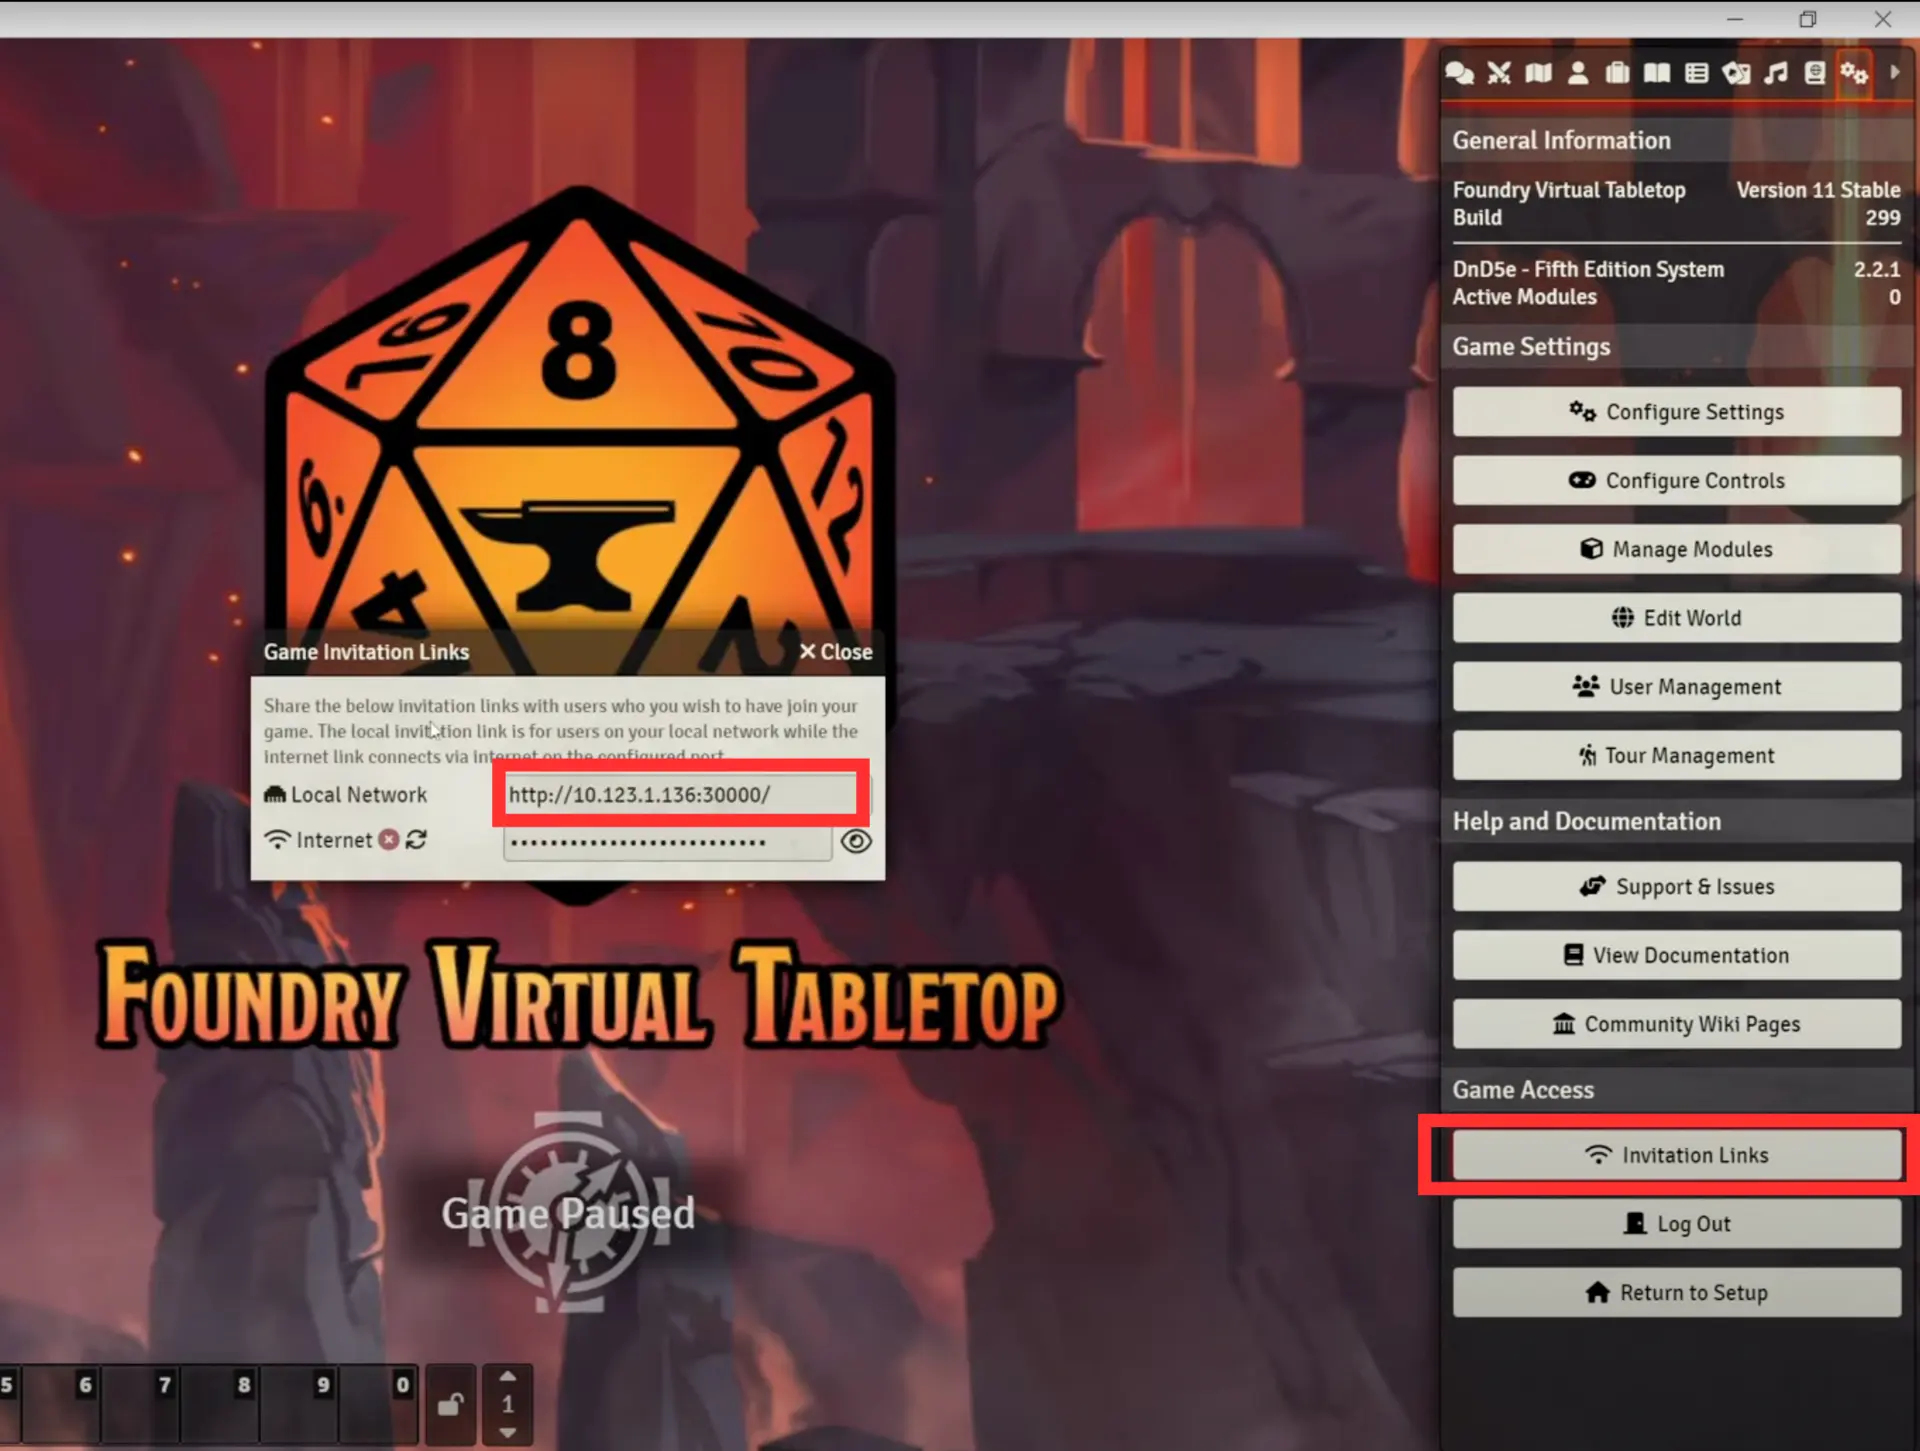
Check Local Network Access
Navigate to Game Access > Invitation Links within the Foundry interface. Here, you’ll see the local network address where Foundry is running, such as:http://10.123.1.136:30000
Quick Tip for Testing (Optional):
If you want to test Pinggy without launching Foundry first, you can quickly spin up a basic local web server using Python. This is a handy way to confirm everything is working correctly:
Open your terminal or command prompt, and run:
python3 -m http.server 30000
This will create a simple web server accessible at http://localhost:30000.
Step 2: Create a Public URL Using Pinggy (Single SSH Command)
Next, you’ll create a public tunnel to your local Foundry VTT instance using Pinggy’s single-line SSH command.
Execute the Following Command:
Open your terminal (macOS/Linux) or PowerShell (Windows) and run:

Explanation of this command:
-p 443: Uses port 443 for SSH, ensuring compatibility through most firewalls.-R0:localhost:30000: Requests Pinggy to forward connections from a random public URL to your local port 30000.a.pinggy.io: Connects to Pinggy’s tunneling server.
Example Output:
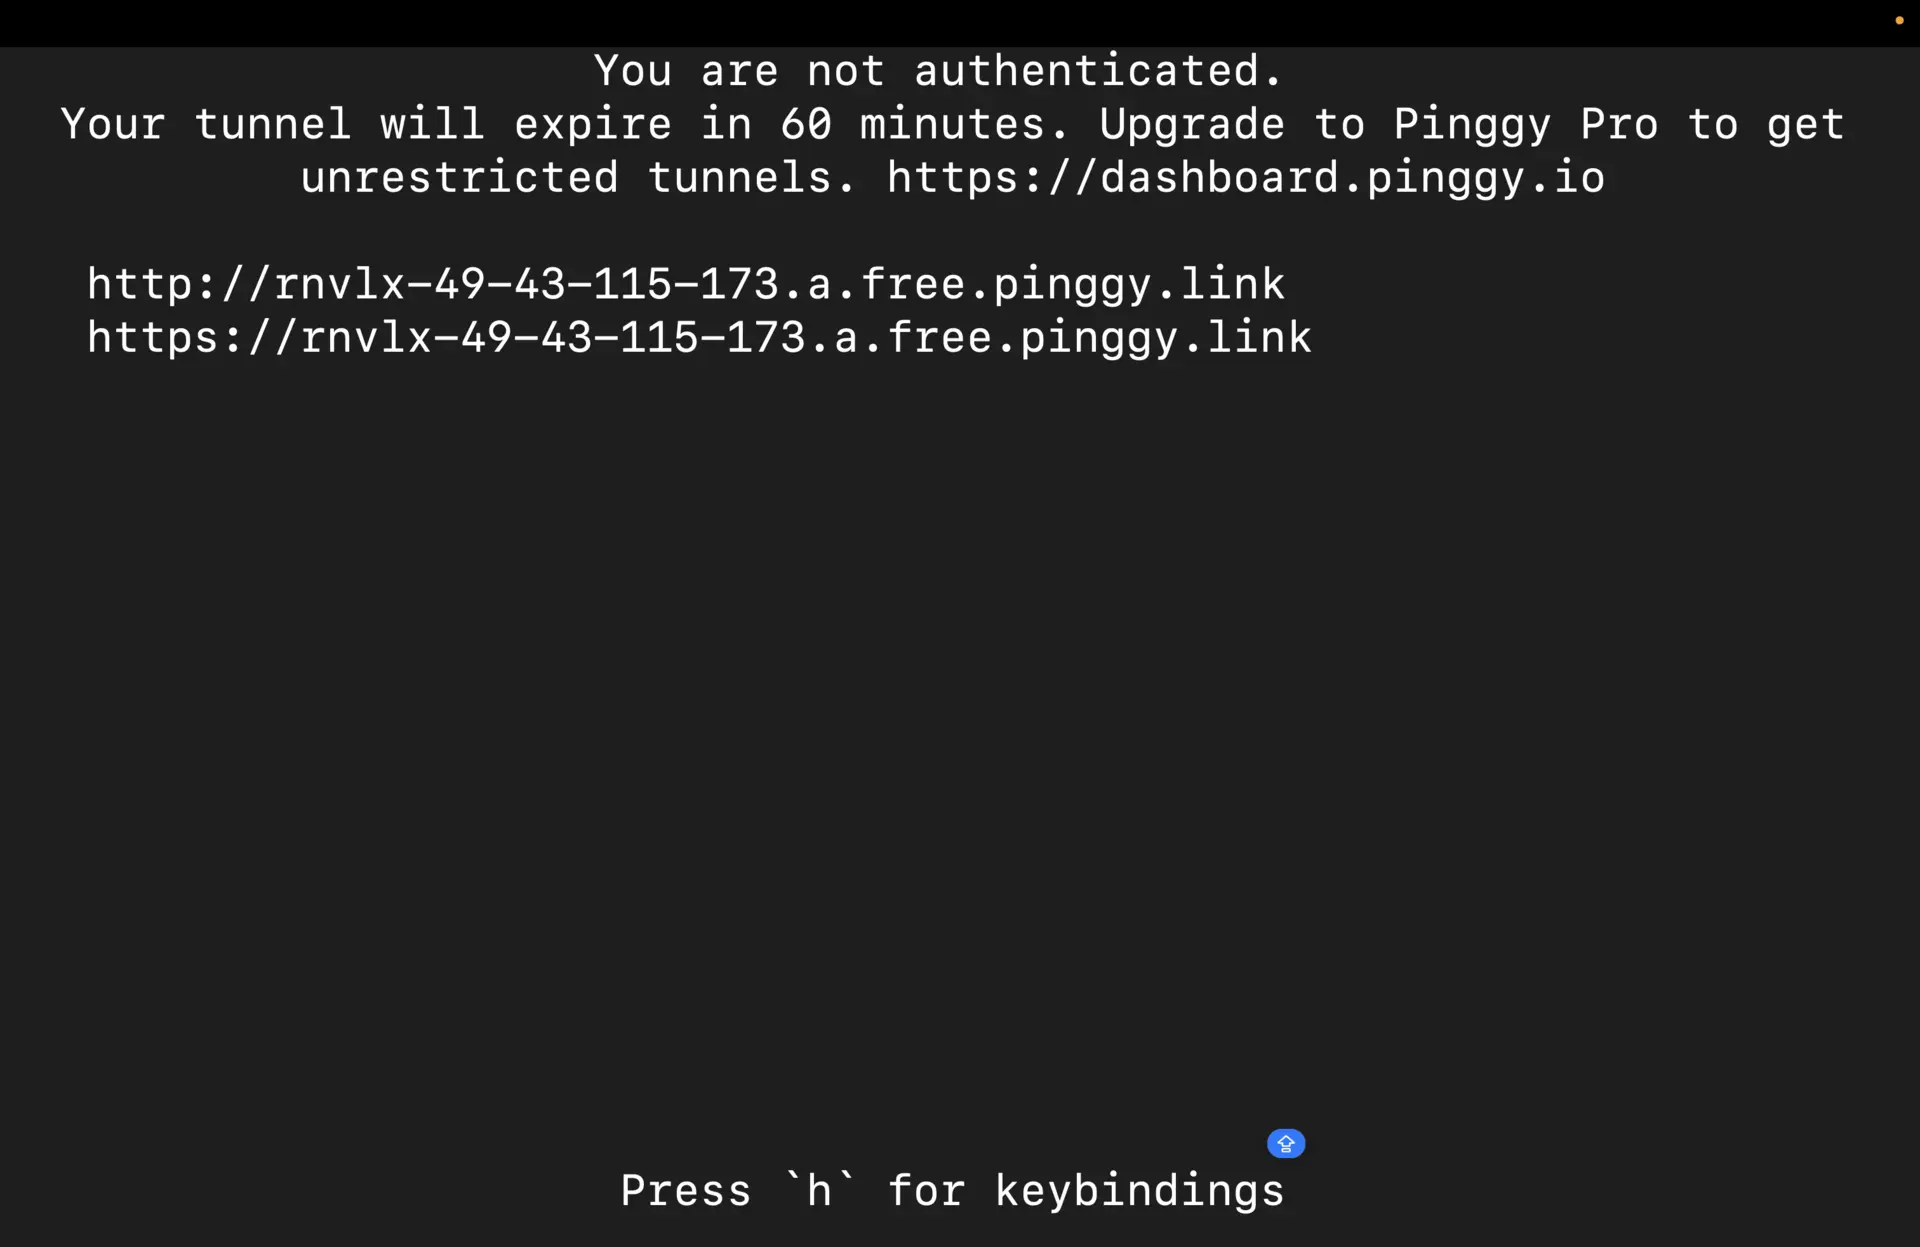
Once you execute the above command, Pinggy will automatically assign you a unique public URL. Your terminal output will look similar to:
You can access your local server via the following URL(s):
http://abc123xyz.a.pinggy.link
https://abc123xyz.a.pinggy.link
How to Share with Players:
Copy one of these provided URLs and share it directly with your Foundry VTT players. They can now instantly access your Foundry session from anywhere on the web—no additional setup required!
Advanced Features for Enhanced Management and Security (Optional, Recommended)
Pinggy offers a few powerful features you can optionally leverage to enhance the security and manageability of your tunnels:
Manage All Your Active Tunnels Using Pinggy Dashboard
Pinggy provides an intuitive, web-based dashboard to monitor and manage your tunnels, connections, and usage statistics.
- Visit the Pinggy Dashboard and sign up or sign in.
- Once logged in, you’ll receive a personalized access token.
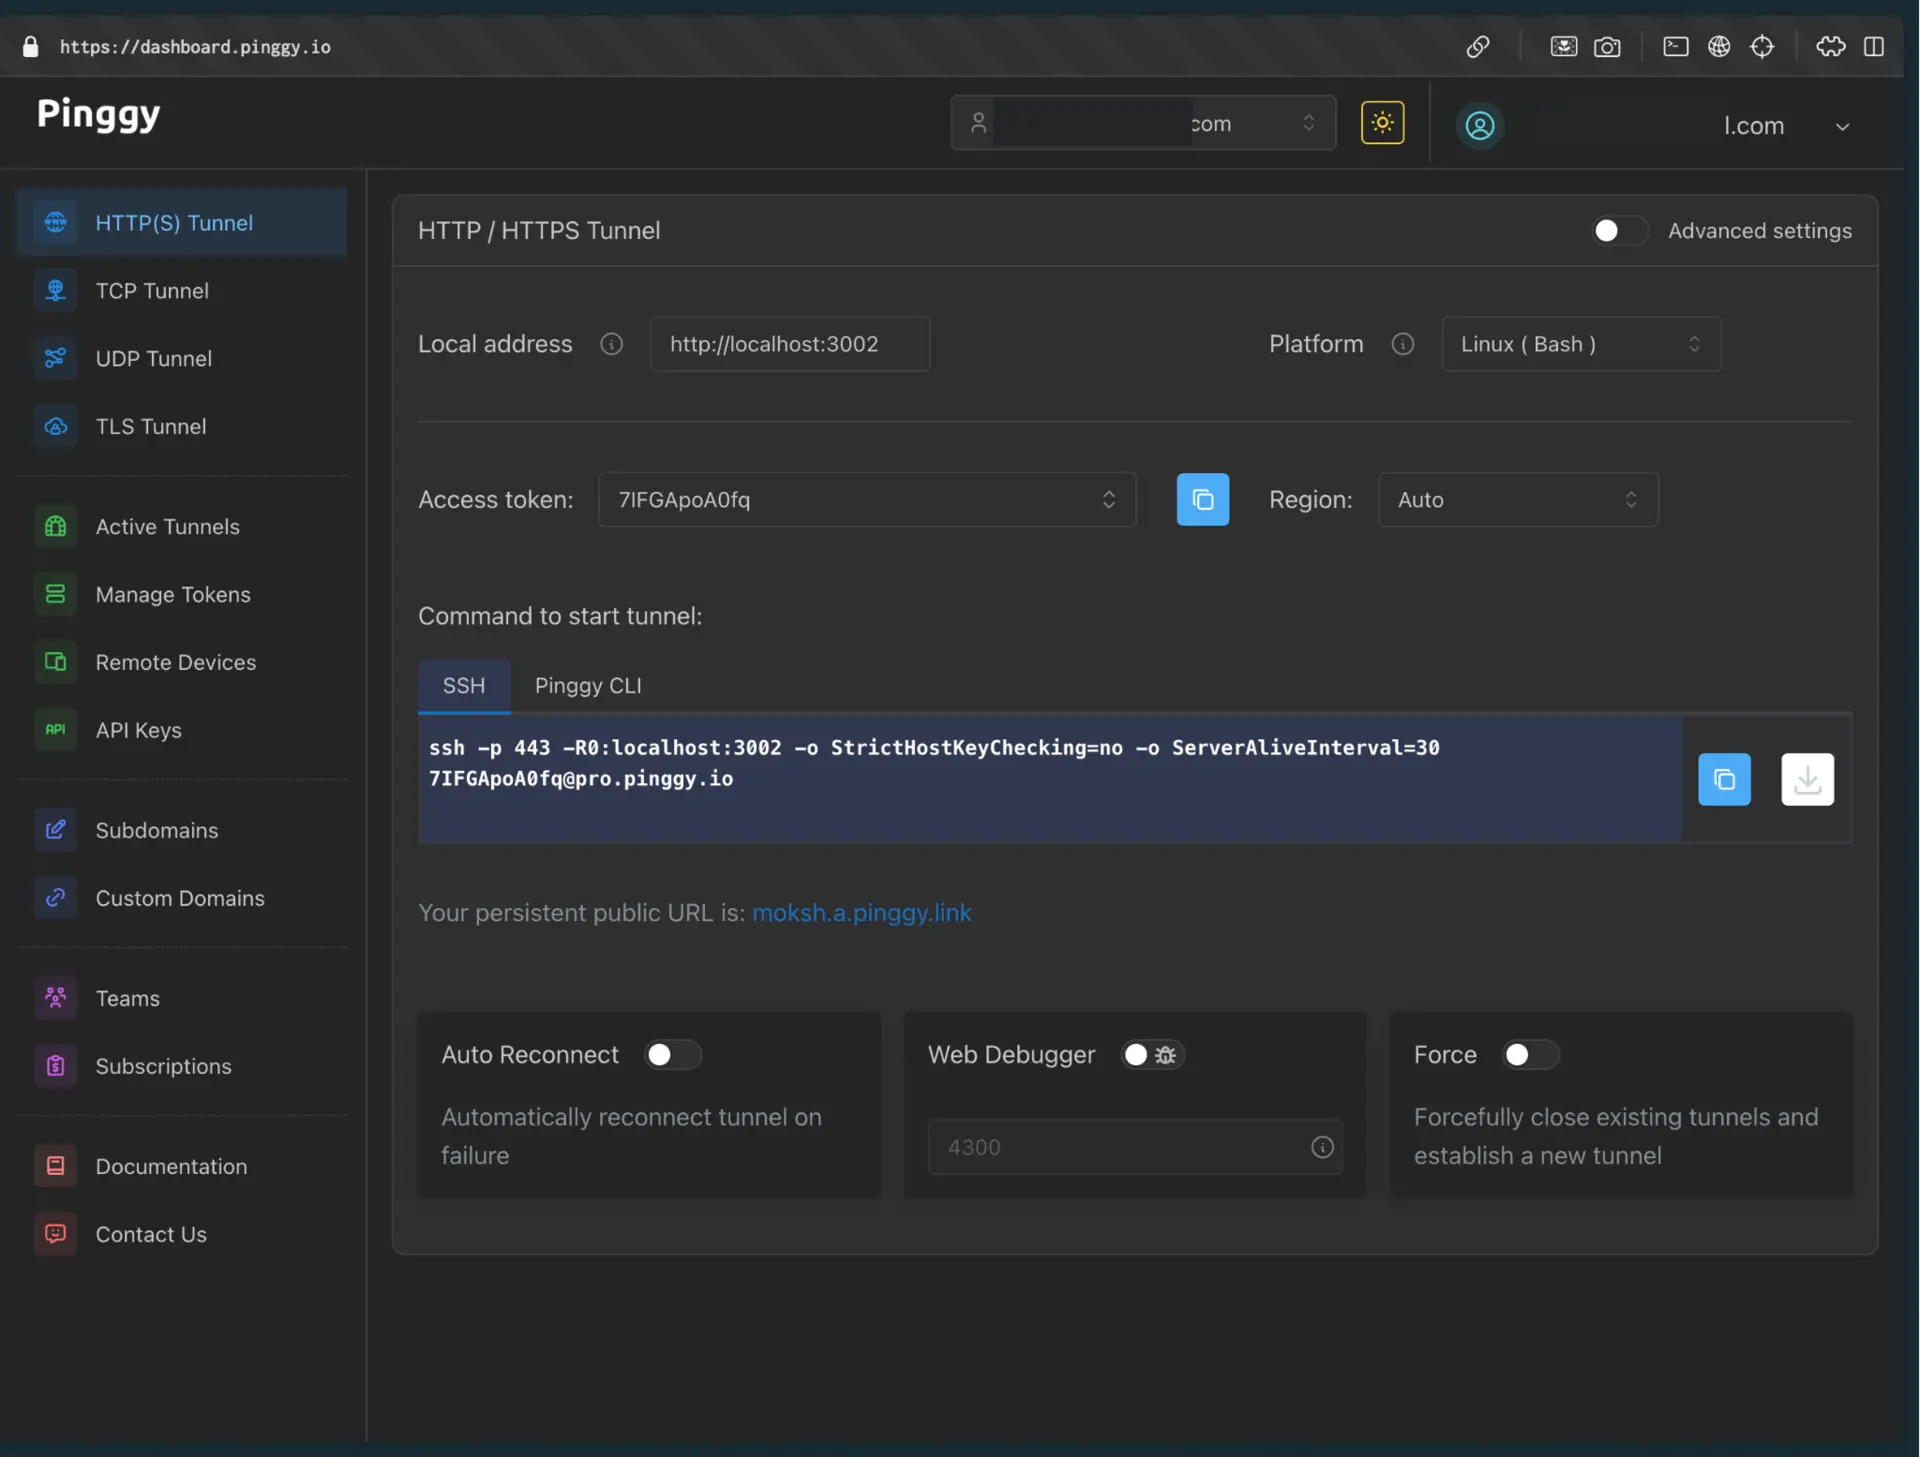
Enhanced SSH Command Using Access Token:
Use your Pinggy access token with your SSH command to link this tunnel directly to your Pinggy dashboard for convenient management:
ssh -p 443 -R0:localhost:30000 -t yourAccessToken@a.pinggy.io
Replace yourAccessToken with the actual token obtained from your dashboard.
Now your tunnels appear neatly listed in your Pinggy dashboard for easier tracking and management.
To further secure your Foundry VTT session, Pinggy supports Basic Authentication, allowing you to require a username and password from anyone trying to access your public URL.
SSH Command with Basic Authentication Enabled:
Execute the following command to enable password-protected access to your Foundry VTT:
ssh -p 443 -R0:localhost:30000 -t a.pinggy.io b:username:password
- Replace
username and password with your desired credentials. - Anyone accessing your public URL will now see a login prompt requiring these credentials, providing an additional layer of security.
Custom Domains & Persistent URLs with Pinggy Pro (Optional)
If you’re looking to host your Foundry sessions regularly or professionally, Pinggy Pro enables:
- Persistent tunnels for longer gaming sessions.
- Custom domains to personalize your gaming URLs.
- More detailed management and analytics options.
Conclusion
Hosting your
Foundry Virtual Tabletop (VTT) games online should never become a complicated ordeal. Thanks to Pinggy, we’ve seen how effortless it can be to securely expose your local Foundry instance using just a simple SSH command—no software installations, no port forwarding, and no complicated network setups required.
With Pinggy, you benefit from:
Instant setup: Quickly generate public URLs through a single SSH command.
Enhanced security: Add Basic Authentication to protect your gaming sessions.
Easy management: Monitor all active tunnels effortlessly through your Pinggy Dashboard.
Professional customization: Leverage Pinggy Pro features like custom domains and persistent tunnels for professional or regular hosting needs.
Whether you’re running casual weekend sessions with friends or managing a professional online gaming community, Pinggy simplifies the whole hosting process, ensuring you spend less time troubleshooting technicalities and more time enjoying immersive gaming sessions.