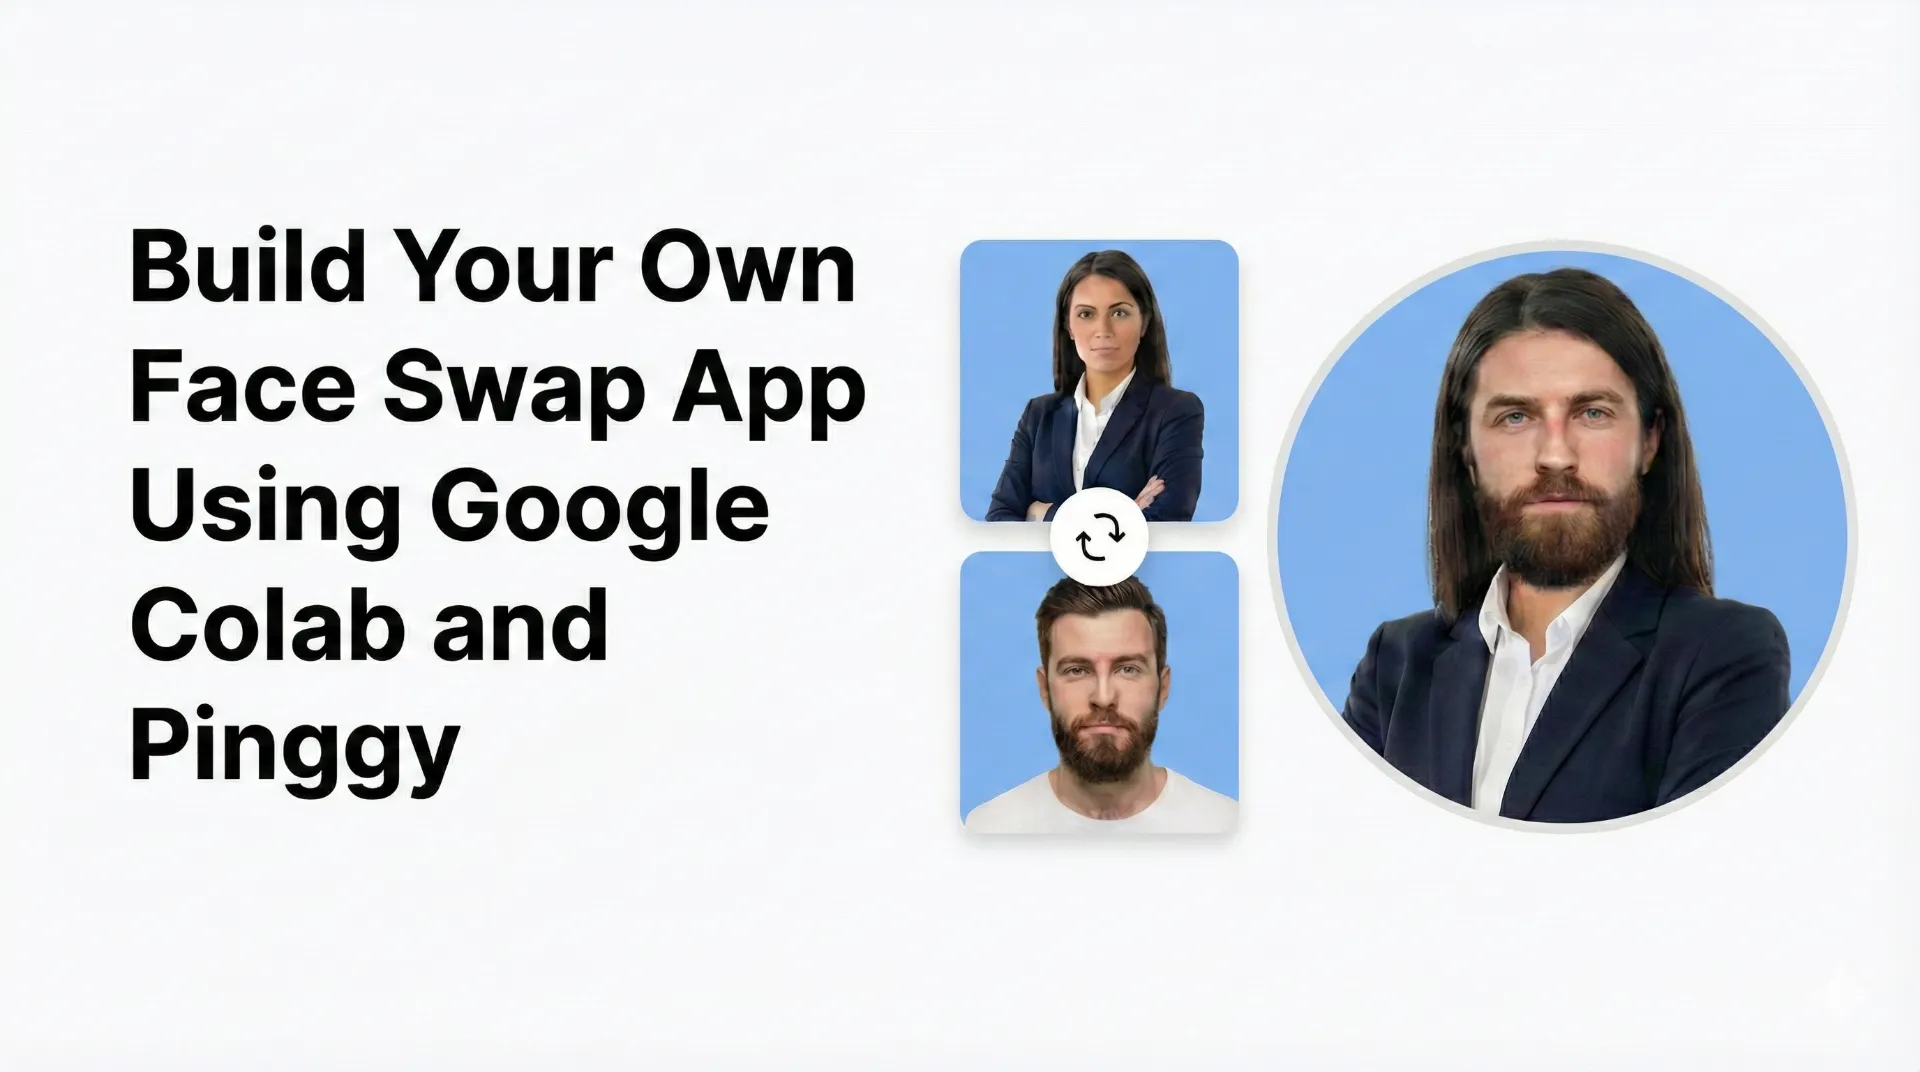
Face swapping technology has become increasingly popular for creative projects, entertainment, and exploring the capabilities of AI-powered image manipulation. While there are many commercial face swap applications available, building your own gives you complete control over the process and costs nothing to run. In this guide, we’ll show you how to create a fully functional face swap application using
Google Colab and make it publicly accessible using
Pinggy.
This setup leverages InsightFace’s powerful face detection and swapping models along with a Gradio-based user interface, all running on Google Colab’s free GPU resources. By the end of this tutorial, you’ll have a face swap app that you can share with friends anywhere in the world.
Summary
What You’ll Build:
- A fully functional face swap application running on Google Colab
- Gradio-based web interface for easy image uploads and face swapping
- Public URL access using Pinggy tunnels to share with anyone
- Support for both image and video face swapping
Quick Setup:
- Create a new Google Colab notebook
- Clone the face-swap-ui repository:
!git clone https://github.com/TheMasterFX/face-swap-ui
- Download the InsightFace model and install requirements
- Set up Pinggy tunnel:
import pinggy
tunnel = pinggy.start_tunnel(forwardto="localhost:7860")
- Run the Face Swap UI and access via the public URL
Resources:
Why Build Your Own Face Swap App?
Ever wanted to see yourself as a movie star, swap faces with your pet, or create hilarious memes with your friends? Face swapping is one of those fun AI projects that never gets old. The best part? You can build your own face swap app in just a few minutes and share it with anyone.
This project is perfect for a weekend experiment, a party trick, or just goofing around with friends. Imagine sending your group chat a link where everyone can swap faces with celebrities, historical figures, or each other. The reactions are priceless.
Plus, building it yourself means no watermarks ruining your creations, no subscription fees eating into your wallet, and no uploading your photos to random servers. Everything runs on Google Colab’s free GPU, so you get professional-grade results without spending anything. It’s the kind of project that’s genuinely fun to build and even more fun to use.
What is Face Swap UI?
Face Swap UI is an open-source project that provides a user-friendly Gradio interface for the InsightFace face swapping model. It uses the inswapper_128 model, which is capable of high-quality face swapping in both images and videos.
Key Features:
- Image Face Swapping: Upload a source image and swap any detected face with another
- Video Face Swapping: Process videos frame by frame to swap faces throughout
- Multiple Face Detection: Automatically detects and numbers all faces in an image
- Click-to-Select Interface: Simply click on the face you want to swap
- Face Tolerance Control: Adjust matching sensitivity for video processing
- No Watermarks: Get clean output without any branding or restrictions
The application runs on localhost port 7860 by default, and when combined with Pinggy’s tunneling service, it becomes accessible from anywhere on the internet.
Prerequisites
Before starting, you’ll need:
- A Google account to access Google Colab
- A web browser (Chrome, Firefox, or Edge recommended)
- Basic familiarity with running code cells in Colab notebooks
No local installation is required since everything runs in the cloud. Google Colab provides the computational resources, and Pinggy handles the networking to make your app publicly accessible.
Step 1: Create a Google Colab Notebook
Start by opening
Google Colab in your browser. Click on “New Notebook” to create a fresh notebook for your face swap application.
You can name your notebook something descriptive like faceswap.ipynb by clicking on the title at the top of the page.
Enable GPU for Faster Processing
While the face swap application can run on CPU, enabling GPU acceleration significantly speeds up face detection and swapping operations. To enable GPU:
- Go to Runtime in the top menu
- Click Change runtime type
- Under Hardware accelerator, select GPU (T4 is available on the free tier)
- Click Save
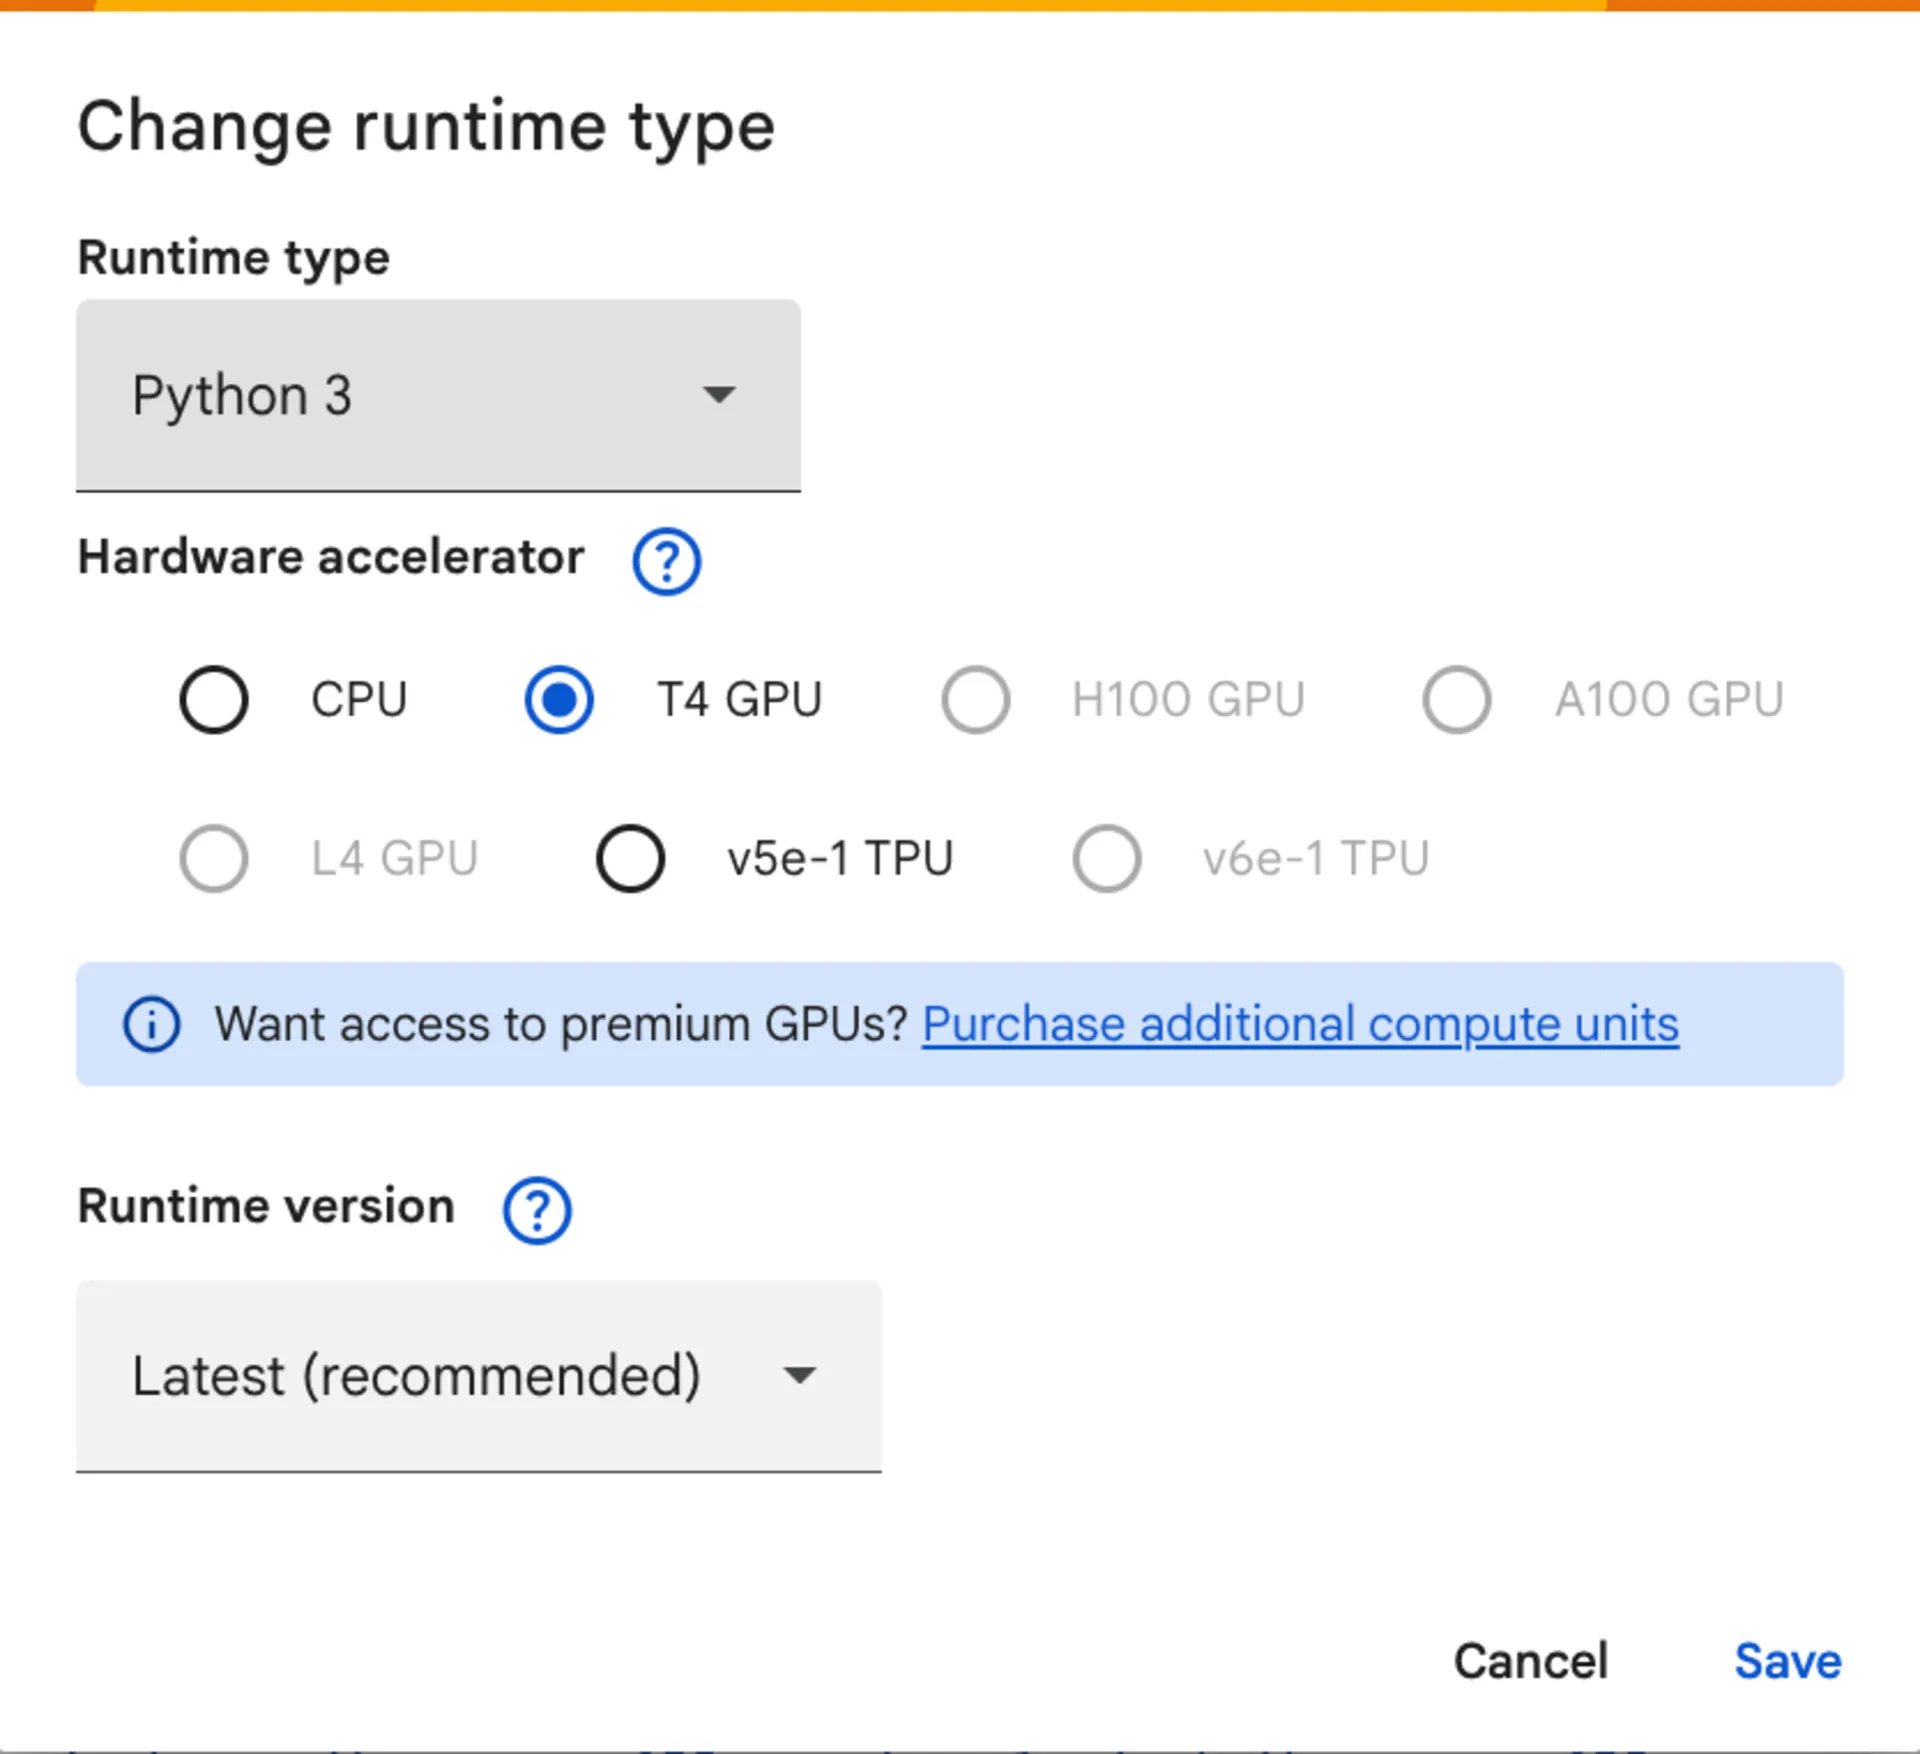
Google Colab provides free access to Tesla T4 GPUs with 15GB of VRAM, which is more than enough for face swapping tasks. With GPU enabled, face detection and swapping operations complete in seconds rather than minutes.
Step 2: Clone the Face Swap UI Repository
In your first code cell, navigate to the content directory and clone the face-swap-ui repository:
%cd /content
!rm -rf face-swap-ui
!git clone https://github.com/TheMasterFX/face-swap-ui

This downloads all the necessary code for the Gradio-based face swap interface. The repository includes the main application file, requirements, and supporting scripts.
Step 3: Download the Face Swap Model
The face swapping functionality requires the inswapper_128.onnx model from InsightFace. Run these commands to create the required directory structure and download the model:
!mkdir -p /root/.insightface/models
!wget -O /root/.insightface/models/inswapper_128.onnx \
  https://huggingface.co/ezioruan/inswapper_128.onnx/resolve/main/inswapper_128.onnx
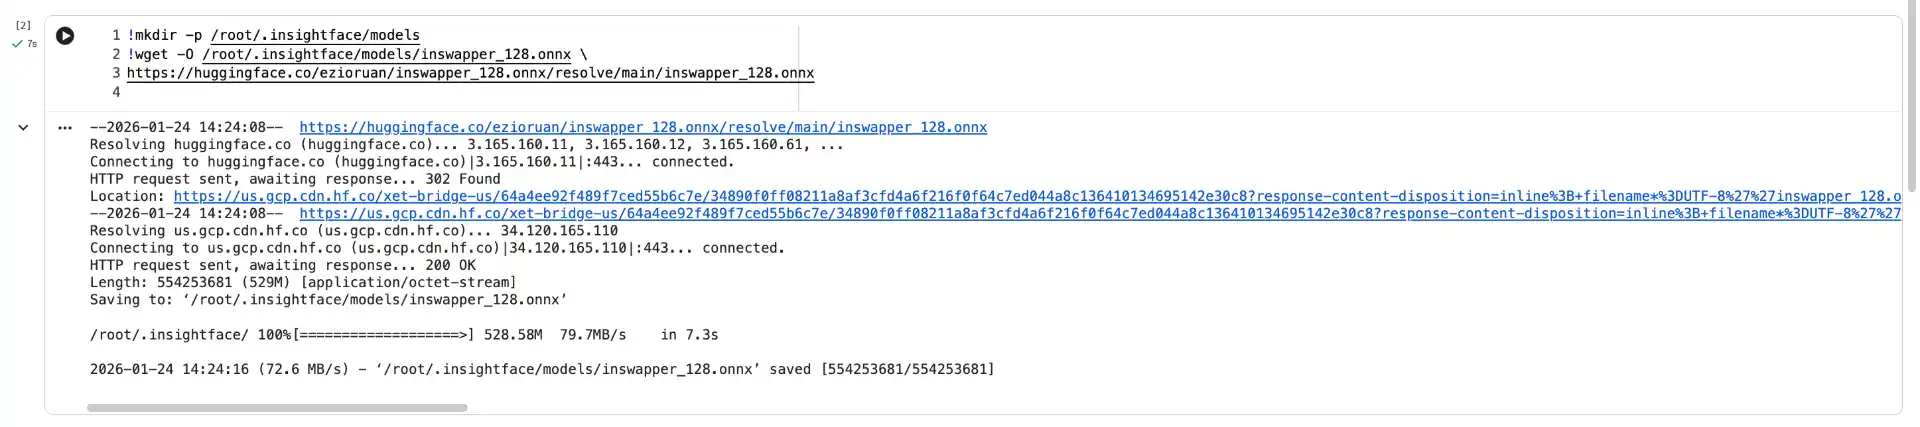
This downloads the pre-trained model file (approximately 500MB) that powers the face swapping algorithm. The model is stored in the InsightFace default model directory where the application expects to find it.
Step 4: Install Requirements
Navigate to the face-swap-ui directory and install all required Python packages:
%cd /content/face-swap-ui
!pip install --upgrade pip
!pip install -r requirements.txt
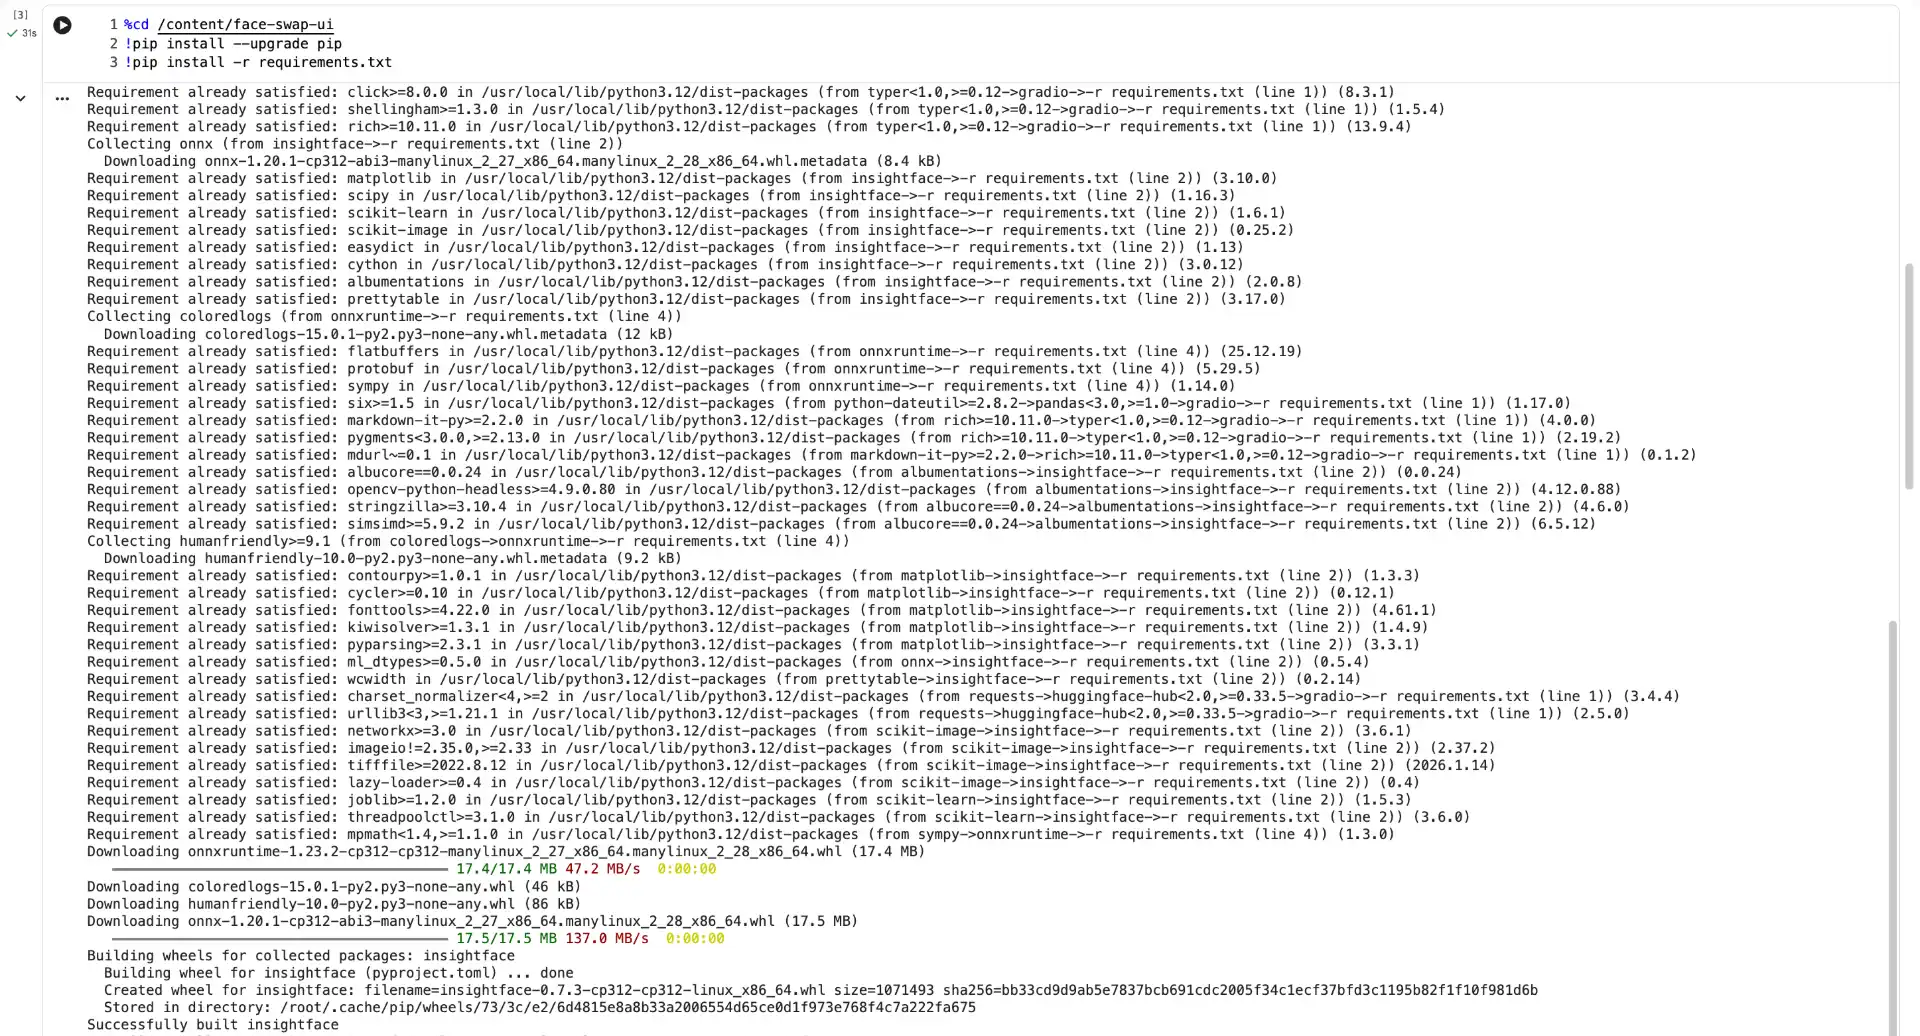
This installs dependencies including:
- InsightFace: For face detection and analysis
- Gradio: For the web interface
- OpenCV: For image and video processing
- NumPy: For numerical operations
- ONNX Runtime: For running the face swap model
The installation process takes a few minutes to complete.
Step 5: Apply Quick Patch Fixes
The face-swap-ui code requires a few modifications to work properly in the Colab environment. Run these sed commands to apply the necessary patches:
Fix the model loading path:
!sed -i "s|get_model('inswapper_128.onnx'.*|get_model('/root/.insightface/models/inswapper_128.onnx', download=False)|" face_swap_ui.py
This forces the application to load the model from the local path instead of attempting to auto-download it.
Fix case-sensitive label errors:
!sed -i "s/Label=/label=/g" face_swap_ui.py
This corrects case sensitivity issues that can break the Gradio UI components.
Remove deprecated style method:
!sed -i "s/\.style(height=400)//g" face_swap_ui.py

This removes the .style(height=400) calls that are deprecated in newer Gradio versions and can cause layout issues.
Step 6: Set Up Pinggy Tunnel
To make your face swap application accessible from anywhere, install and configure Pinggy:

Then create the tunnel in a new code cell:
import pinggy

tunnel1 = pinggy.start_tunnel(
    forwardto="localhost:7860"
)
print(f"Tunnel1 started - URLs: {tunnel1.urls}")

This creates a public URL that forwards traffic to your local Gradio server running on port 7860. Copy the generated URL - you’ll use this to access your face swap application from any browser.
Step 7: Run the Face Swap UI
Finally, launch the face swap application:
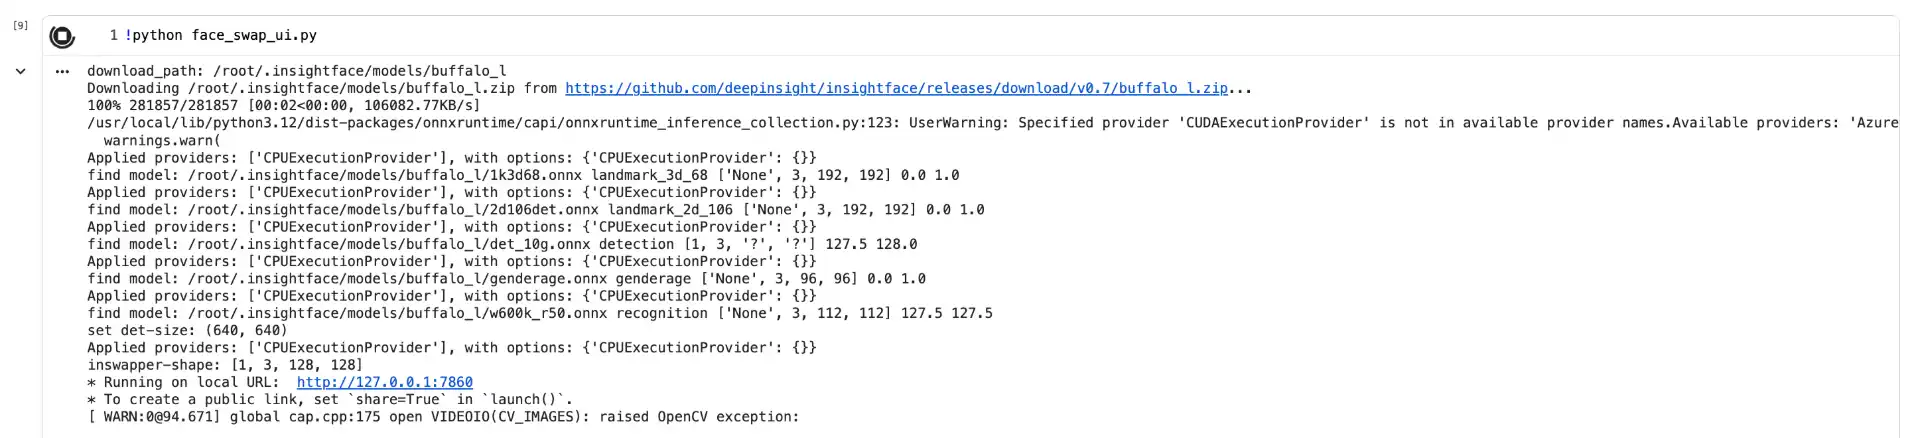
The application will initialize the face analysis model and start the Gradio server. You’ll see output indicating that it’s running on localhost:7860. This initialization may take a minute as it loads the face detection and swapping models into memory.
Using Your Face Swap Application
Once the application is running, open the Pinggy URL in any browser (you can even use an incognito window to test). You’ll see the Face Swap UI with two main tabs:
Swap Face Image Tab
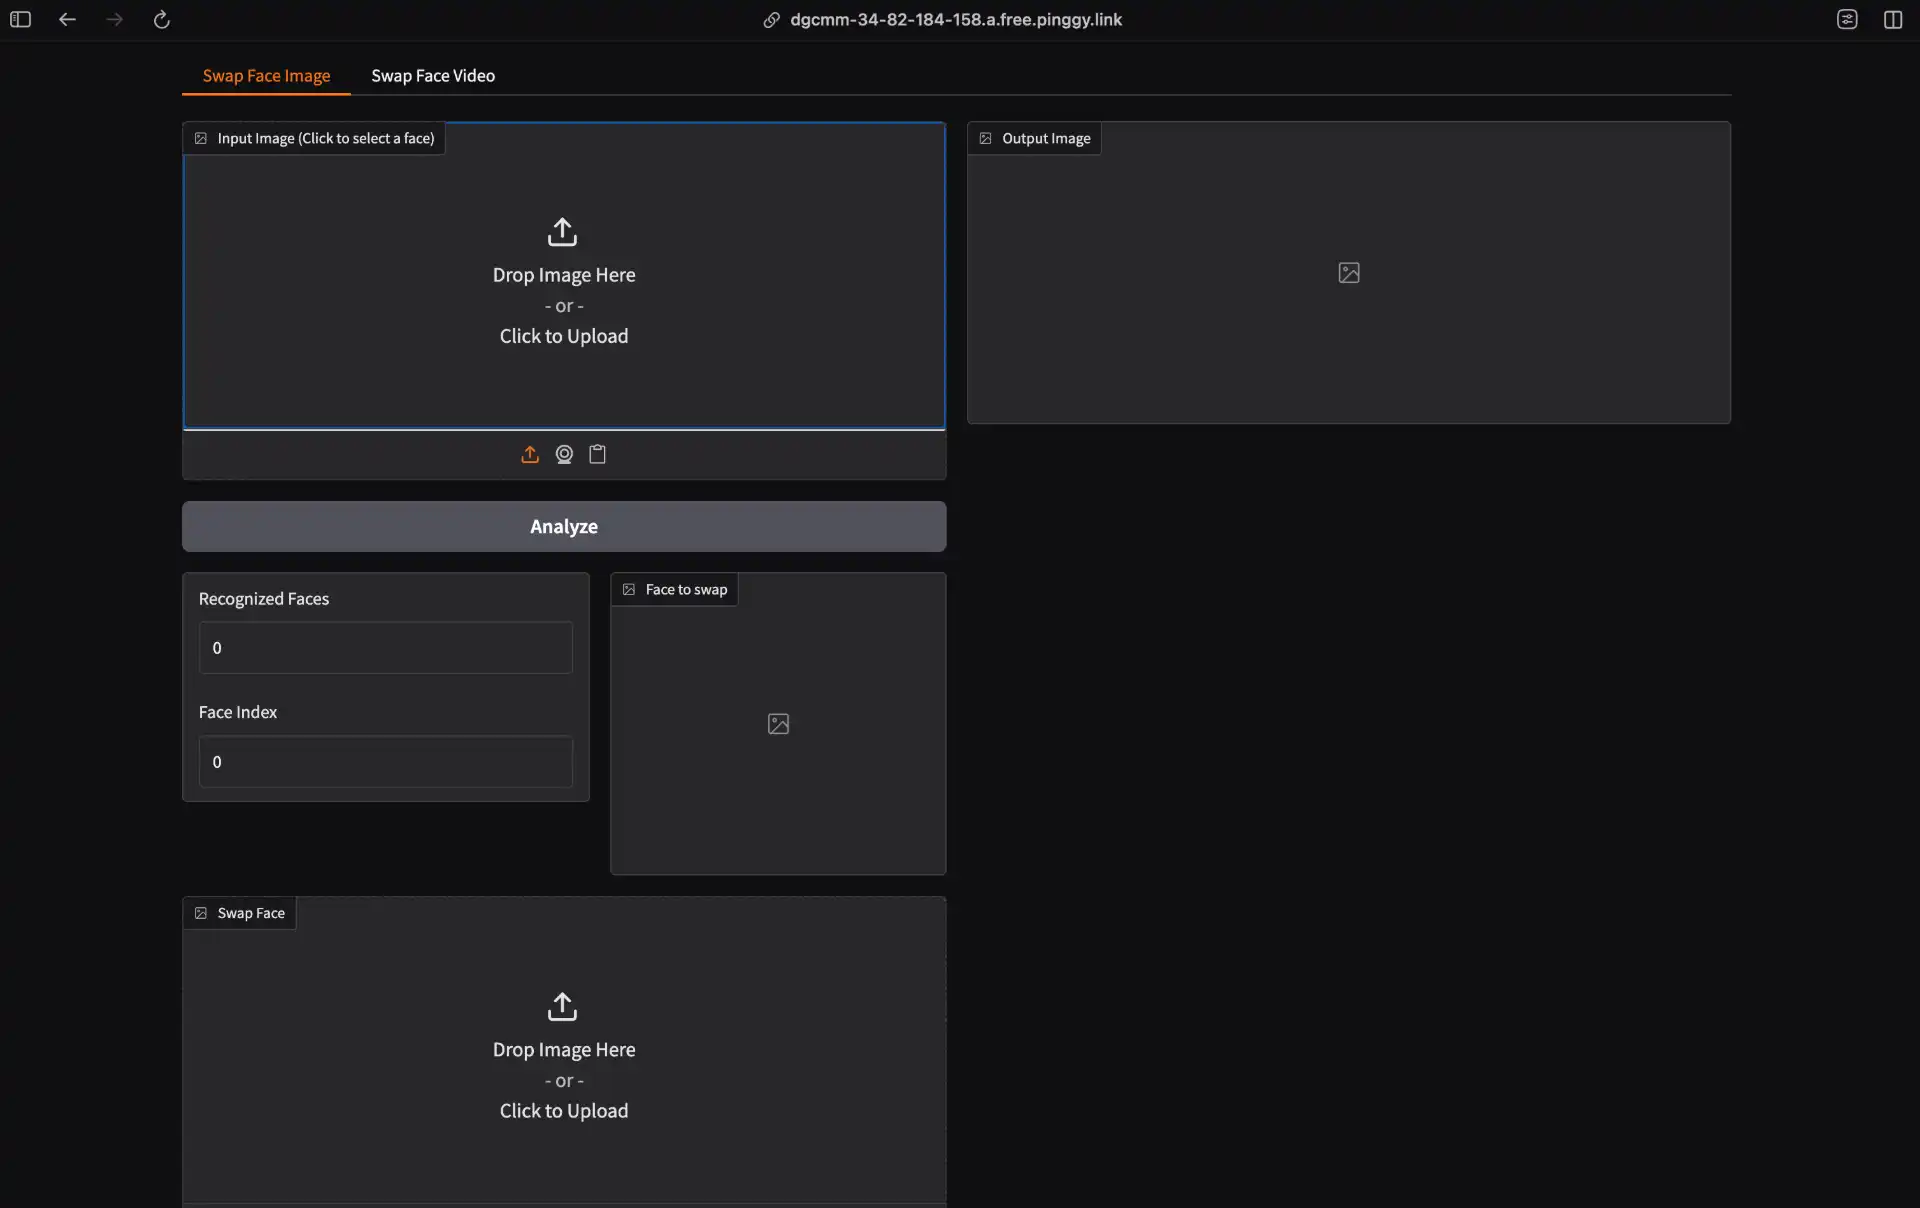
- Upload Target Image: Click “Drop image here” to upload the image containing the face(s) you want to replace
- Click Analyze: The application detects all faces and displays the count
- Select a Face: Click directly on the face you want to swap in the image
- Upload Swap Face: Upload an image of the face you want to use as the replacement
- Click Swap: The application performs the face swap and displays the result
Swap Face Video Tab
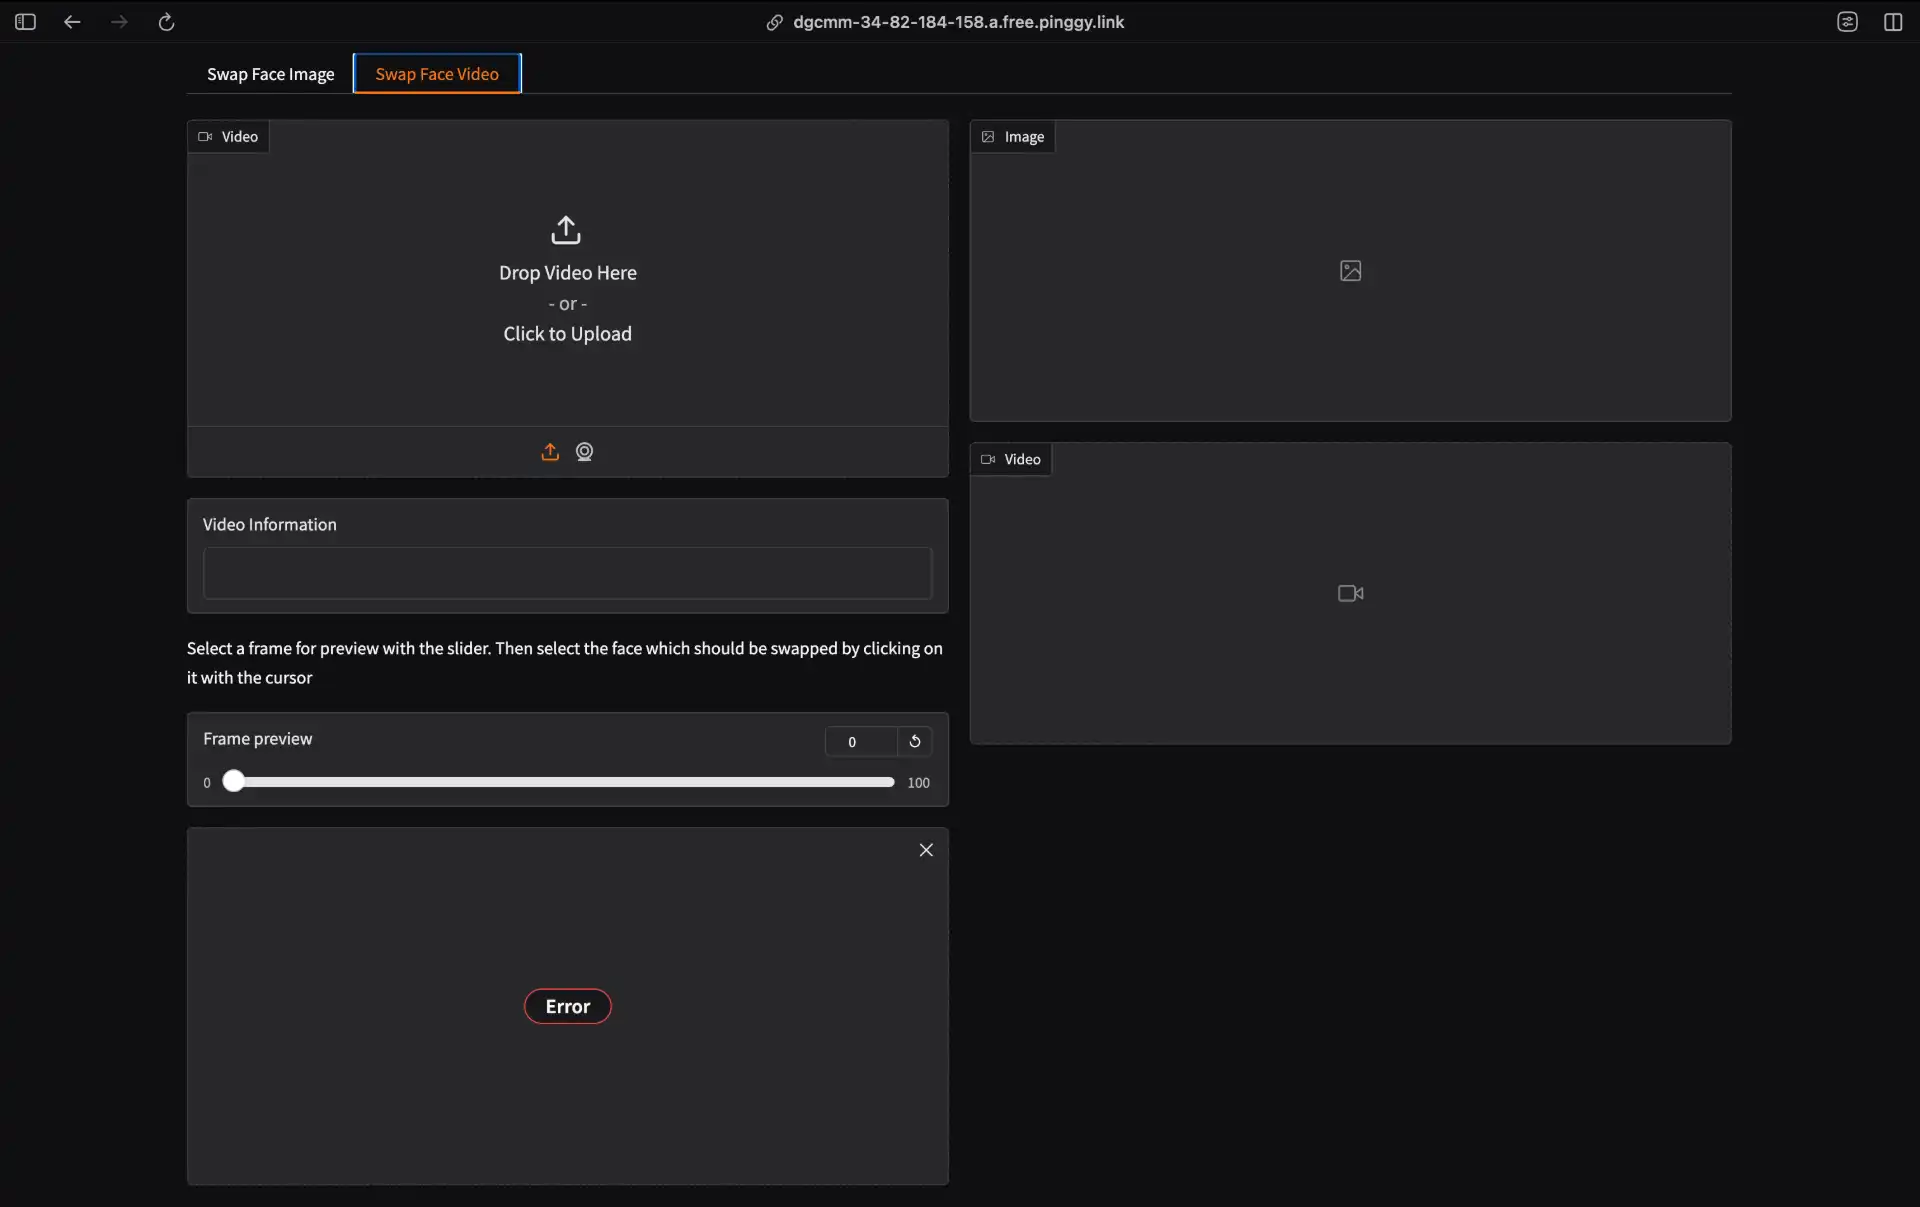
- Upload Source Video: Select a video file to process
- Preview Frame: Use the slider to navigate to a frame with the target face
- Select Faces: Click on the face to swap and upload the replacement face
- Adjust Tolerance: Higher values increase matching flexibility (30-40 recommended)
- Process Video: Click to swap faces throughout the entire video
GitHub Repository
You can find the complete Colab notebook with all commands ready to run in the GitHub repository:
Face Swap Colab Notebook. Simply open the notebook in Colab and run all cells to get your face swap application up and running.
Conclusion
Building your own face swap application on Google Colab with Pinggy provides a free, private, and fully functional alternative to commercial face swap services. The combination of InsightFace’s powerful models, Gradio’s intuitive interface, and Pinggy’s tunneling capabilities creates a professional-grade tool accessible to anyone with a web browser.
This setup is ideal for creative projects, learning about AI-powered image manipulation, or simply having fun with friends. Since everything runs on Google’s infrastructure with public access through Pinggy, there’s no need to worry about local hardware requirements or complex networking configurations.
Whether you’re a developer exploring computer vision technologies or someone looking for a free face swap solution, this guide provides everything you need to get started. Share the Pinggy link with friends and let them experience your self-hosted face swap application from anywhere in the world.