
In this blog, we’ll discuss how to securely connect to your Raspberry Pi or IoT device remotely from anywhere over the internet without port forwarding, allowing you to remotely manage your devices more effectively.
Ever tried to access your Raspberry Pi from work, only to realize it’s sitting behind your home router with no way to reach it? You’re not alone. Most IoT enthusiasts face this exact challenge when trying to manage their devices remotely.
Why Remote Access Matters for IoT Projects
Whether you’re monitoring a home automation system, checking sensor data, or troubleshooting a project, remote access is crucial for serious IoT work. But traditional methods come with baggage:
- Port forwarding exposes your devices to internet threats
- Dynamic IPs change without warning
- CGNAT (Carrier-Grade NAT) blocks incoming connections entirely
- Corporate firewalls prevent most tunneling solutions
Four Ways to Access Your Raspberry Pi Remotely
Here are the main methods we’ll cover, each suited for different use cases:
- SSH (Command Line) - Perfect for server management, file transfers, and running scripts remotely
- VNC (Desktop GUI) - Ideal when you need the full desktop experience for configuration or development
- RDP (Remote Desktop) - Great for Windows users who prefer familiar remote desktop tools
- Web Applications - Access custom dashboards, APIs, or web-based IoT interfaces
The beauty? All of these work without touching your router settings.
Summary
Step 1. Run these commands on your Raspberry Pi:
sudo apt update
sudo apt install xrdp
sudo systemctl start xrdp
Step 2. Run this command to get a public URL to your Raspberry Pi:
ssh -p 443 -R0:localhost:3389 tcp@free.pinggy.io
You will get a URL and port in the output such as:
tcp://tljocjkijs.a.pinggy.link:40527
Step 3. Open Remote Desktop Connection application on your Windows / Microsoft Remote Desktop on Mac. Enter the URL:Port to connect.
Example: tljocjkijs.a.free.pinggy.link:40527
Sign in to https://dashboard.pinggy.io to get your ongoing tunnel URLs from the dashboard.
The Challenge with Port Forwarding
Internet Service Providers (ISPs) often place devices behind NAT or CGNAT routers, making port forwarding challenging. Port forwarding exposes devices to the internet, increasing vulnerability to attacks.
Here, we’ll discuss how to configure and setup Raspberry Pi for remote access without setting up port forwarding using Pinggy.io.
Pinggy is a tunneling tool that gives a public address to access your localhost, even while sitting behind a NAT or a firewall – all this in a single command.
Method 1: SSH Access - Your Command Line Gateway
SSH is the Swiss Army knife of remote access. Whether you’re updating packages, checking logs, or running Python scripts, SSH gives you full command-line control of your Raspberry Pi from anywhere.
Why SSH is perfect for IoT:
- Lightweight and fast, even on slow connections
- Secure encrypted communication
- Perfect for headless servers and automation
- Works great for file transfers with SCP/SFTP
The challenge? SSH typically requires port forwarding, which most home networks and corporate firewalls block. Here’s how to bypass that entirely.
Using Pinggy for remote SSH access
Pinggy provides a secure and reliable method to remotely access your IoT devices, including Raspberry Pi, Banana Pi, Orange Pi, NanoPi NEO, Odroid, Rock Pi, NVIDIA Jetson Nano, and others, even if they don’t have a public IP address. It enables you to establish an SSH connection to your devices from anywhere in the world. It has a free tier that will allow you to remotely access your devices from anywhere.
On your Raspberry Pi, open a terminal and run the following command:
ssh -p 443 -R0:localhost:22 tcp@free.pinggy.io
This command establishes a secure connection to the Pinggy server, creating a tunnel that forward traffic from the server’s port 22 to your IoT device’s port 22.
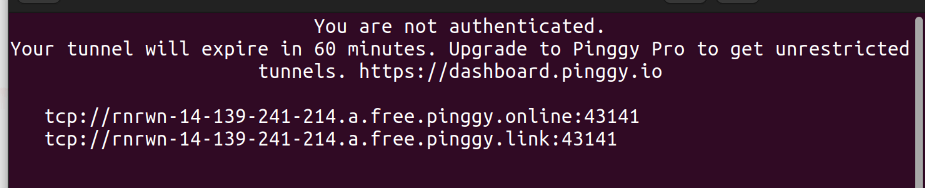
After running the tunneling command, you will receive a public URL in the following format: tcp://rnrwn-14-139-241-214.a.free.pinggy.link:43141
Now, you can use the public URL to connect to your Raspberry Pi from anywhere in the world. Open a terminal on your laptop or PC and run the following command:
ssh -p 43141 username@rnrwn-14-139-241-214.a.free.pinggy.link
By executing this command, you establish an SSH connection to the Pinggy server, which redirects the traffic to your Raspberry Pi through the previously created tunnel. You can now access and control your Raspberry Pi as if it were directly connected to your local network.
You should however create a free account in Pinggy so that you can get the remote URL just by logging in to the dashboard. It is recommended that you go through the guide to learn how to run the tunnel automatically whenever the raspberry pi is switched on.
Method 2: VNC Access - Full Desktop Experience
Sometimes you need more than a command line. Maybe you’re configuring GPIO pins with a visual tool, debugging a Python GUI application, or just prefer clicking around the desktop. VNC gives you the complete Raspberry Pi desktop experience, streamed directly to your computer.
When to use VNC:
- Setting up new software with graphical installers
- Debugging visual applications or GPIO projects
- Teaching others how to use the Raspberry Pi
- When you need the familiar desktop environment
VNC traditionally runs on port 5901, but again, we’ll bypass the port forwarding headache entirely.
Install TightVNC server on Raspberry Pi
Open a terminal on your Raspberry Pi and run the following two commands in the to install Tight VNC Server. The first command is not necessary but it is recommended to update and upgrade the raspberry pi before installing any new software. The second command is to install Tight VNC Server.
sudo apt-get update && sudo apt-get upgrade
sudo apt-get install tightvncserver
Wait till the installation is complete. To check if the installation was successful, run the following command:
On running the command for the first time, you will be asked to set new VNC password for accessing the Raspberry Pi using TightVNC.

After setting the password, you will receive a message with the following information:
New 'X' desktop is raspberrypi:1
This message indicates that the VNC server is running on the Raspberry Pi and is listening on port 5901.
Using Pinggy for remote VNC access
On your Raspberry Pi, open a terminal and run the following command:
ssh -p 443 -R0:localhost:5901 tcp@free.pinggy.io
This command establishes a secure connection to the Pinggy server, creating a tunnel that forward traffic from the server’s port 5901 to your IoT device’s port 5901.
After running the tunneling command, you will receive a public URL in the following format: tcp://rnrwn-14-139-241-214.a.free.pinggy.link:43141
Now, you can use the public URL to connect to your Raspberry Pi from anywhere in the world. Open a VNC client on your laptop or PC and enter the public URL in the address bar.
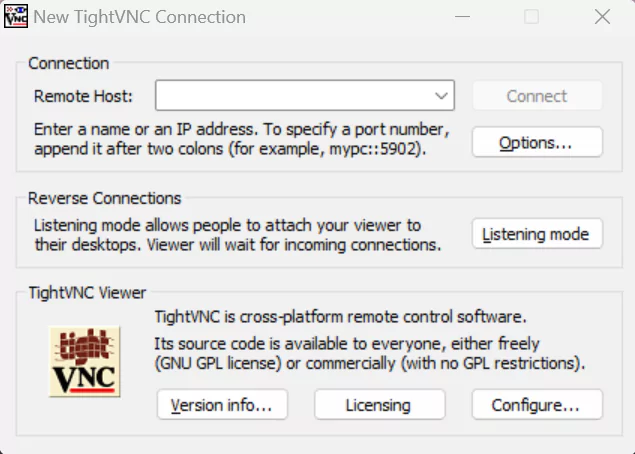
Install VNC Viewer on your laptop or PC
Since the raspberry pi acts as a TightVNC server, we need software which acts as a TightVNC client. Download the zip file from the
official website and install it on your laptop or PC.
After installing the VNC Viewer, open the application and enter the public URL in the address bar. Click on the connect button to establish a connection to your Raspberry Pi.
Method 3: RDP Access - Windows-Style Remote Desktop
If you’re coming from a Windows background, RDP will feel like home. It’s Microsoft’s remote desktop protocol, and it works surprisingly well on Raspberry Pi. The interface is smooth, responsive, and integrates nicely with Windows’ built-in Remote Desktop Connection tool.
Why choose RDP:
- Familiar interface for Windows users
- Built into Windows (no extra software needed)
- Often faster than VNC for desktop tasks
- Good clipboard and file sharing support
Let’s get RDP running on your Pi and accessible from anywhere.
Install xrdp on Raspberry Pi
Open a terminal on your Raspberry Pi and run the following command to install xrdp:
sudo apt update
sudo apt install xrdp
sudo systemctl start xrdp
Using Pinggy for remote desktop (RDP) access
On your Raspberry Pi, open a terminal and run the following command:
ssh -p 443 -R0:localhost:3389 tcp@free.pinggy.io
This command establishes a secure connection to the Pinggy server, creating a tunnel that forward traffic from the server’s port 3389 to your IoT device’s port 3389.
After running the tunneling command, you will receive a public URL in the following format: tcp://rnrwn-14-139-241-214.a.free.pinggy.link:43141
Now, you can use the public URL to connect to your Raspberry Pi from anywhere in the world. Open an RDP client on your laptop or PC and enter the public URL in the address bar.
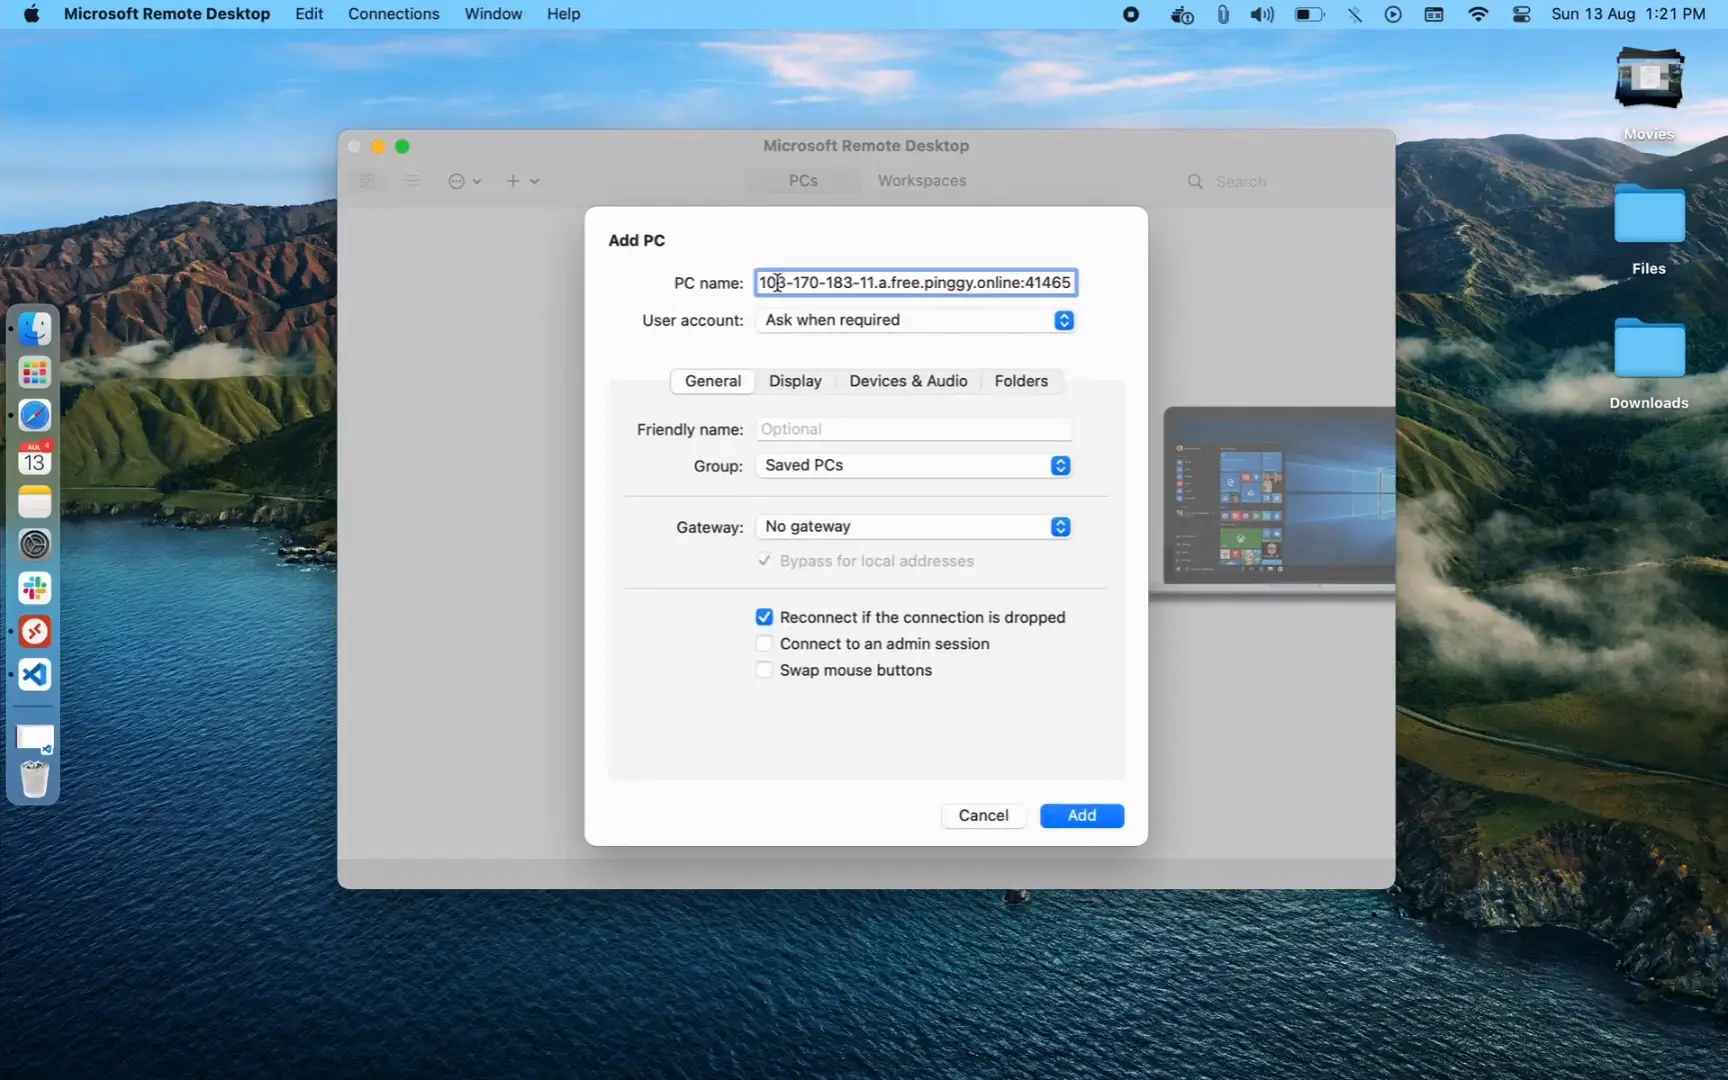
Connect to remote desktop
Since the raspberry pi acts as an RDP server, we need an RDP client to connect to the raspberry pi. Open Remote Desktop Connection application on your Windows / Microsoft Remote Desktop on Mac. Enter the URL:Port to connect.
Method 4: Web Application Access - Custom Dashboards and APIs
This is where IoT gets really exciting. Maybe you’ve built a sensor dashboard, a home automation control panel, or an API that serves data from your Pi. Getting these web applications accessible remotely opens up endless possibilities.
Perfect for:
- IoT sensor dashboards and monitoring interfaces
- Home automation control panels
- REST APIs serving sensor data
- Custom web applications for device management
Let’s say you have a Node.js web server running on your Raspberry Pi, and you want to access it from anywhere in the world.
const express = require("express");
const app = express();
const port = 3000;

// Simple IoT dashboard example
app.get("/", (req, res) => {
  res.send(`
    <h1>My IoT Dashboard</h1>
    <p>Temperature: 23.5°C</p>
    <p>Humidity: 65%</p>
    <p>Last updated: ${new Date().toLocaleString()}</p>
  `);
});

// API endpoint for sensor data
app.get("/api/sensors", (req, res) => {
  res.json({
    temperature: 23.5,
    humidity: 65,
    timestamp: new Date().toISOString()
  });
});

app.listen(port, () => {
  console.log(`IoT Dashboard running at http://localhost:${port}`);
});
Save this code as iot-dashboard.js and run it:
This creates a simple IoT dashboard that you can access from anywhere once we set up the tunnel.
Right now the web application can be accessed only from a local network because it runs on your IoT behind a NAT router or Firewall.
Using Pinggy for remote access
On your Raspberry Pi, open a terminal and run the following command:
ssh -p 443 -R0:localhost:3000 -o ServerAliveInterval=30 free.pinggy.io
After running the tunneling command, you will receive a public URL in the following format:
https://rnbsm-14-139-241-214.a.free.pinggy.link
Now, you can use the public URL to access your web app from anywhere in the world. Open a web browser on your laptop or PC and enter the public URL in the address bar.
Bonus: Monitor Your Pi’s Health Remotely
Once you have remote access set up, keeping an eye on your Pi’s performance becomes crucial. Is your IoT project consuming too much CPU? Running out of memory? A quick health check can save you from mysterious crashes and performance issues.
htop is like Task Manager for Linux—it shows you exactly what’s happening with your Pi’s resources in real-time.
Installing htop on Raspberry Pi
To begin the installation process, open a terminal on your Raspberry Pi and execute the following commands:
sudo apt-get update
sudo apt-get install htop
These commands ensure that your package list is updated, and HTOP is installed on your Raspberry Pi.
Using Pinggy for remotely monitoring iot using htop
Before using HTOP, you need to create a tunnel to your Raspberry Pi using Pinggy. Follow the steps mentioned in the previous sections to create a tunnel to your Raspberry Pi.
Using HTOP to monitor system resources
Once you have established the SSH connection, you can initiate HTOP by entering the following command in the terminal:
This command launches the HTOP interface, providing you with real-time insights into your Raspberry Pi’s CPU usage, memory consumption, running processes, and more.
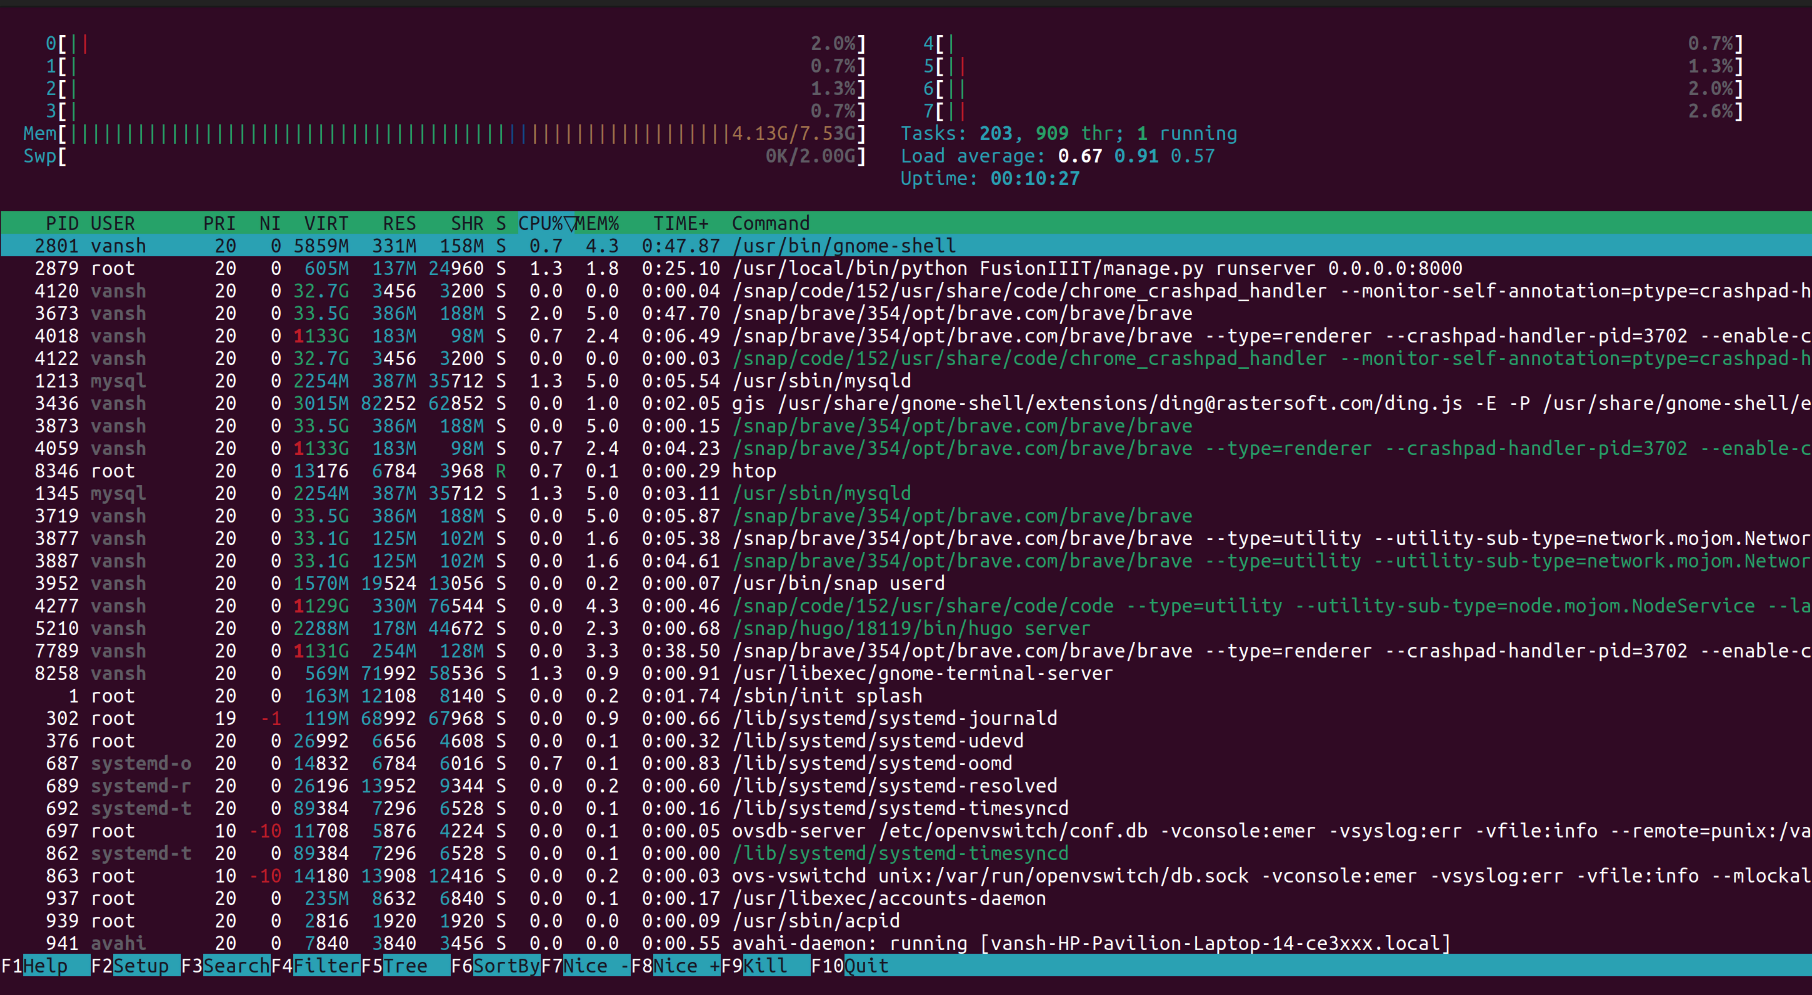
By incorporating HTOP into your remote management toolkit, you can proactively address performance concerns, ensuring a smooth and reliable experience for your Raspberry Pi and IoT devices.
Monitoring Raspberry Pi System Metrics
Tools like htop let you check CPU, memory, and process usage in real time via SSH. However, if you want quick or programmatic access to these metrics without manually logging in, you can run an API (e.g., FastAPI + psutil) to serve system stats (CPU, RAM, disk usage) over HTTP. By tunneling this local API through Pinggy, you can securely reach it from anywhere—no NAT configurations required.
See our Remote System Monitoring with FastAPI and Pinggy article for a ready-to-use example. The corresponding source code is available on
GitHub. Once your app is running (typically on port 8000), create a tunnel:
ssh -p 443 -R0:localhost:8000 qr@free.pinggy.io
Pinggy provides a public URL—anyone with that URL (and any auth you set up) can view metrics remotely. For interactive CLI monitoring, stick to htop via SSH; for automated or on-the-fly checks, use the FastAPI endpoints.
Tips
Use Pinggy Dashboard to manage your tunnels, monitor traffic, and access logs.
You can explore Pinggy’s pricing details here to find the most suitable plan for your needs and budget.
Conclusion
In this blog, we explored how to securely connect to your Raspberry Pi or IoT device remotely over the internet without the need for port forwarding. We discussed methods such as SSH, VNC, and RDP, and discovered how to use Pinggy.io to create secure tunnels for seamless remote management. By leveraging these techniques, you can enhance your IoT device control and management from anywhere in the world, ensuring optimal performance and security.