Self-hosting Obsidian
Updated on Mar 5, 2026 · 11 mins read
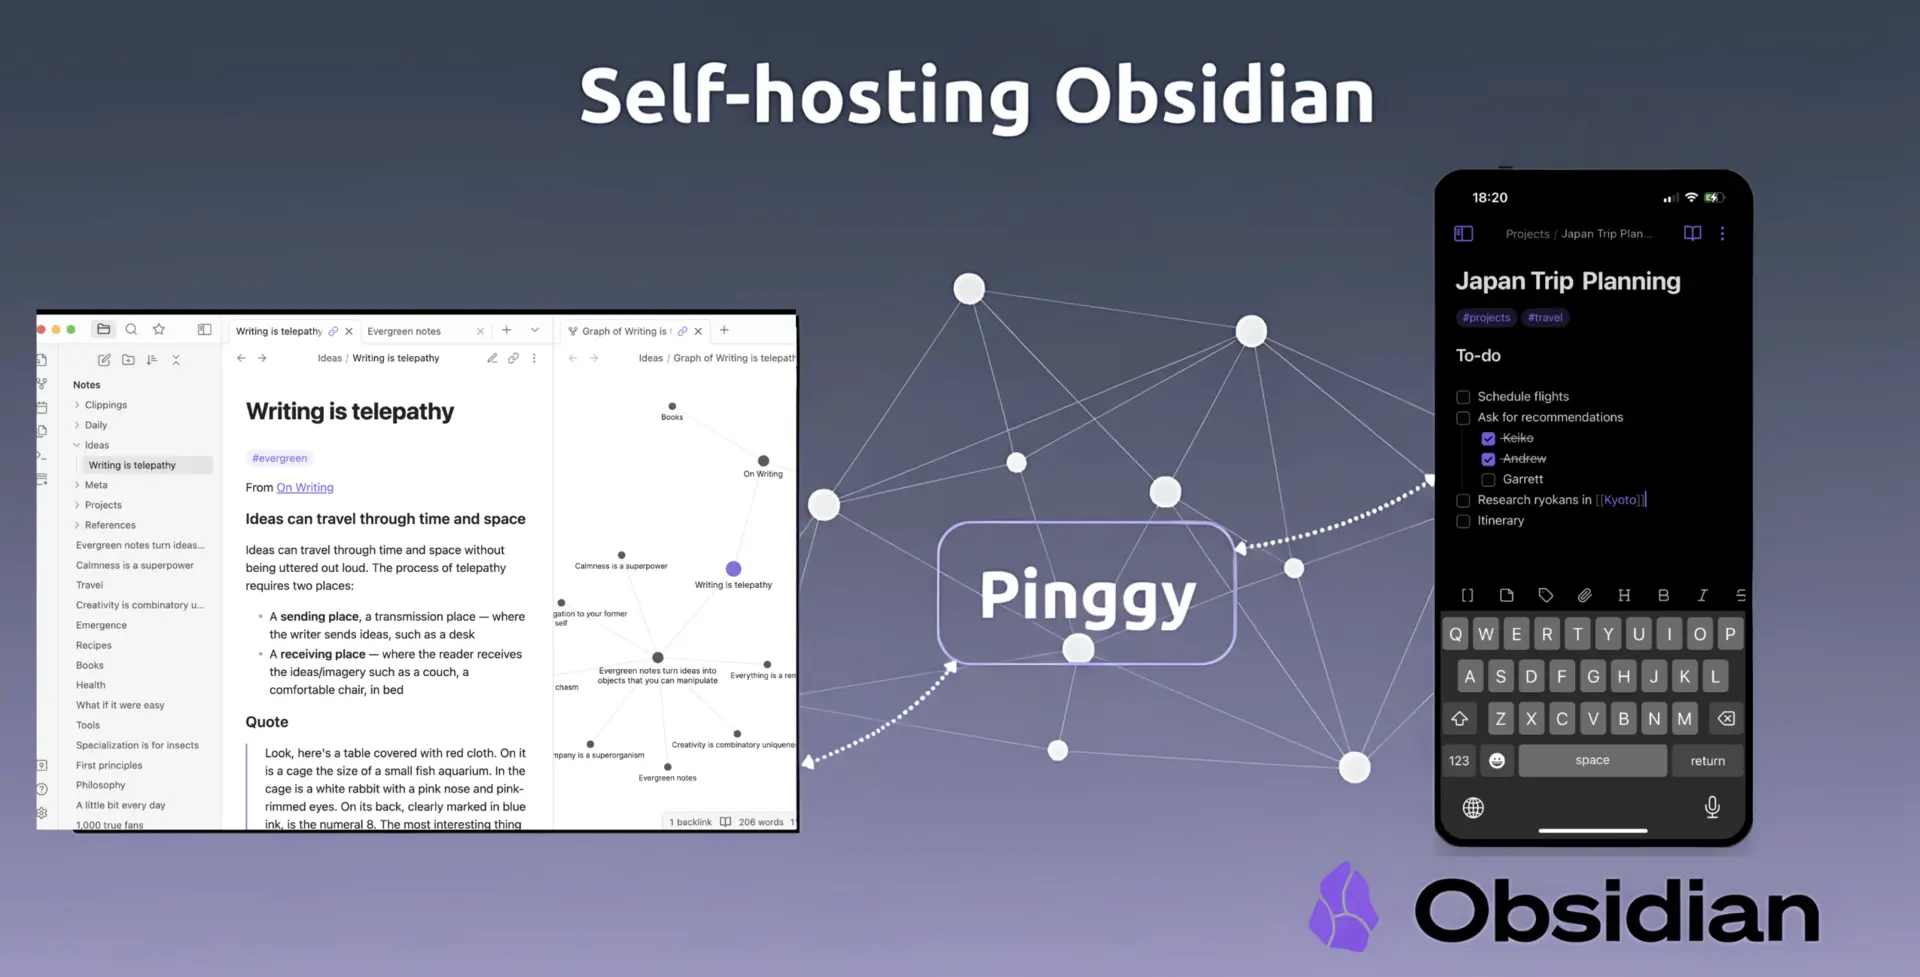
Obsidian has become one of the most popular note-taking apps for developers, writers, and knowledge workers but its official Sync service costs $5/month. If you’d rather keep that money and own your data entirely, self-hosting is the way to go. In this guide, I’ll show you how to set up your own Obsidian sync server using Docker, CouchDB for real-time replication, and Pinggy for secure remote access all at virtually zero cost.
What makes this approach powerful is the Obsidian LiveSync plugin, which delivers instant, conflict-free synchronization that rivals (and often outperforms) the paid service. I’ve stress-tested this setup with large vault reorganizations, simultaneous edits from multiple devices, and heavy daily use it handles everything without breaking a sweat. Because the entire stack runs inside Docker containers, you get a portable, reproducible setup that works identically on Windows, macOS, and Linux. Follow along, and you’ll have your own private sync server up and running in under an hour.
Summary
What You’ll Build:
- Self-hosted CouchDB database for storing your notes securely
- Docker containers for easy deployment and management across any OS
- Pinggy tunnel for secure remote access without port forwarding hassles
- Real-time sync across all your devices using the LiveSync plugin
- Complete data ownership with zero monthly fees (save $48/year!)
Prerequisites:
- Docker installed on your system (Windows, macOS, or Linux)
- Basic command line knowledge (copy/paste level)
- Obsidian installed on your devices
Why I Built My Own Sync Server
My Obsidian vault holds thousands of interconnected notes project documentation, code snippets, research material, journal entries, and everything in between. When your entire second brain lives inside one app, trusting a third-party cloud with that data feels risky. The $5/month Obsidian Sync subscription wasn’t just about cost; it was about control. After experiencing a couple of frustrating sync conflicts that resulted in lost edits, I decided to take matters into my own hands.
Here’s what pushed me to self-host:
- Data privacy: My vault contains sensitive client projects and personal notes that I’d rather keep off third-party servers
- Cost savings: $48/year may seem small, but a free alternative that works better is hard to ignore
- Deeper understanding: Building my own sync taught me how real-time database replication actually works under the hood
- Reliability on my terms: I control the uptime, the backups, and the performance no dependency on someone else’s infrastructure
- Flexibility: I can tweak every aspect of the setup to match my exact workflow
After evaluating several options from Git-based sync to Syncthing I landed on CouchDB paired with the Obsidian LiveSync plugin. Add Docker for containerization and Pinggy for secure tunneling, and you get a stack that’s lightweight, maintainable, and genuinely more reliable than most paid sync services.
What We’re Building
The architecture behind this self-hosted sync setup is straightforward yet powerful. Three core components work together: CouchDB serves as the real-time database engine its built-in replication protocol is specifically designed for synchronizing data across distributed systems, which makes it a perfect fit for note syncing. Docker wraps everything in containers, ensuring your setup behaves identically whether you’re running it on a Windows desktop, a Mac laptop, or a Linux server.
The LiveSync plugin acts as the bridge between Obsidian and CouchDB. It handles all the synchronization logic behind the scenes detecting changes, resolving conflicts intelligently, and pushing updates instantly to every connected device. Unlike Git-based sync solutions that require manual commits and often produce merge conflicts, LiveSync operates in real time with zero user intervention. Finally, Pinggy provides secure HTTPS tunneling so you can access your CouchDB instance from anywhere no port forwarding, no static IP, and no DNS configuration needed.
Prerequisites and System Requirements
The beauty of a Docker-based setup is that the system requirements are minimal. As long as your machine can run Docker, you’re good to go there’s no need for a powerful server or any special hardware.
You’ll need Docker installed on your system. Docker Desktop is the easiest option for Windows and macOS users, while Linux users can install Docker Engine directly from the official repository. If you already have Docker running for other projects, you’re one step ahead.
You’ll also need Obsidian installed on every device you plan to sync. The LiveSync plugin supports all platforms where Obsidian runs that includes desktop (Windows, macOS, Linux) as well as mobile (iOS and Android). This means your notes stay perfectly in sync whether you’re at your desk or on the go.
Step 1: Installing Docker
Docker is the foundation of our setup, providing containerization that makes deployment consistent across different operating systems. The installation process varies by platform, so I’ll cover all three major operating systems.
Windows Installation
Download Docker Desktop from docker.com and run the installer. You’ll need Windows 10 64-bit Pro, Enterprise, or Education (Build 19041 or higher), or Windows 11. The installer will enable WSL 2 if it’s not already active.
# Verify Docker installation
docker --version
docker-compose --version
After installation, Docker Desktop should show a green status indicator in your system tray. If you encounter issues, make sure virtualization is enabled in your BIOS settings.
macOS Installation
Download Docker Desktop for Mac from the official website. The installer works on both Intel and Apple Silicon Macs running macOS 10.15 or newer.
# Verify Docker installation
docker --version
docker-compose --version
Linux Installation
For Ubuntu/Debian systems, use the official Docker repository for the most up-to-date version:
# Update package index
sudo apt update

# Install prerequisites
sudo apt install apt-transport-https ca-certificates curl gnupg lsb-release

# Add Docker's official GPG key
curl -fsSL https://download.docker.com/linux/ubuntu/gpg | sudo gpg --dearmor -o /usr/share/keyrings/docker-archive-keyring.gpg

# Add Docker repository
echo "deb [arch=$(dpkg --print-architecture) signed-by=/usr/share/keyrings/docker-archive-keyring.gpg] https://download.docker.com/linux/ubuntu $(lsb_release -cs) stable" | sudo tee /etc/apt/sources.list.d/docker.list > /dev/null

# Install Docker
sudo apt update
sudo apt install docker-ce docker-ce-cli containerd.io docker-compose-plugin

# Add your user to docker group (requires logout/login)
sudo usermod -aG docker $USER

# Verify installation
docker --version
docker compose version
Step 2: Setting Up CouchDB with Docker
Now we’ll create our CouchDB instance using Docker. CouchDB is perfect for this use case because it’s designed for replication and handles the complex synchronization logic that makes LiveSync work so well.
Creating the Docker Compose Configuration
Create a new directory for your Obsidian sync server and set up the Docker Compose configuration:
Windows (PowerShell):
# Create project directory
mkdir obsidian-sync
cd obsidian-sync

# Create docker-compose.yml
New-Item -ItemType File -Name "docker-compose.yml"
macOS/Linux:
# Create project directory
mkdir obsidian-sync
cd obsidian-sync

# Create docker-compose.yml
touch docker-compose.yml
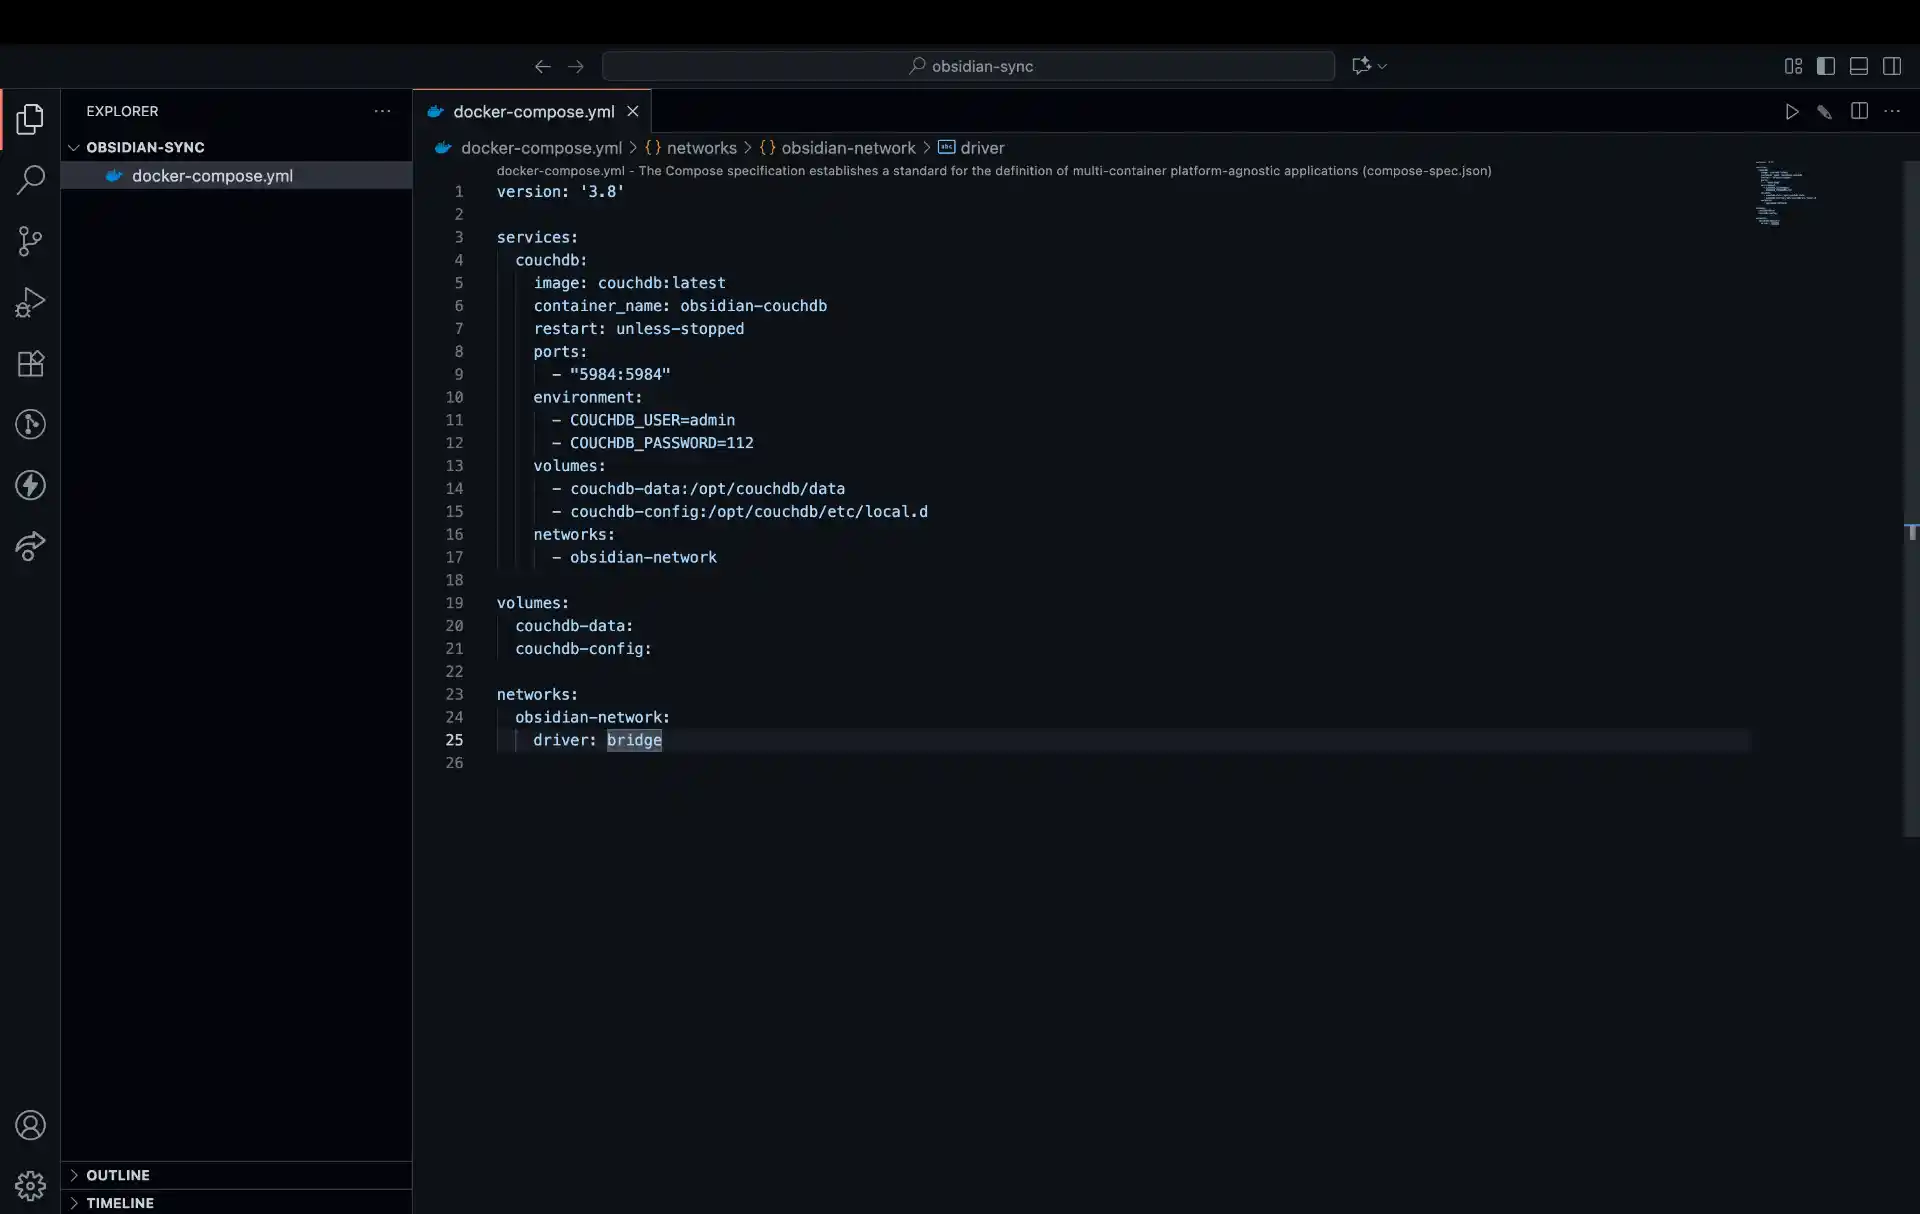
Now edit the docker-compose.yml file with your preferred text editor and add the following configuration:
version: '3.8'

services:
  couchdb:
    image: couchdb:latest
    container_name: couchdb-for-ols
    user: 5984:5984
    environment:
      - COUCHDB_USER=admin #Please change as you like.
      - COUCHDB_PASSWORD=112 #Please change as you like.
    volumes:
      - ./couchdb-data:/opt/couchdb/data
      - ./couchdb-etc:/opt/couchdb/etc/local.d
    ports:
      - 5984:5984
    restart: unless-stopped

volumes:
  couchdb-data:
  couchdb-config:

networks:
  obsidian-network:
    driver: bridge
Replace the default password (112 in the example above) with a strong, secure password. This will be your CouchDB admin password, so make it both secure and memorable.
Starting CouchDB
Launch your CouchDB container using Docker Compose:
All Platforms:
# Start CouchDB in detached mode
docker compose up -d

# Check if container is running
docker compose ps

# View logs if needed
docker compose logs couchdb
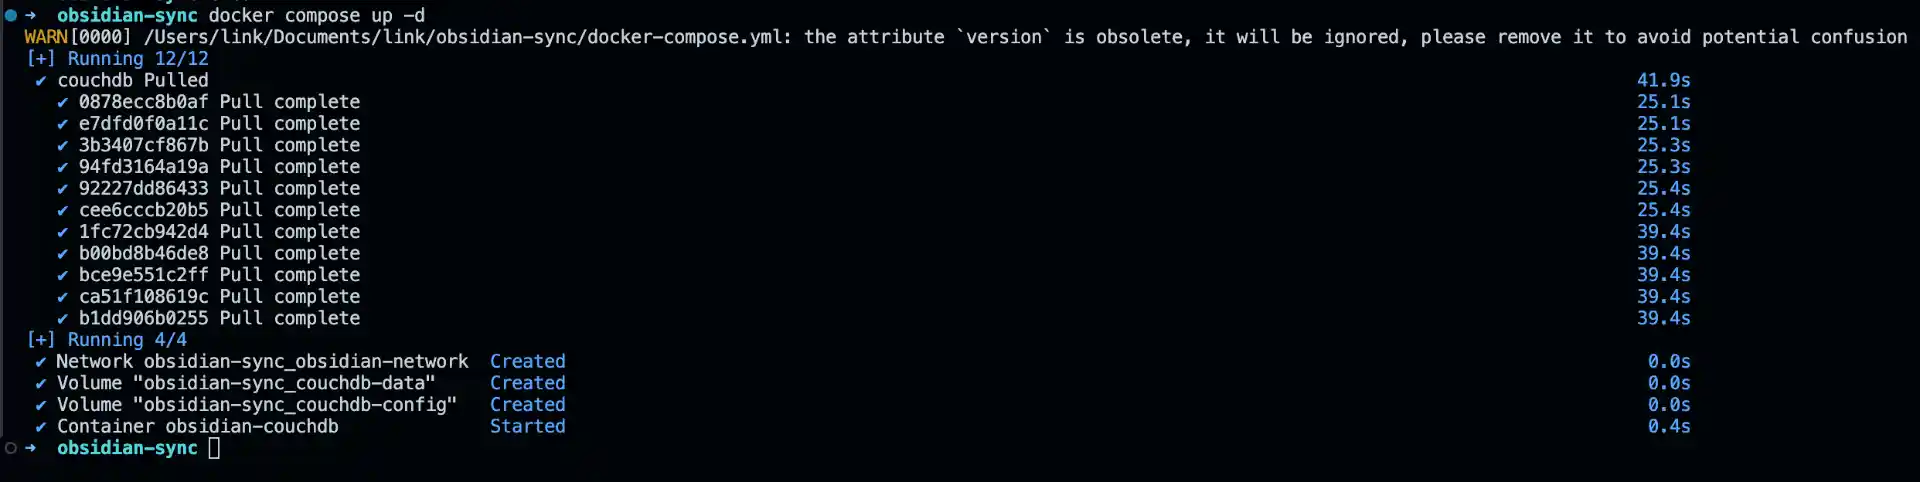
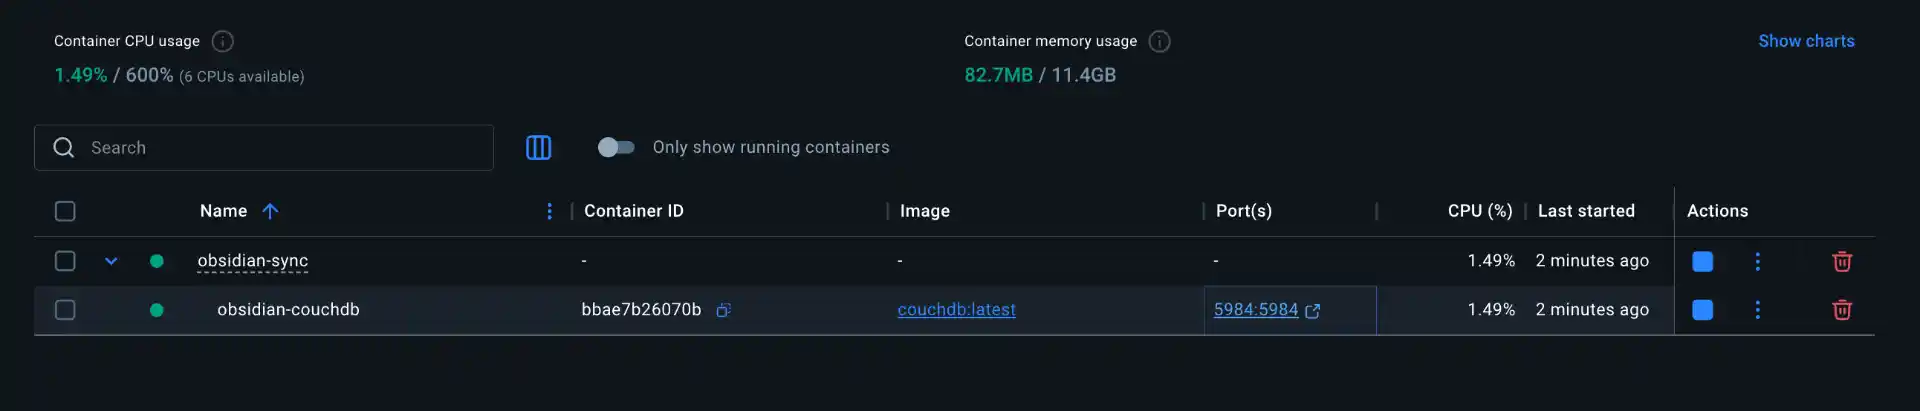
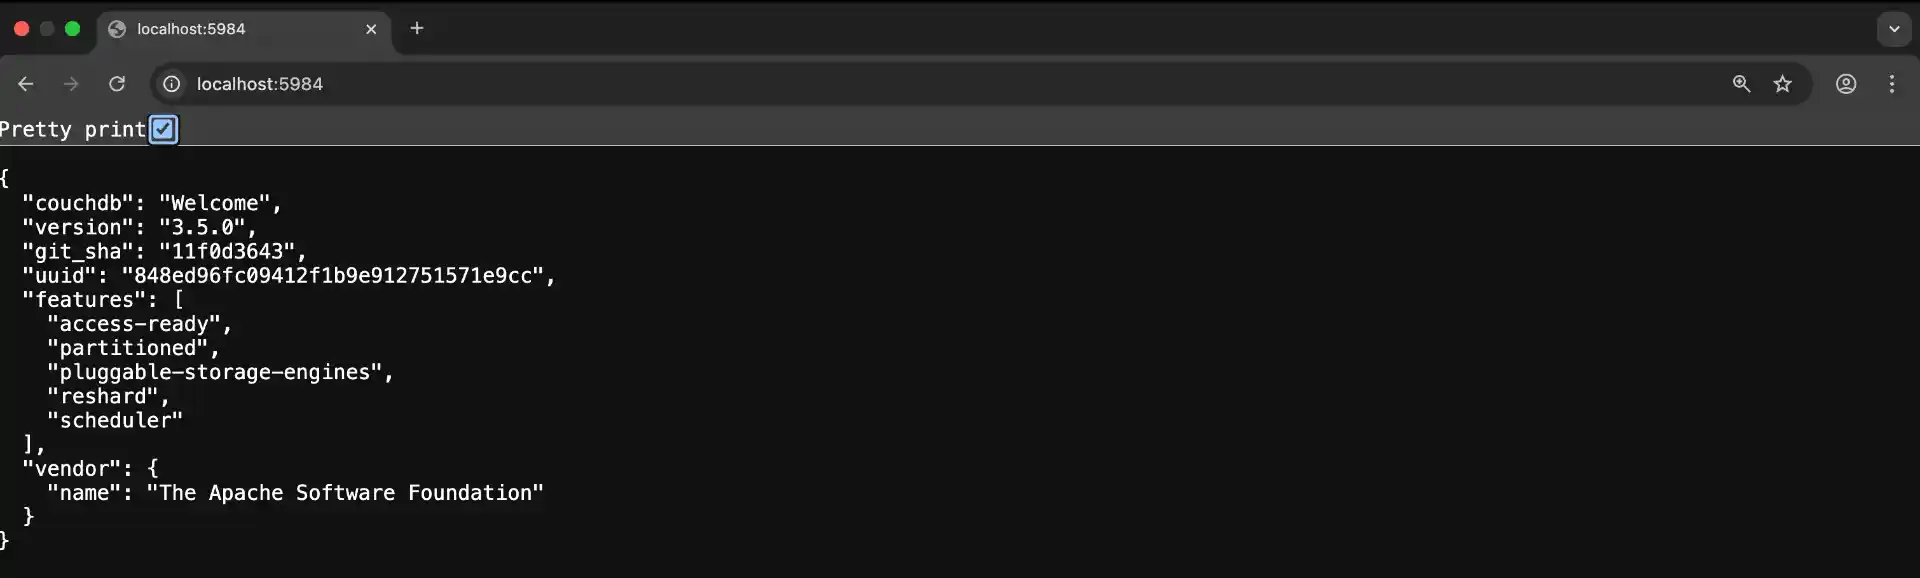
After a few moments, CouchDB should be running and accessible at http://localhost:5984. You can verify this by opening the URL in your browser – you should see a JSON response welcoming you to CouchDB.
Step 3: Configuring CouchDB
With CouchDB running, we need to set it up for use with Obsidian LiveSync. This involves creating a database and configuring user permissions.
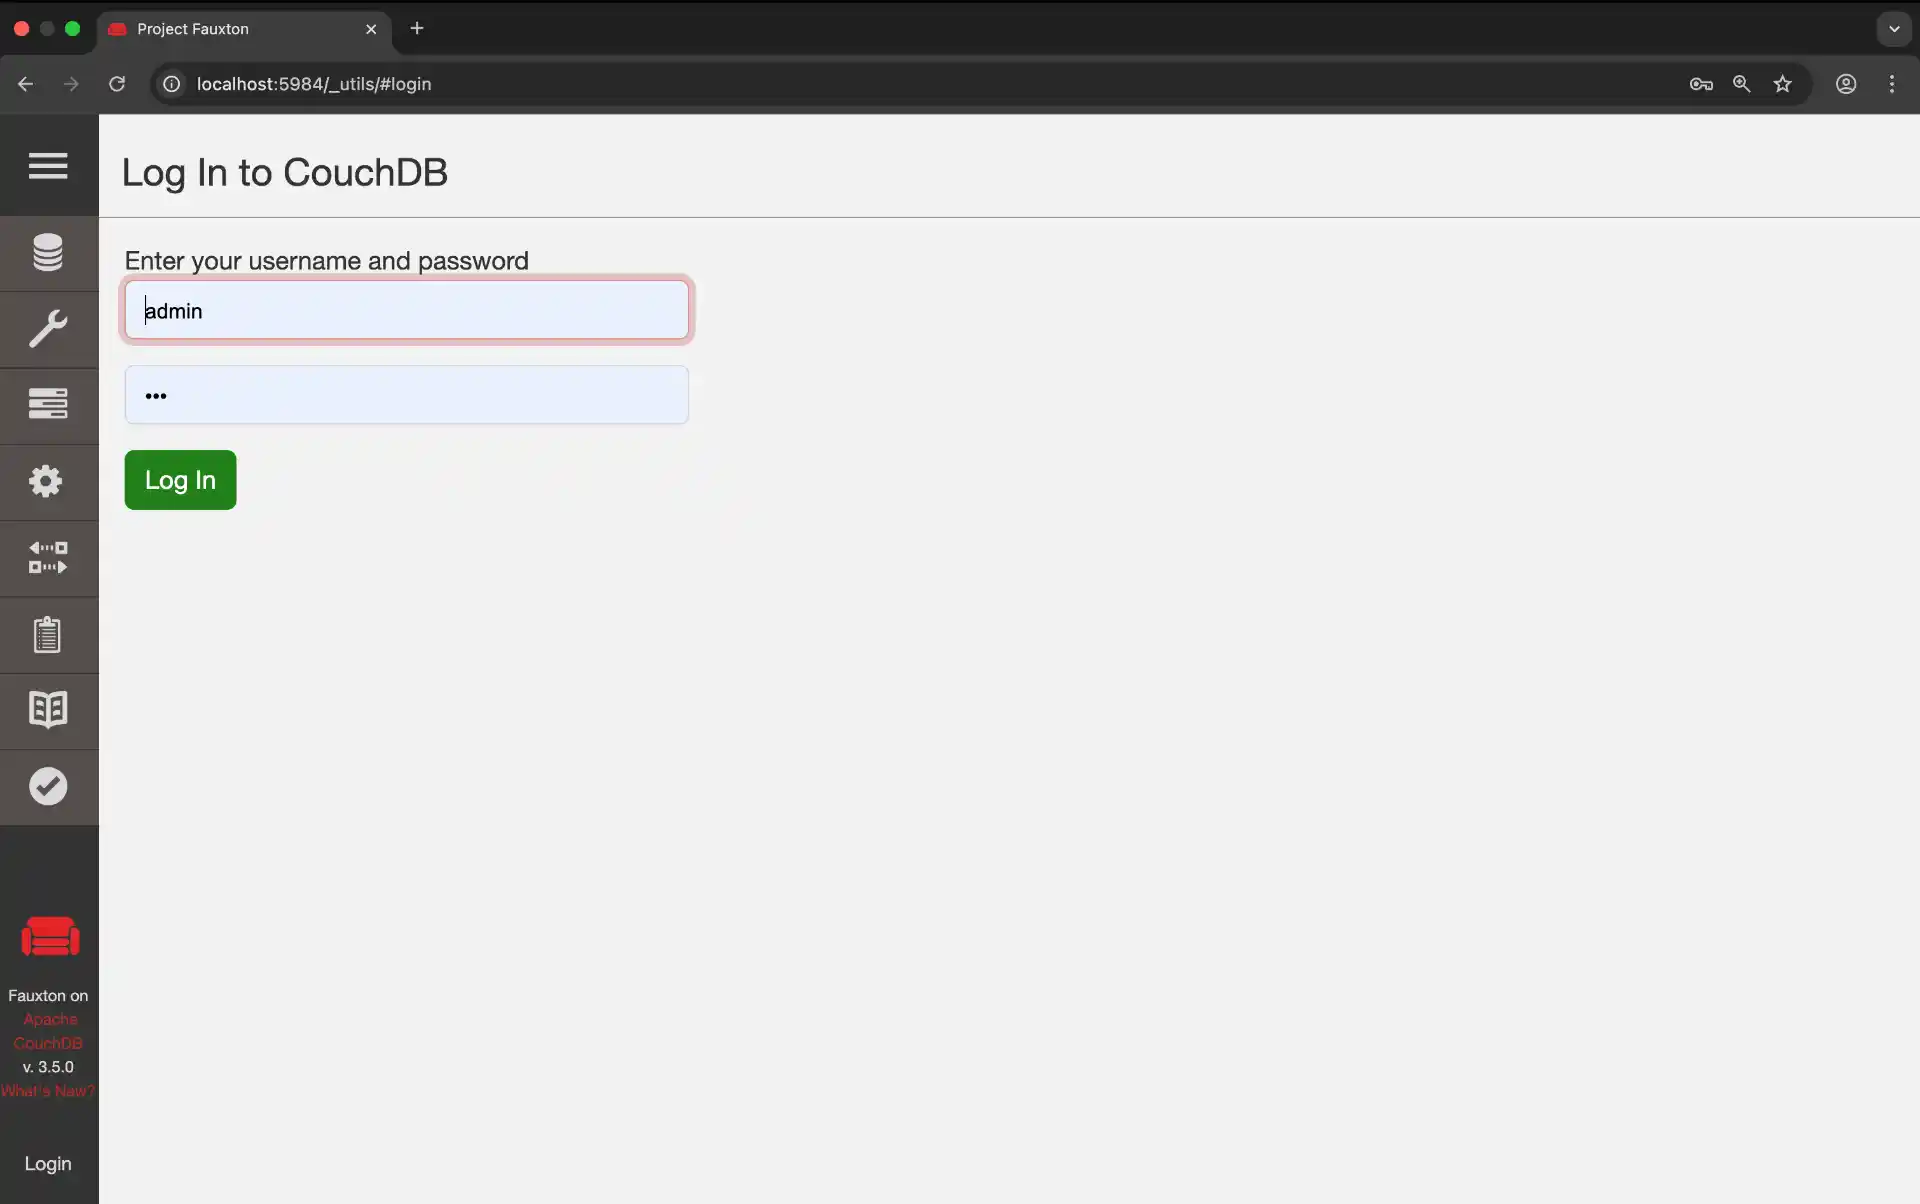
Initial CouchDB Setup
Open your browser and navigate to http://localhost:5984/_utils to access the CouchDB admin interface. Log in using the credentials you specified in the Docker Compose file (username: admin, password: your chosen password).
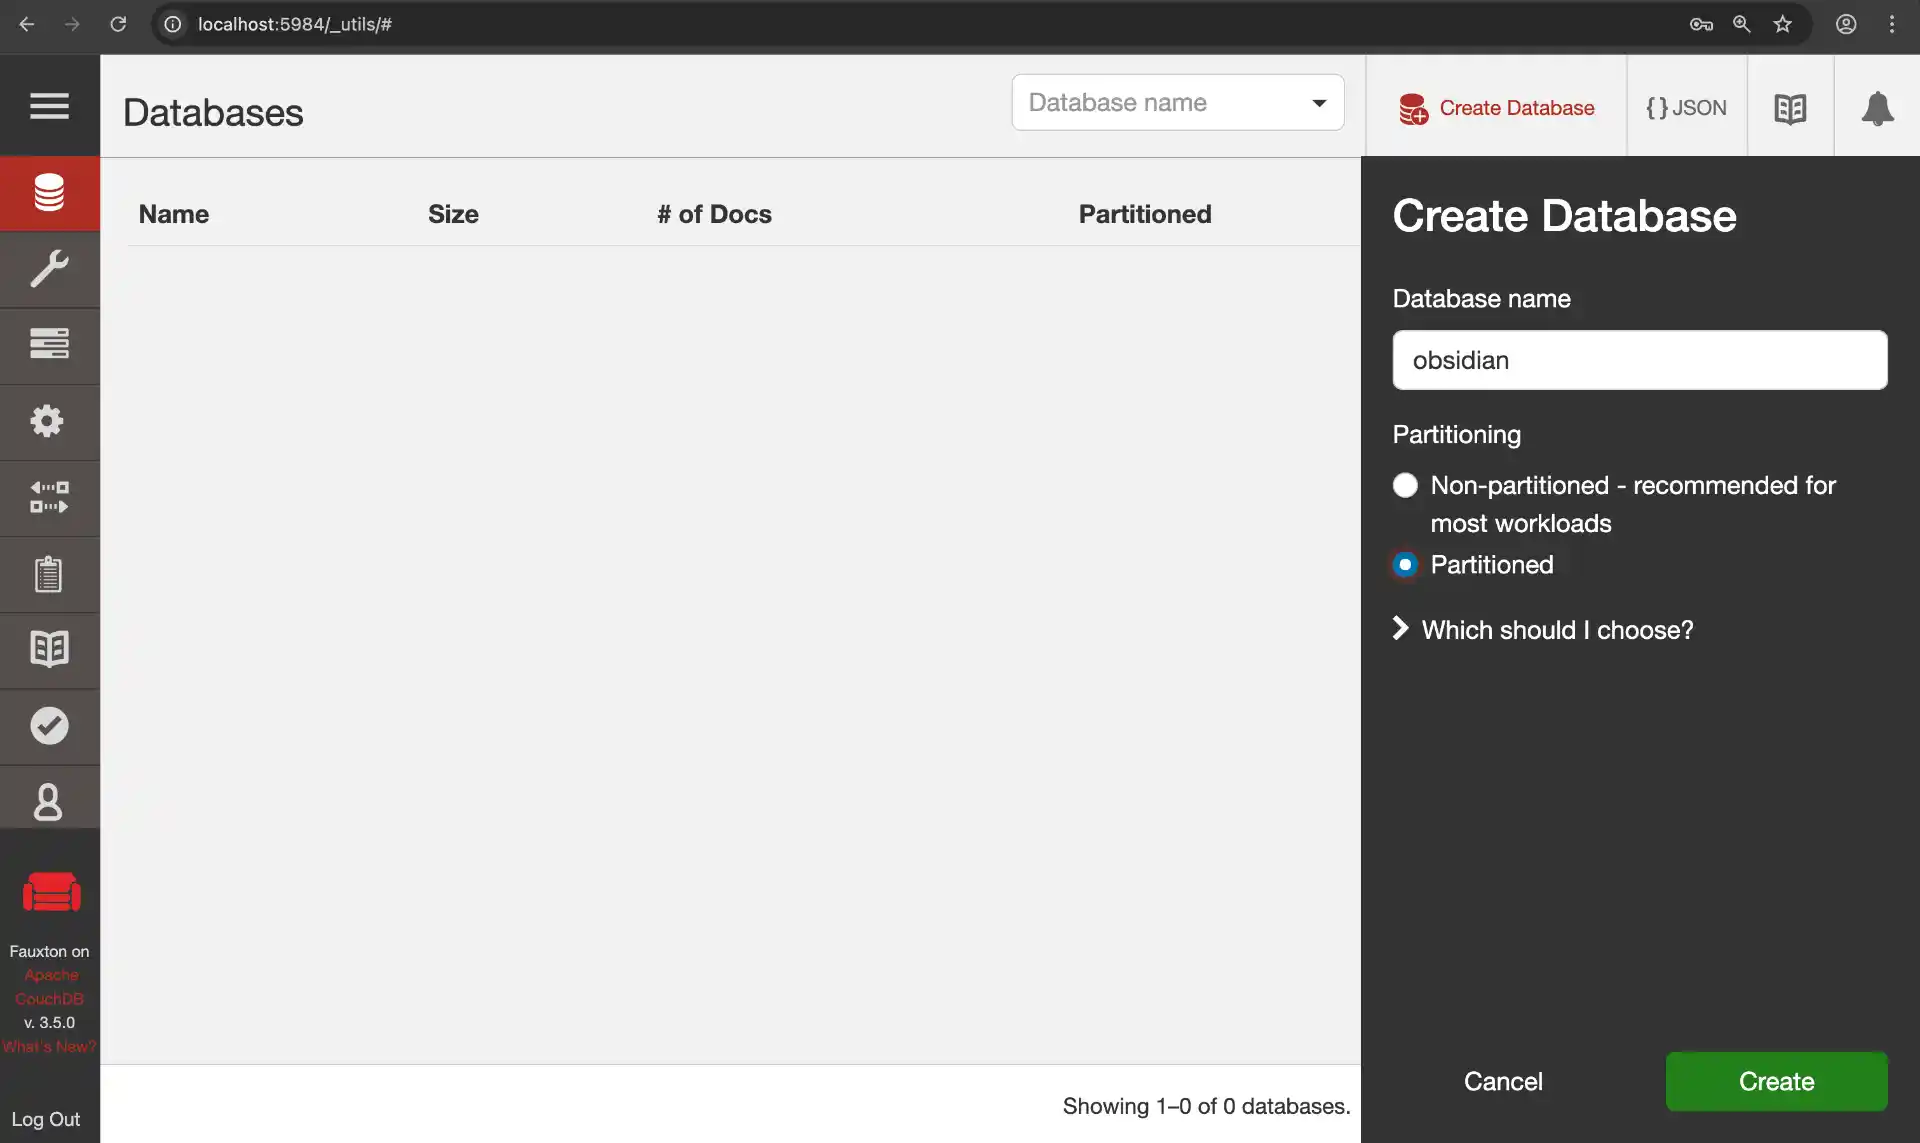
Creating the Database
In the CouchDB admin interface:
- Click “Create Database” in the sidebar
- Name your database
obsidian(or any name you prefer) - Leave “Partitioned” unchecked
- Click “Create”
Configuring Database Permissions
Now we need to give our new user access to the obsidian database:
- Navigate to your
obsidiandatabase - Click on “Permissions” in the sidebar
- Under “Members”, add
obsidian_userto both “Names” fields (for read and write access) - Click “Save”
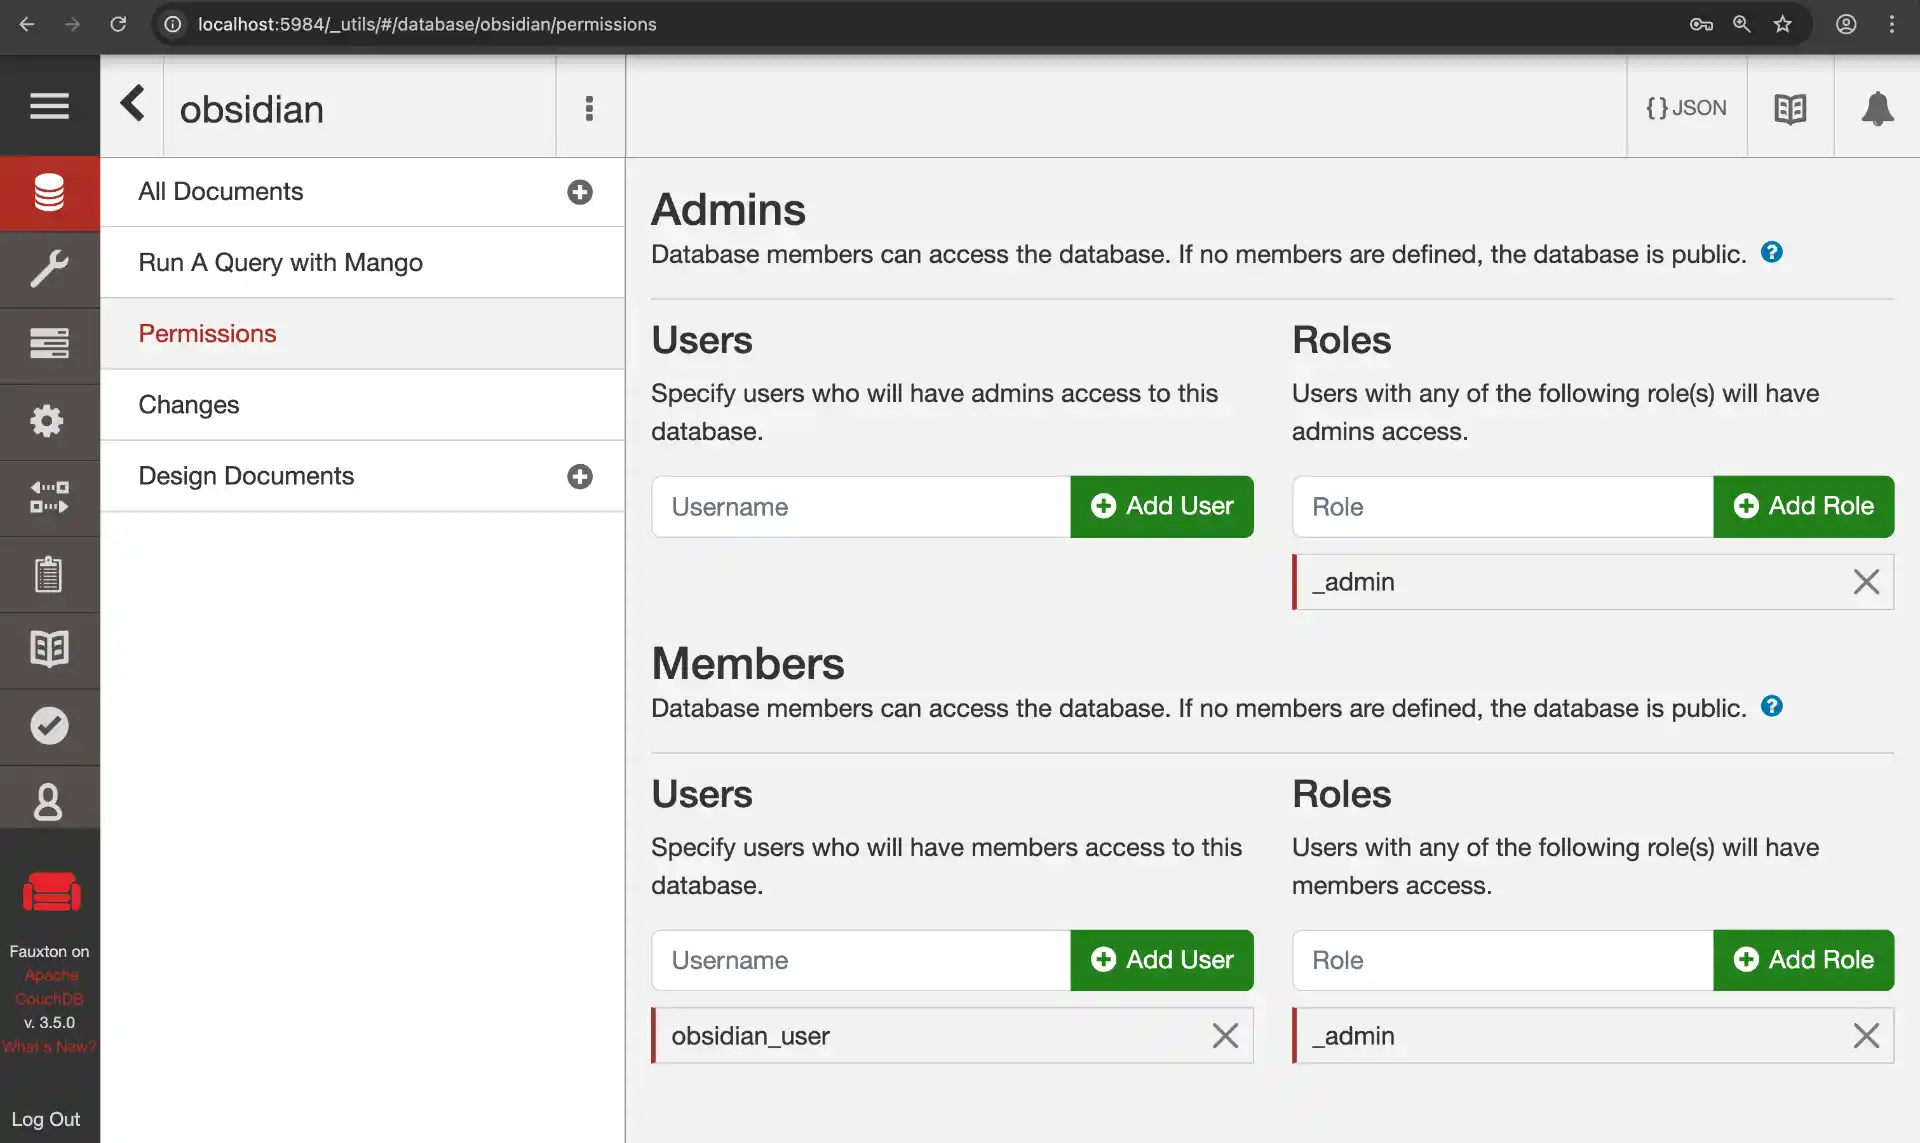
Your CouchDB instance is now ready for Obsidian LiveSync!
Step 4: Setting Up Pinggy Tunnel for Remote Access
Now that CouchDB is running locally, we need a way to access it from outside your home network. Traditional approaches like port forwarding or dynamic DNS are tedious to configure and come with security risks. Instead, we’ll use Pinggy to create an encrypted tunnel that securely exposes your CouchDB instance to the internet.
What makes Pinggy ideal for this use case is that there’s nothing to install it works entirely over SSH, which comes pre-installed on every modern operating system. You run a single command, and Pinggy gives you a public HTTPS URL that routes traffic directly to your local CouchDB server.
Note: This tunnel setup requires Pinggy Pro.
Creating the Tunnel
Start a Pinggy tunnel to expose your CouchDB instance securely with just one command:
ssh -p 443 -R0:localhost:5984 free.pinggy.io
That’s it! Pinggy will provide you with a public URL (something like https://abc123.a.pinggy.io) that securely tunnels to your local CouchDB instance. This URL will work from anywhere on the internet, allowing you to sync your Obsidian notes from any device.
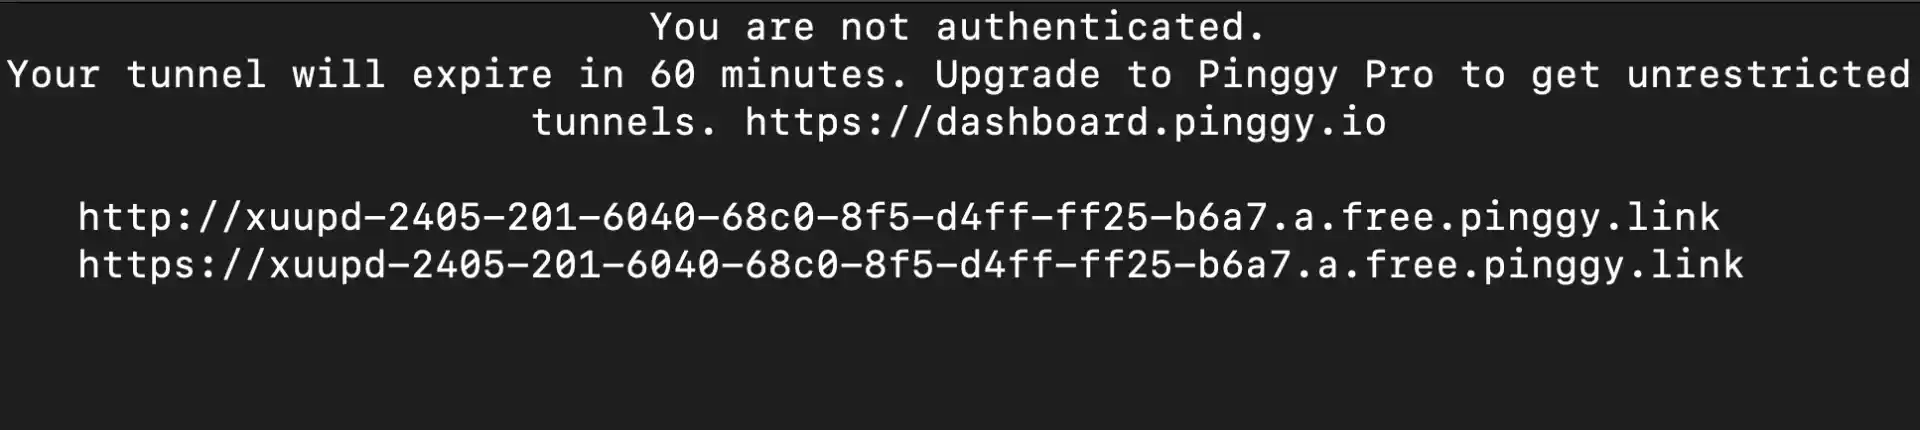
The tunnel will display something like this:
You can access local server via following URL(s):
https://abc123.a.pinggy.io
Copy this URL - you’ll need it for configuring Obsidian LiveSync.
Step 5: Installing Obsidian and Configuring LiveSync
Now comes the exciting part – downloading Obsidian, setting it up, and connecting it to your self-hosted CouchDB instance using the LiveSync plugin.
Downloading and Installing Obsidian
First, let’s get Obsidian installed on your system. Obsidian is available for all major platforms and is completely free to use.
Windows:
- Visit obsidian.md
- Click “Download for Windows”
- Run the downloaded installer (
Obsidian.Setup.exe) - Follow the installation wizard
- Launch Obsidian from your Start menu or desktop shortcut
macOS:
- Visit obsidian.md
- Click “Download for Mac”
- Open the downloaded DMG file
- Drag Obsidian to your Applications folder
- Launch Obsidian from Applications or Spotlight
Linux:
- Visit obsidian.md
- Choose your preferred format:
- AppImage (universal): Download and make executable
- Snap:
sudo snap install obsidian --classic - Flatpak:
flatpak install flathub md.obsidian.Obsidian - DEB/RPM: Download the appropriate package for your distribution
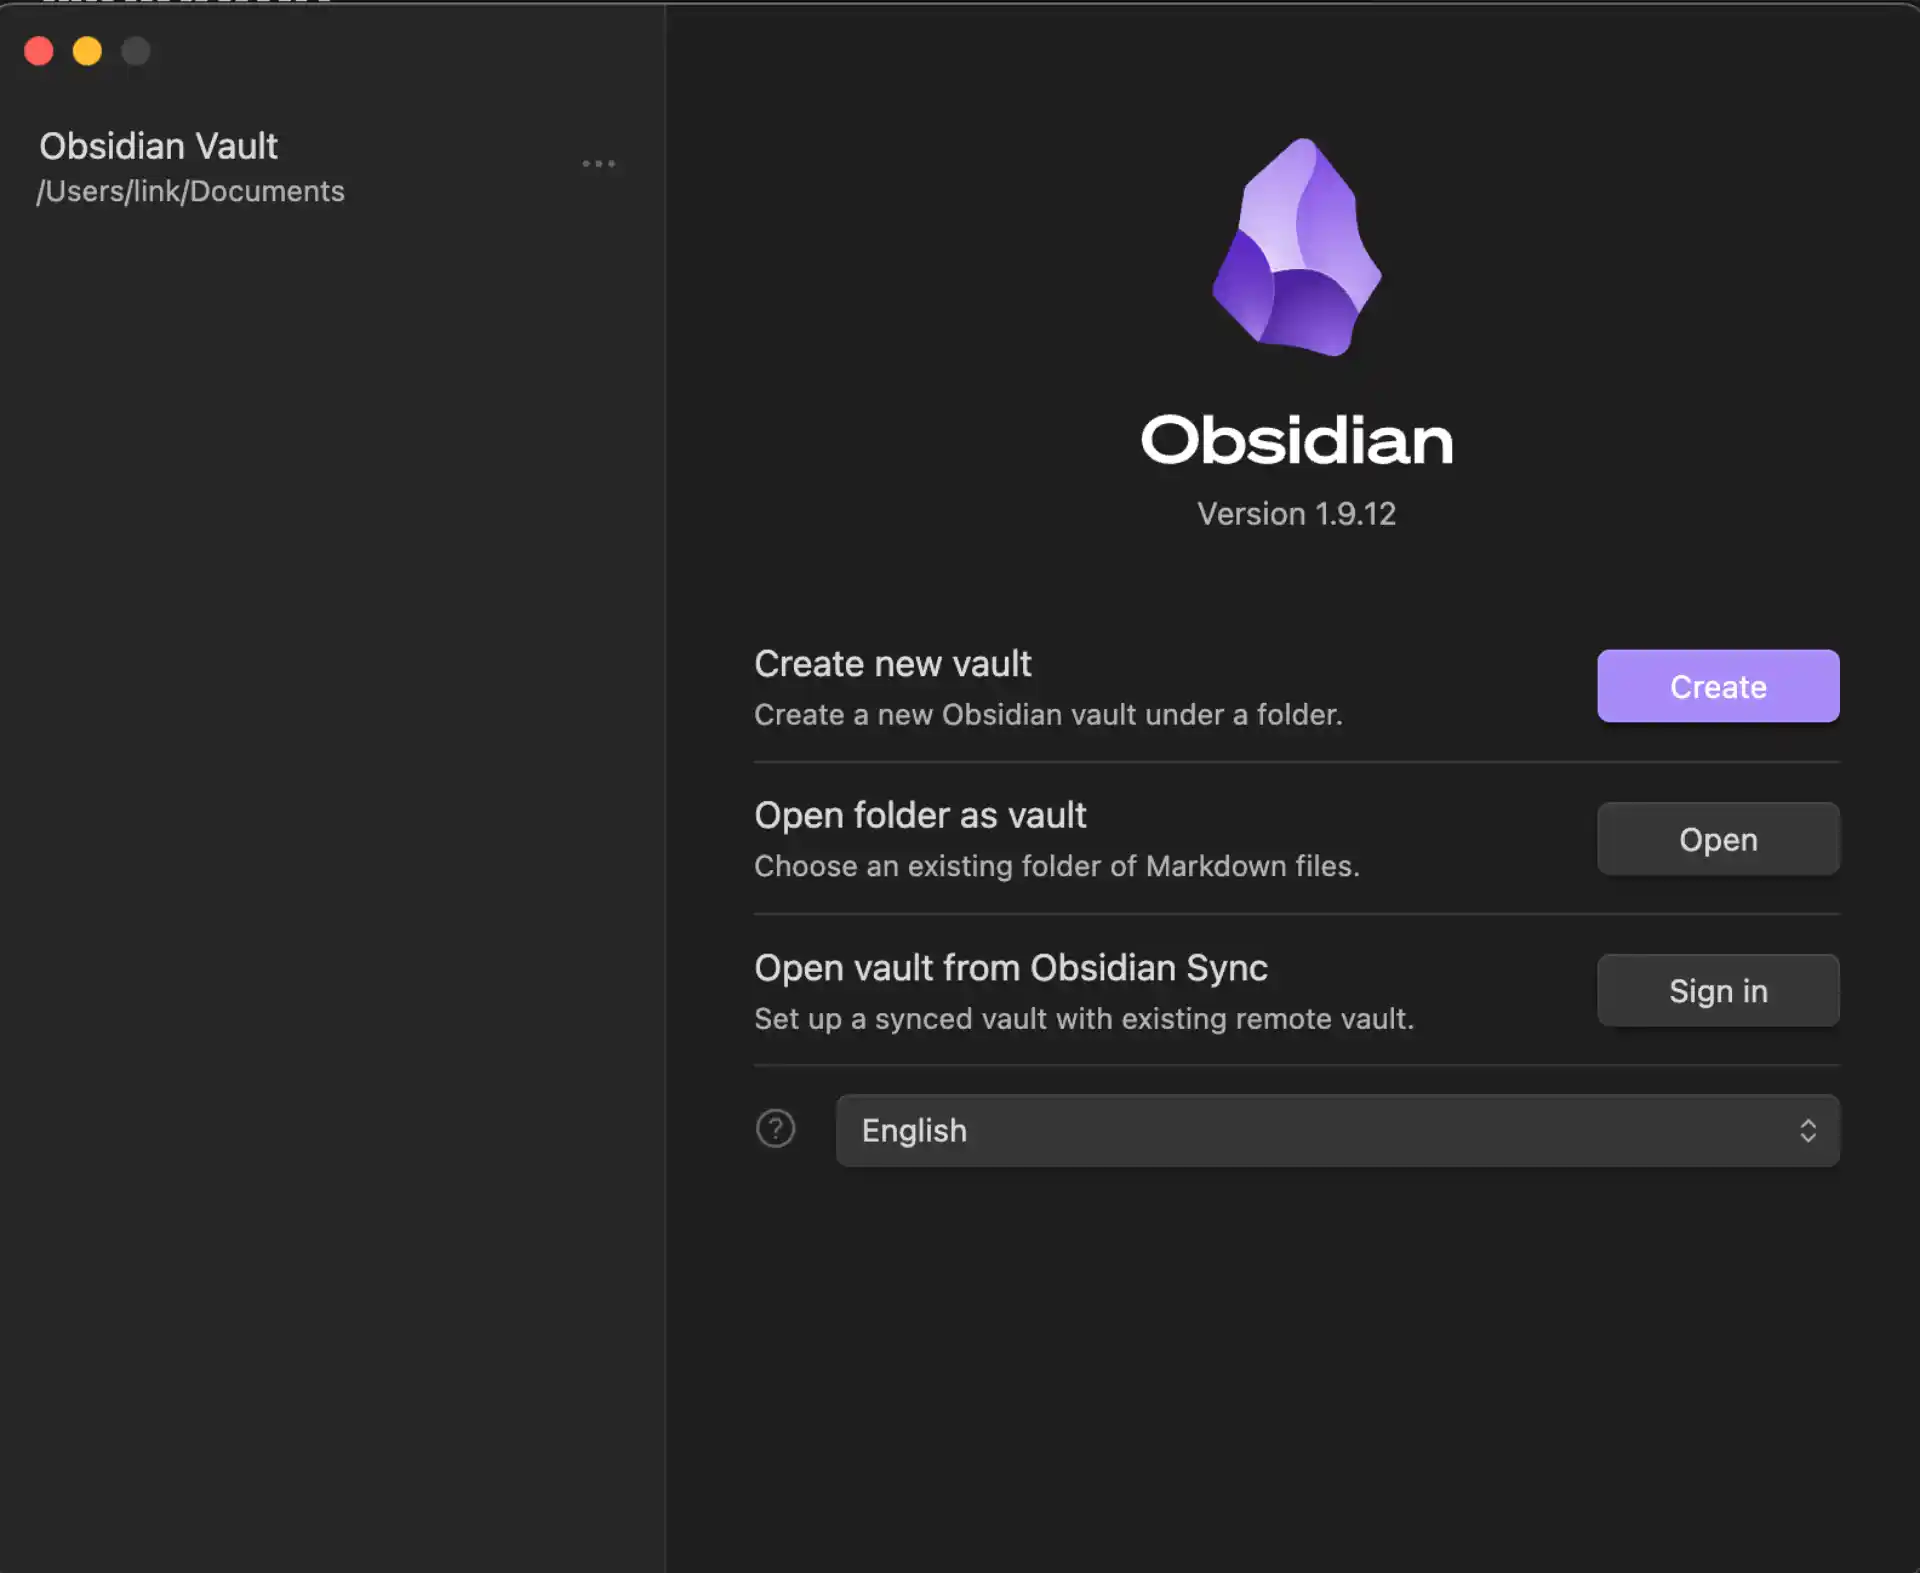
Initial Obsidian Setup
When you first launch Obsidian:
- Create or Open a Vault: Choose “Create new vault” if this is your first time
- Name your vault: Give it a meaningful name like “My Notes” or “Knowledge Base”
- Choose location: Select where you want to store your notes locally
- Skip the tutorial for now (we’ll set up sync first)
Installing the LiveSync Plugin
Now let’s install the plugin that will connect to your CouchDB server:
- Open Obsidian and click the Settings icon (gear icon) in the bottom-left
- In the left sidebar, navigate to “Community plugins”
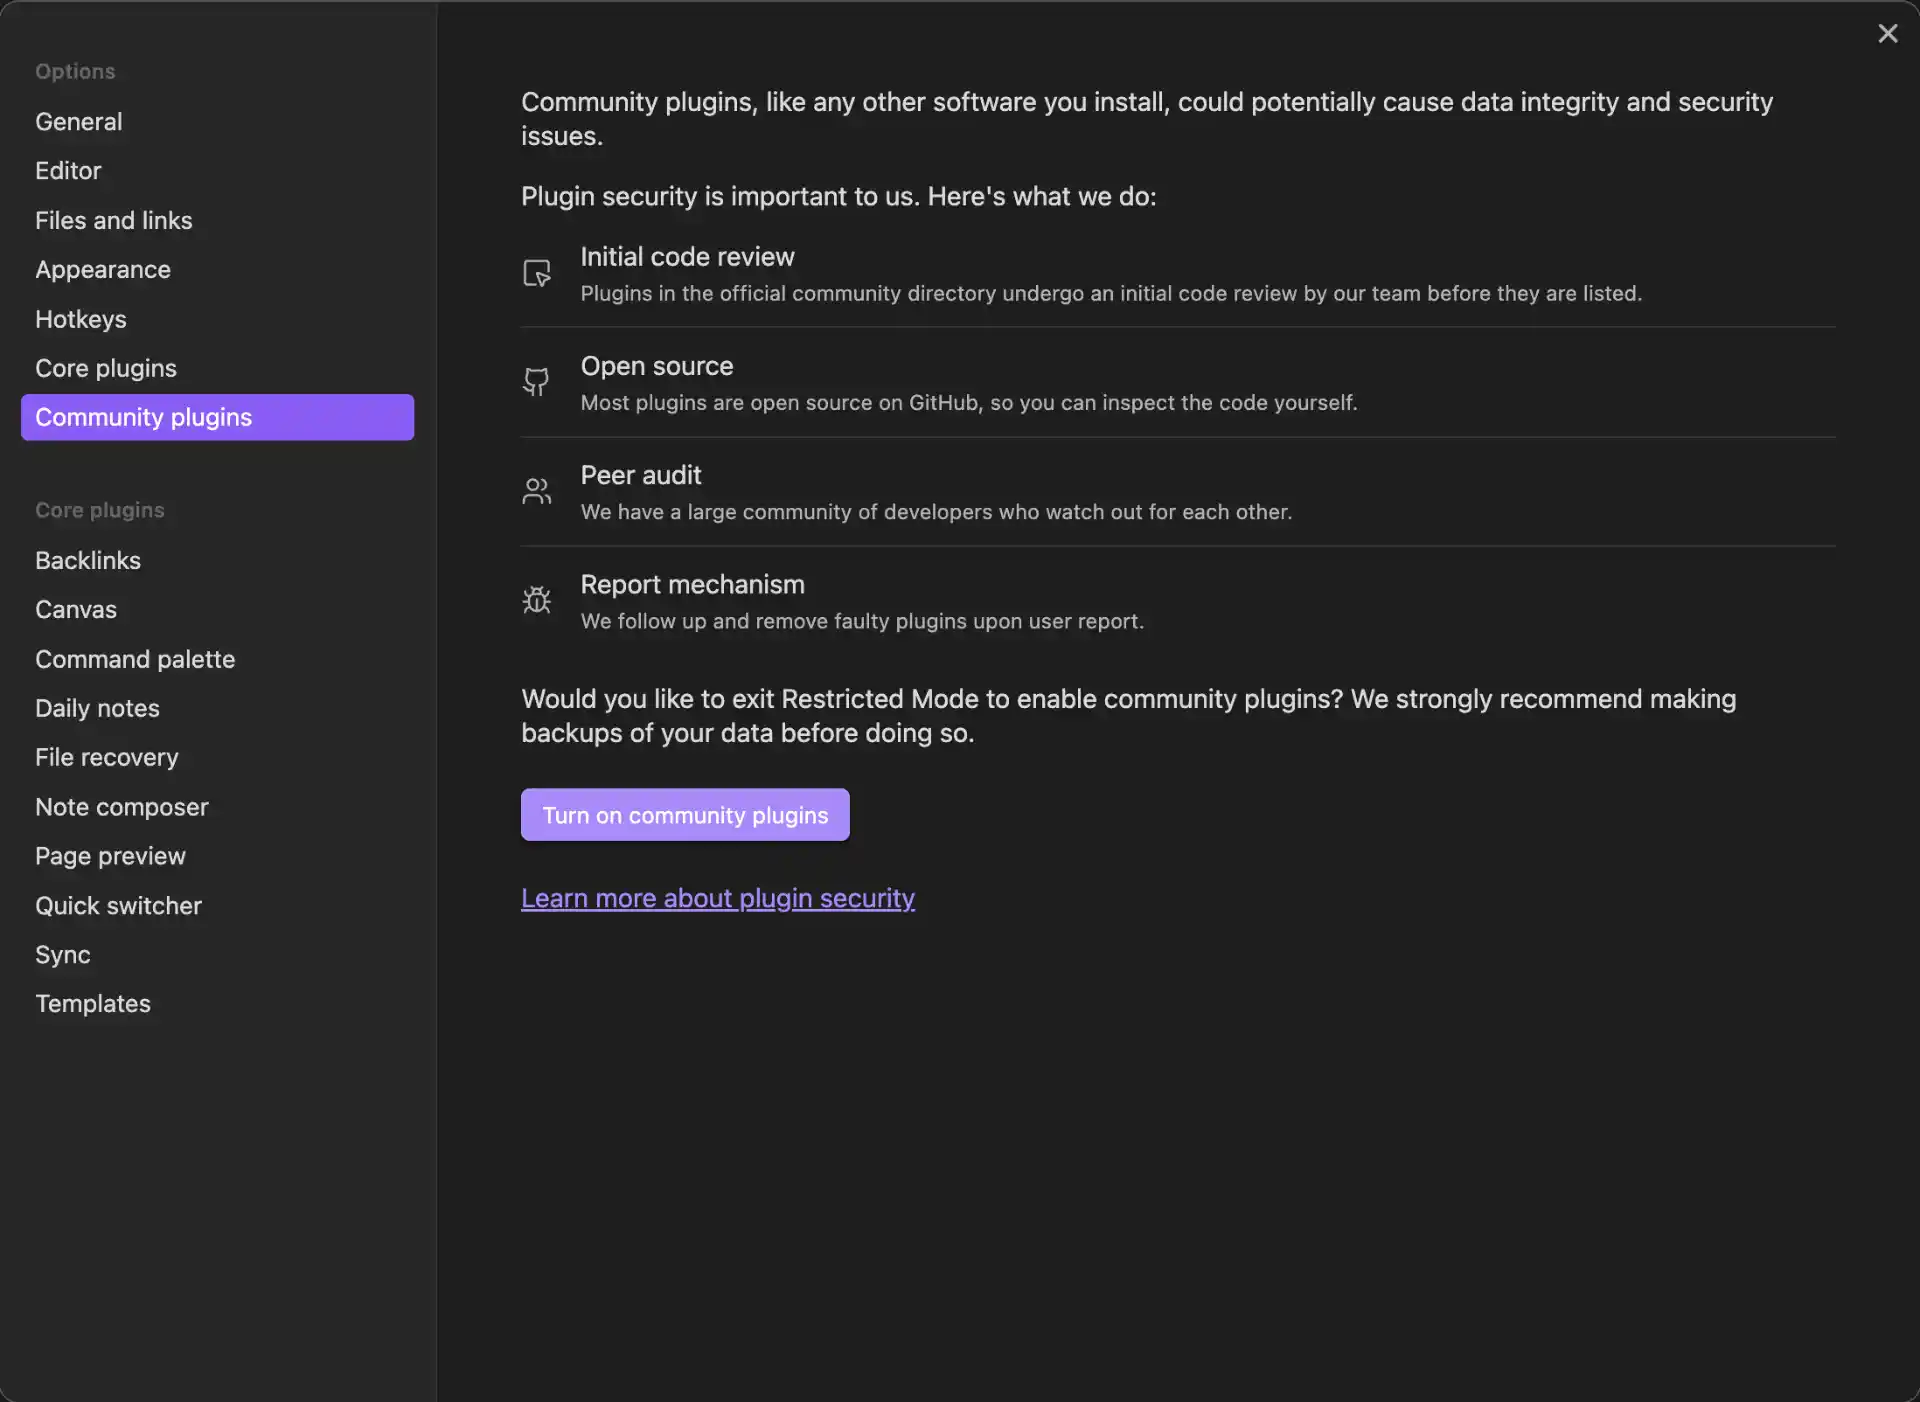
- If this is your first community plugin, click “Turn on community plugins”
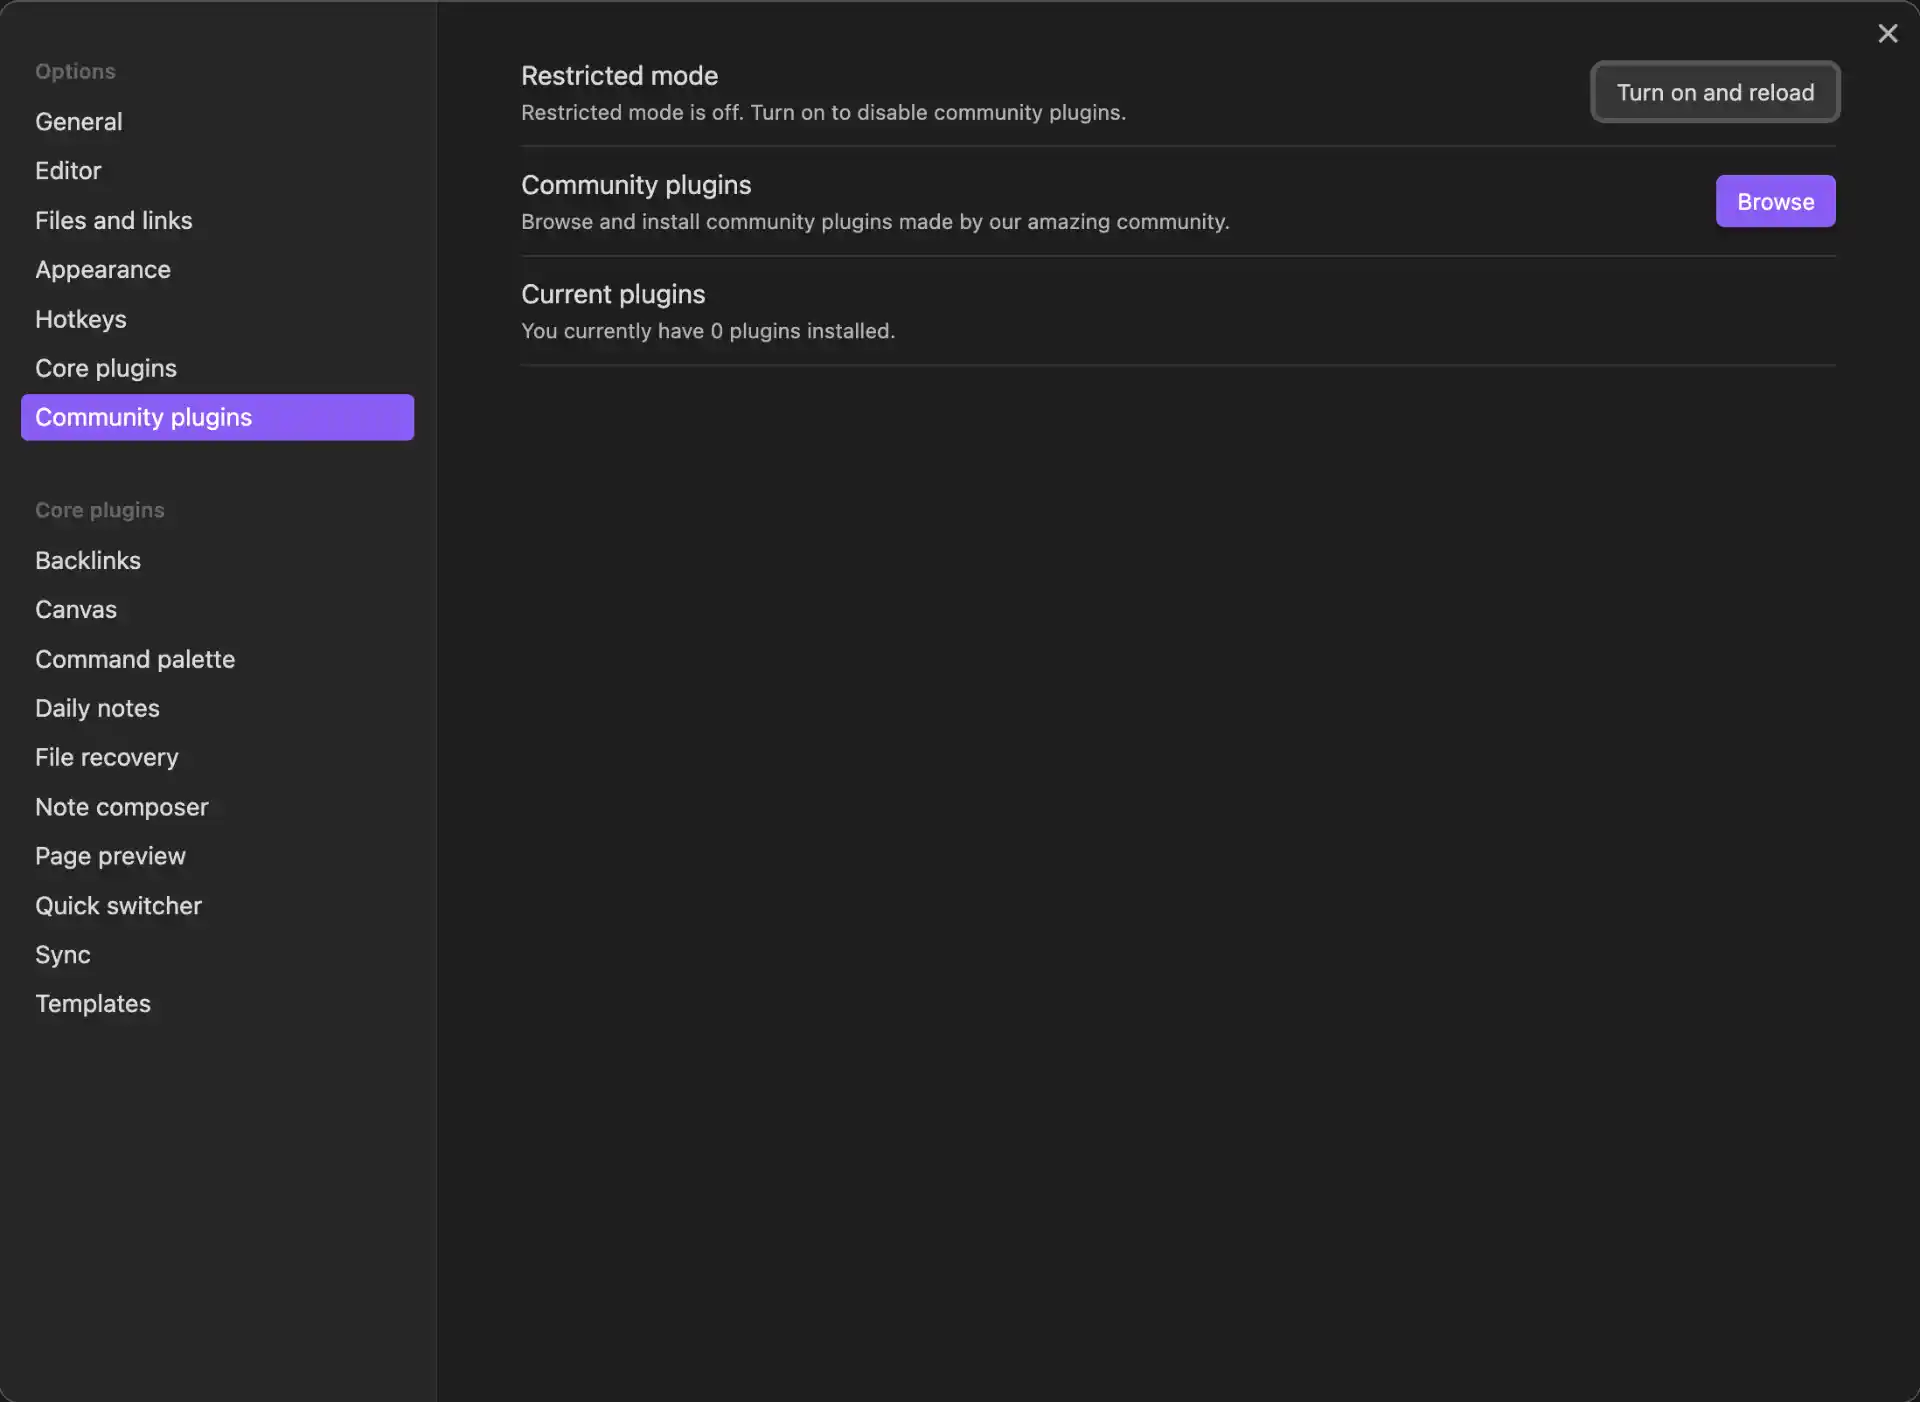
Click “Browse” to open the plugin marketplace
In the search bar, type “Self-hosted LiveSync”
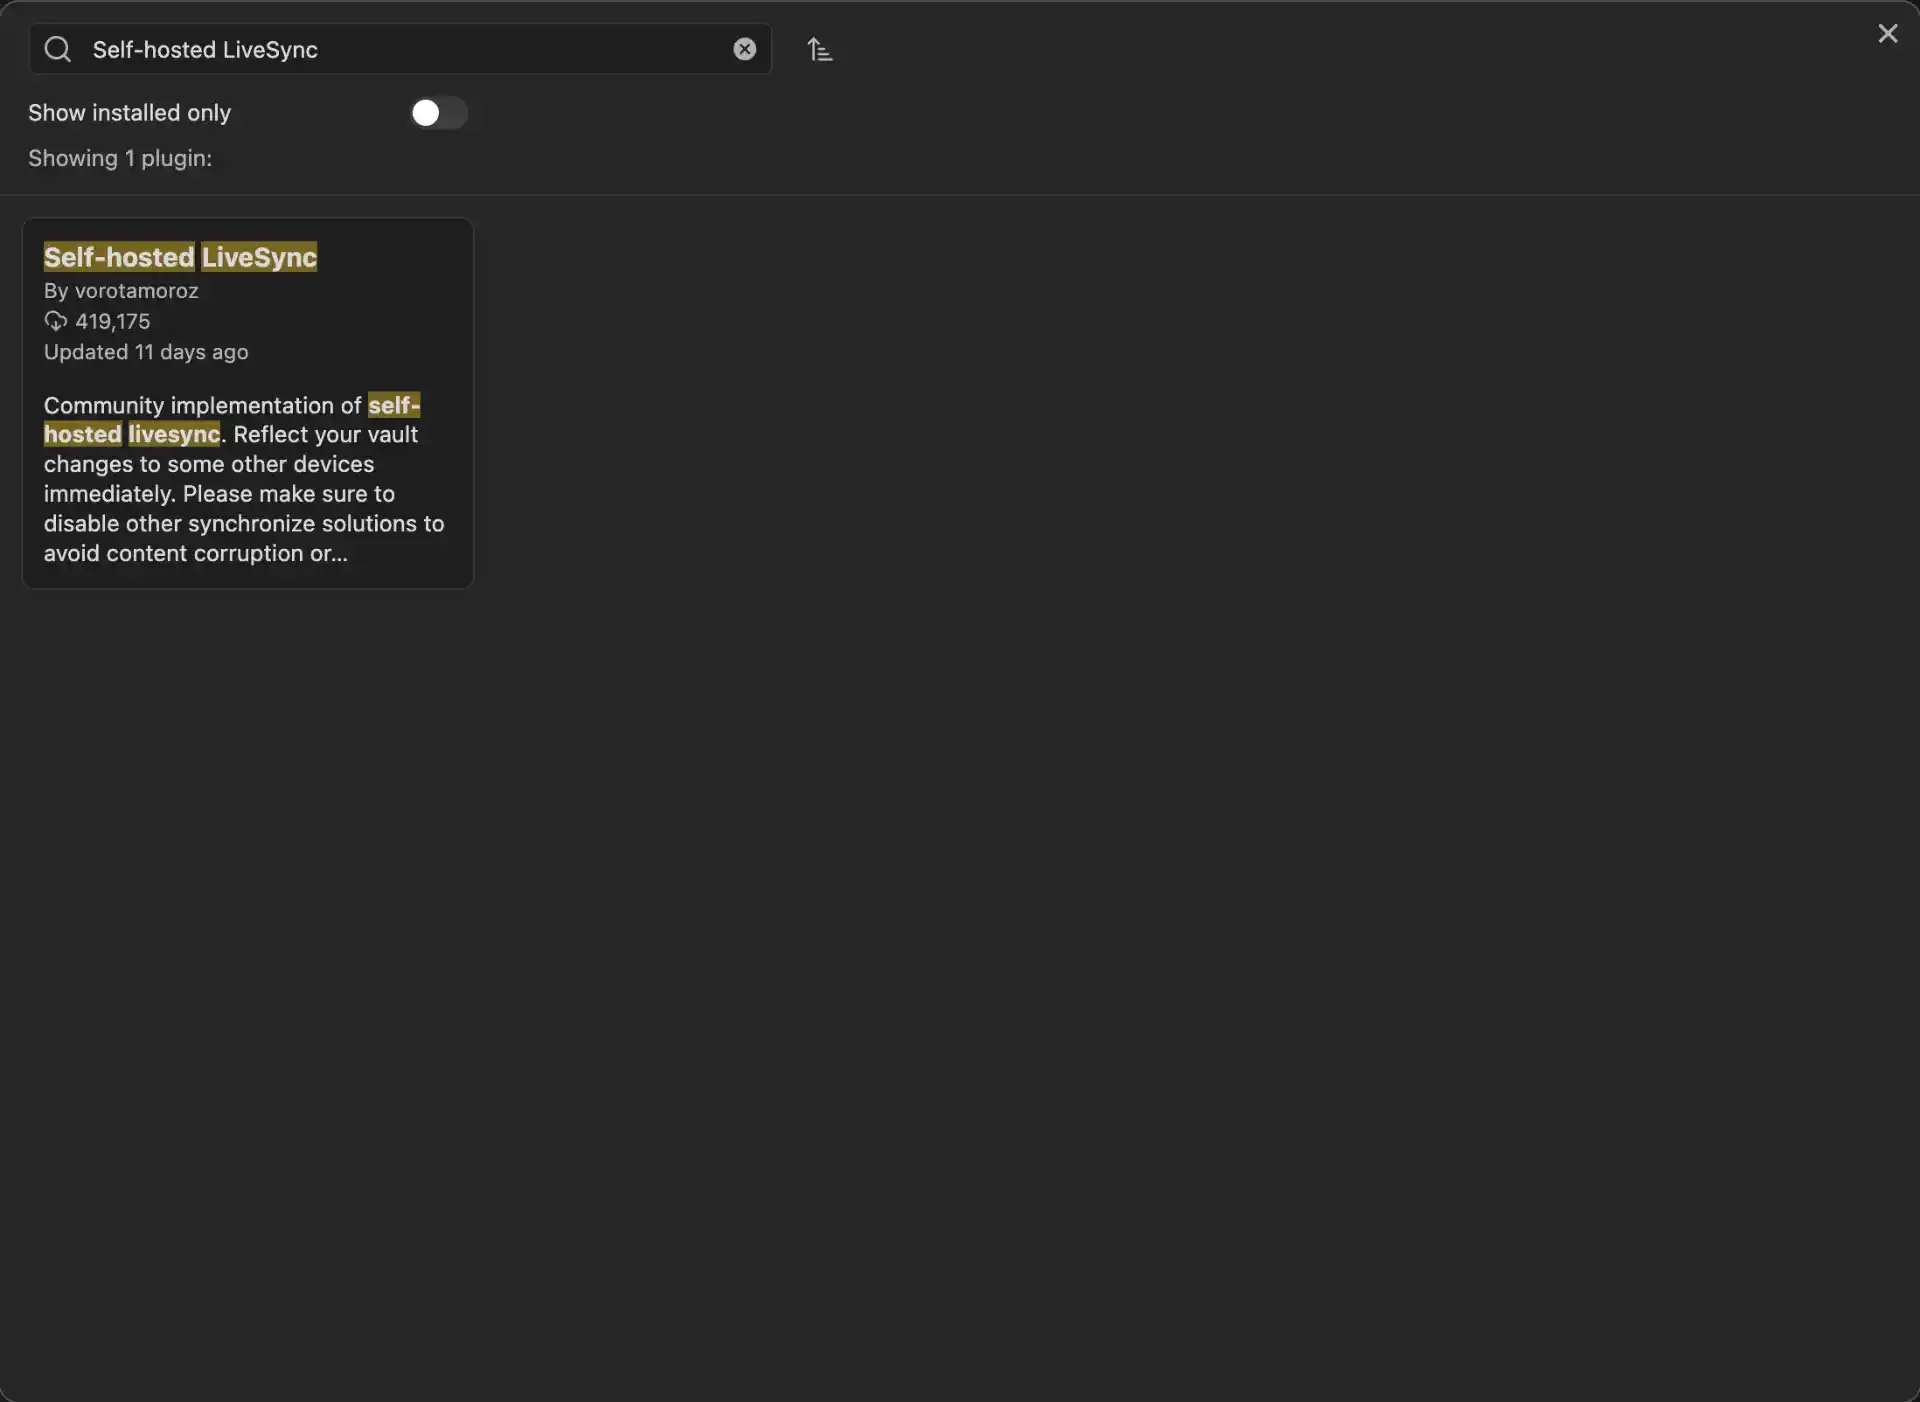
- Find the plugin by vorotamoroz (make sure it’s the official one)
- Click “Install”
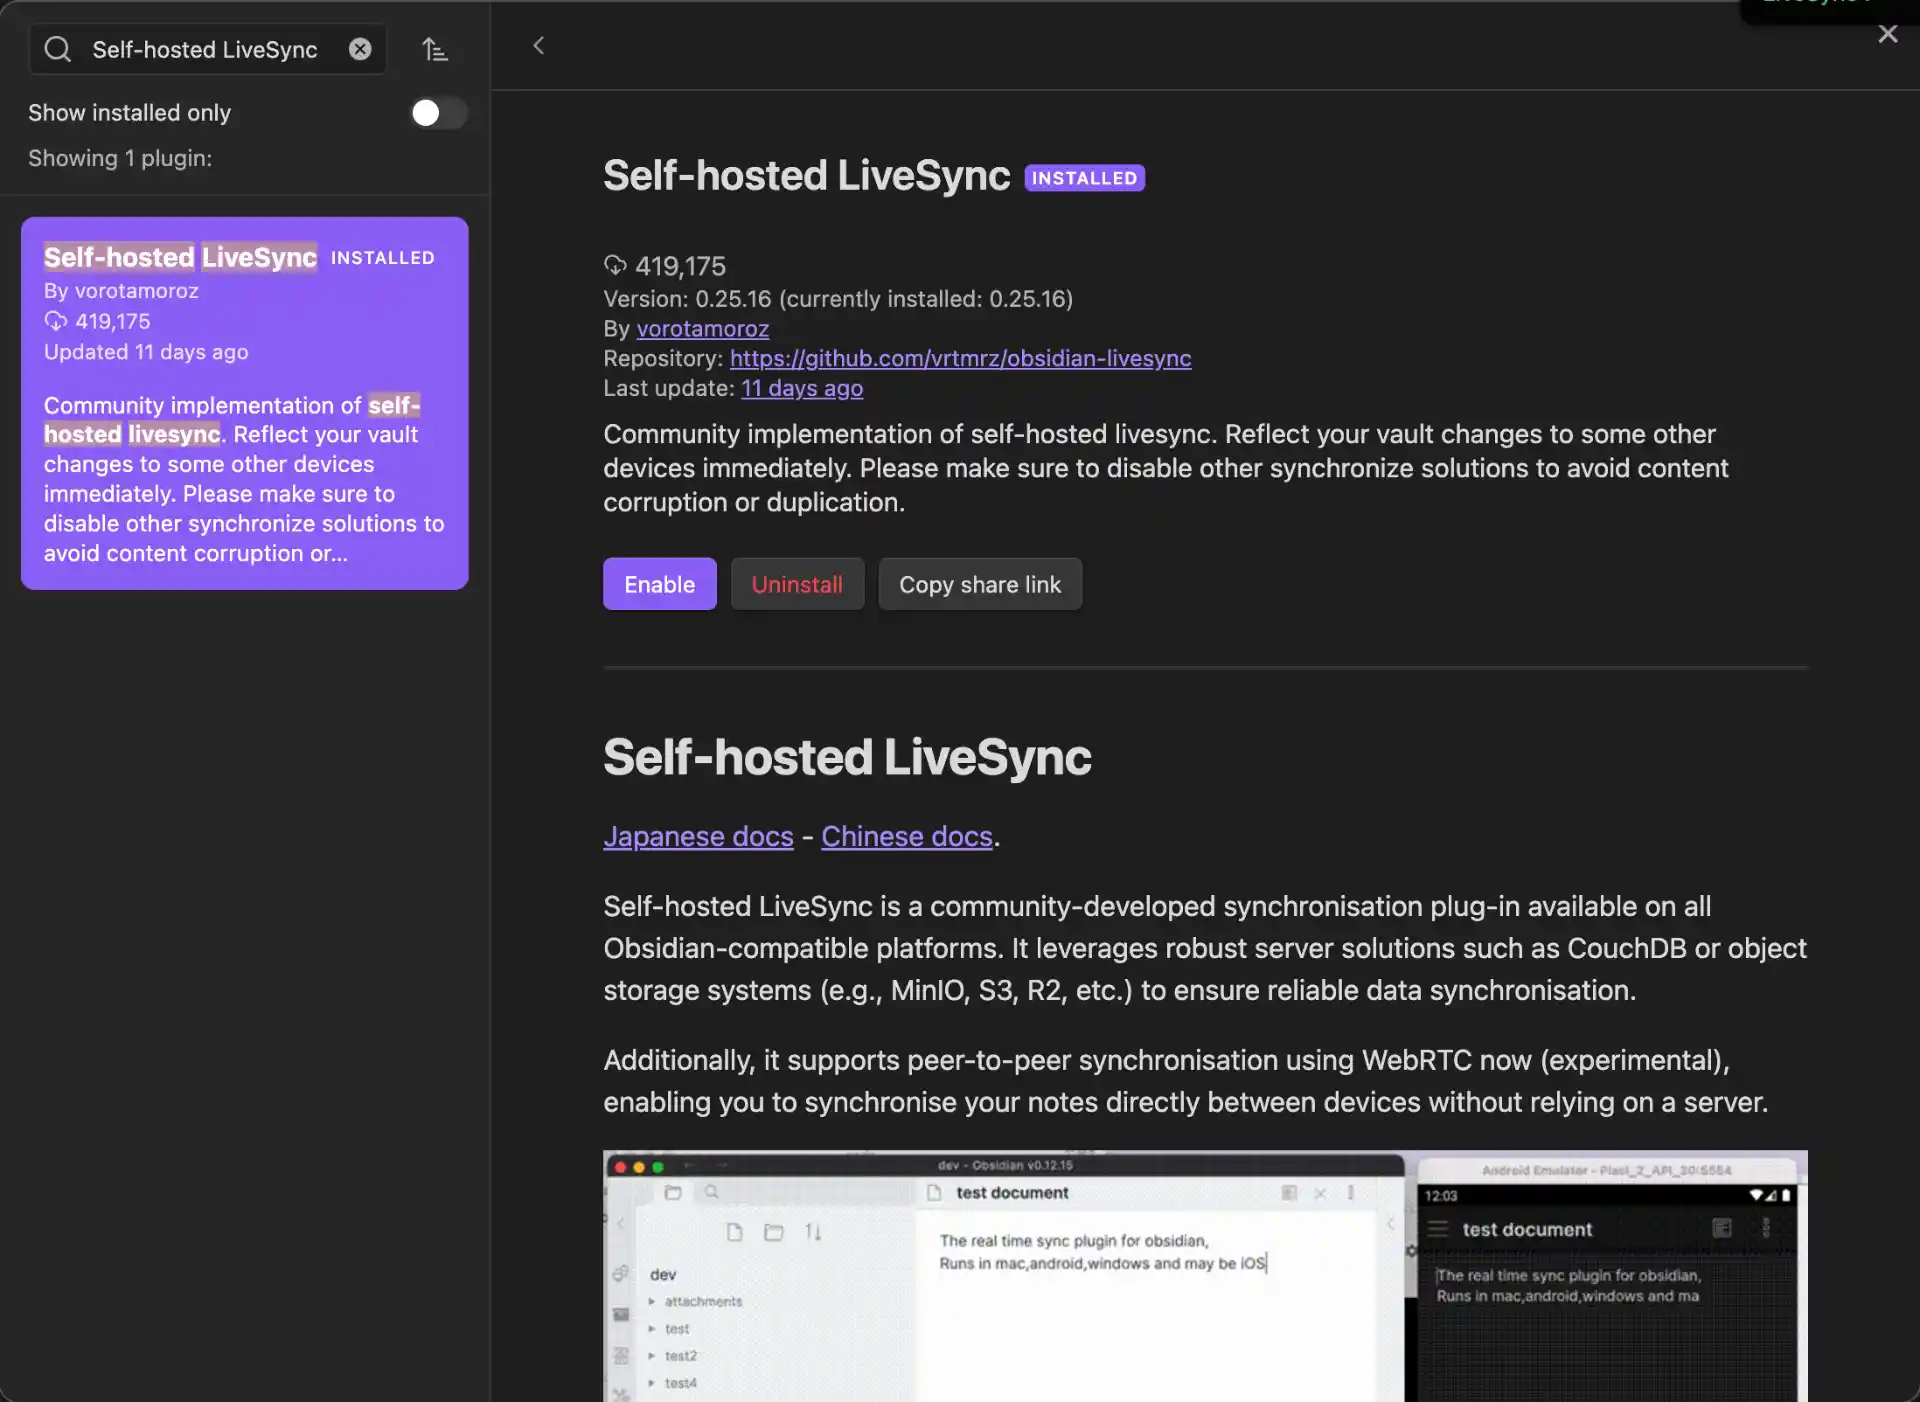
- After installation, click “Enable” to activate the plugin
Configuring LiveSync Plugin
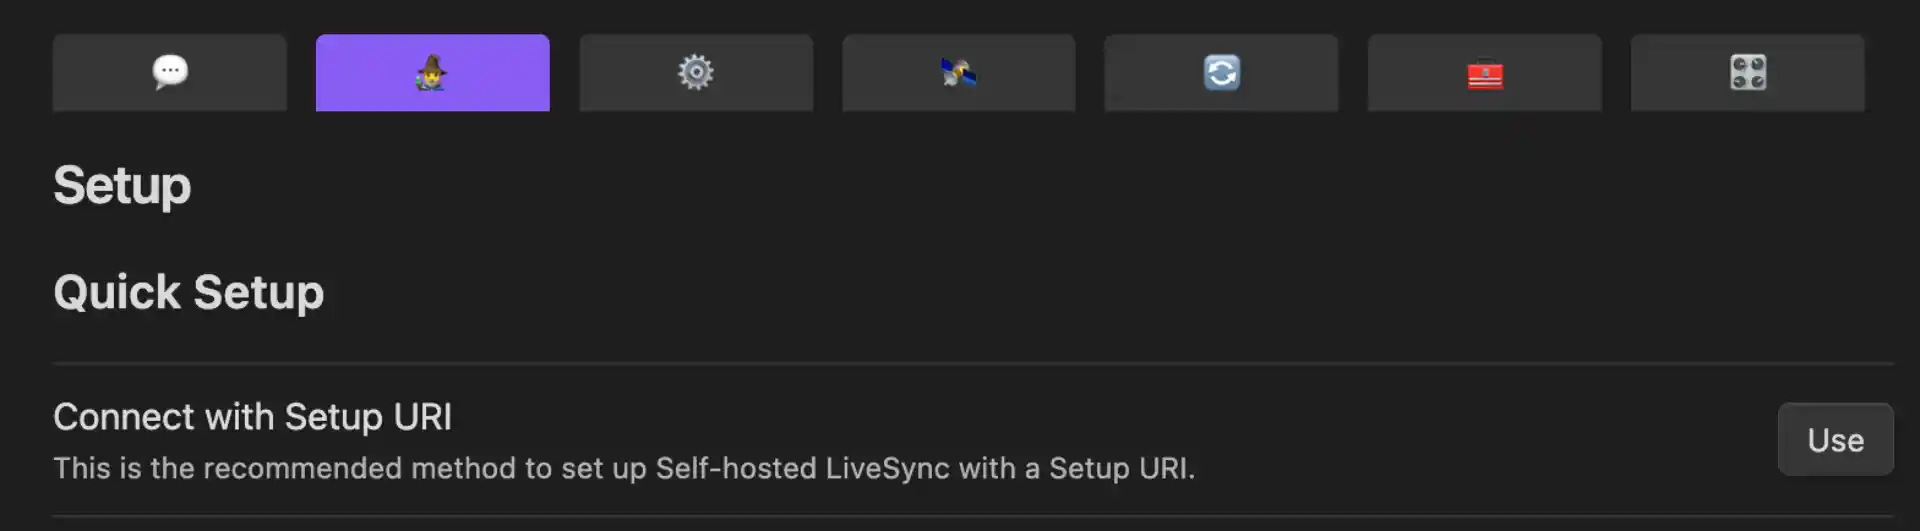
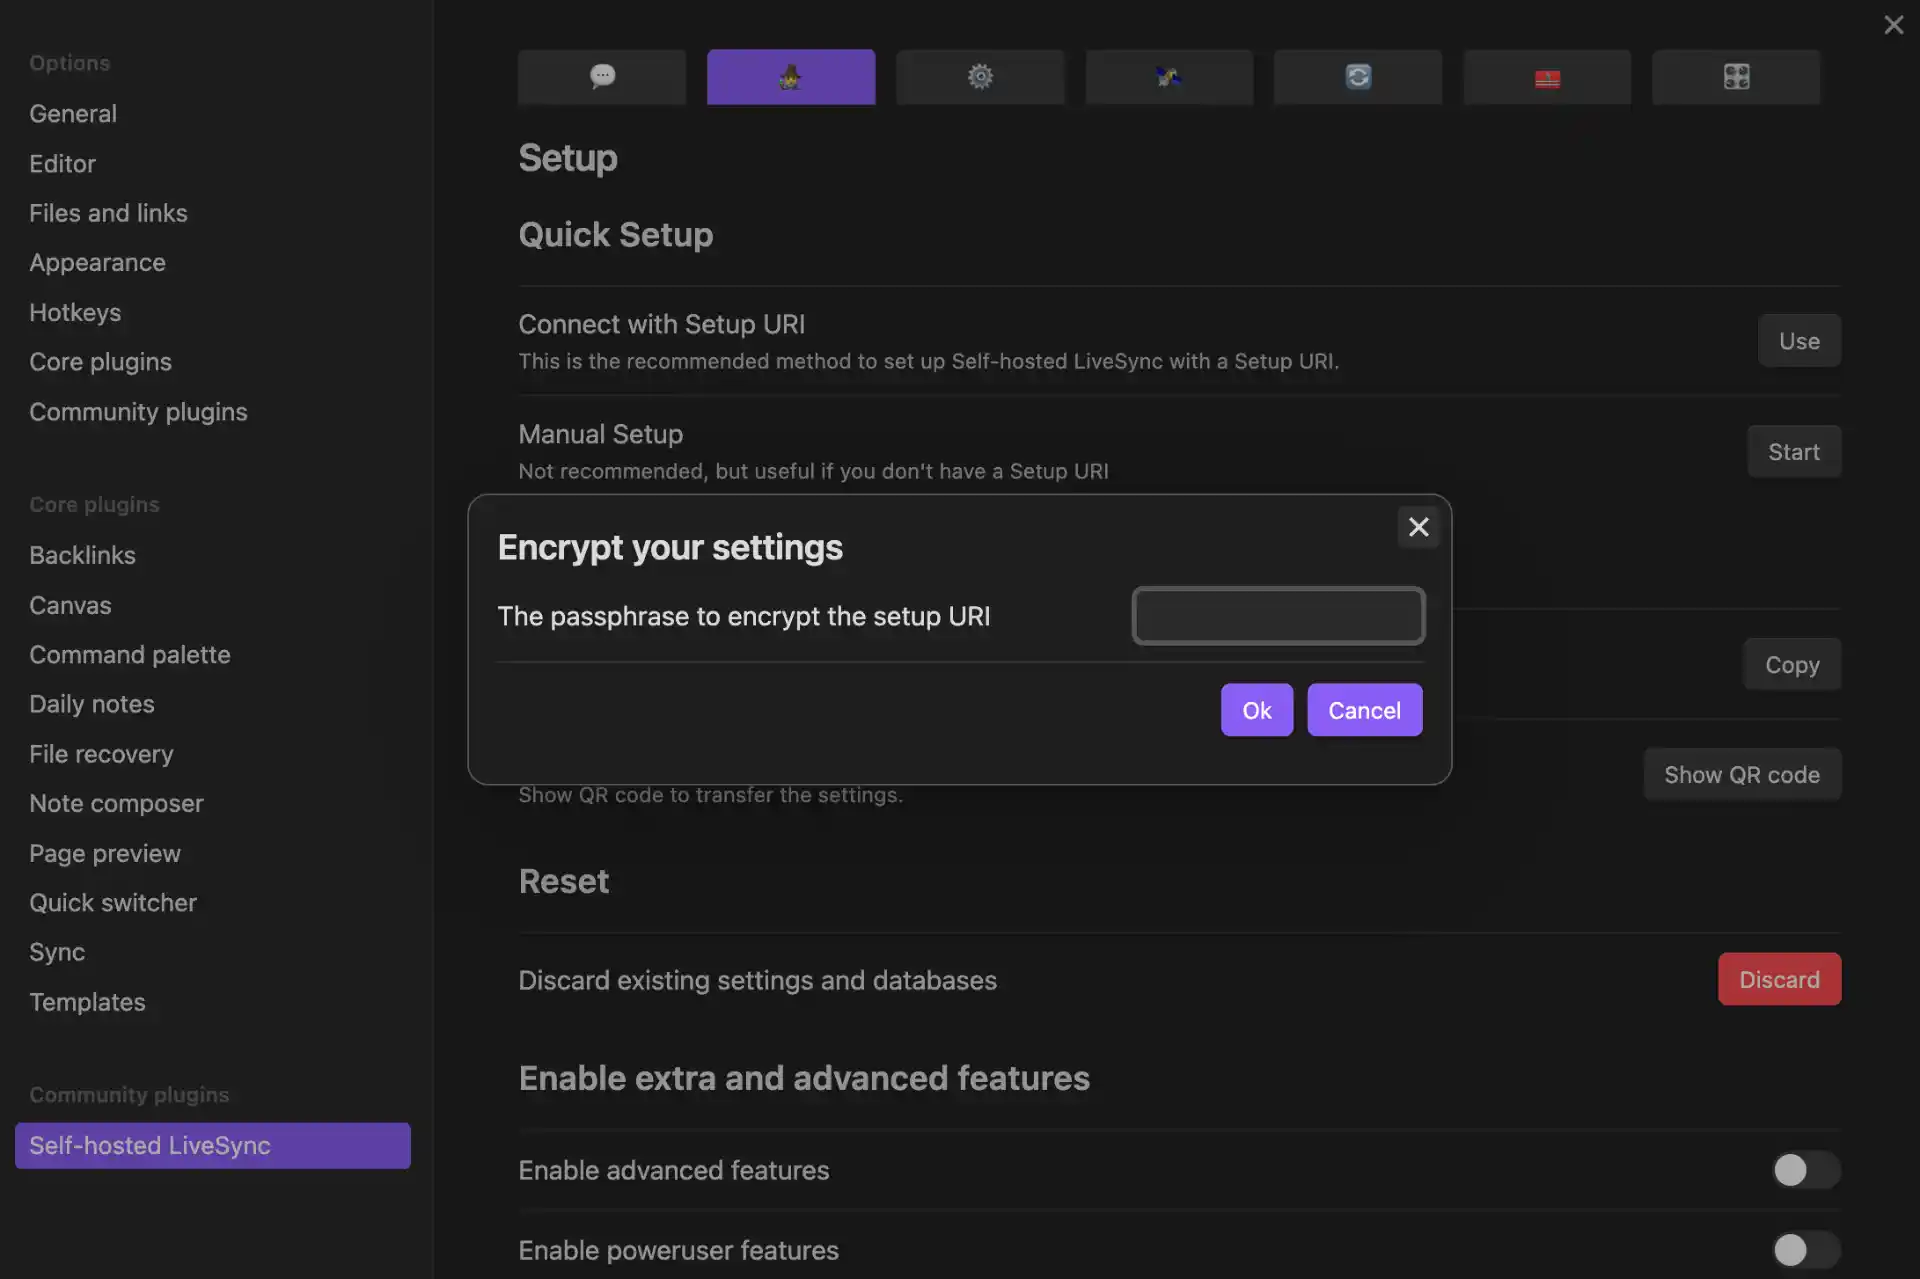
Once the plugin is installed and enabled, you’ll see a new “Self-hosted LiveSync” option in your settings. We’ll use the manual setup for full control.
- In Settings, scroll down to find “Self-hosted LiveSync” in the left sidebar
- Click it to open the plugin settings
- Go to the “Setup” tab
- Click “Manual setup”
- Click “Next” to Appearance Settings
- Fill in your connection details:
Database Configuration:
- Server URI: Your Pinggy tunnel URL (e.g.,
https://abc123.a.pinggy.io) - Username:
admin - Password: Your CouchDB admin password (from
docker-compose.yml) - Database name:
obsidian - Enable CORS: Turn this on to allow cross-origin requests (required for web-based sync)
- Test Connection: Click to verify your settings
- Then click “Next” and accept any warnings if prompted
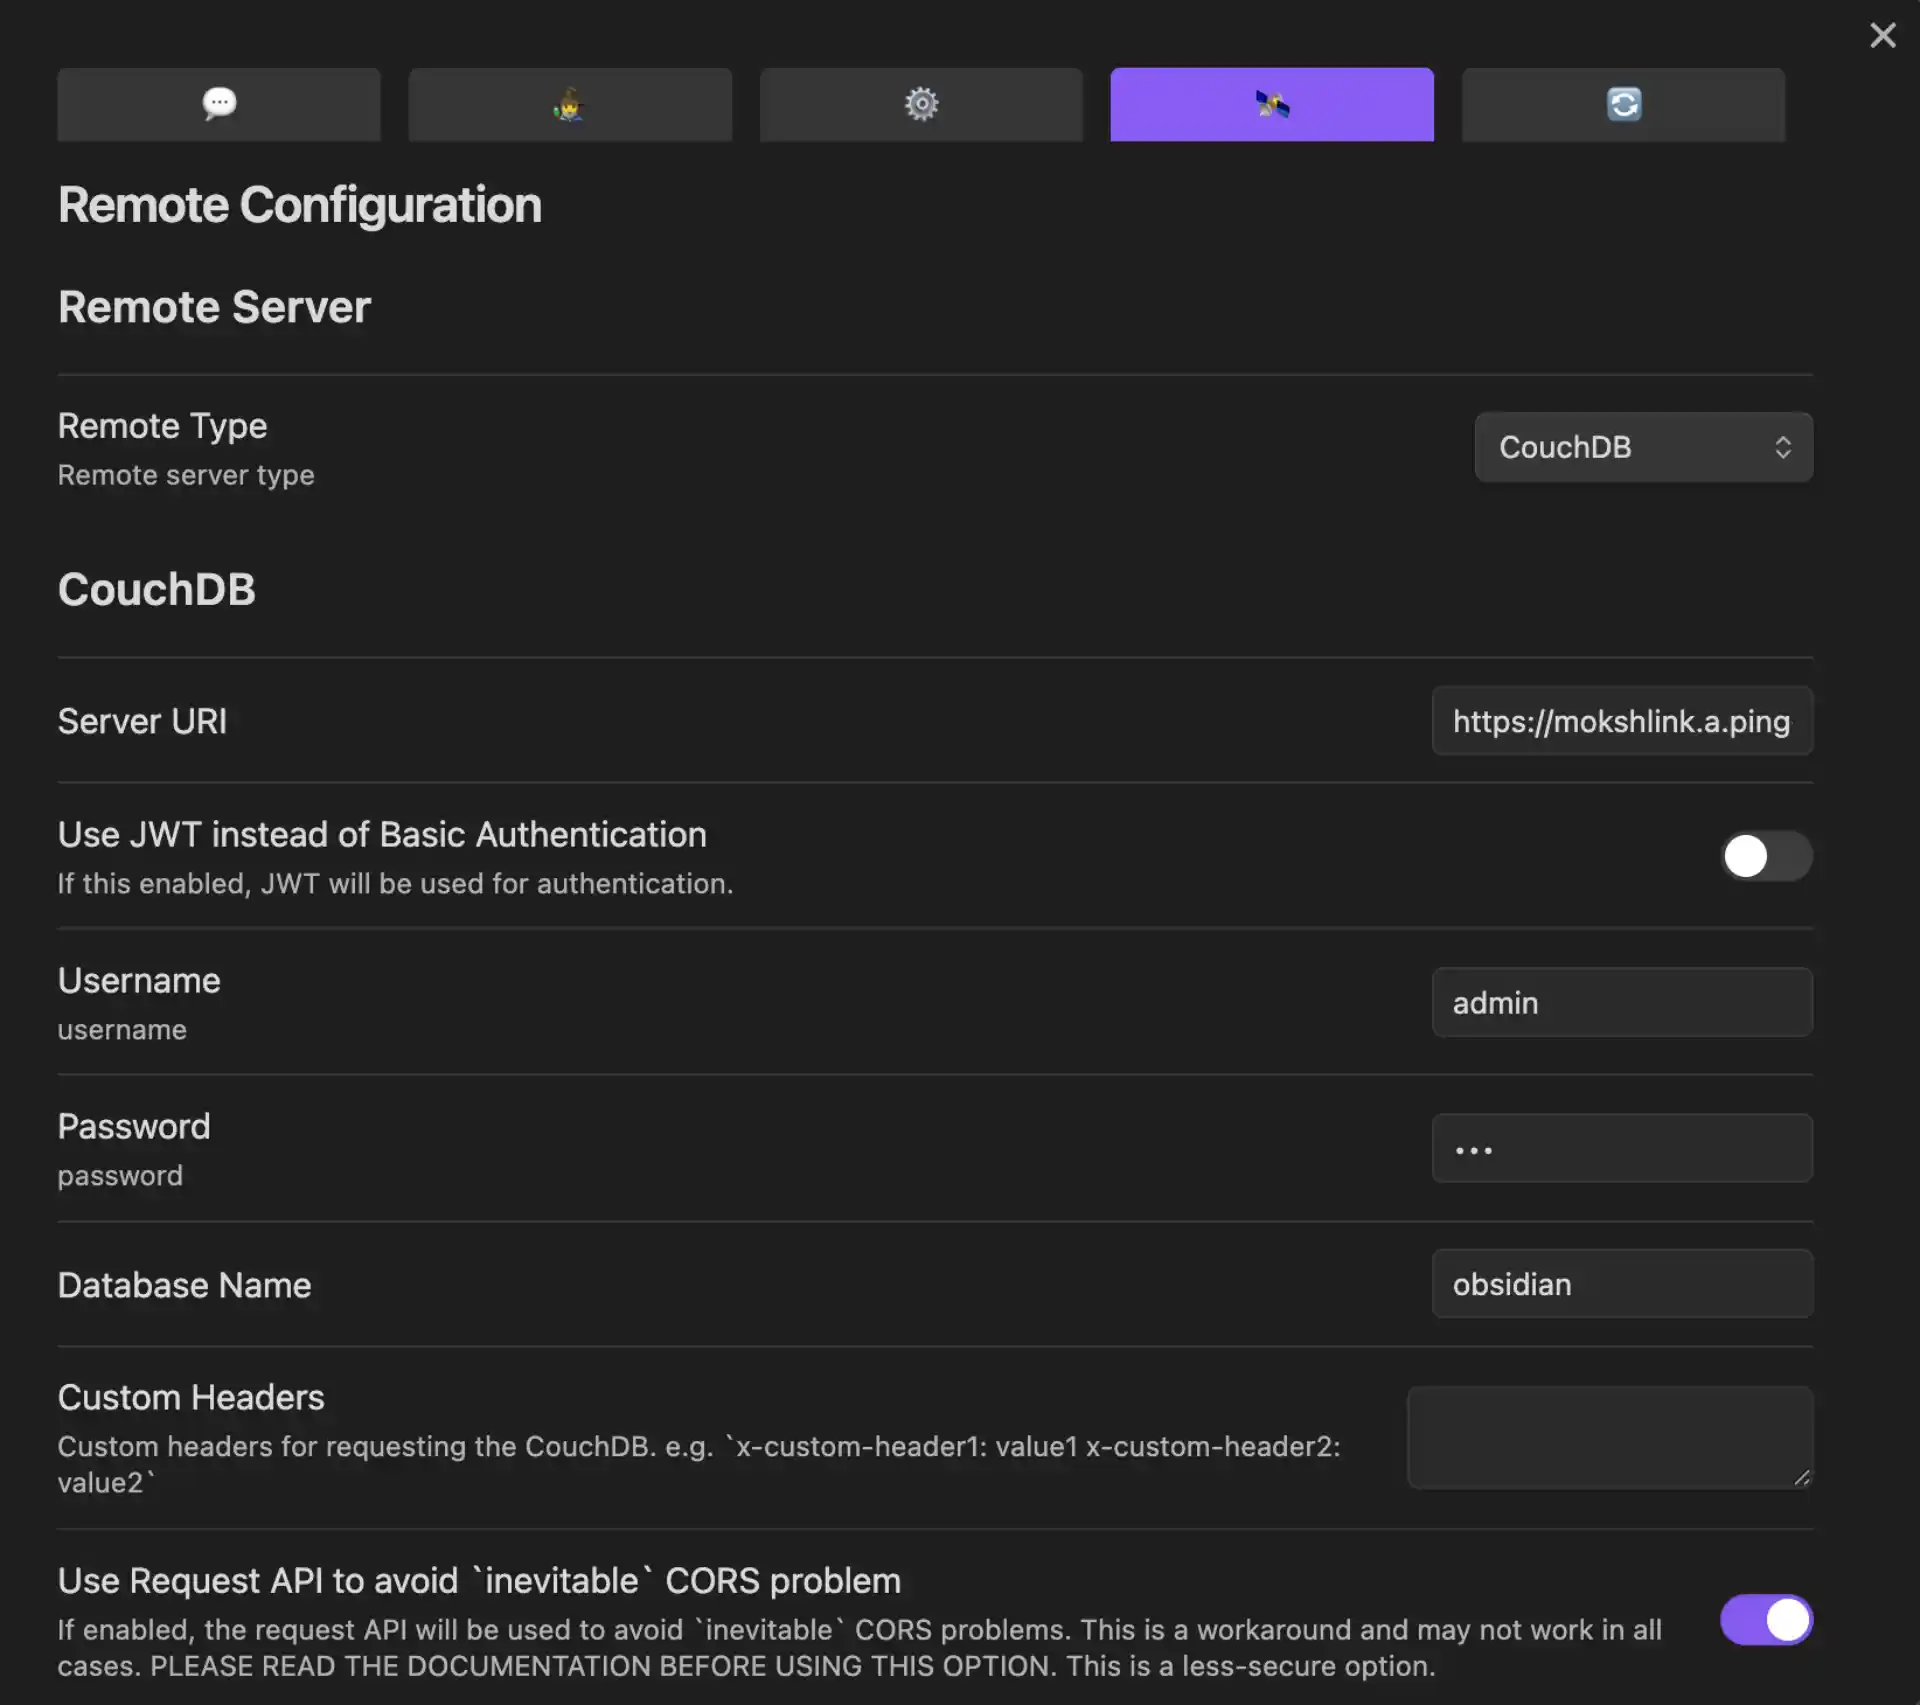
Important Configuration Notes:
- Use the full Pinggy URL including
https:// - Don’t add
/obsidianor any extra path to the URI - Make sure your Pinggy tunnel is running before testing
Step 6: Adding Additional Devices
One of the best features of this setup is how easy it is to add new devices to your sync network.
Generating Setup URI for Other Devices
Once sync is working properly:
- Go to the “Setup” tab in LiveSync settings
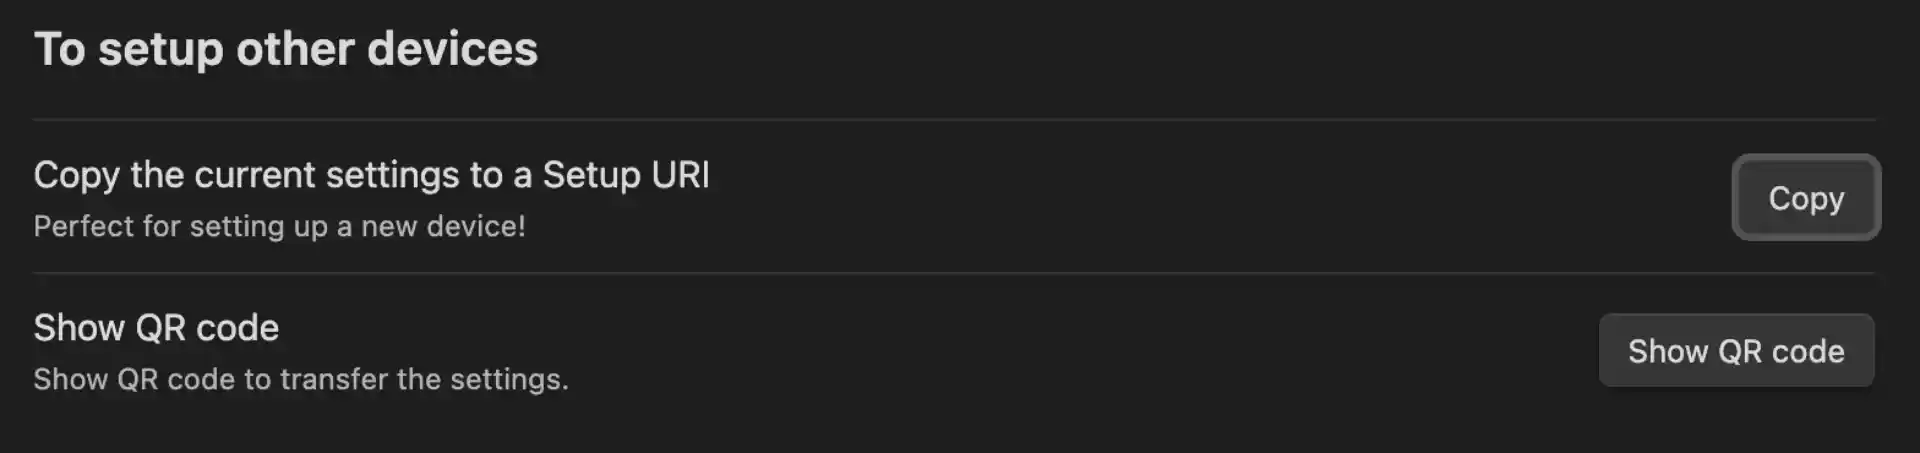
- In the “Set up other devices” section, click “Copy setup URI”
- Enter a passphrase to encrypt the setup URI and click “OK”
- The setup URI will be copied automatically
- The URI format:
obsidian://setuplivesync?settings=encrypted_config_data
Security Note: This URI contains encrypted connection information. Store it in a password manager or secure location.
Using the Setup URI
On each new device where you want to sync your Obsidian vault:
- Install Obsidian and the Self-hosted LiveSync plugin
- Go to Settings → Self-hosted LiveSync
- Go to the “Setup” tab
- Choose “Connect with setup URL”
- Paste the setup URI you saved earlier
- Enter the passphrase
- Click “Apply”
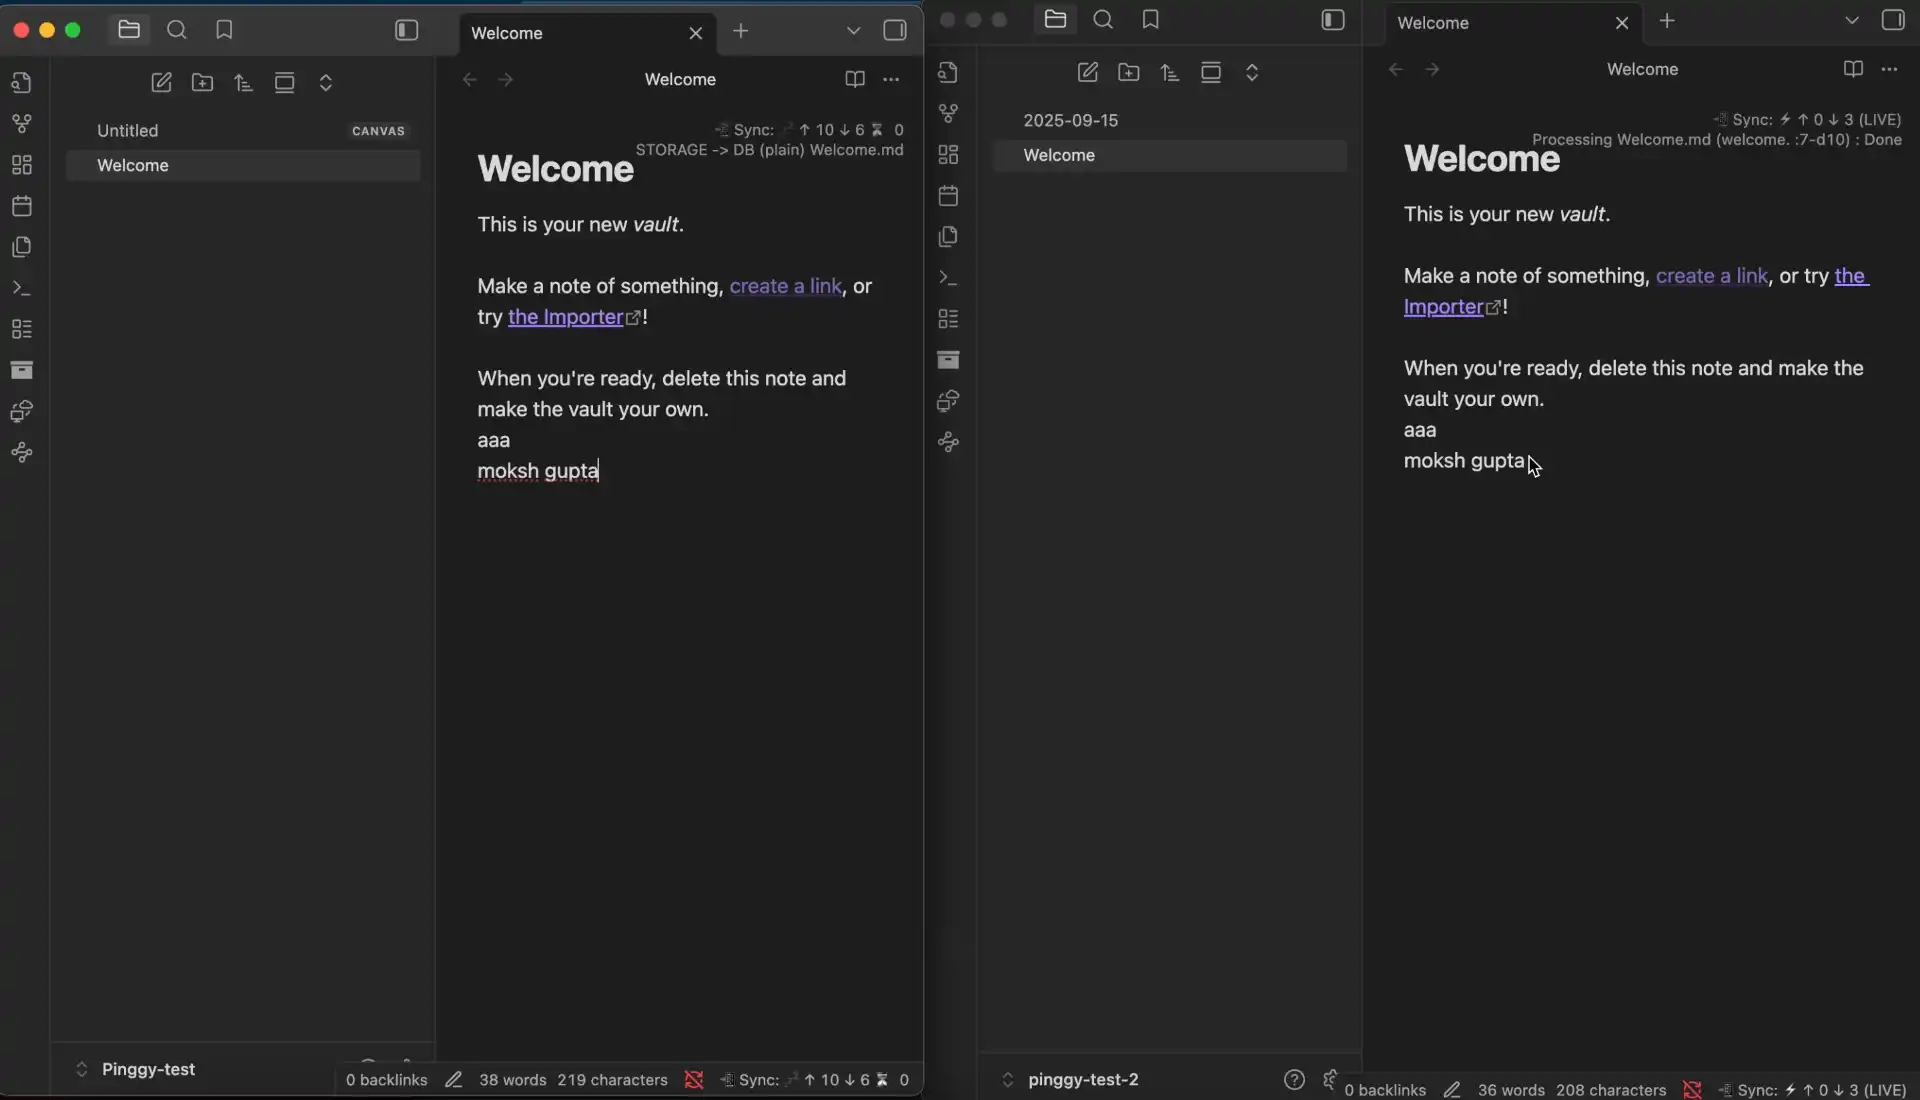
The plugin will automatically configure all the connection settings and begin syncing your vault to the new device.
Conclusion
With Docker, CouchDB, Pinggy, and the LiveSync plugin working together, you now have a fully private, zero-cost alternative to Obsidian Sync that you control end to end. The entire setup takes under an hour, runs quietly in the background, and keeps your notes synchronized across every device desktop and mobile alike.
Beyond saving $48/year, the real benefit is ownership. Your notes never leave infrastructure you control, sync conflicts become a thing of the past, and you’re free to customize the setup as your needs evolve. Whether you’re a developer managing technical documentation, a student organizing research, or anyone who takes their notes seriously self-hosting Obsidian sync is one of the most practical DIY projects you can complete in an afternoon.