How to Self-Host Langflow and Access It Remotely
Updated on Mar 14, 2026 · 11 mins read
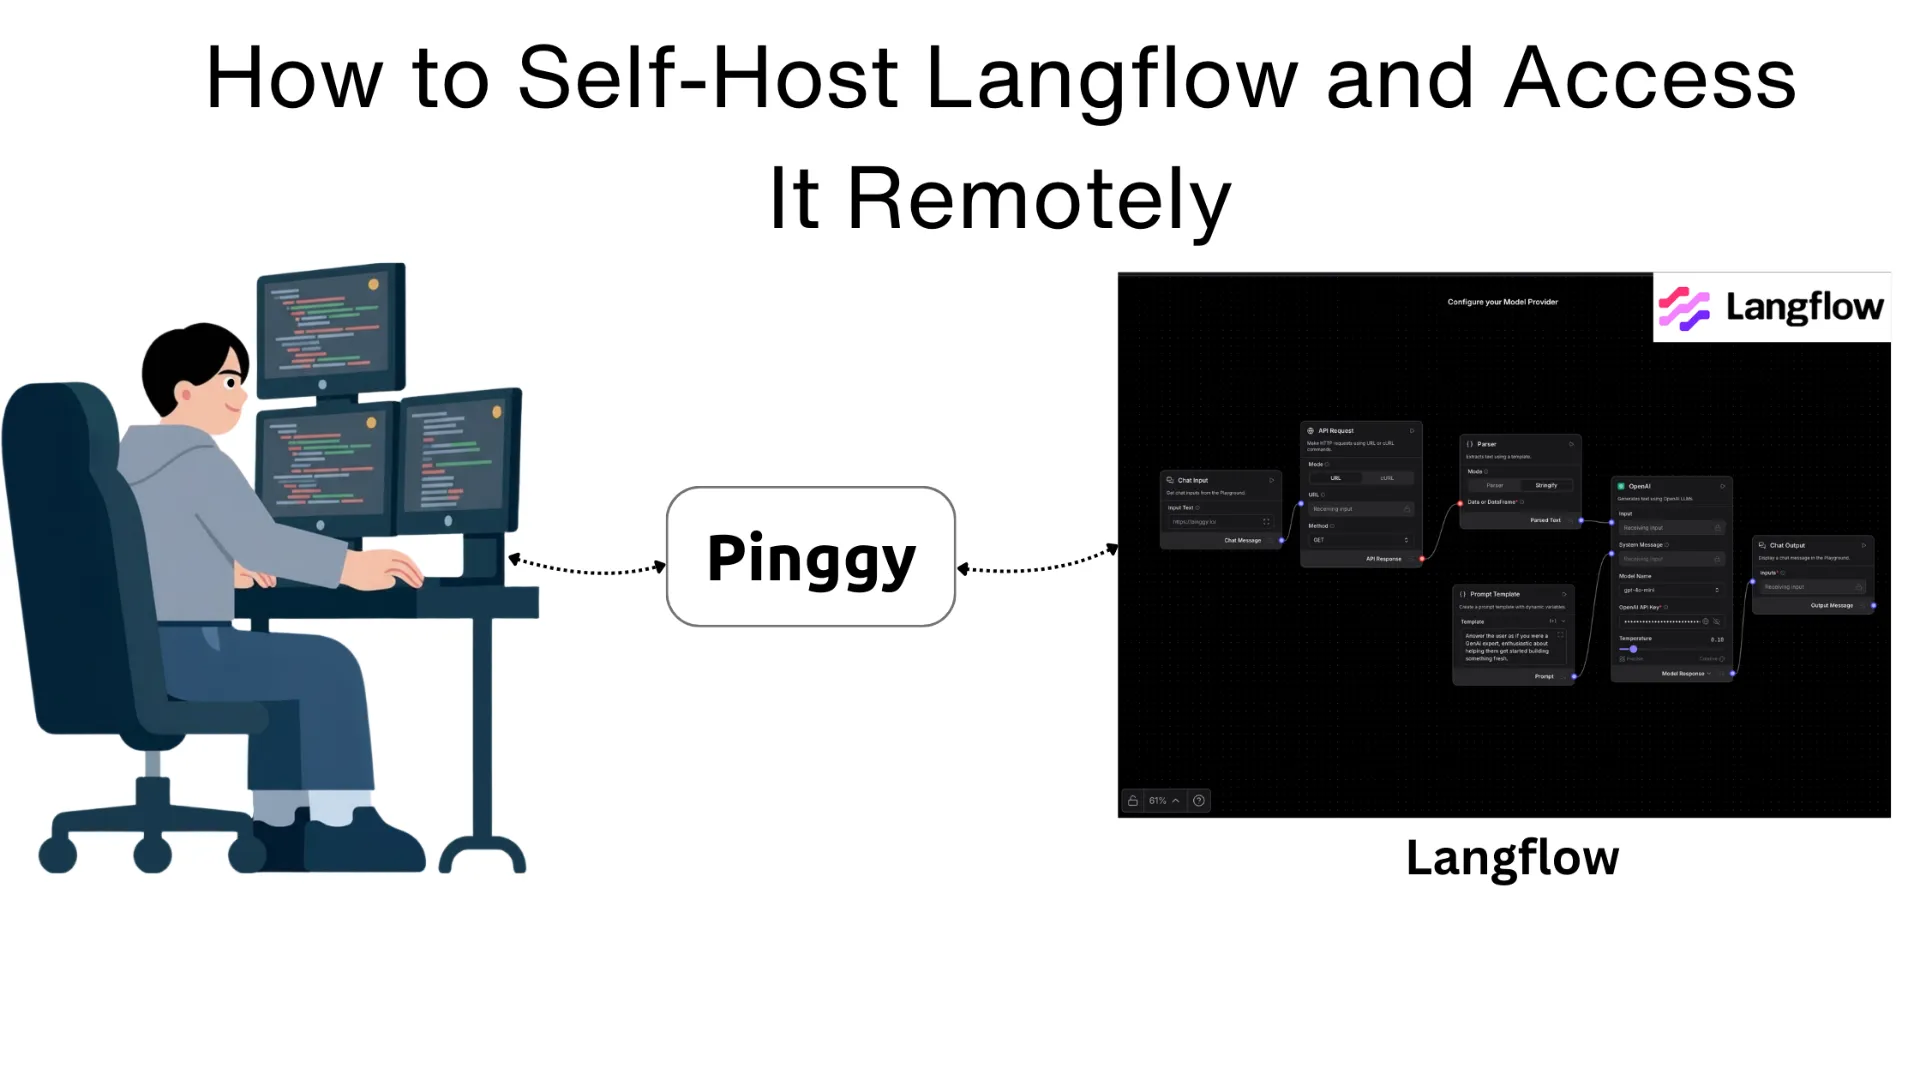
Building custom AI agents used to require deep knowledge of LangChain internals, prompt engineering, and API wiring. Langflow changes that by giving you a visual drag-and-drop canvas where you can compose AI workflows from components LLMs, vector stores, tools, memory, APIs and instantly deploy them as REST endpoints. It runs entirely on your own machine, so your data never leaves your infrastructure.
The catch with any self-hosted tool is remote access. Once Langflow is running on your laptop or home server, you can only reach it on your local network. This guide shows you how to install Langflow, run it locally, and then expose it to the internet using Pinggy so you can share your agent with teammates, test it from your phone, or integrate it into external services.
Summary
Install and run Langflow
Using
uv(recommended):pip install uv uv pip install langflow uv run langflow runOr with Docker (no Python required):
docker run -p 7860:7860 langflowai/langflow:latestLangflow runs at
http://localhost:7860Expose Langflow remotely with Pinggy
ssh -p 443 -R0:localhost:7860 free.pinggy.ioYou get a public HTTPS URL like
https://abc123.a.pinggy.link- share it with anyone.Add password protection (optional)
ssh -p 443 -R0:localhost:7860 -t free.pinggy.io b:username:password
Resources:
- Langflow on GitHub
- Langflow Documentation
- Pinggy for instant public tunnels
What is Langflow?
Langflow is an open-source, low-code platform for building AI-powered agents and pipelines. It provides a visual canvas where you connect components language models, vector databases, web search tools, custom Python code, APIs, and more into a complete workflow without writing boilerplate integration code.
Every flow you build in Langflow automatically becomes a callable REST API endpoint. You can also expose flows as MCP (Model Context Protocol) servers, making them directly usable as tools by Claude Desktop, Cursor, or any MCP-compatible client.
Langflow is backed by DataStax and sits firmly in the LangChain ecosystem, but it isn’t locked to any particular LLM provider or vector store. You can swap OpenAI for Anthropic, replace Pinecone with a local Chroma instance, or connect any LLM running through Ollama all from the same canvas. The latest stable release as of March 2026 is version 1.8.0, which introduced built-in Knowledge Bases, global model configuration, and Docling-powered document parsing.
Why Self-Host Langflow?
The cloud-hosted version of Langflow (DataStax Langflow) is convenient, but self-hosting gives you several practical advantages. Privacy is the most obvious one your documents, prompts, and agent logic never leave your infrastructure. This matters if you are working with proprietary data, customer information, or anything that falls under compliance requirements.
Cost is another factor. Langflow itself is free to run. If you pair it with a locally running model via Ollama, you can build and run agents without paying per-token API fees. For prototyping and internal tooling, this is often the right tradeoff.
Self-hosting also gives you full control over the environment you can pin specific versions, load custom components at startup, configure persistent PostgreSQL storage, and integrate with on-premise services that a cloud platform cannot reach.
Prerequisites
Before starting, make sure you have:
- Python 3.10–3.13 (macOS/Linux) or 3.10–3.12 (Windows), or Docker
- At least 4 GB of RAM (2 GB minimum, 4 GB+ recommended)
- A dual-core CPU or better
- Basic comfort with a terminal
If you prefer not to manage Python environments, the Docker method in Step 2 skips all of that.
Step 1: Install Langflow
There are three ways to install Langflow. Choose the one that fits your setup.
Option A: Install with uv (Recommended)
uv is a fast Python package manager that handles virtual environments cleanly. It is the recommended approach in Langflow’s official documentation.
# Install uv if you don't have it
pip install uv

# Create and activate a virtual environment
uv venv langflow-env
source langflow-env/bin/activate   # on Windows: langflow-env\Scripts\activate

# Install Langflow
uv pip install langflow
To install a specific version:
uv pip install langflow==1.8.0
Option B: Install with pip
If you already have a Python environment you prefer, the plain pip install works just as well:
pip install langflow
Option C: Run with Docker
Docker is the simplest path if you want an isolated, reproducible setup with no Python environment management:
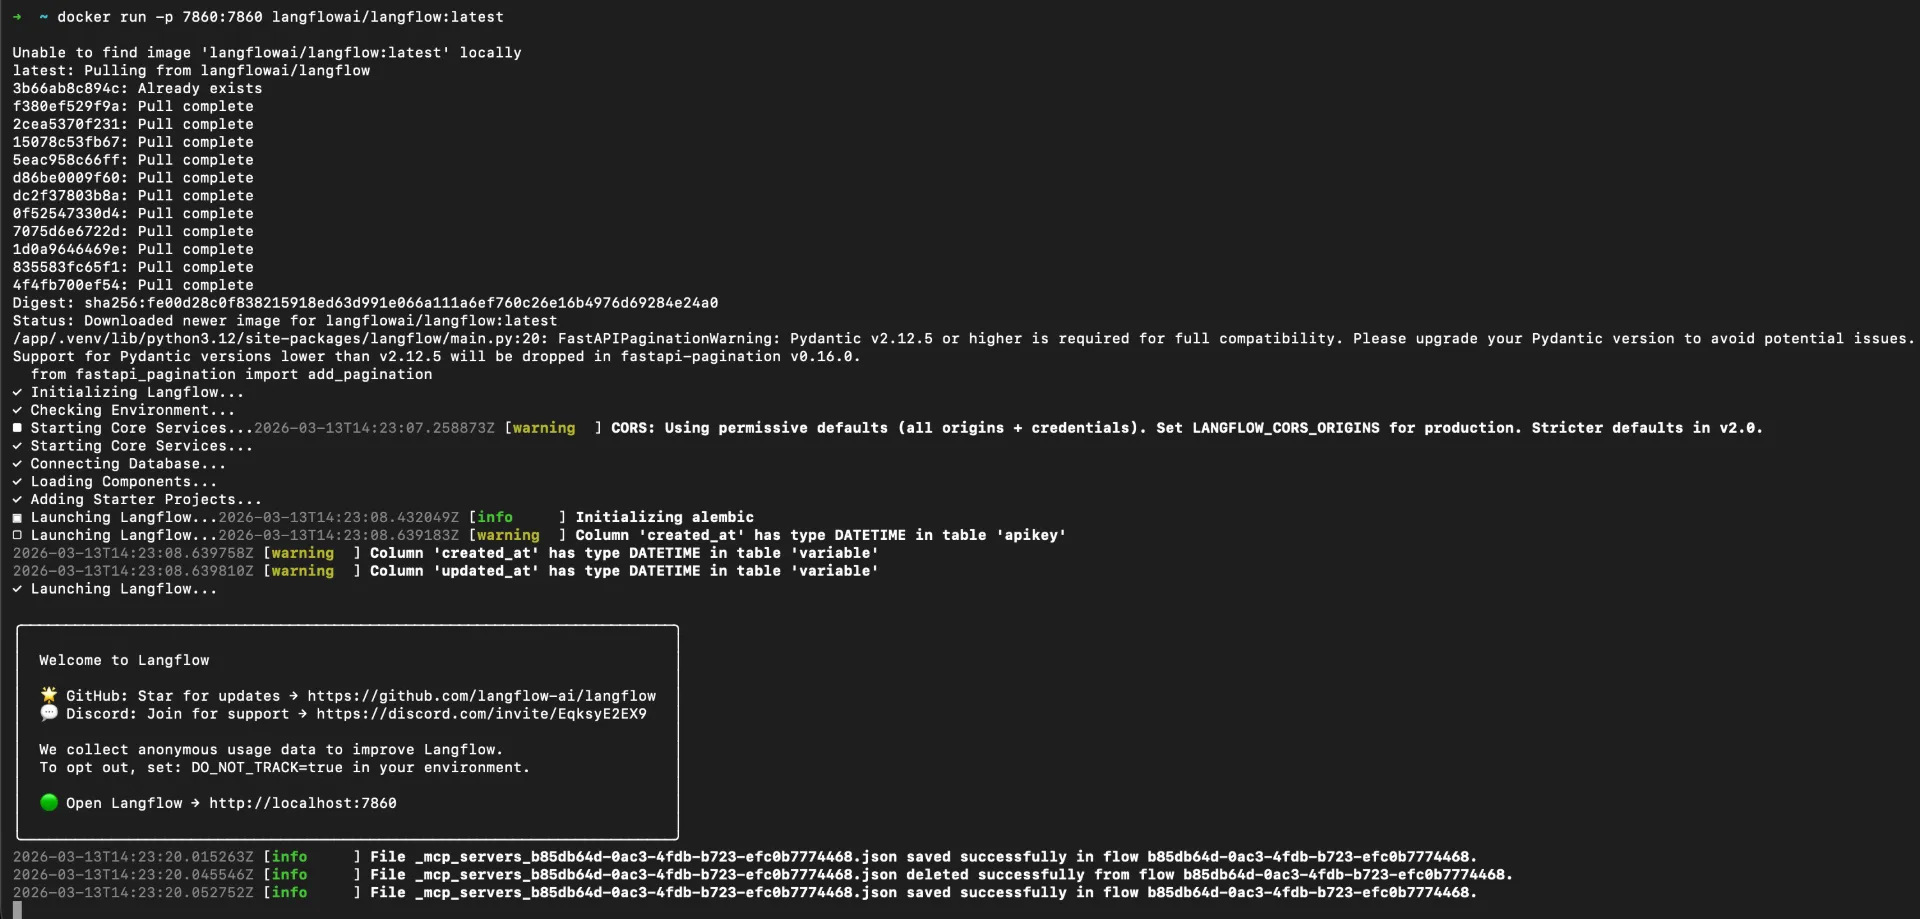
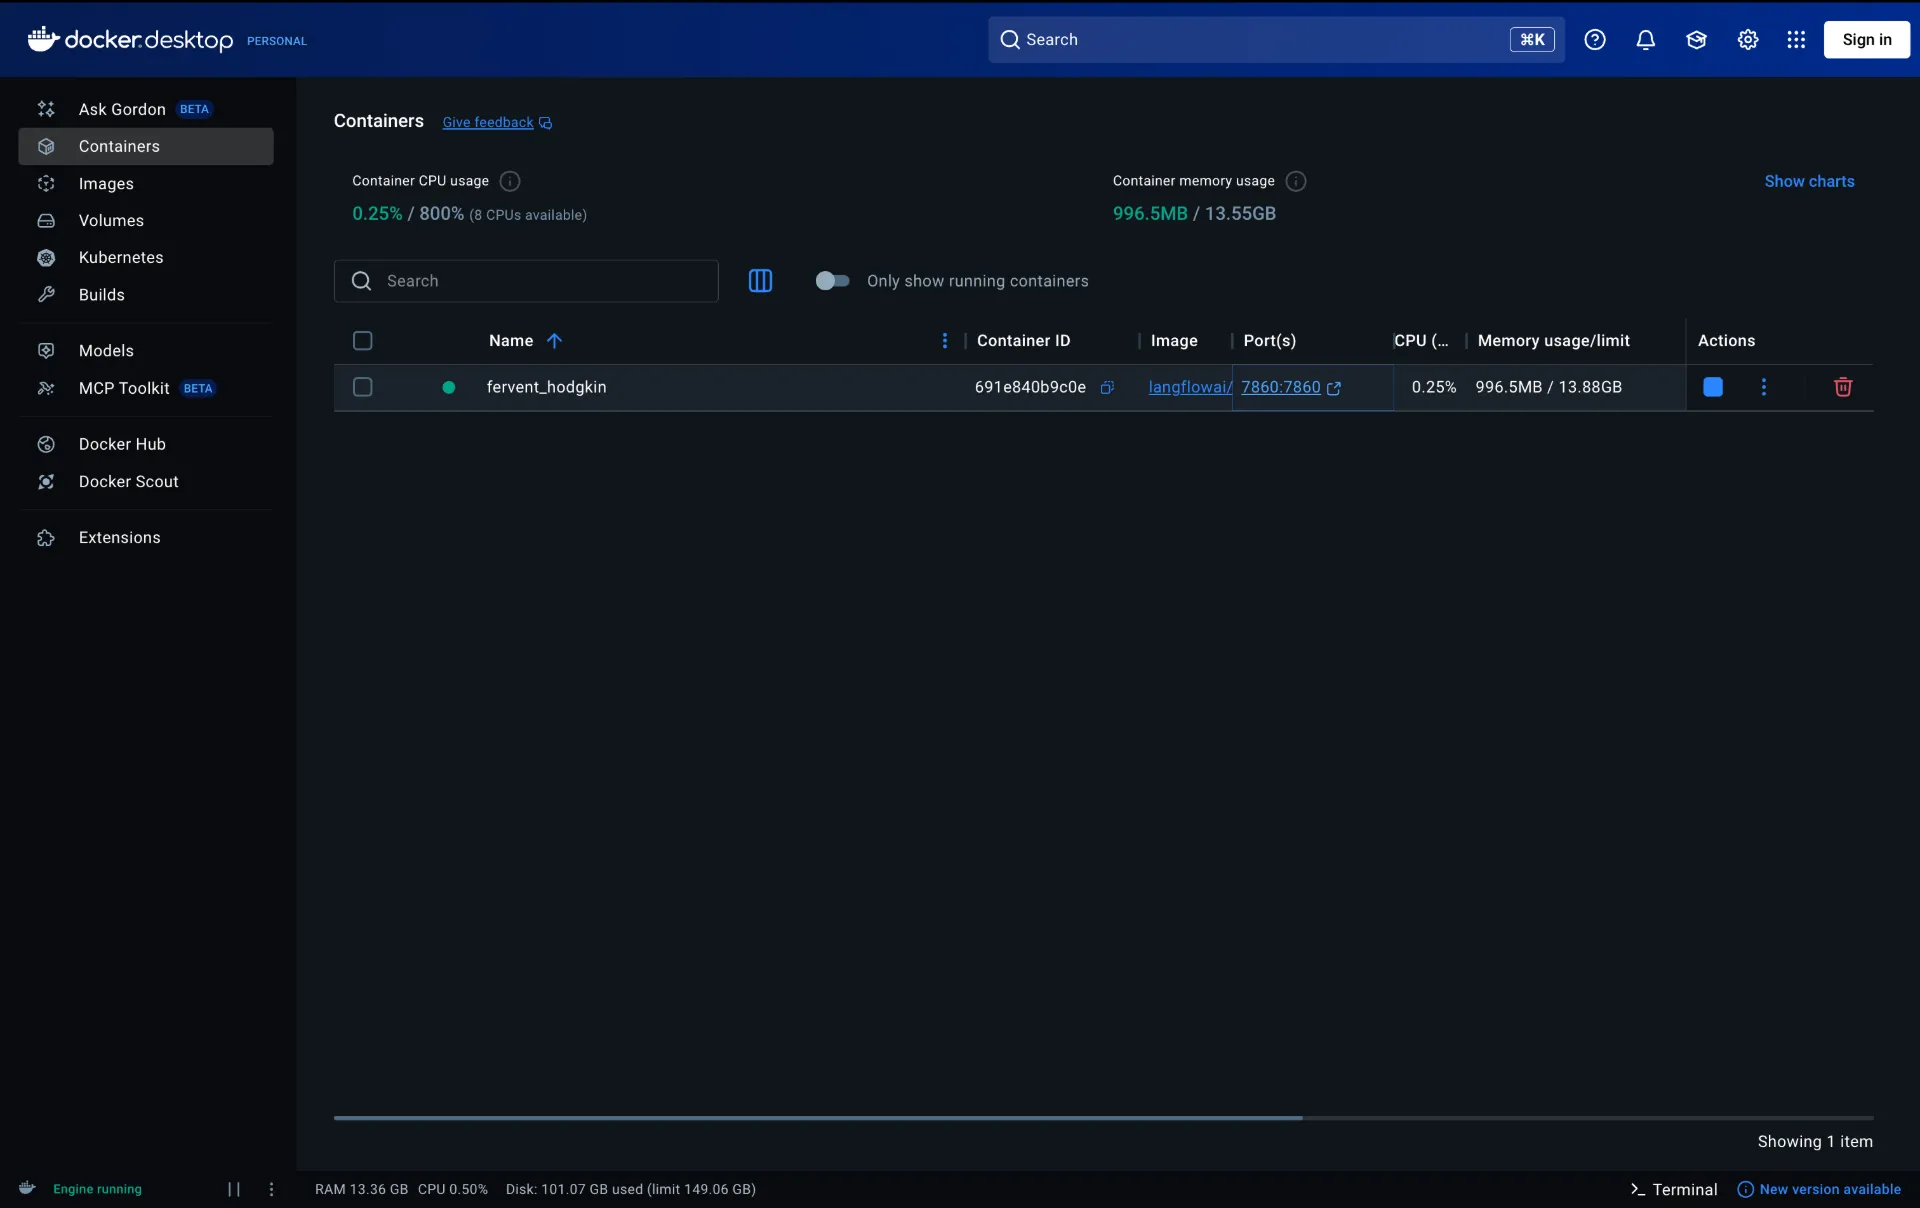
docker run -p 7860:7860 langflowai/langflow:latest
This pulls the latest Langflow image and maps port 7860 on your machine to port 7860 inside the container. Everything runs in isolation and data is preserved in the container’s filesystem between restarts.
Step 2: Start Langflow
Once installed, start the Langflow server:
# If installed via uv or pip
langflow run

# Or with uv
uv run langflow run
You should see output similar to:
╭─────────────────────────────────────────────────────╮
│ Welcome to ⛓ Langflow                               │
│                                                     │
│ Collaborate, and contribute at our GitHub Repo      │
│                                                     │
│ We collect anonymous usage data to improve Langflow │
│ ...                                                 │
╰─────────────────────────────────────────────────────╯
...
INFO:     Uvicorn running on http://0.0.0.0:7860
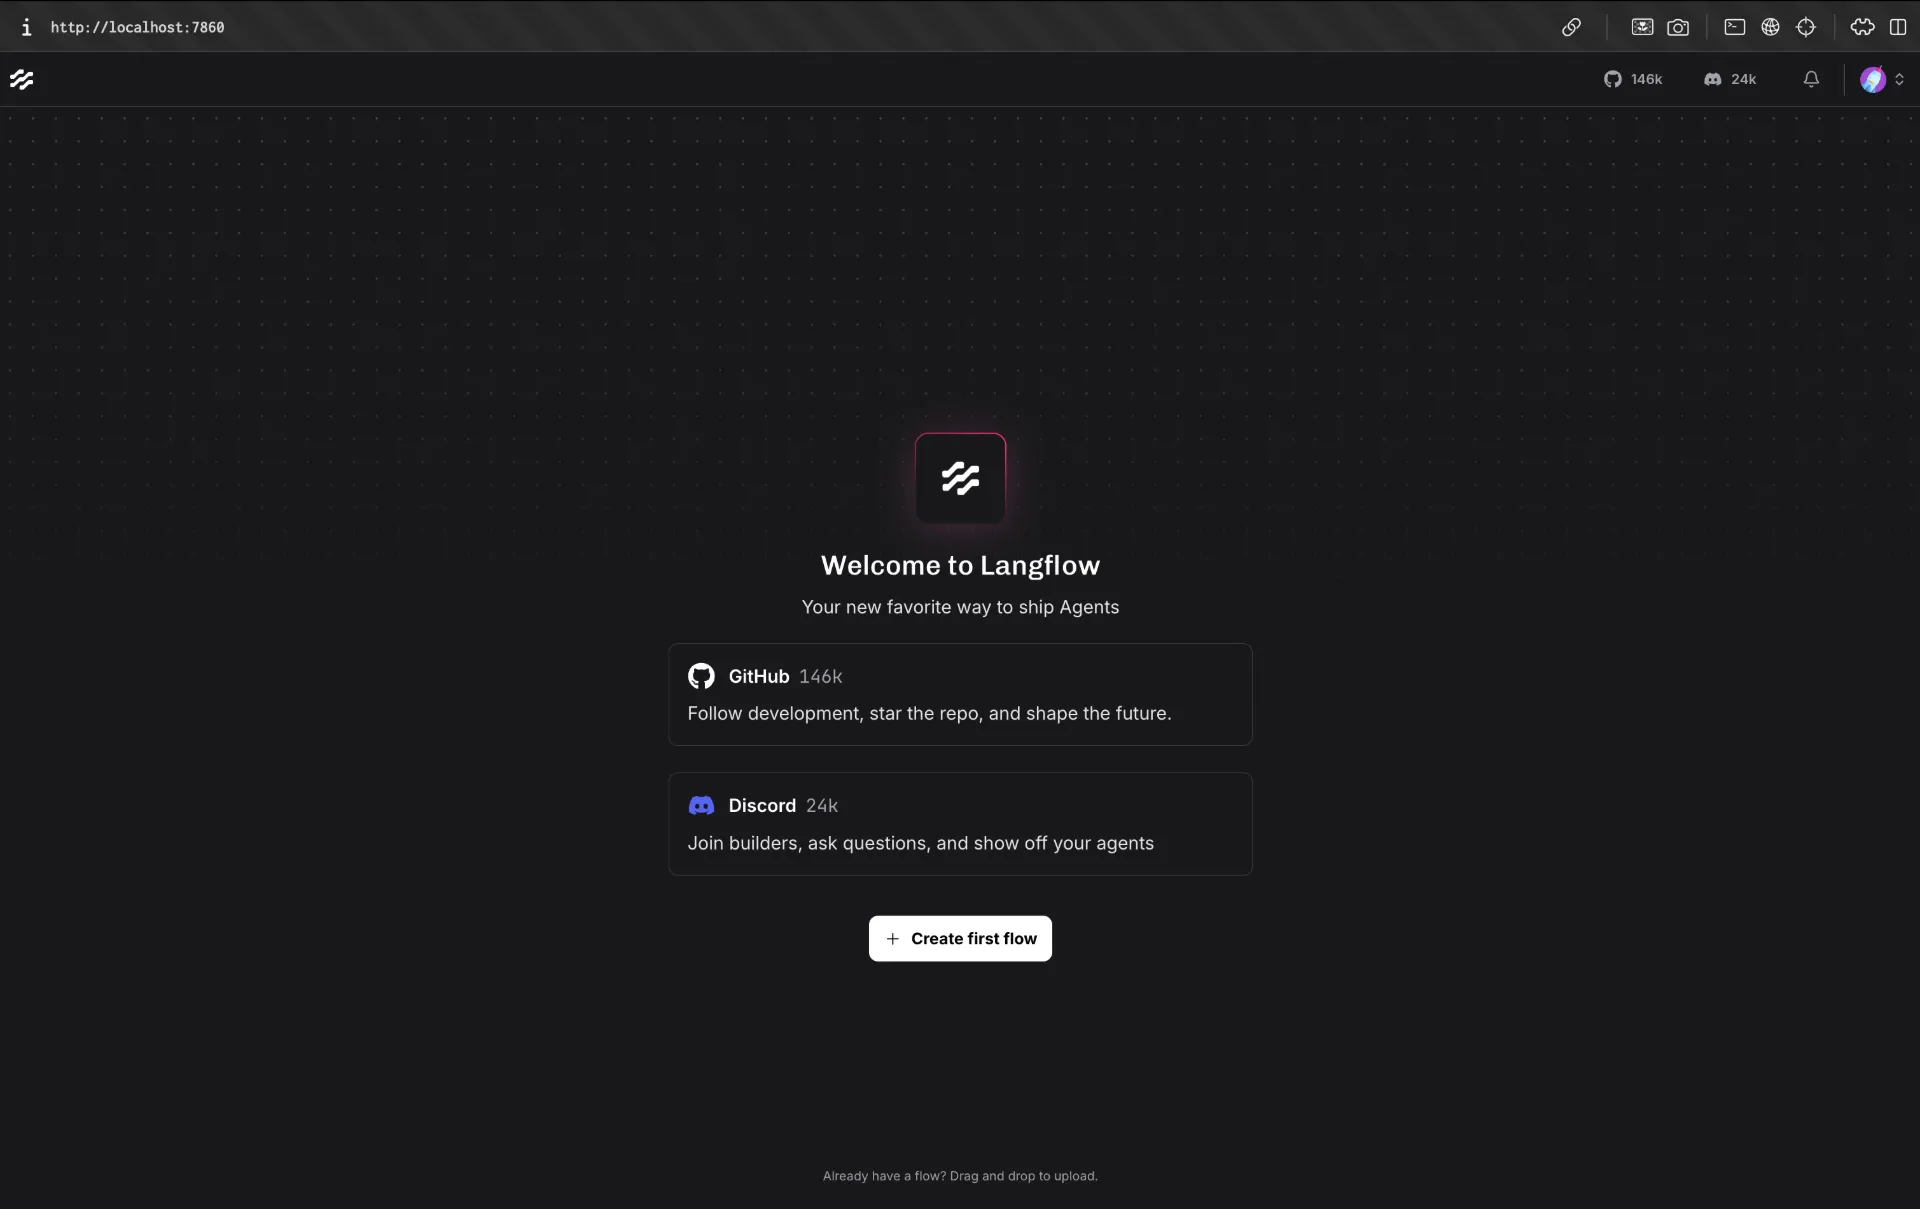
Open your browser and go to http://localhost:7860. You will be greeted by the Langflow editor a blank canvas ready for your first flow.
Changing the Default Port
If port 7860 is already in use on your machine, you can start Langflow on a different port:
langflow run --port 8080
Or set it permanently via an environment variable:
export LANGFLOW_PORT=8080
langflow run
Step 3: Production Setup with Docker Compose
For a more durable setup one that survives restarts and keeps your flows stored in a real database use Docker Compose with PostgreSQL. Create a docker-compose.yml file with the following contents:
services:
  langflow:
    image: langflowai/langflow:latest
    pull_policy: always
    ports:
      - "7860:7860"
    depends_on:
      - postgres
    env_file:
      - .env
    environment:
      - LANGFLOW_DATABASE_URL=postgresql://${POSTGRES_USER}:${POSTGRES_PASSWORD}@postgres:5432/${POSTGRES_DB}
      - LANGFLOW_CONFIG_DIR=/app/langflow
    volumes:
      - langflow-data:/app/langflow

  postgres:
    image: postgres:16
    environment:
      POSTGRES_USER: ${POSTGRES_USER}
      POSTGRES_PASSWORD: ${POSTGRES_PASSWORD}
      POSTGRES_DB: ${POSTGRES_DB}
    volumes:
      - langflow-postgres:/var/lib/postgresql/data

volumes:
  langflow-postgres:
  langflow-data:
Create a .env file in the same directory:
POSTGRES_USER=langflow
POSTGRES_PASSWORD=changeme
POSTGRES_DB=langflow
LANGFLOW_SUPERUSER=admin
LANGFLOW_SUPERUSER_PASSWORD=changeme
LANGFLOW_AUTO_LOGIN=False
Start everything with:
docker compose up -d
Your flows and credentials are now stored in PostgreSQL and will persist across container upgrades. When you want to update Langflow, run:
docker compose pull && docker compose up -d
Step 4: Expose Langflow Remotely with Pinggy
Langflow is running on your machine, but it is only accessible on your local network. To reach it from anywhere a remote office, a mobile device, or a collaborator’s laptop you need to create a public tunnel.
Pinggy makes this a single SSH command. No client installation is required; the SSH client that comes with every macOS, Linux, and Windows machine is all you need.
Create a Public Tunnel
Open a new terminal and run:
ssh -p 443 -R0:localhost:7860 free.pinggy.io
ssh -p 443 -R0:localhost:7860 free.pinggy.io
Pinggy will immediately output two public URLs:
http://abc123.a.pinggy.link  ➜  forwarding to localhost:7860
https://abc123.a.pinggy.link ➜  forwarding to localhost:7860
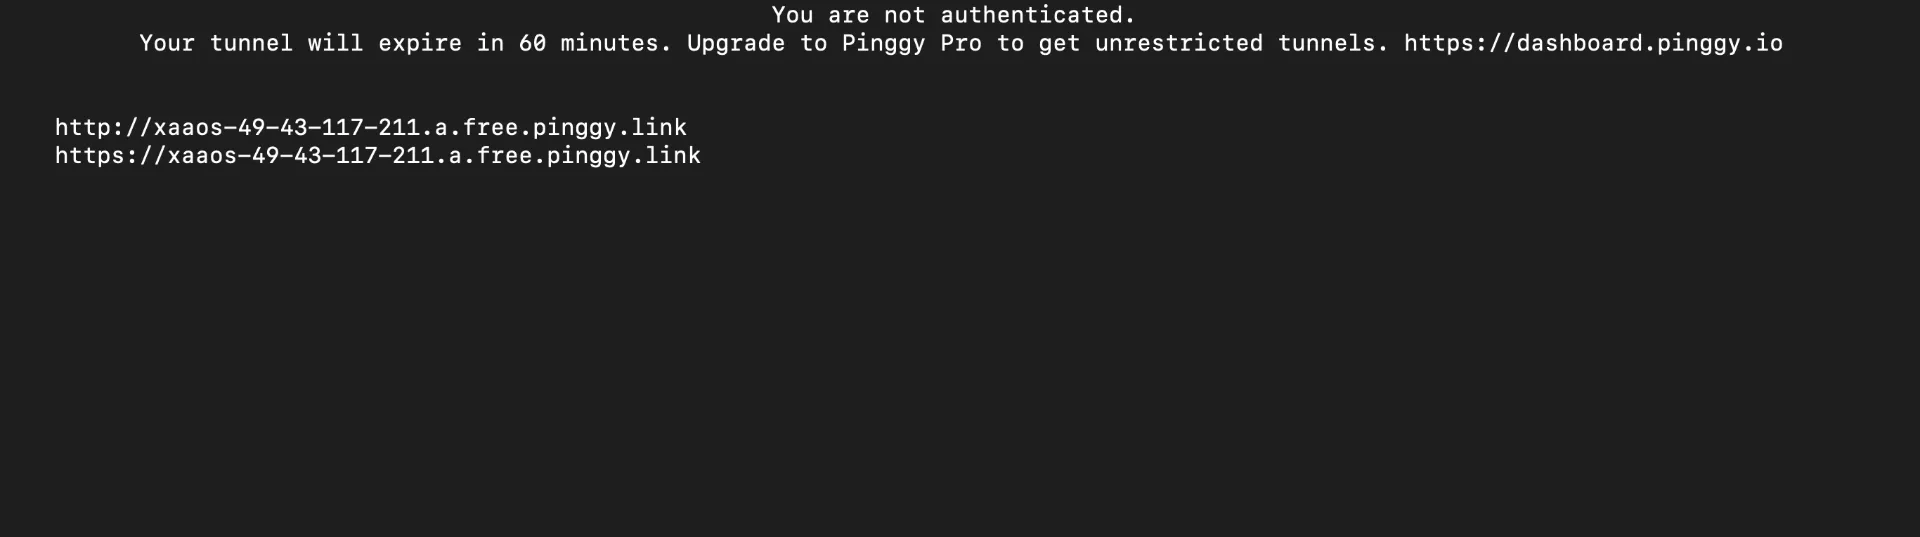
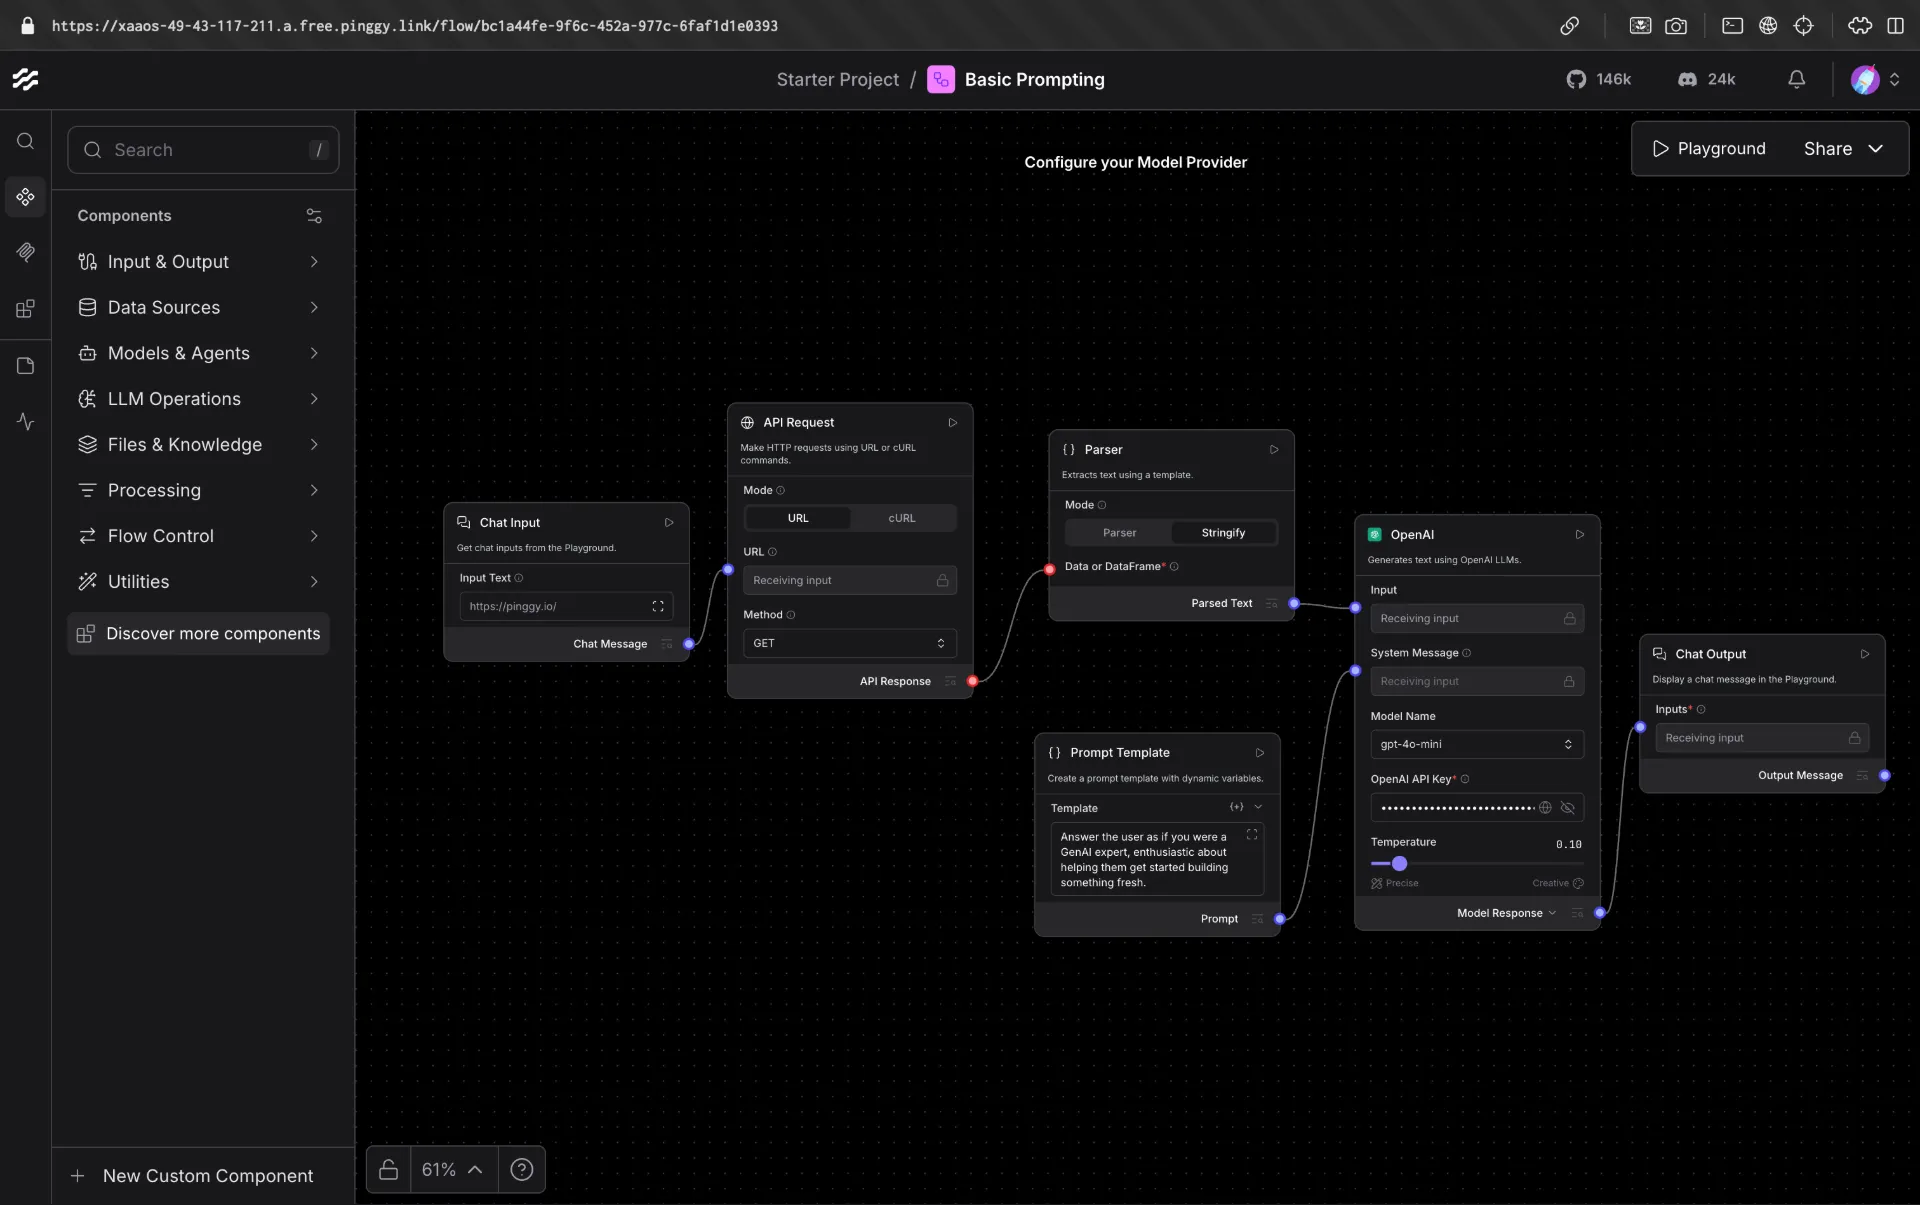
Open the HTTPS URL in any browser on any device, anywhere in the world and you will see your Langflow instance live.
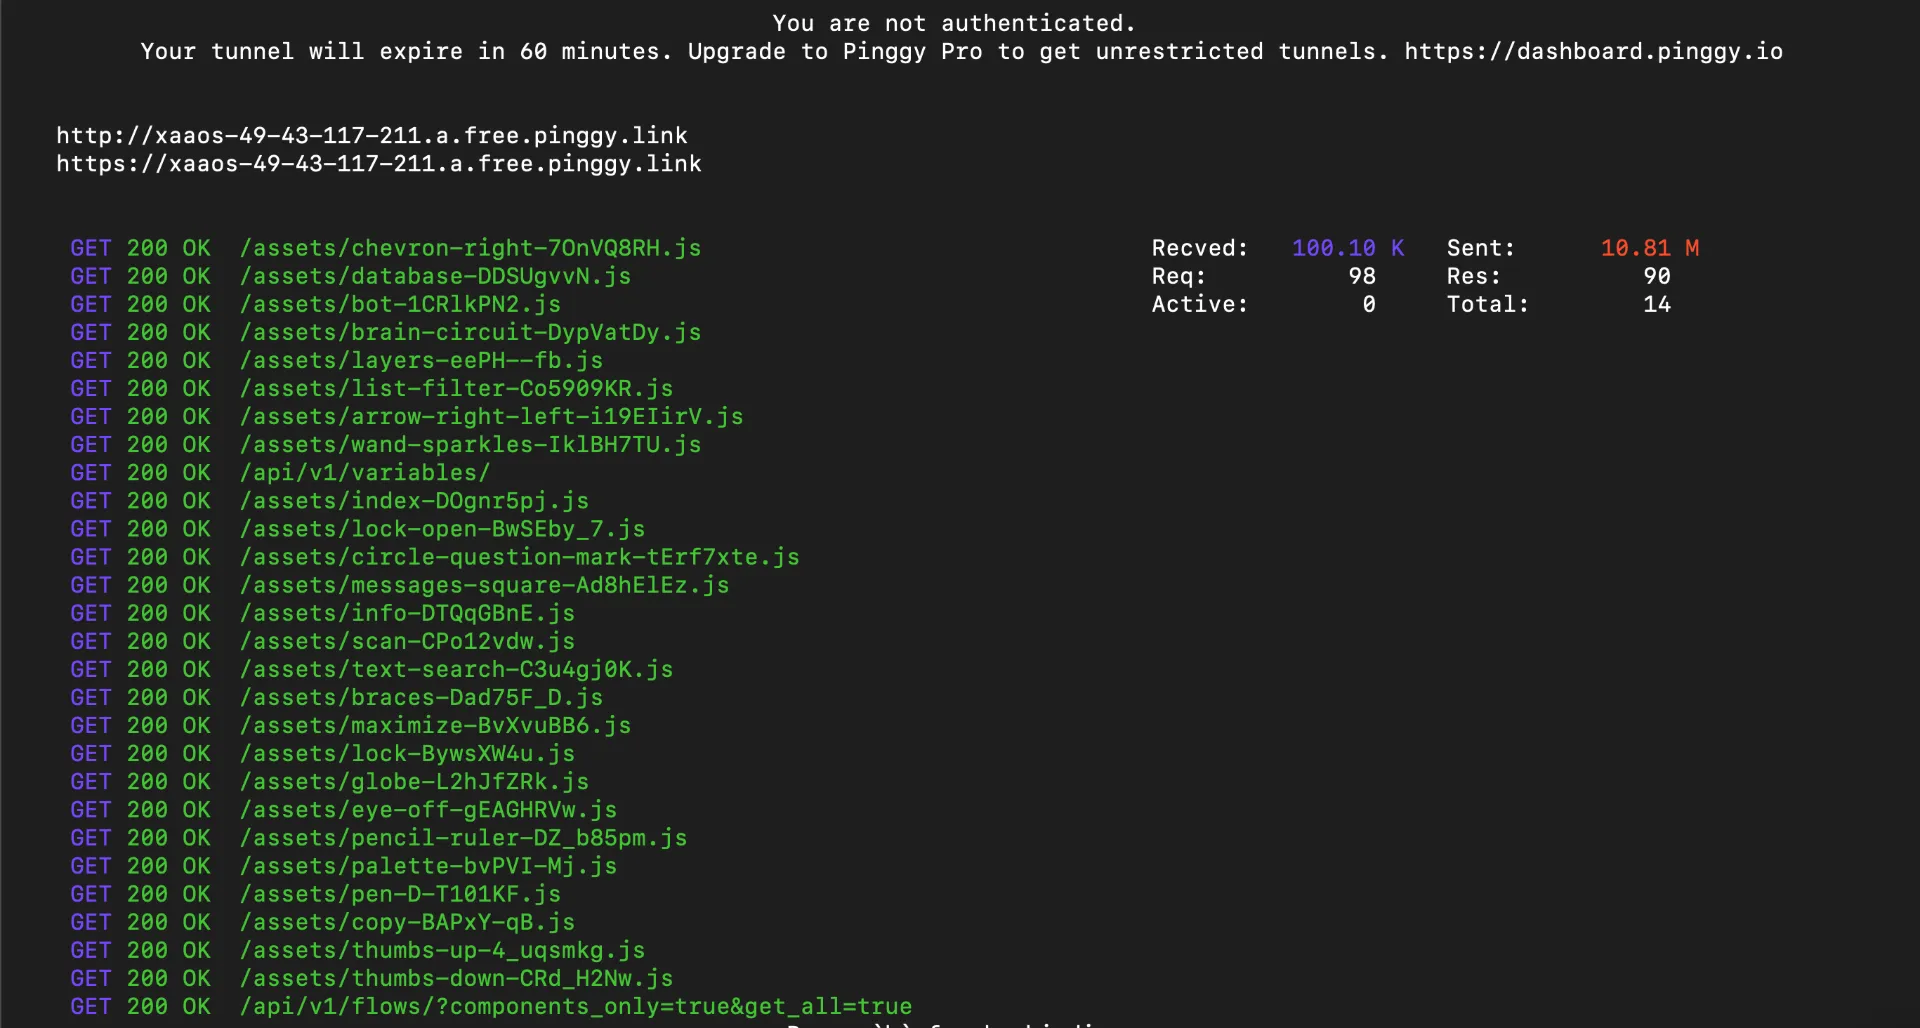
As you use Langflow through the tunnel, Pinggy logs every request in real time useful for confirming traffic is reaching your local instance and for debugging connectivity issues.
Add Password Protection
If you’re sharing the URL with specific collaborators, add basic authentication directly in the Pinggy command:
ssh -p 443 -R0:localhost:7860 -t free.pinggy.io b:username:password
Anyone visiting the public URL will see a browser login prompt before they can reach your Langflow canvas. This is especially useful if LANGFLOW_AUTO_LOGIN is enabled (the default) and you want an outer layer of access control.
Step 5: Build Your First AI Agent in Langflow
With Langflow running and accessible remotely, let’s build a simple AI agent. This example creates a chatbot that can answer questions and search the web a common starting point for custom AI agents.
Creating a New Flow
Click New Flow on the Langflow home screen, then select Blank Flow to start from scratch. You’ll see an empty canvas with a component library on the left sidebar.
Example: A Web Search Agent
This flow builds an agent that can search the web in real time and summarize the results useful for questions about current events or anything beyond the model’s training cutoff.
Components needed:
- Chat Input - the user’s question
- DuckDuckGo Search (or SerpAPI) - performs the web search, outputs
Data - Parse Data - converts
DatatoTextso it can feed into a prompt - Prompt Template - combines the question and search results into a prompt
- OpenAI - generates the final answer
- Chat Output - displays the response
The Parse Data component is required because the Search API outputs a Data object (structured records), while the Prompt Template expects plain Text. Without it, Langflow will refuse the connection the handle colors won’t match.
Steps:
Drag Chat Input onto the canvas.
Drag a DuckDuckGo Search component onto the canvas (no API key required). Set Max Results to
5in its settings.Drag a Parse Data component onto the canvas. In its Template field, enter
{text}to extract the result text from each record.Connect DuckDuckGo Search → Parse Data: wire the
Dataoutput (yellow handle) to theDatainput of Parse Data.Drag a Prompt Template component. In its Template field, enter:
Answer the following question using the search results below.

Question: {question}
Search results: {results}
Connect Chat Input → Prompt Template: wire the
Messageoutput to thequestioninput.Connect Parse Data → Prompt Template: wire the
Textoutput to theresultsinput.Drag an OpenAI component and connect Prompt Template → OpenAI. Add your API key and set the model to
gpt-4o-mini.Drag Chat Output and connect OpenAI → Chat Output.
Open Playground, type “What happened in AI news this week?”, and send.
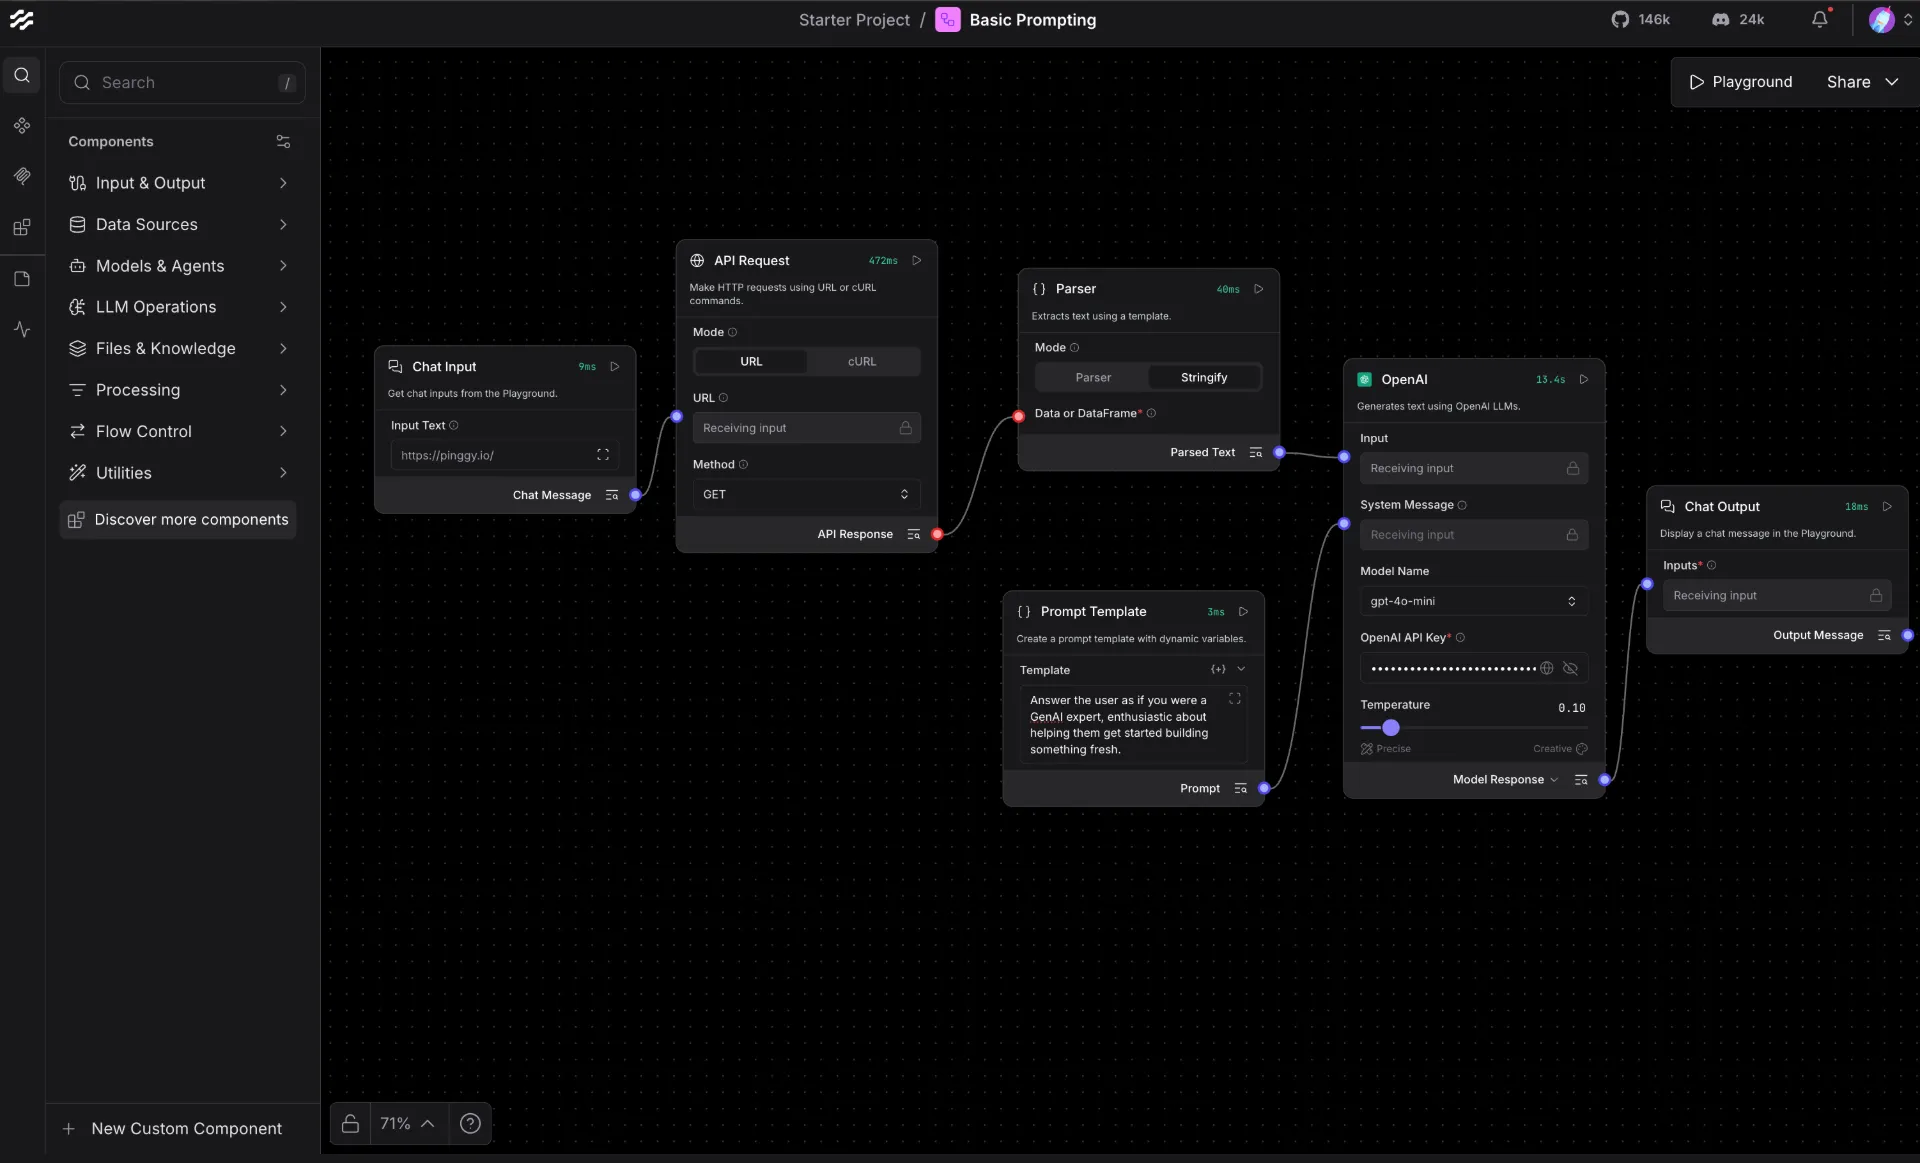
Langflow runs the search first, Parse Data flattens the results into a text block, then the Prompt Template injects both the question and results into the LLM. Check each component’s output in the Playground’s Logs tab to verify the data is flowing correctly at every step.
Building a Simple RAG Pipeline
A Retrieval-Augmented Generation (RAG) pipeline is one of the most common Langflow use cases. It lets your agent answer questions based on your own documents instead of just the model’s training data. Here’s the component flow:
- File component - upload a PDF or text file
- Split Text component - chunk the document into smaller pieces
- OpenAI Embeddings (or Ollama Embeddings for local inference) - convert chunks to vectors
- Chroma DB component - store and index the vectors locally
- Chat Input component - accept the user’s question
- Retriever component - fetch the most relevant chunks for the question
- Prompt Template component - combine the retrieved context with the question
- OpenAI / Anthropic / Ollama LLM component - generate the final answer
- Chat Output component - display the response
Drag each component onto the canvas and connect them by clicking the output handle of one component and dragging it to the input handle of the next. Langflow color-codes the handles by data type, so mismatched connections are easy to spot.
Connecting a Local LLM with Ollama
If you want to run the entire pipeline without sending data to any external API, connect an Ollama LLM component instead of OpenAI. Make sure Ollama is running on your machine:
ollama pull llama3.2
ollama serve
In the Langflow Ollama component, set the base URL to http://localhost:11434 and choose llama3.2 as your model. Every prompt and every document chunk stays on your hardware.
Running and Testing Your Flow
Click the Playground button at the bottom of the canvas to open the interactive chat panel. Type a question Langflow runs the flow step by step, and you can inspect the input and output at each node in real time. This is useful for debugging prompts and verifying that your retrieval is pulling the right context.
Once you’re satisfied, Langflow automatically generates a REST API for your flow. You can call it from any application:
curl -X POST \
  "http://localhost:7860/api/v1/run/<your-flow-id>" \
  -H "Content-Type: application/json" \
  -d '{"input_value": "What does the document say about pricing?"}'
Replace localhost:7860 with your Pinggy URL to call the agent from anywhere.
Supported Models and Integrations
Langflow supports a wide range of LLM providers out of the box. You can swap the language model component in any flow without changing anything else:
Language Models: OpenAI (GPT-4o, o-series), Anthropic (Claude), Google Gemini, Mistral, Groq, Cohere, Azure OpenAI, Ollama (any local model), HuggingFace, and LiteLLM (which itself proxies 100+ providers).
Vector Databases: Pinecone, Weaviate, Chroma, Qdrant, Astra DB, OpenSearch, FAISS, and Langflow’s built-in Knowledge Base (no external service required, introduced in v1.8).
Tools and Integrations: Web search, Slack, Gmail, Google Drive, GitHub, custom REST API calls, and any MCP-compatible tool server.
Starting with version 1.8, you can configure your API keys once in the Models panel and they are automatically available to every component across all your flows no need to re-enter credentials per component.
Conclusion
Langflow gives you a practical, privacy-respecting way to build custom AI agents without writing integration code from scratch. Running it locally keeps your data on your own infrastructure, and pairing it with Pinggy gives you instant, secure remote access with a single SSH command. Whether you’re building a RAG pipeline over internal documents, prototyping a multi-step agentic workflow, or exposing a flow as an API for a larger application, the self-hosted setup described here gives you full control over the entire stack.
For next steps, explore the Langflow documentation to learn about MCP server integration, the v2 Workflow API for async background jobs, and the built-in tracing and observability features that help you debug and optimize complex flows.