How to Set Up and Test PayPal Webhook Locally
Updated on Dec 25, 2025 · 6 mins read
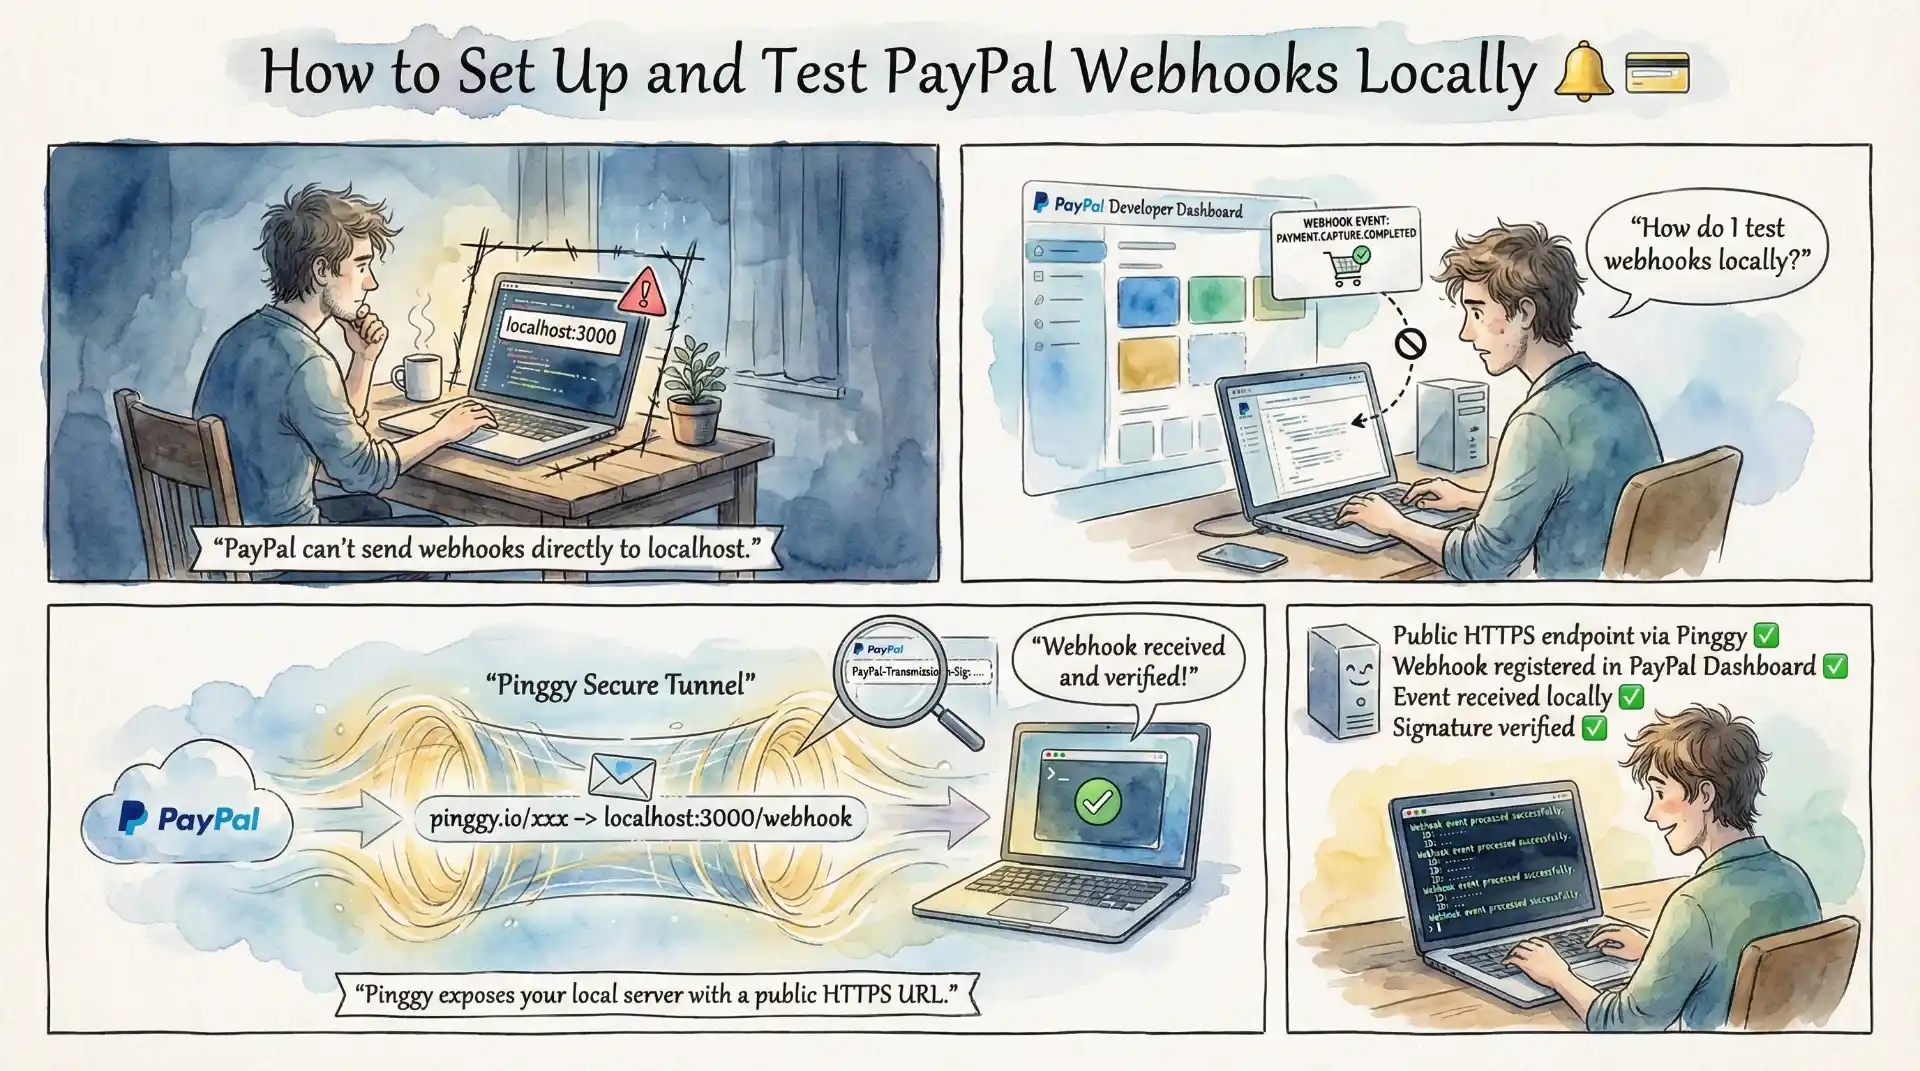
Building a payment integration with PayPal requires handling webhooks to receive real-time notifications about transactions, disputes, subscriptions, and other payment events. However, testing webhooks during local development presents a significant challenge: PayPal needs to send HTTP requests to your server, which means your localhost isn’t directly reachable. In this guide, you’ll learn how to set up and test PayPal webhooks locally using Pinggy, a simple tunneling tool that exposes your local server to the internet with just one command.
Summary
PayPal Webhooks Explained
- Real-time HTTP notifications for payment events like
PAYMENT.CAPTURE.COMPLETED,CHECKOUT.ORDER.APPROVED, and more - Essential for tracking payment status, handling disputes, and managing subscriptions
- Requires a publicly accessible URL to receive events
Quick Setup Guide
- Create PayPal Developer account at developer.paypal.com
- Create webhook listener server (Node.js/Express) to receive events
- Expose locally with Pinggy:
ssh -p 443 -R0:localhost:3000 qr@a.pinggy.io
- Configure webhook URL in PayPal sandbox app settings
- Test using PayPal Webhook Simulator
Why Use Webhooks?
- Receive instant payment confirmations without polling
- Handle asynchronous payment flows (e.g., pending payments)
- Get notified about disputes, refunds, and subscription changes
- Required for production-grade PayPal integrations
Understanding PayPal Webhooks
PayPal webhooks are HTTP callbacks that notify your application when specific events occur in your PayPal account. Instead of continuously polling the PayPal API to check for updates, your server receives real-time notifications whenever a relevant event happens whether that’s a completed payment, a refund, a dispute, or a subscription renewal.
When an event occurs, PayPal sends an HTTP POST request to your configured webhook URL containing a JSON payload with details about the event. This payload includes the event type, timestamp, and resource data such as transaction details, customer information, and payment amounts. Your server must respond with an HTTP 2xx status code to acknowledge receipt; otherwise, PayPal will retry delivery up to 25 times over 3 days.
Common webhook events you’ll want to handle include:
- PAYMENT.CAPTURE.COMPLETED - Payment successfully captured
- CHECKOUT.ORDER.APPROVED - Customer approved the payment
- PAYMENT.CAPTURE.REFUNDED - Payment was refunded
- BILLING.SUBSCRIPTION.ACTIVATED - Subscription became active
- CUSTOMER.DISPUTE.CREATED - Customer opened a dispute
Prerequisites
Before getting started, ensure you have the following:
- A PayPal Developer account (free to create)
- Node.js 16+ installed on your machine
- Basic familiarity with Express.js or similar web frameworks
- Access to a terminal/command line
Step 1: Set Up Your PayPal Developer Account
First, you need to access the PayPal Developer Dashboard and create a sandbox application:
- Go to developer.paypal.com and log in with your PayPal account
- Navigate to “Apps & Credentials” in the dashboard
- Make sure you’re in Sandbox mode (toggle at the top)
- Click “Create App” to create a new sandbox application
- Give your app a name and click “Create App”
After creating your app, you’ll see your Client ID and Secret. Keep these credentials secure as you’ll need them for API authentication and webhook verification.
PayPal’s sandbox environment provides test accounts that allow you to simulate transactions without processing real payments. You can find these under “Sandbox” → “Accounts” in the developer dashboard.
Step 2: Create a Local Webhook Listener Server
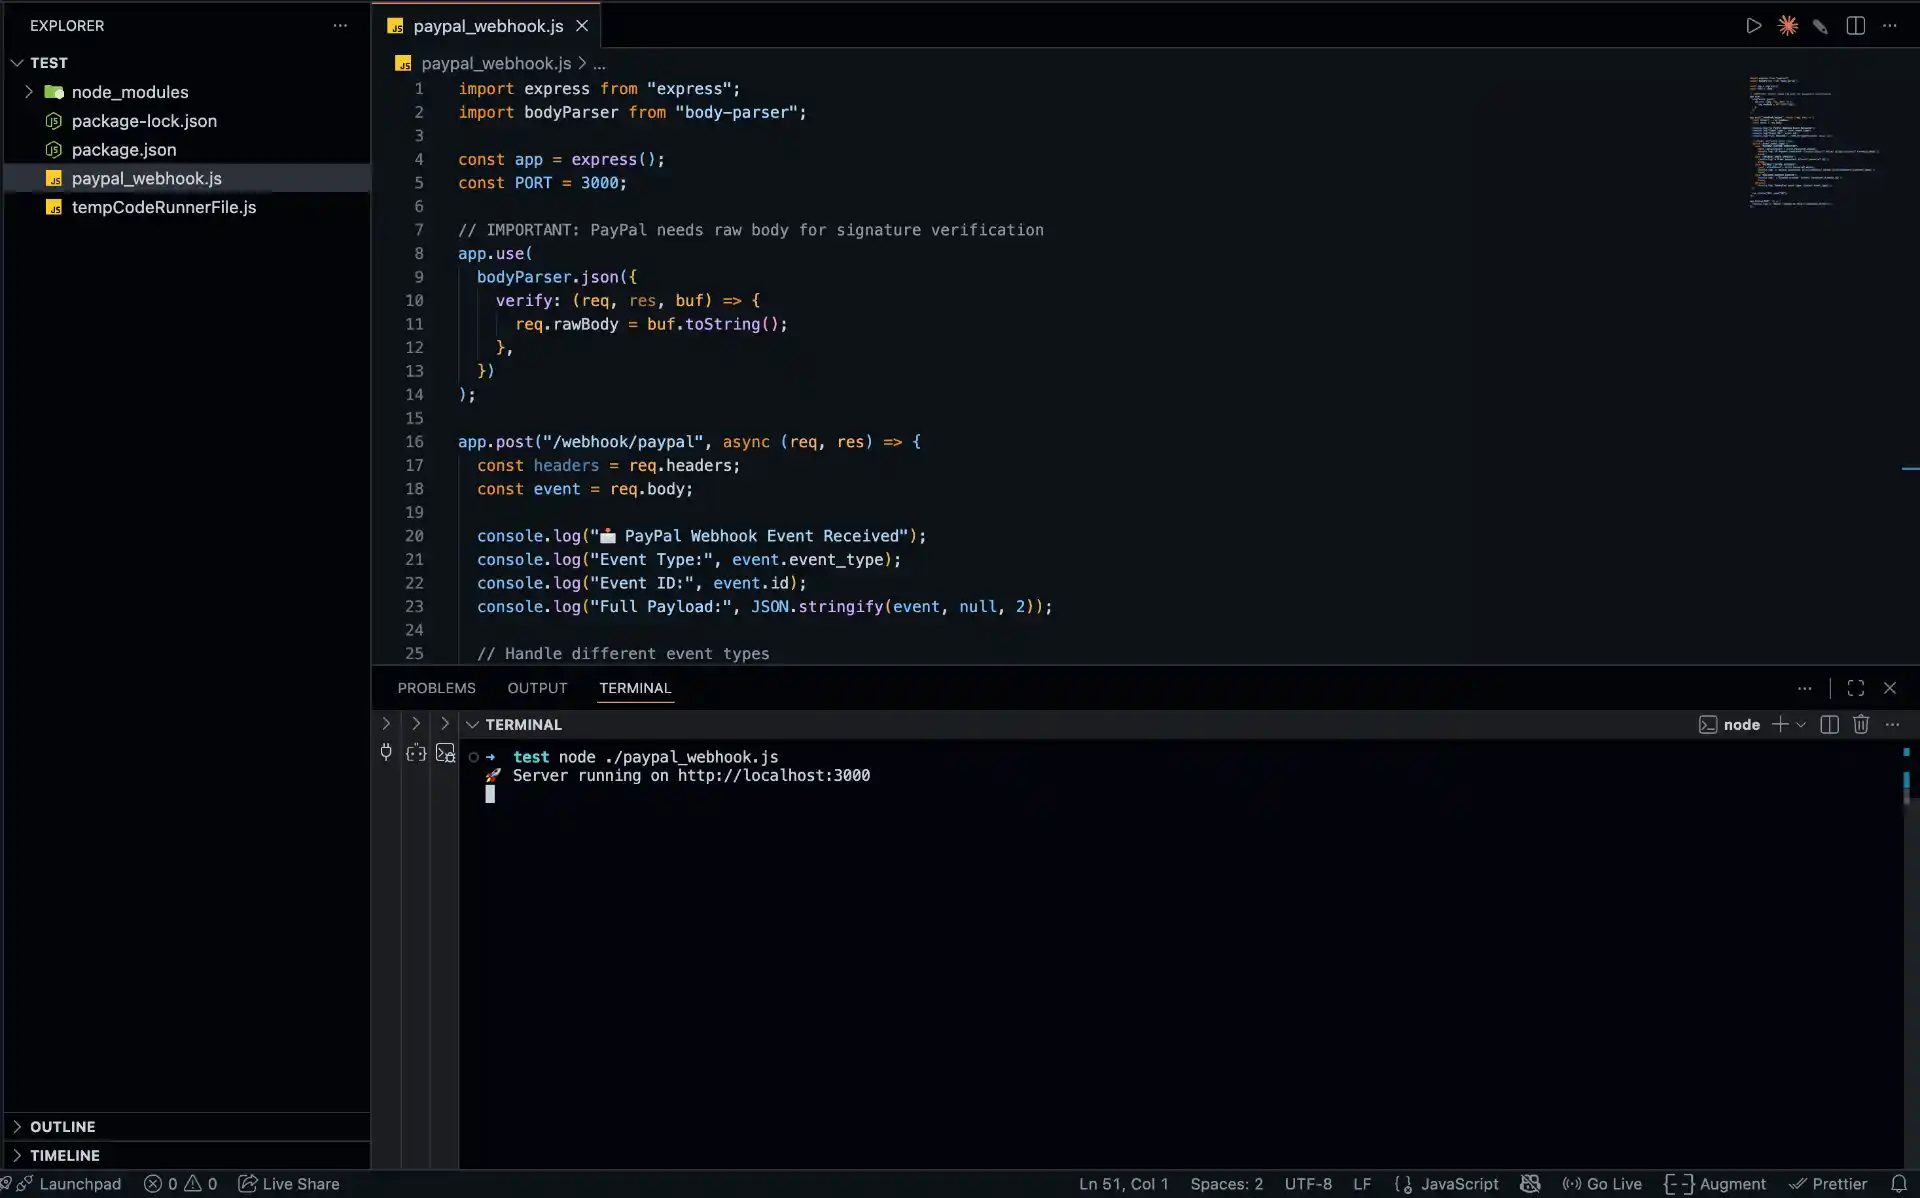
Next, create a server that can receive and process webhook events from PayPal. Here’s a simple example using Node.js and Express that includes the raw body preservation needed for signature verification:
import express from "express";
import bodyParser from "body-parser";

const app = express();
const PORT = 3000;

// IMPORTANT: PayPal needs raw body for signature verification
app.use(
  bodyParser.json({
    verify: (req, res, buf) => {
      req.rawBody = buf.toString();
    },
  })
);

app.post("/webhook/paypal", async (req, res) => {
  const headers = req.headers;
  const event = req.body;

  console.log("📩 PayPal Webhook Event Received");
  console.log("Event Type:", event.event_type);
  console.log("Event ID:", event.id);
  console.log("Full Payload:", JSON.stringify(event, null, 2));

  // Handle different event types
  switch (event.event_type) {
    case "PAYMENT.CAPTURE.COMPLETED":
      const captureAmount = event.resource?.amount;
      console.log(`💰 Payment completed: ${captureAmount?.value} ${captureAmount?.currency_code}`);
      break;
    case "CHECKOUT.ORDER.APPROVED":
      console.log(`✅ Order approved: ${event.resource?.id}`);
      break;
    case "PAYMENT.CAPTURE.REFUNDED":
      const refundAmount = event.resource?.amount;
      console.log(`↩️ Refund processed: ${refundAmount?.value} ${refundAmount?.currency_code}`);
      break;
    case "CUSTOMER.DISPUTE.CREATED":
      console.log(`⚠️ Dispute created: ${event.resource?.dispute_id}`);
      break;
    default:
      console.log(`Unhandled event type: ${event.event_type}`);
  }

  res.status(200).send("OK");
});

app.listen(PORT, () => {
  console.log(`🚀 Server running on http://localhost:${PORT}`);
});
Save this code as paypal_webhook.js and initialize your project:
npm init -y
npm install express body-parser
Add "type": "module" to your package.json to enable ES modules, then run the server:
node paypal_webhook.js
Your webhook listener is now running at http://localhost:3000/webhook/paypal.
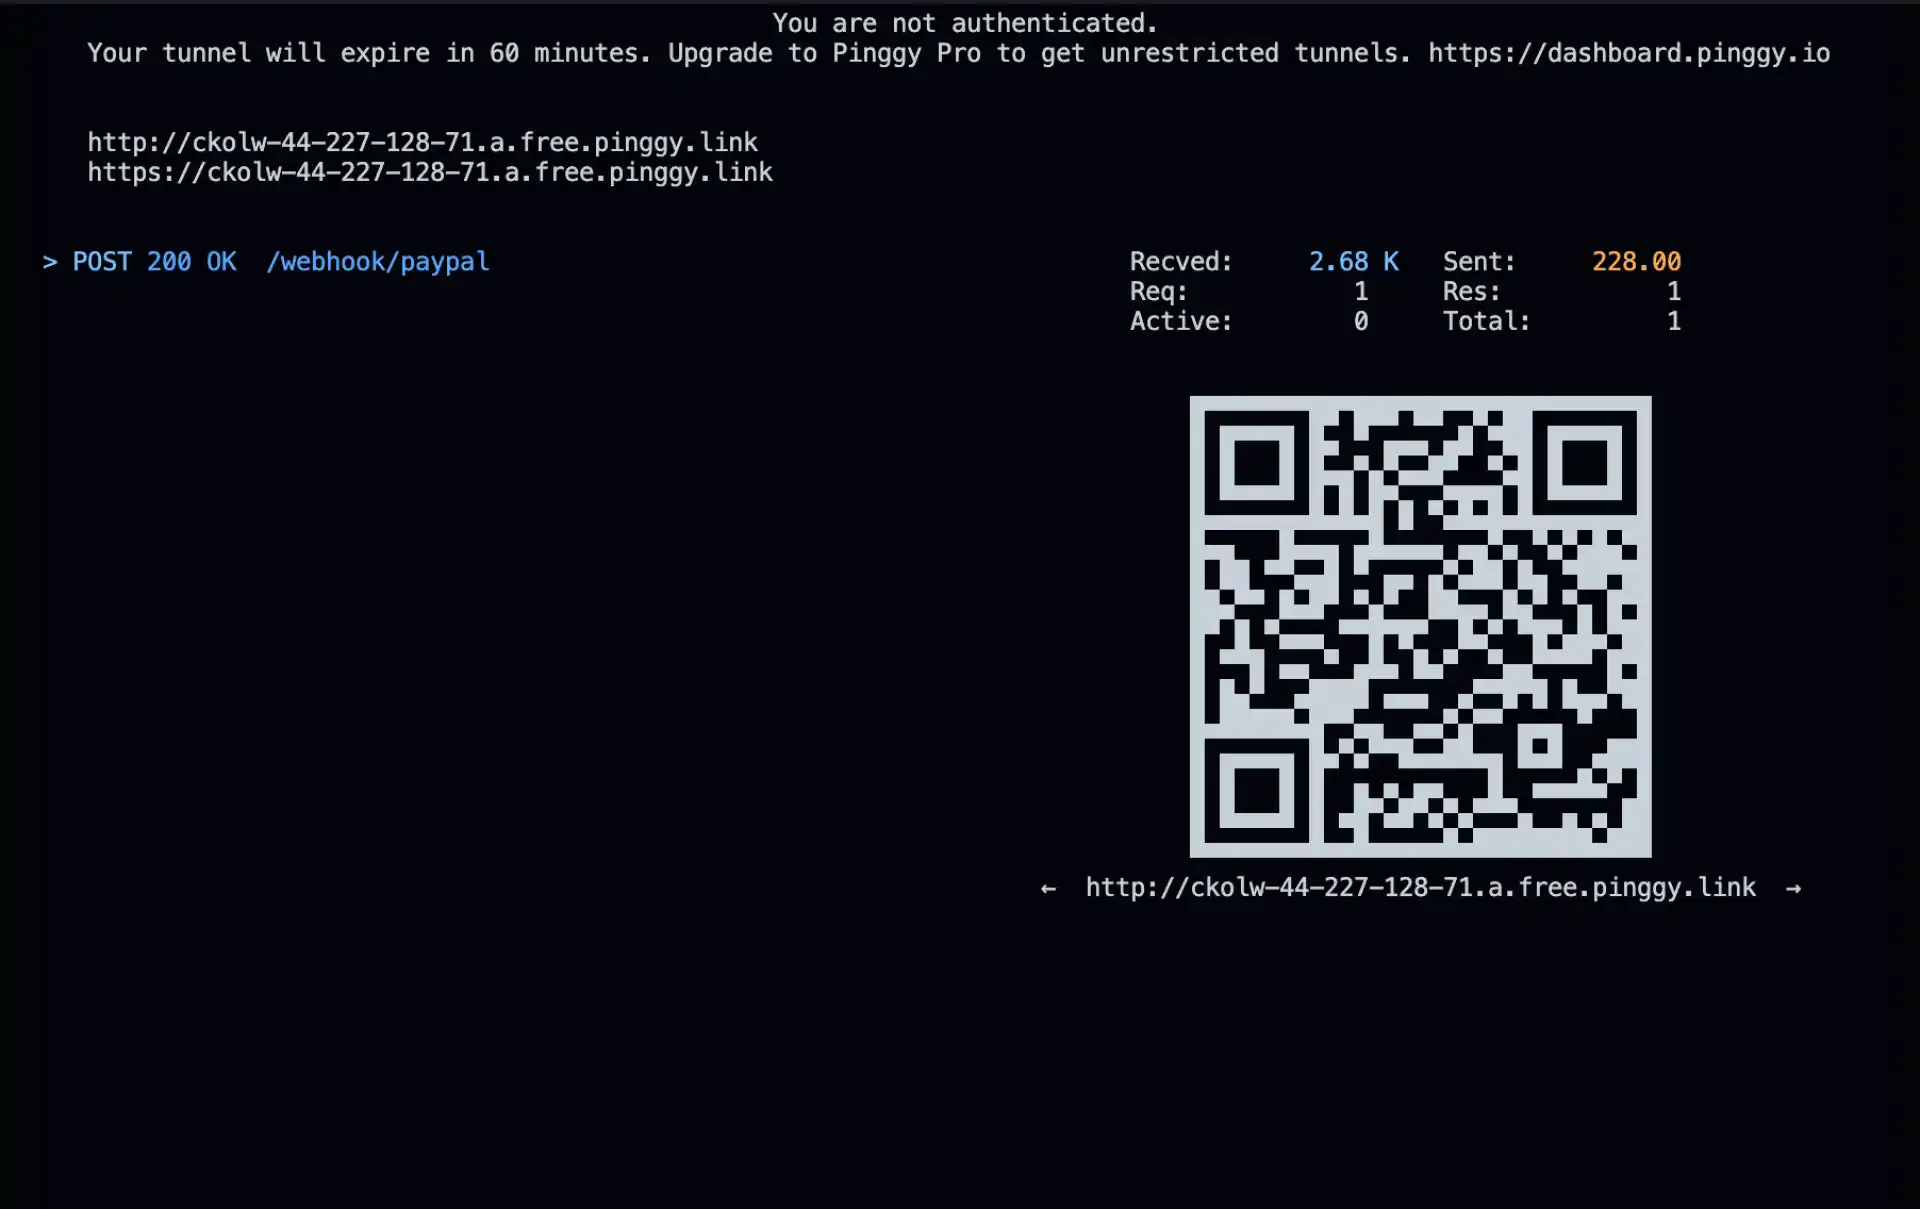
Step 3: Expose Your Localhost with Pinggy
PayPal requires a publicly accessible HTTPS URL to send webhook events. During local development, your localhost isn’t reachable from the internet. This is where Pinggy comes in it creates a secure tunnel that exposes your local server to the web with a single command.
Open a new terminal window and run:

Pinggy will provide you with a public URL like:
https://abcdefghij.a.pinggy.link
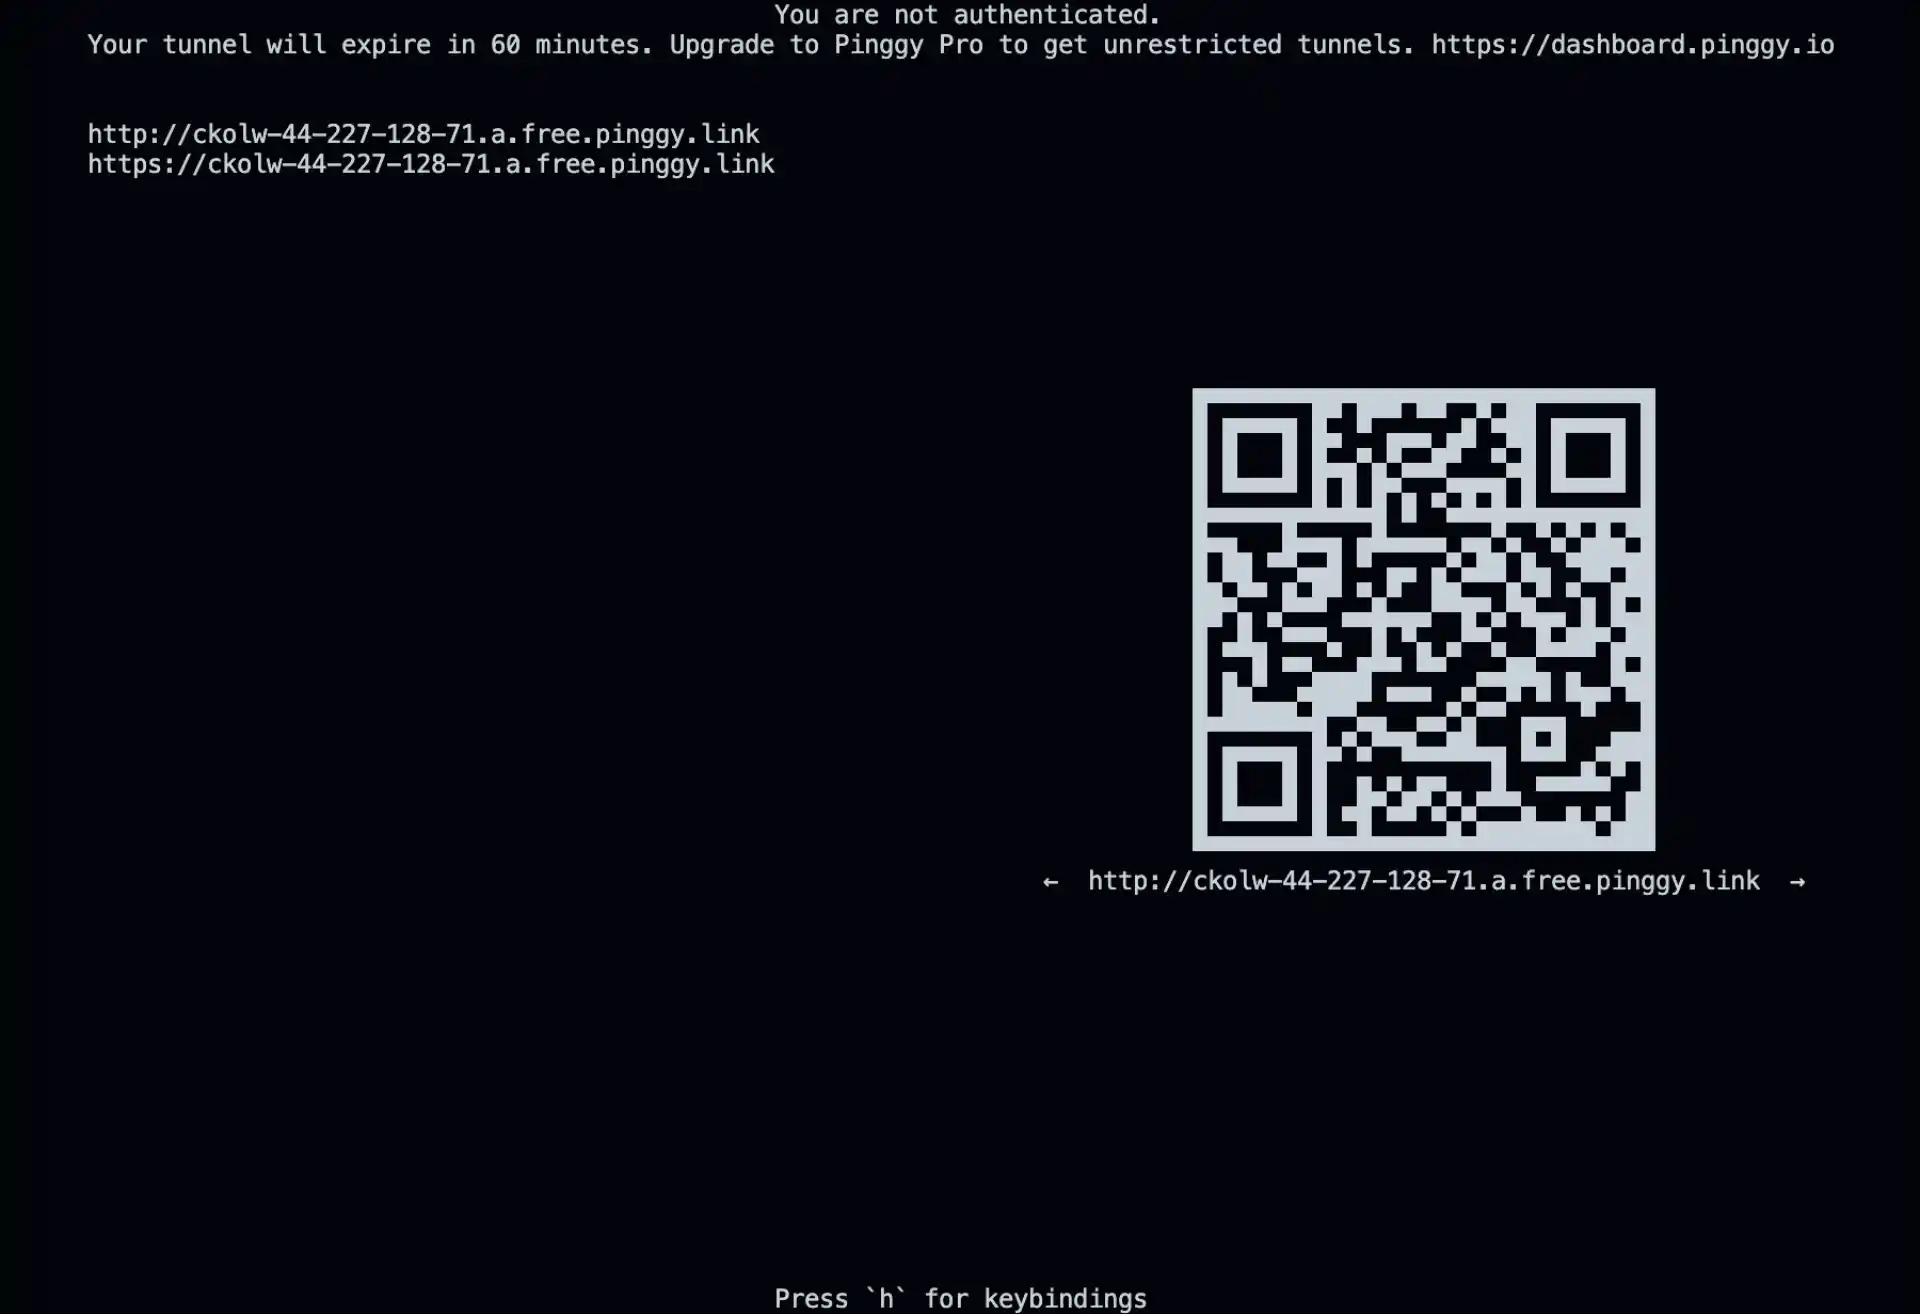
This URL now points to your local webhook server. Your complete webhook endpoint URL will be:
https://abcdefghij.a.pinggy.link/webhook/paypal
Keep the Pinggy tunnel running while you configure and test your PayPal webhooks.
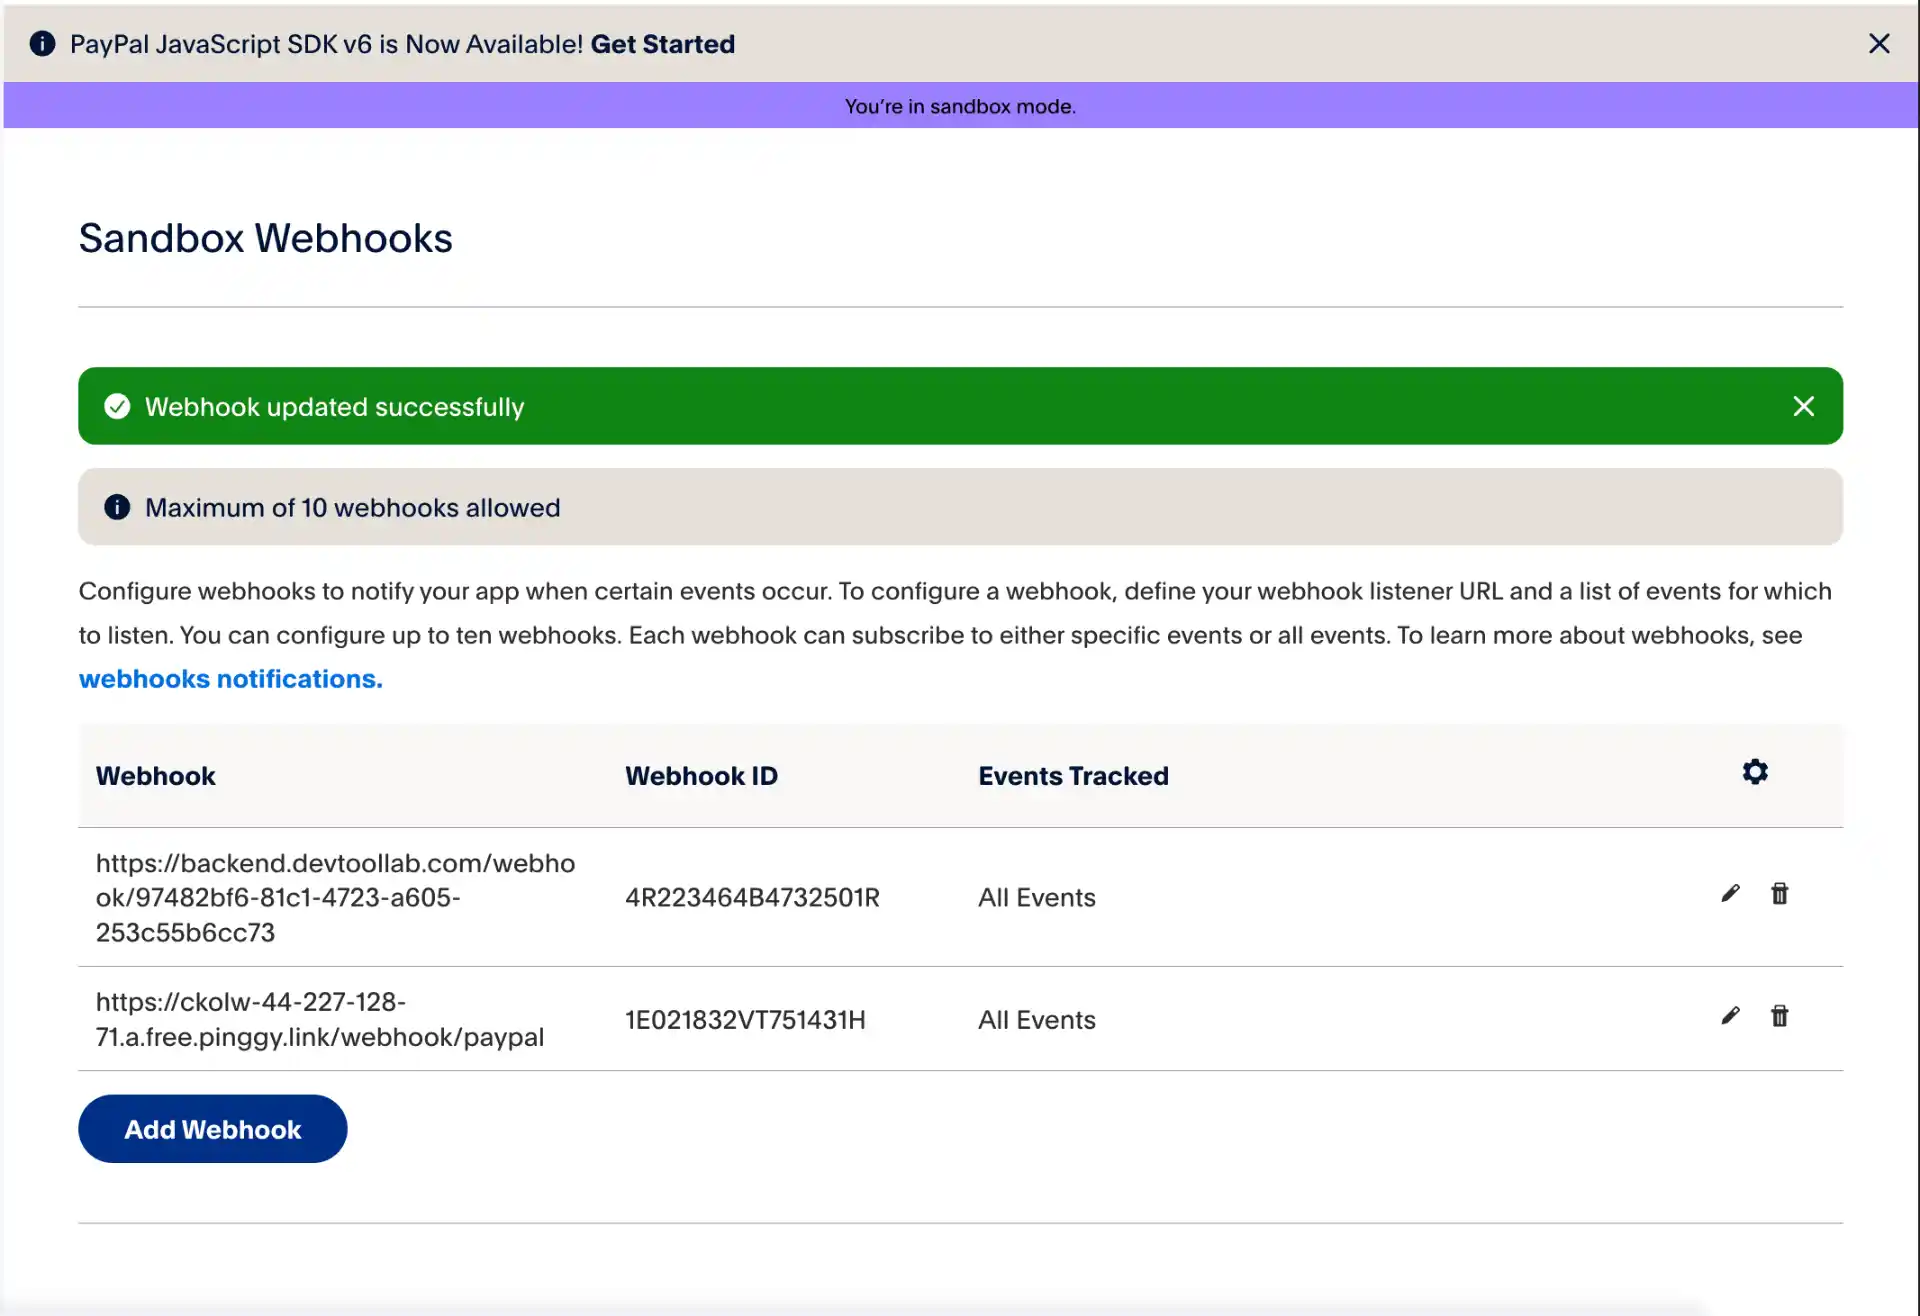
Step 4: Configure Webhook in PayPal
Now that you have a public URL, configure it in your PayPal sandbox application:
- Go to your PayPal Developer Dashboard
- Click on your sandbox application
- Scroll down to the “Webhooks” section
- Click “Add Webhook”
- Enter your Pinggy URL with the webhook endpoint path:
https://abcdefghij.a.pinggy.link/webhook/paypal - Select the events you want to subscribe to. For testing, select:
PAYMENT.CAPTURE.COMPLETEDCHECKOUT.ORDER.APPROVEDPAYMENT.CAPTURE.REFUNDEDCUSTOMER.DISPUTE.CREATED
- Click “Save”
PayPal will display a Webhook ID after successful configuration. Make note of this ID you’ll need it for signature verification in production.
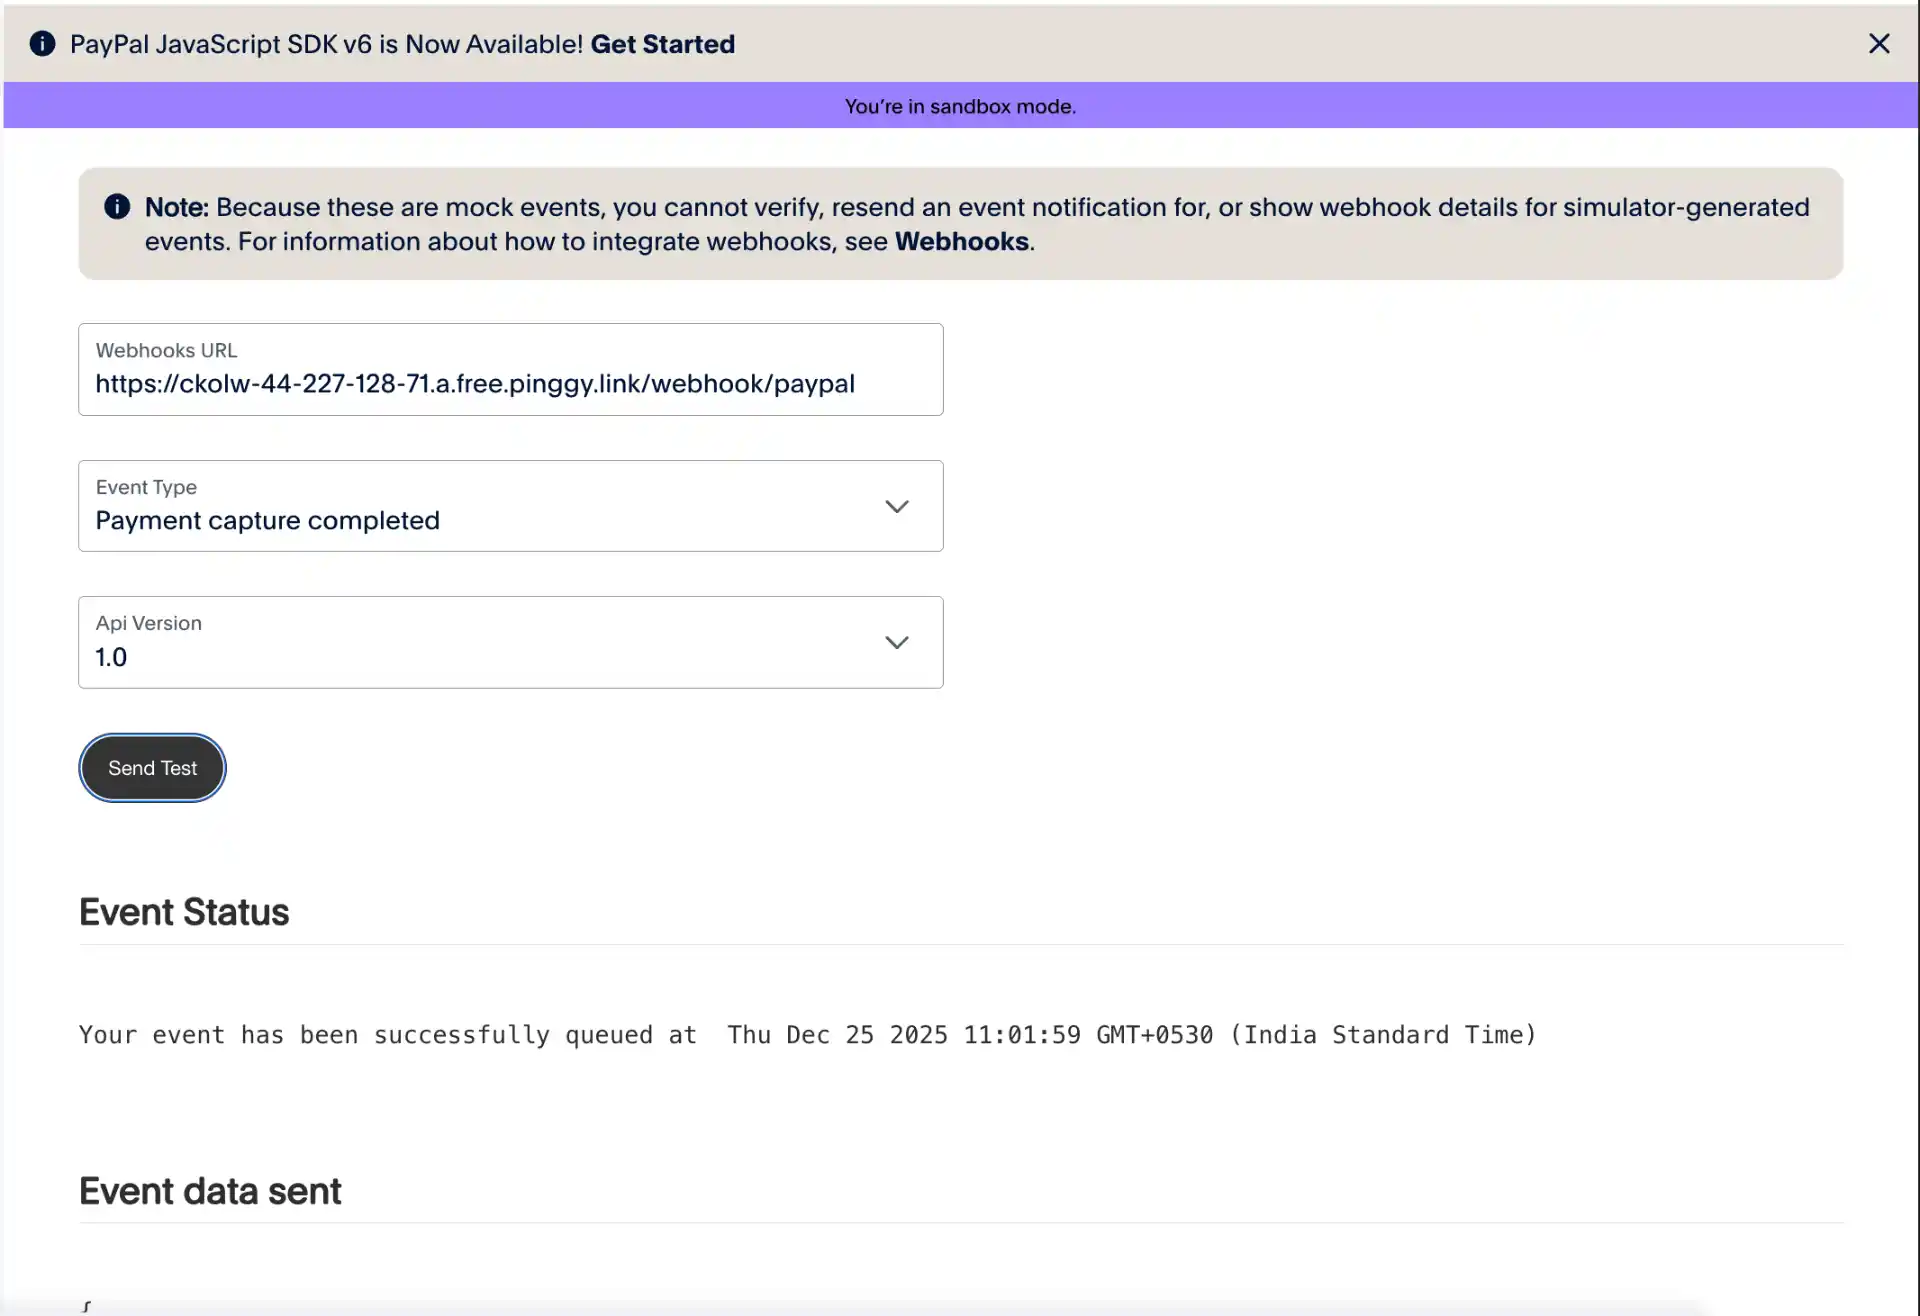
Step 5: Test with PayPal’s Webhook Simulator
PayPal provides a Webhook Simulator that lets you send test events to your webhook endpoint without making actual transactions. This is perfect for verifying your listener is working correctly.
- Go to the PayPal Webhook Simulator
- Enter your webhook URL:
https://abcdefghij.a.pinggy.link/webhook/paypal - Select an event type from the dropdown (e.g.,
PAYMENT.CAPTURE.COMPLETED) - Click “Send Test”
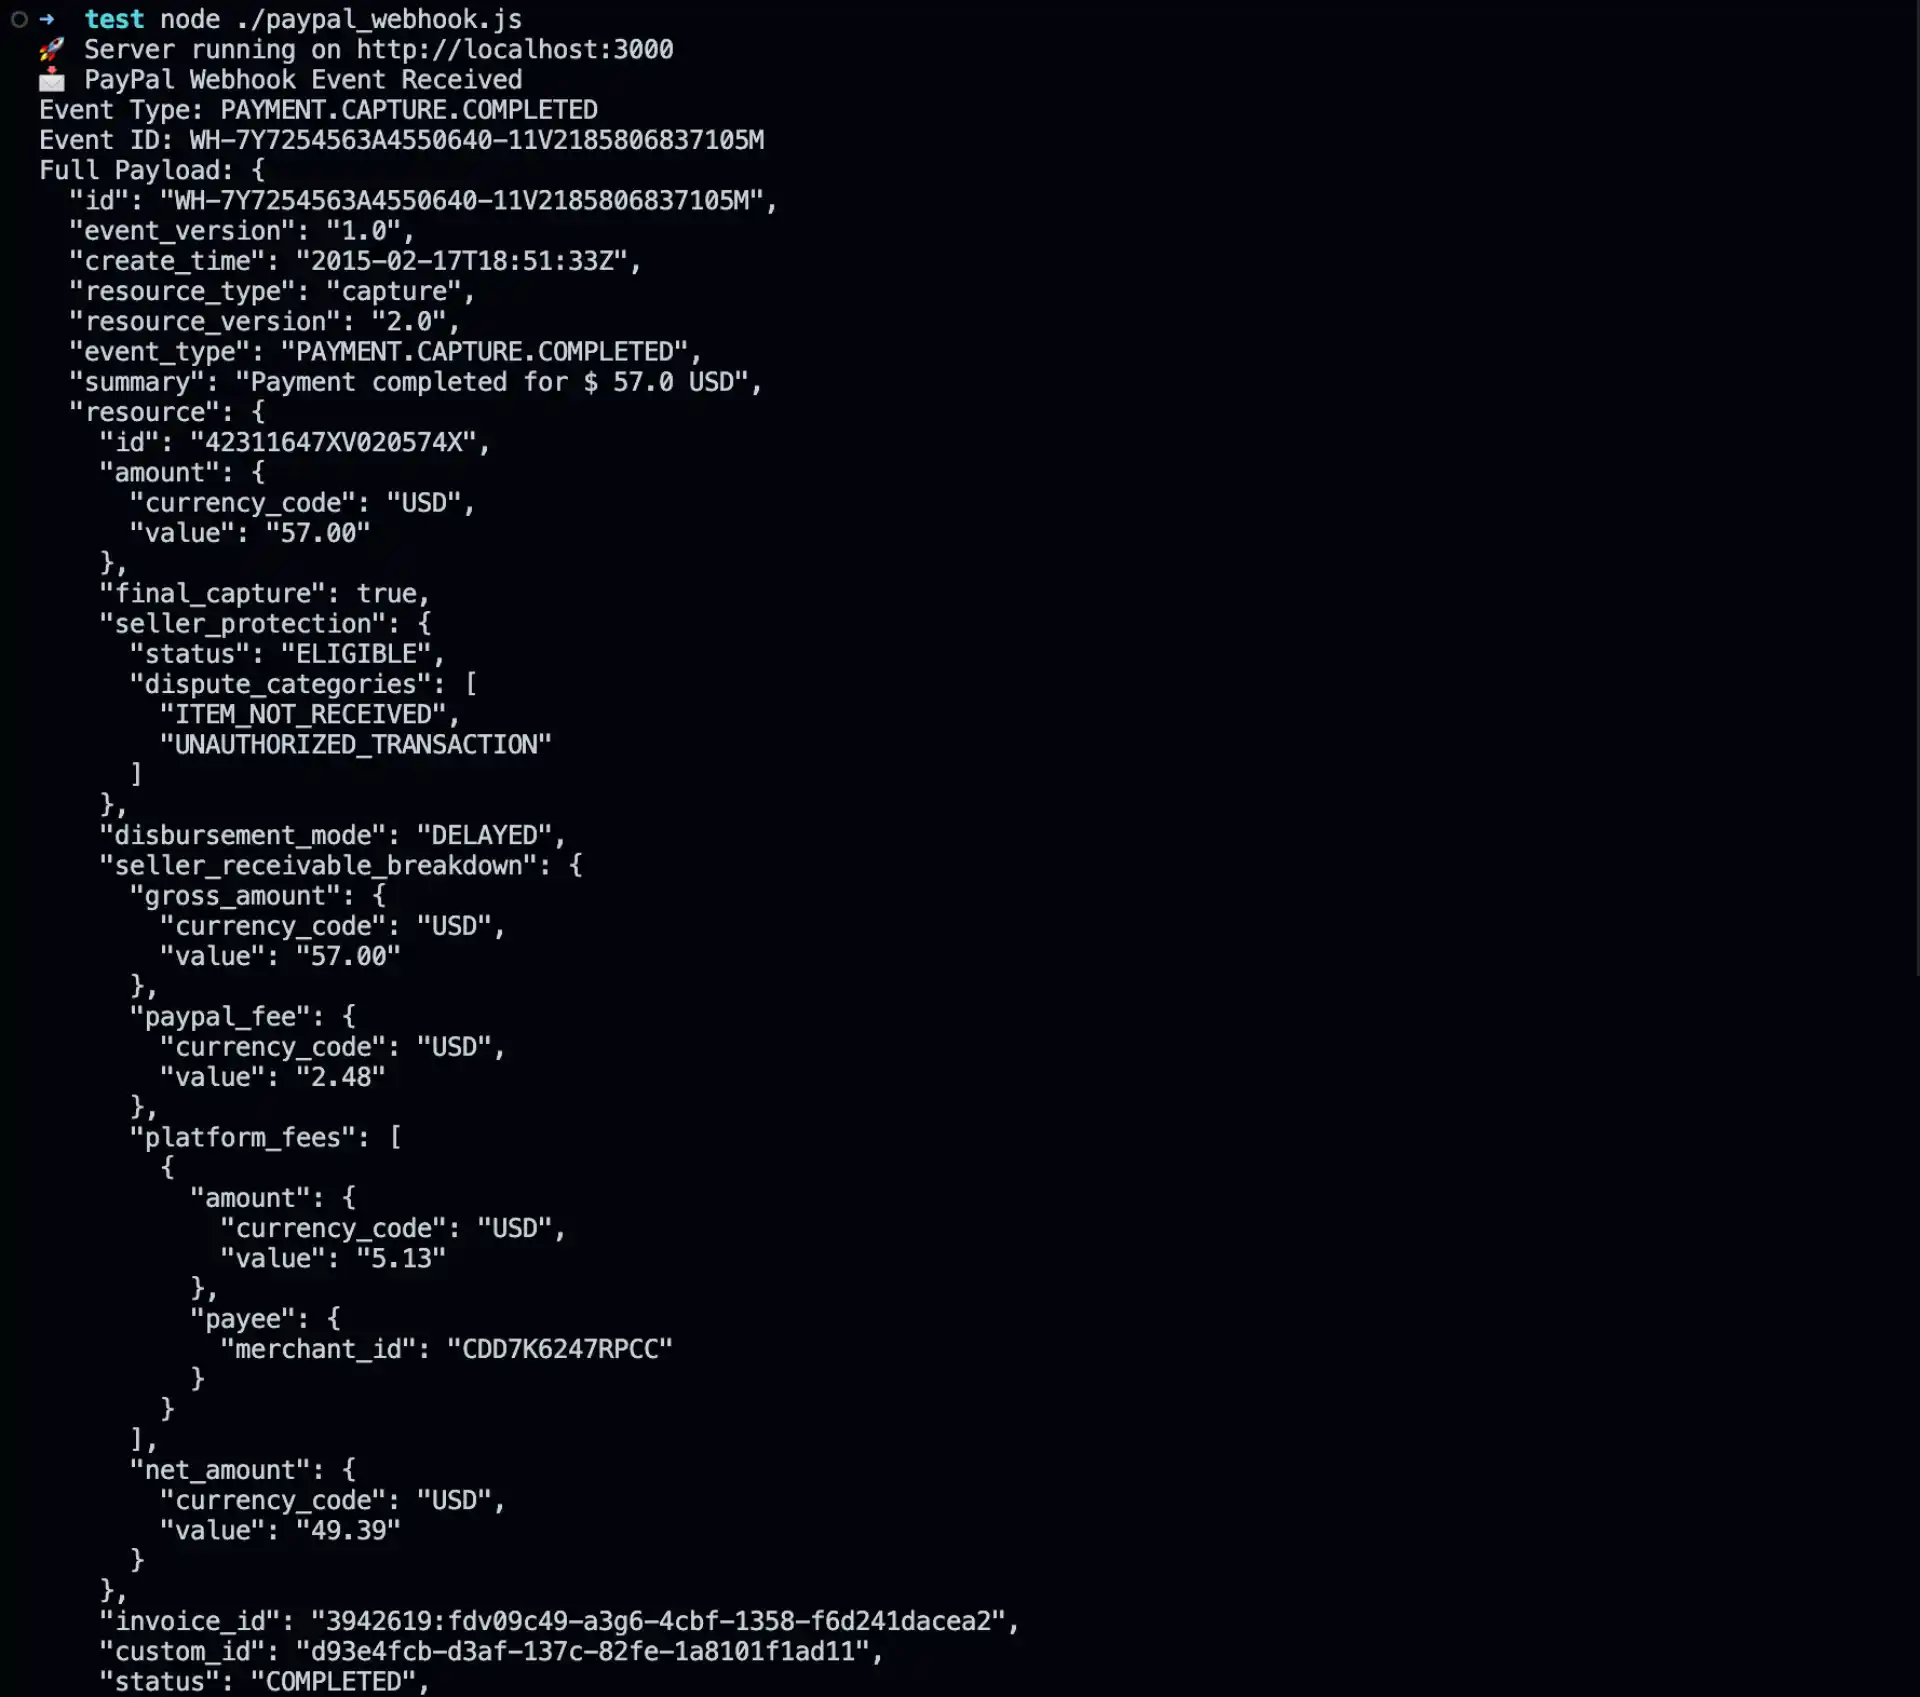
Check your terminal where the Node.js server is running. You should see log output showing the received webhook event:
📩 PayPal Webhook Event Received
Event Type: PAYMENT.CAPTURE.COMPLETED
Event ID: WH-7YX49823S2290830K-0FE11B7M
💰 Payment completed: 100.00 USD
If you see this output, your webhook listener is working correctly.
Note: Mock events from the simulator have a special Webhook ID of WEBHOOK_ID and cannot be verified using PayPal’s signature verification endpoint. They’re purely for testing the functionality of your listener.
Conclusion
Setting up and testing PayPal webhooks locally is straightforward with the right tools. By using Pinggy to expose your local development server, you can test your webhook integration without deploying to a production server. This significantly speeds up development and debugging of payment integrations.
The combination of PayPal’s Webhook Simulator for quick functional testing and real sandbox transactions for end-to-end testing ensures your integration is robust before going live. Remember to always implement proper signature verification in production to protect against malicious requests.
For more advanced webhook configurations, including handling multiple webhook endpoints and managing webhook subscriptions programmatically, refer to the PayPal Webhooks documentation.