Access IoT Devices from Anywhere
Updated on Jun 30, 2025 · 4 mins read

You can access your Internet of Things (IoT), devices remotely and manage our devices from anywhere with just one command.
Summary
Run this command on your IoT device such as Raspberry Pi:
ssh -p 443 -R0:localhost:22 tcp@a.pinggy.ioThis command creates a TCP tunnel and it will output a public URL like
tcp://tljocjkijs.a.pinggy.link:40527.Use the SSH command with the URL and port to connect to your IoT device:
ssh -p <port> <username>@<pinggy_url>Example:
ssh -p 40527 pi@tljocjkijs.a.pinggy.linkNow, you can securely SSH into your IoT device from anywhere in the world.
Sign in to https://pinggy.io and use and access token to know your active tunnel address remotely.
As developers and devops engineers we need remote access to our IoT fleets to monitor, maintain, push updates, and add features to our IoT applications. The ability to access IoT devices from anywhere through ssh is key in this aspect. Using Pinggy you can get a TCP tunnel for SSH access, enabling us to connect to our IoT devices from anywhere in the world. This service ensures seamless remote access, simplifying the management of web portals, camera access, and other functionalities, all from virtually anywhere.
To remotely access your IoT devices, various methods are available based on the device and manufacturer’s setup. Here are popular ways:
SSH Remote Access: SSH (Secure Shell) provides a remote terminal to your IoT device. This is a secure and reliable method for remote administration.
RDP for Remote Desktop: Microsoft’s RDP (Remote Desktop Protocol) lets you connect and control your IoT using graphical user interface (GUI) over a network.
Web Portals: Manufacturers offer web portals for IoT device access and management via a browser. These portals work on internet-connected devices like computers, laptops, and tablets, simplifying remote control.
Using Pinggy for SSH from anywhere
With Pinggy.io you can access IoT devices, including Raspberry Pi, Banana Pi, Orange Pi, NanoPi NEO, Odroid, Rock Pi, NVIDIA Jetson Nano, and others, even if they don’t have a public IP address. It enables you to establish an SSH connection to your devices from anywhere in the world.
Step 1: Create a Tunnel to Your IoT Device
On your IoT device, open a terminal or SSH client and run the following command to create a tunnel to port 22 (SSH):
ssh -p 443 -R0:localhost:22 tcp@a.pinggy.io
This command establishes a secure connection to the Pinggy.io server, creating a tunnel that forwards traffic from the server’s port 22 to your IoT device’s port 22.
Step 2: Obtain the Public URL
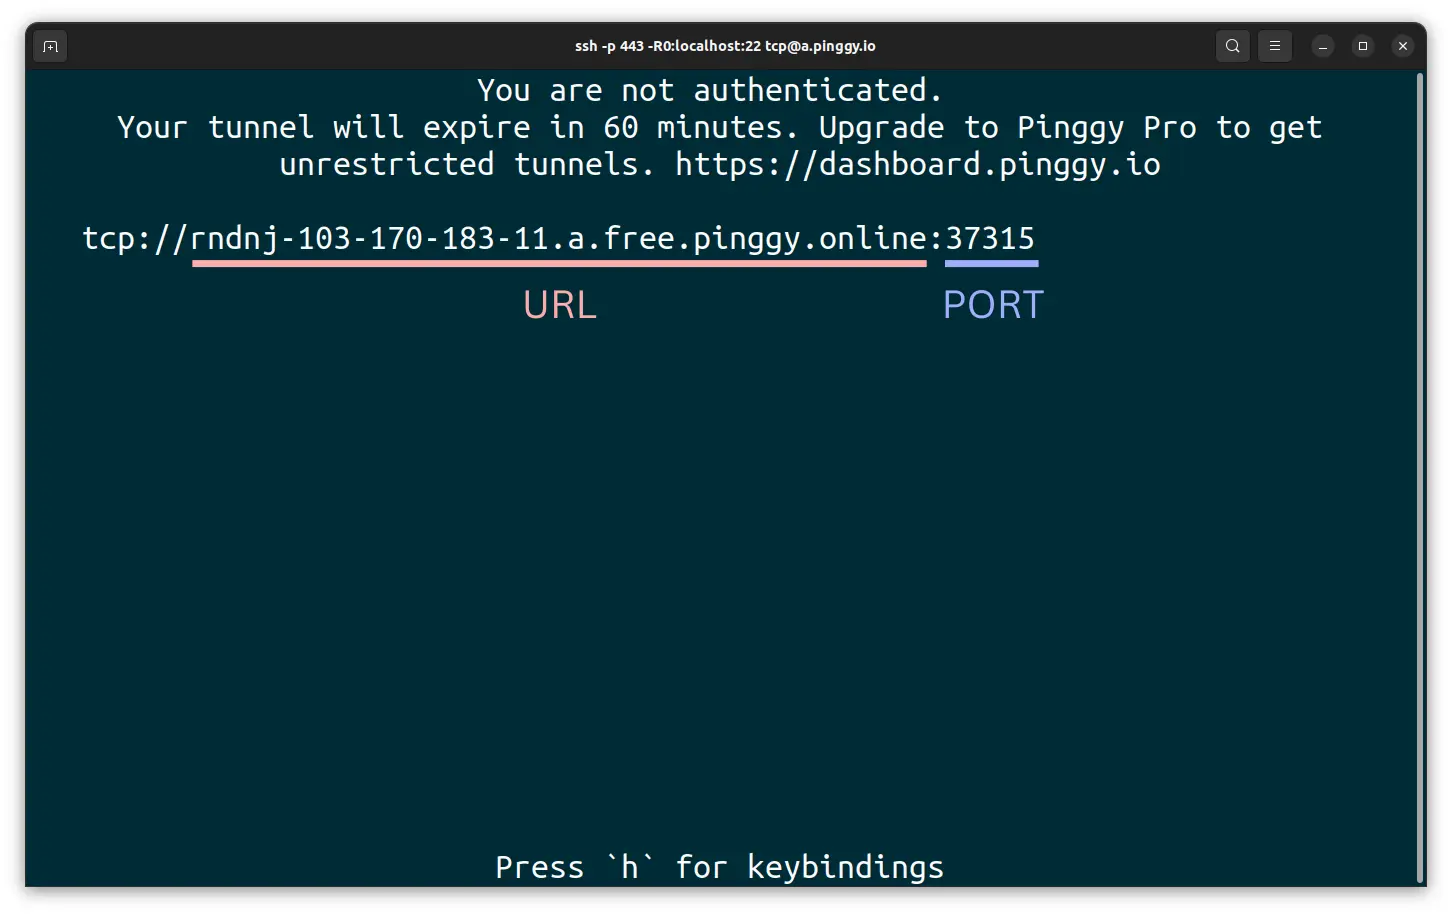
After running the tunneling command, you will receive a public URL in the following format: tcp://tljocjkijs.a.pinggy.link:40527
Make note of this URL (tljocjkijs.a.pinggy.link) and port (40527) as they will be used to establish an SSH connection to your IoT device.

Step 3: SSH into Your IoT Device
To SSH into your IoT device, use the SSH command along with the public URL and port number obtained in the previous step. Replace username with the username of your IoT device, and the URL and the port 40527 from the output of the pinggy command:
ssh -p 40527 username@tljocjkijs.a.pinggy.link
By executing this command, you establish an SSH connection to the Pinggy.io server, which redirects the traffic to your IoT device through the previously created tunnel. You can now access and control your IoT device as if it were directly connected to your local network.
TIP: the username for Raspberry Pi is usually “pi”.
Find public urls to your devices using Pinggy dashboard
Step 1: Sign in to Pinggy
Start by signing in to Pinggy dashboard using your credentials. If you don’t have an account, you can create one for free.
Step 2: Obtain your Access Token
On the Pinggy dashboard you’ll find your access token, which is a unique identifier associated with your account and devices. Make a note of this token as you’ll need it later.
Step 3: Use the access token to create the Pinggy tunnel
On your IoT device, open a terminal or SSH client and run the following command to create a tunnel to port 22 (SSH) using your access token:
ssh -p 443 -R0:localhost:22 access_token+tcp@a.pinggy.io
Replace access_token with your own access token obtained from pinggy dashboard.
Conclusion
By leveraging Pinggy.io’s TCP tunneling capabilities, you can securely connect to your IoT devices from anywhere.
If you want remote desktop access for remotely operating the GUI, you can just create a tunnel to your VNC / RDP server’s port.